Cherry π’s


Designer:
Ron Erickson
Project Category:
Tower Speakers
Project Level:
Advanced
Project Time:
20+ Hours
Project Cost:
Over $1,000
Project Description:
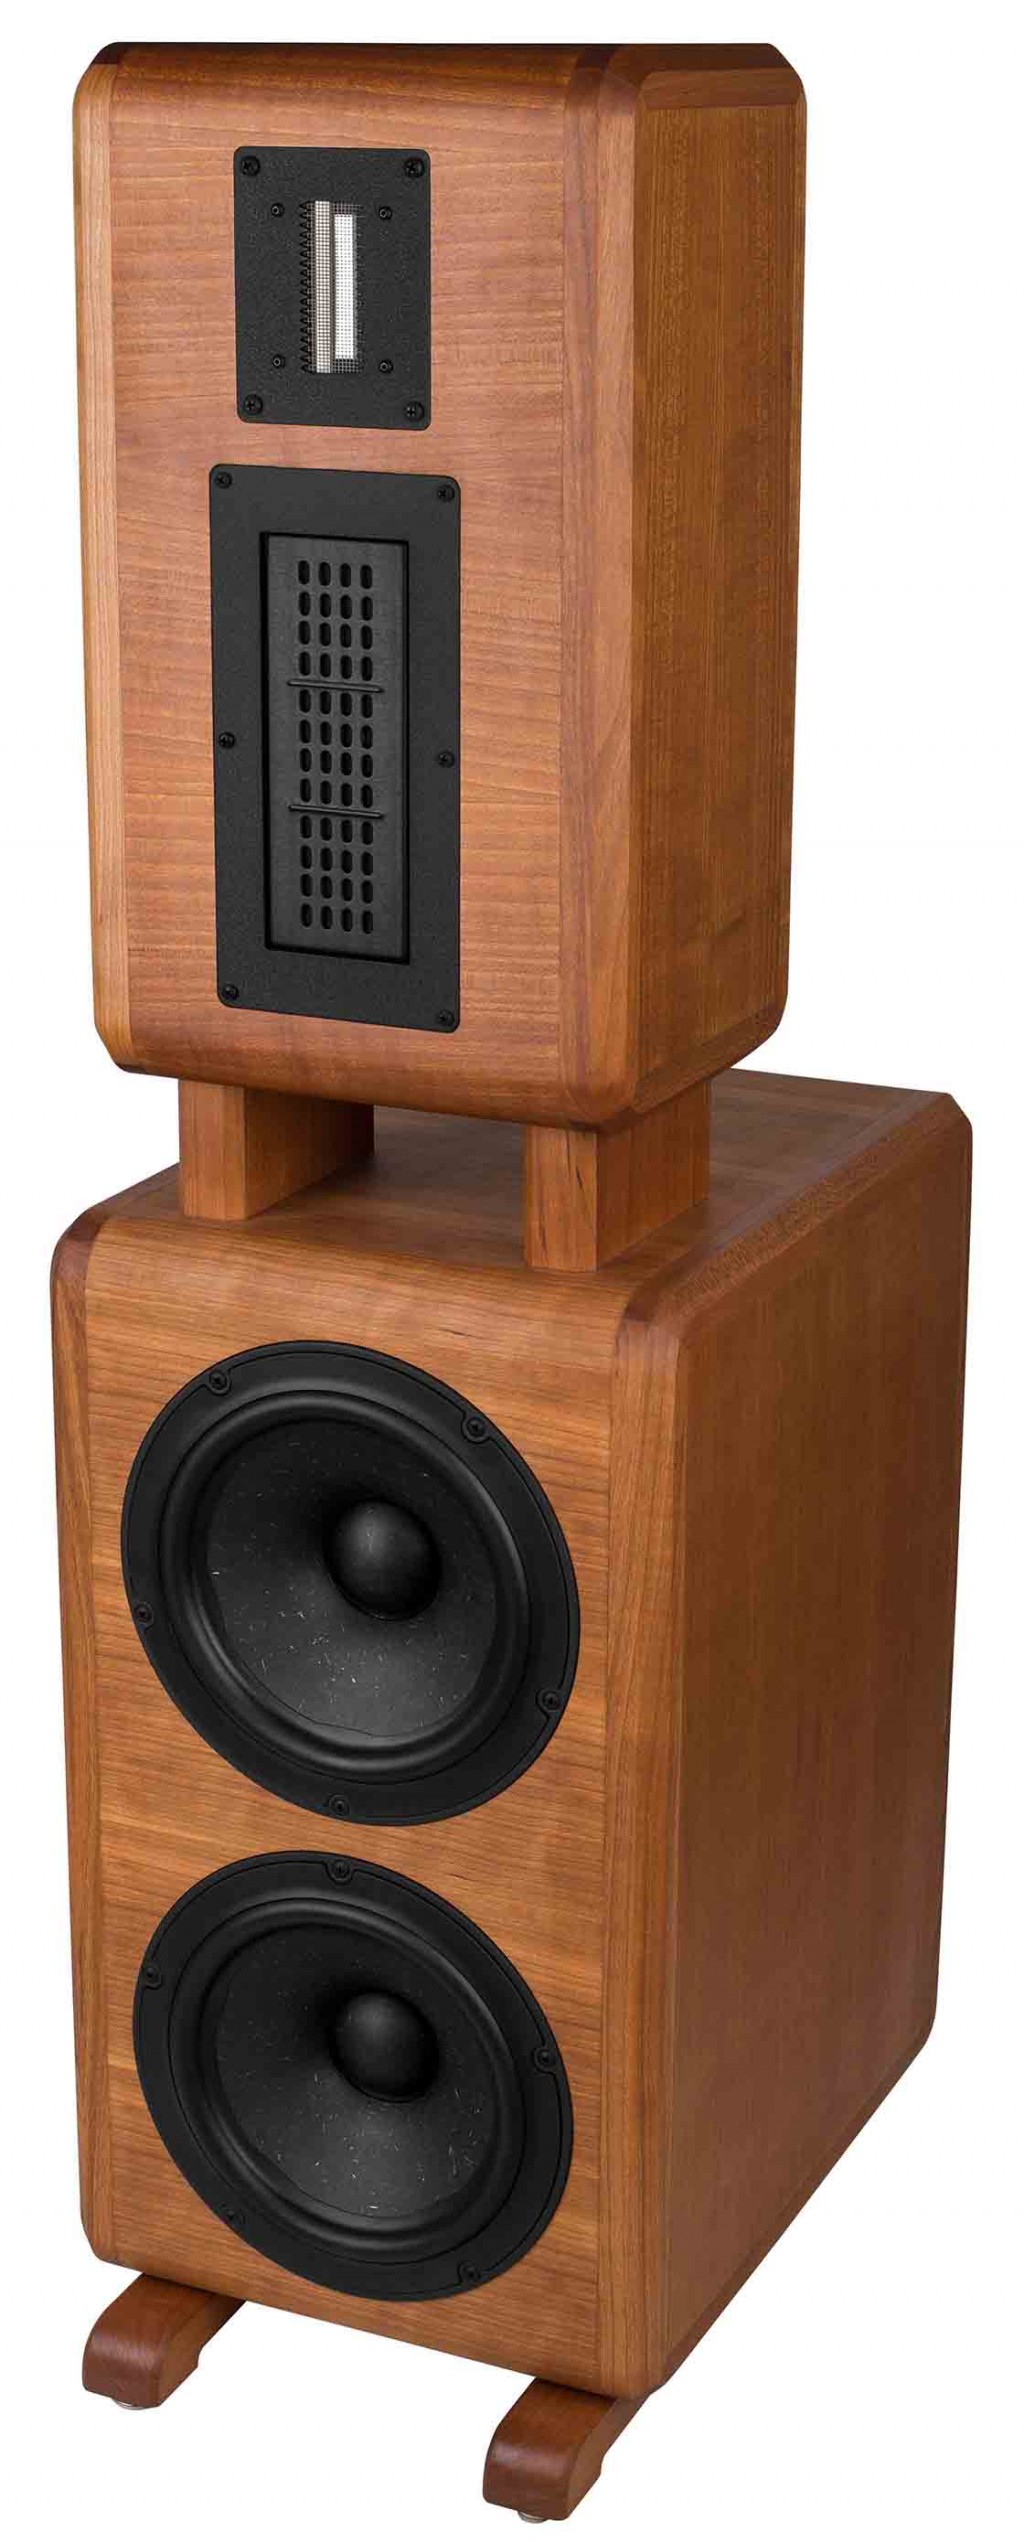
TMWW fully active 3-way.
Design Goals:
My goal was to create a state of the art fully active speaker system using the best drivers I could afford using Ultimate Equalizer software. I took my design cues for the cabinets from the beautiful art deco radios of the past.
Driver Selection:
I attended DIY Chicago 2011 and fell in love with the Raal 10-70D tweeters I heard in a system there. While pricey I just had to have them. I’d used the BG Neo3 tweeters and heard systems with the BG Neo 8’s and liked them so I decided to use the BG Neo8-S 264-752 for the mid. I was looking for a woofer or woofers to go with them and found that the Vifa NE225W-08 264-1138 modeled well and came highly recommended by PE forum members so I bought 4 of them when they were on sale.
Enclosure Design:
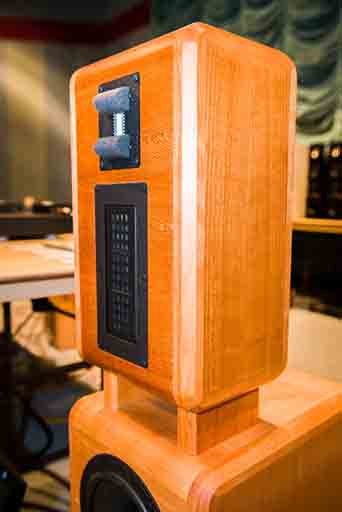
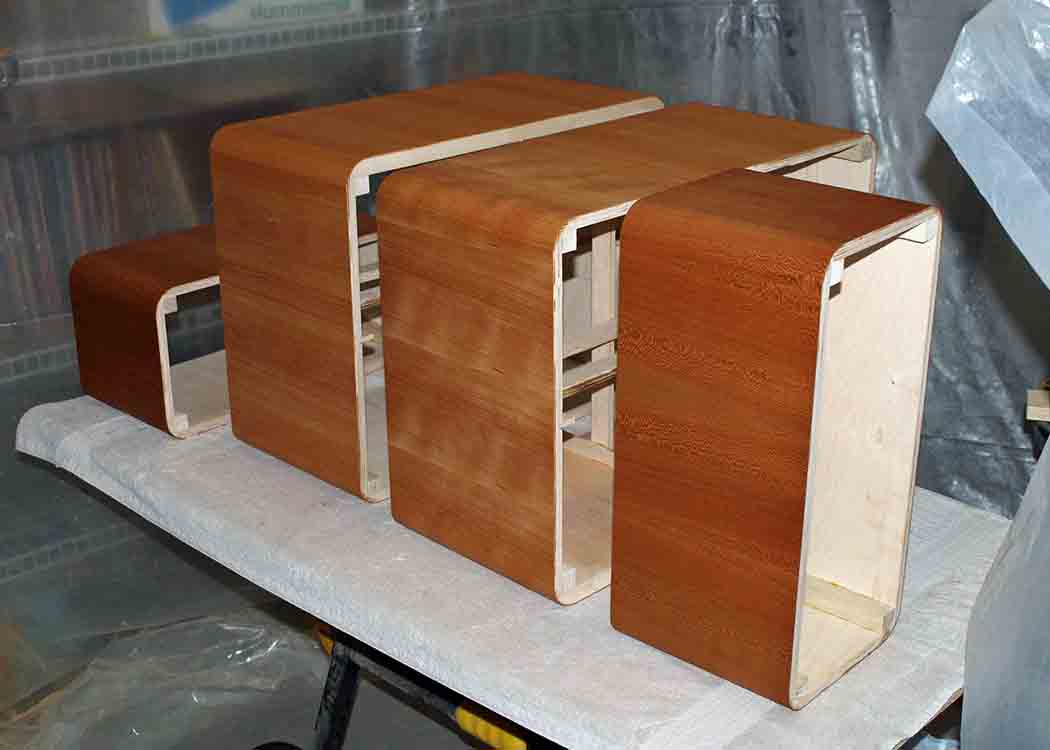
The enclosure design is comprised of a 2 cu. ft. sealed woofer cabinet with a smaller cabinet mounted on stand offs to house the midrange and tweeter. The cabinets were constructed of quarter sawn cherry veneer over ½” Baltic birch plywood with the front of the woofer cabinet done in ¾” stock with all edges, stand offs and feet made of solid cherry.
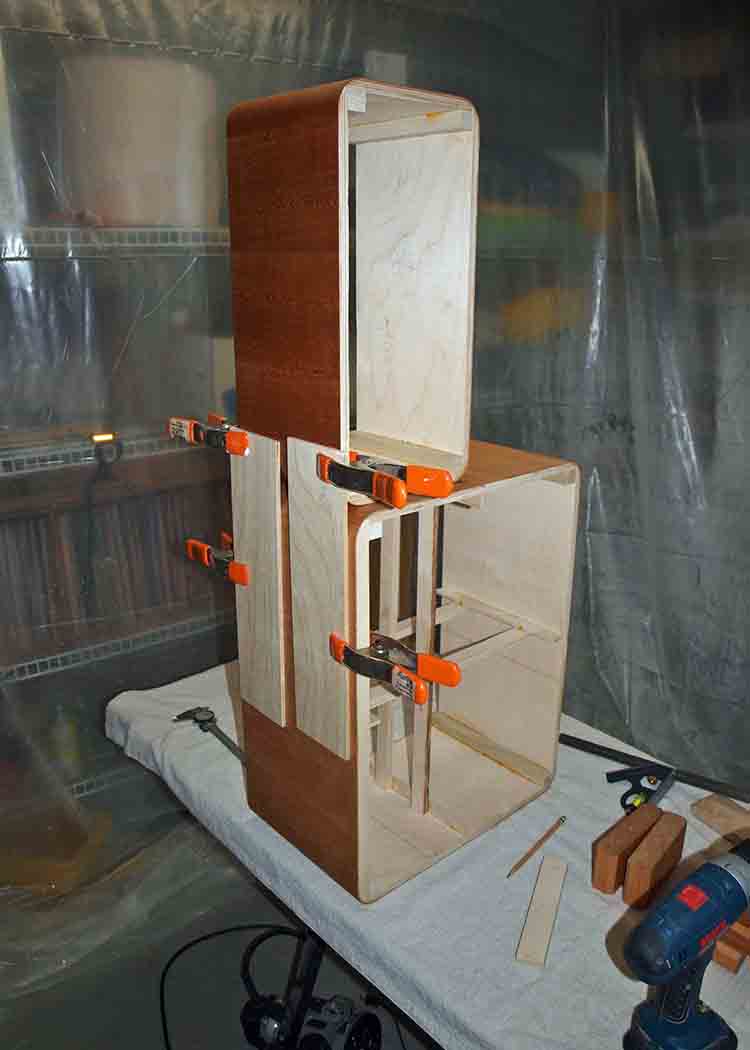
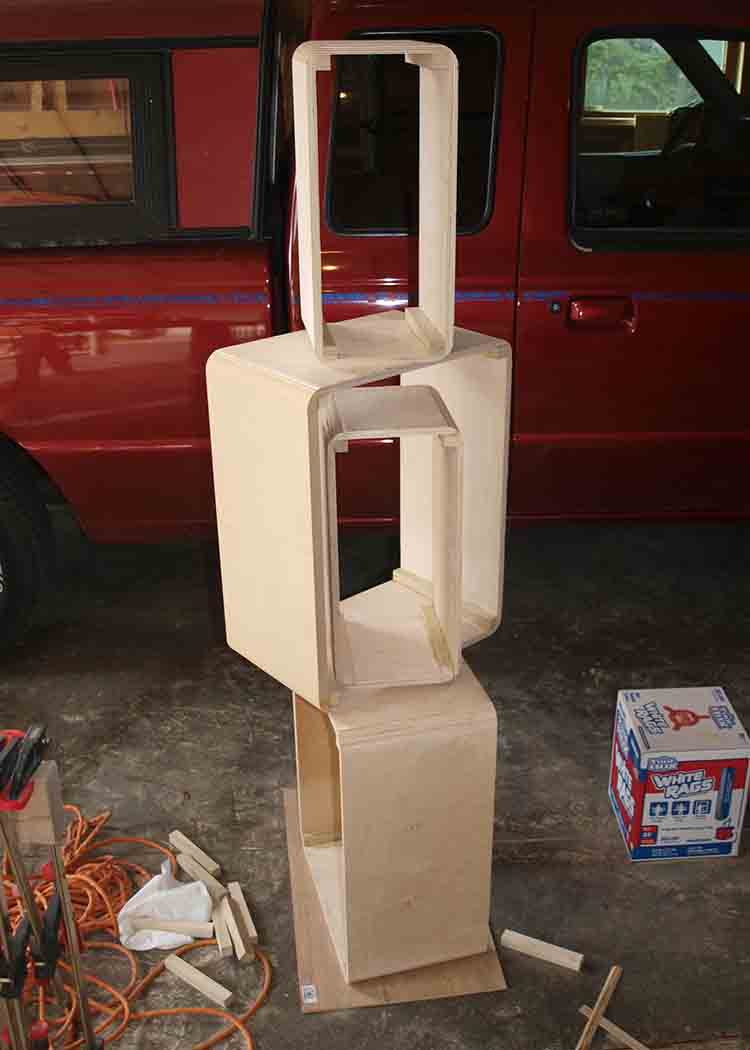
Enclosure Assembly:
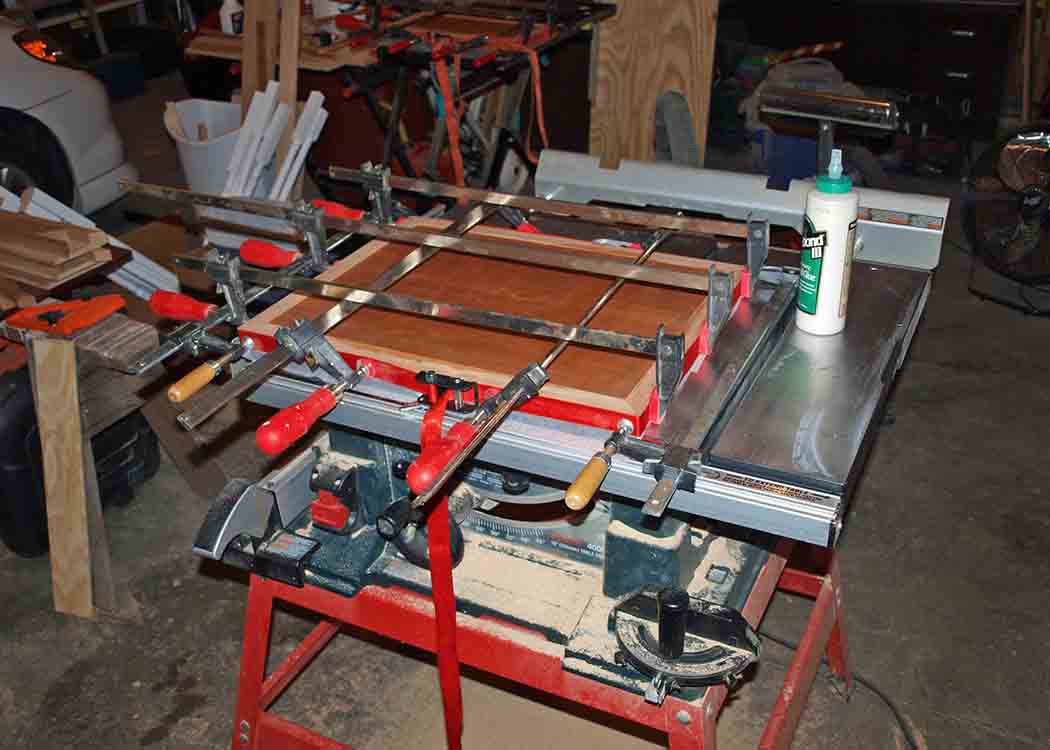
I assembled the fronts, tops, bottoms and backs into basic boxes using double rabbet joints with ¾” square cleats inside each corner to reinforce them before removing most of the corner joint with a 1¼” round over router bit on all corners. ¼” dados were cut into the 4 inside panels on each box and plywood strips were glued into the slots and multiple cross braces were glued in. I used the iron on glue method to glue the veneer completely around each box. I finished all four boxes with Natural Watco Danish Oil.
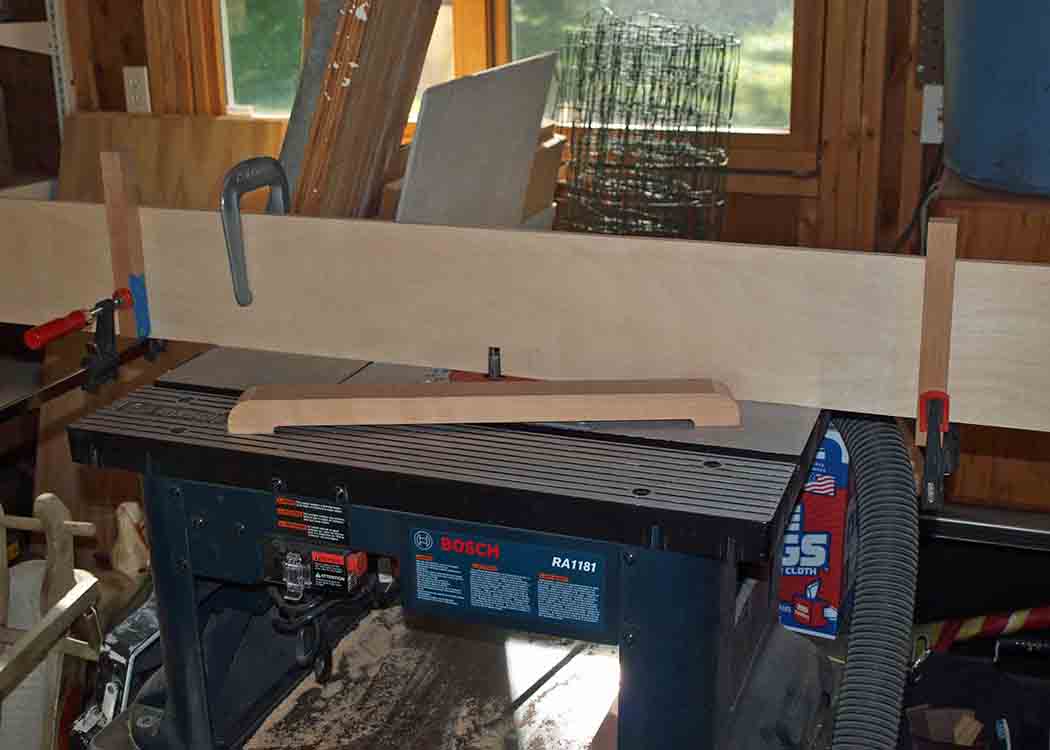
The plywood side panels were cut, veneered and finished with the edges taped to keep the finish off the edges. I cut a piece of 4/4 solid cherry into strips and trued up the edges on a router table using it like a jointer to get all the 1” square edge trim. I added a 45 degree cleat to the panel cutting jig I use on the table saw to cut 45 degree angles on the edge trim. I cut undersize blanks of plywood to stack under the finished sides so that the panels were just slightly recessed from the edge trim while I glued the edges around the sides. Once the edges were glued on I stood the glued up panels on edge and ran them through the router table with a top bearing bit to get the edge stock almost flush with the plywood panel and then sanded them the rest of the way flush.
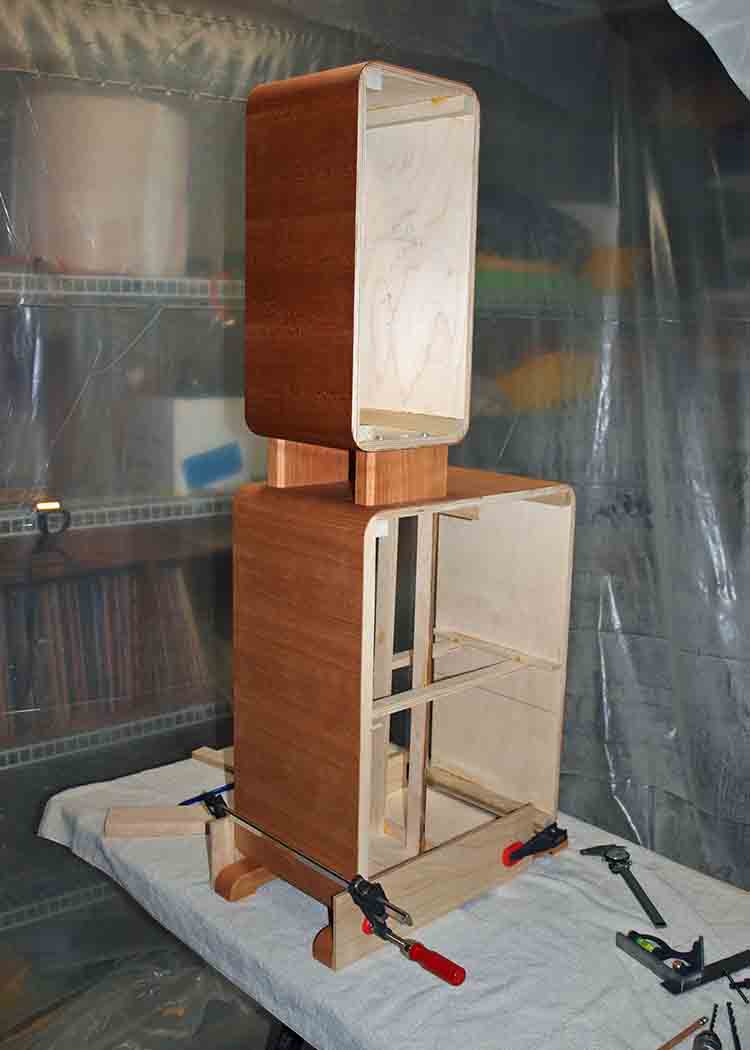
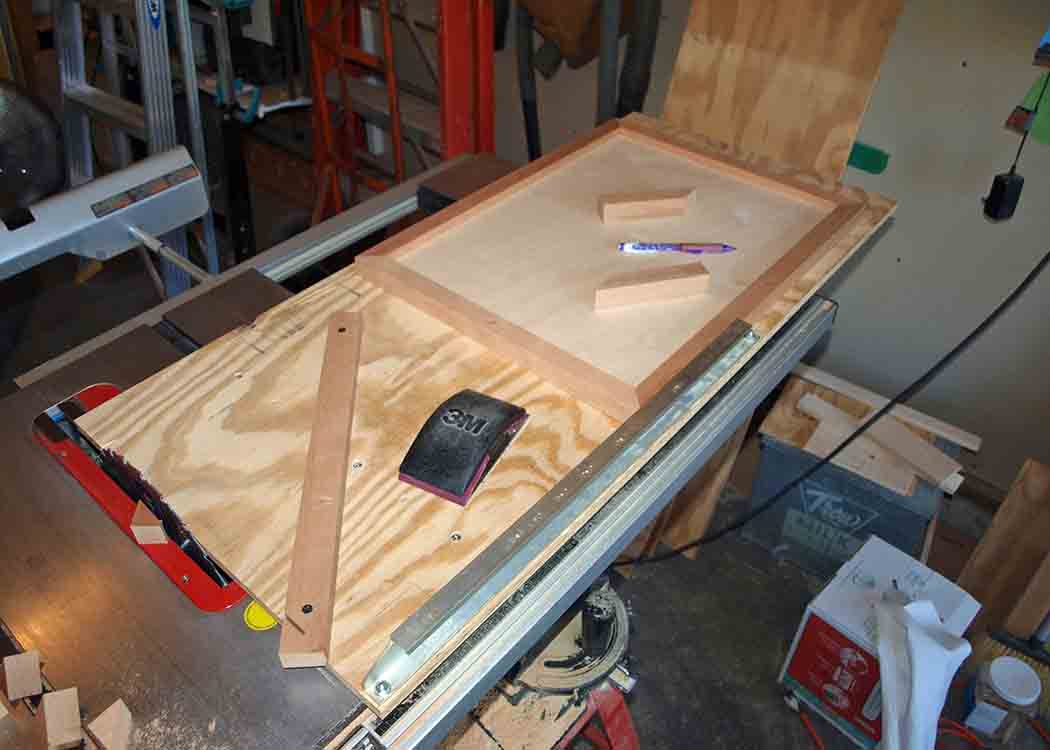
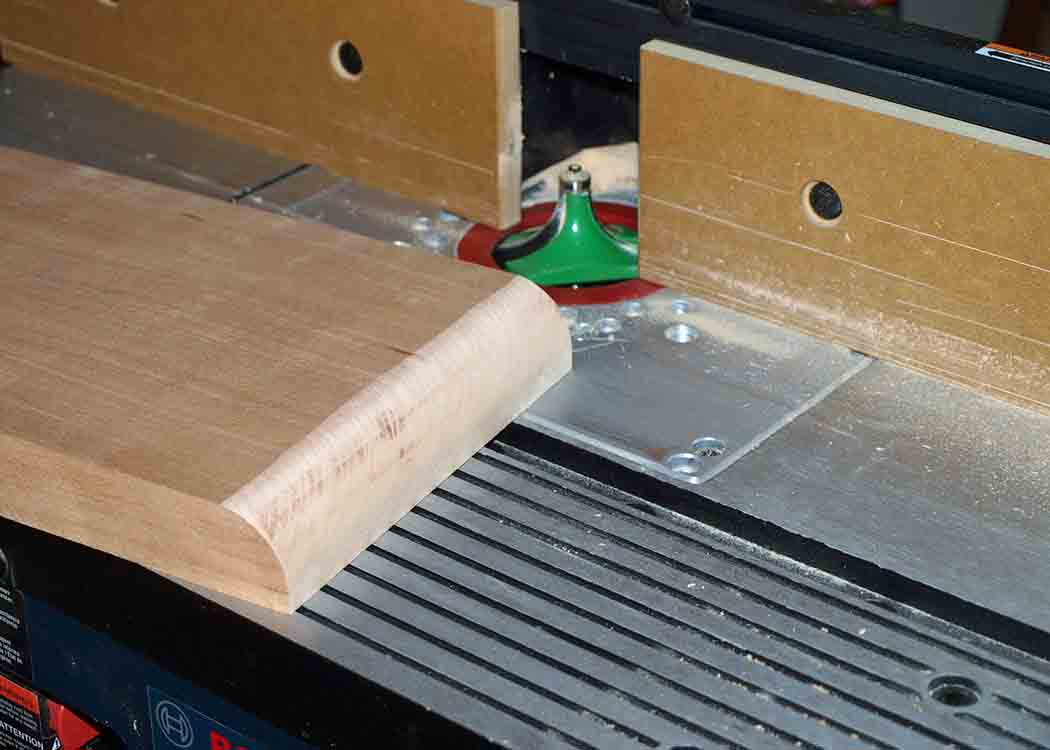
The standoffs were made from solid blocks of cherry with simple 45 degree chamfers on all four edges. I made a wooden drill template for the hole layout and used it to drill the holes in the cabinets and standoffs. The holes in the standoff were done on a drill press and a pair go all the way through the block so wires could be fed to the mid/tweet box. The feet were made by putting a 1” round over on each end of a piece of 5/4 cherry and then cutting it into 1 5/8” wide strips. I put a long auxiliary fence on my router table and clamped stops to it and over several passes removed the recess on the bottom of each foot. The top edge of each foot was then chamfered with a 45 degree router bearing bit. All the holes were drilled to mount the feet to the cabinets. The spacers and feet were all finished and test bolted together with deck screws and flat washers.
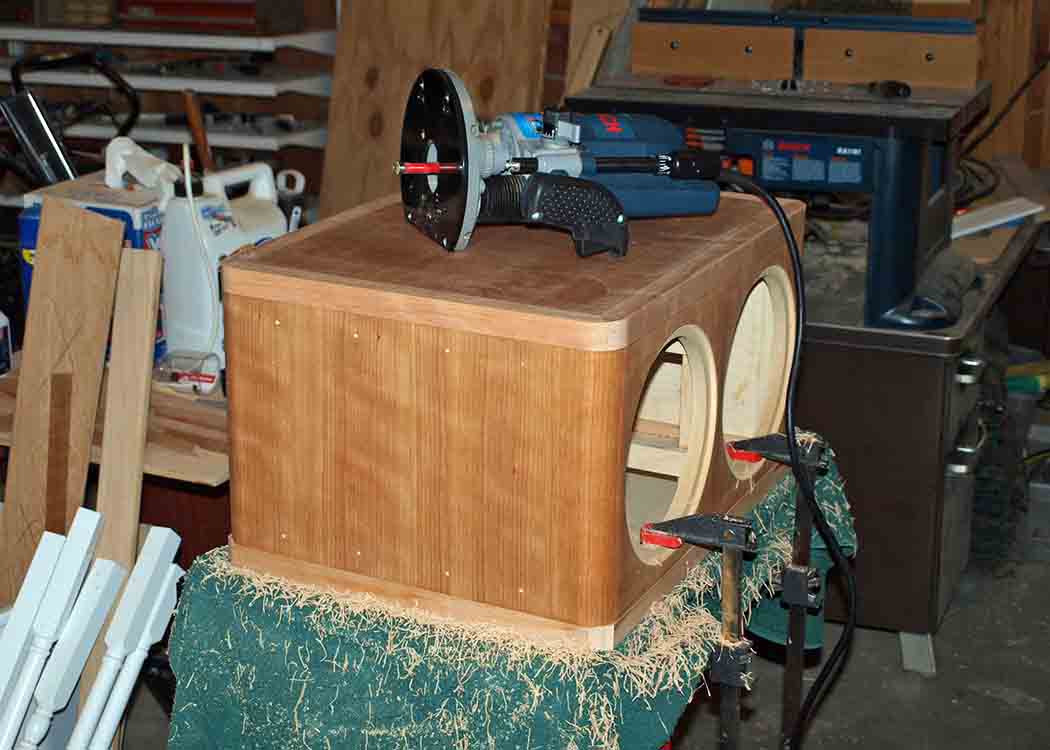
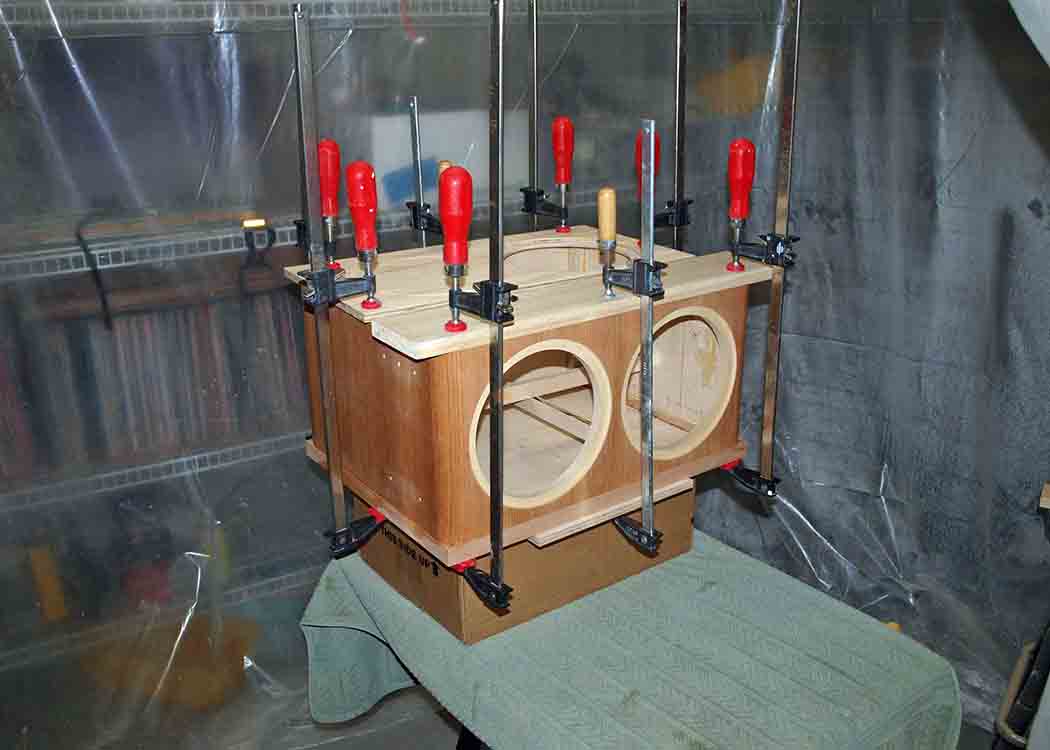
The woofer holes were cut in the woofer cabinets and rebates were cut using a template clamped to the box and a router with a top bearing bit. The side panels were then glued to the boxes. The panels were made slightly oversized and were trimmed with a router and flush trim bearing bit to conform to the box and round overs. A 45 degree bearing bit was then used to put a chamfer on the edge of the each box. The mid/tweeter boxes were assembled the same way after the cut outs and rebates were cut. After the woofer cabinets were assembled cross braces were installed to brace the large side panels.
I created the rear connector panel by veneering a plastic electrical box cover and mounting 3 pairs of jacks on it. It was fastened from the inside in a cutout in the back of the woofer box.
Both cabinets were lined with 1.8″ UltraTouch denim insulation and stuffed with Acousta-Stuf polyfill.
Outside cabinet dimensions are 12″W x 21″D x 16.5″T (2 cu. ft. internal) for the woofer cabinet with outside dimensions of 10″W x 8″D x 17 1/4″T for the Mid/Tweeter cabinet on 3″ risers.
Crossover Design:
The active crossover is implemented using Bodzio’s Ultimate Equalizer software running on a PC I built using an ASUS M5A78L-M LX PLUS motherboard, AMD FX-8350 Black Edition Vishera 8-Core 4.0 GHz CPU and multi-channel M-Audio Delta 1010LT sound card. Crossovers are 48db/oct LR set at 450 and 4000Hz. At home the woofer is EQ’d down to 25Hz with an 18db/oct roll off and I can use features that compensate for the room below 200Hz and run all digital in. At the MWAF the room EQ feature was bypassed, the woofer EQ was set at 35Hz and analog inputs were used. There is a 6.8uF cap in front of the tweeter for protection.
Tips & Tricks:
When wrapping veneer around a box like I did in this project I needed to make a seam where the ends met. Using the iron on method you leave the ends unfastened and overlapped and use a straightedge and utility knife to trim both ends at once. I found that when I ironed the veneer down it would shrink and leave a gap. The solution was to cut up some coat hangers and lay several pieces of wire under one end of the veneer while I cut the joint. That left one end of the veneer a little longer so that when it shrank the ends still met and the joint was invisible.
When I glued the sides on I was worried that they would float on the glue and get misaligned when I was trying to clamp them. I dry fitted the box on the side and used a drop of hot melt glue to fasten a wooden biscuit used for biscuit joints in each corner of the side panel. That way I could apply the glue and the side would not wander when I applied the clamps.
When cutting the rebates for the mid and tweeter the radius of the router bit must match the radius of the faceplate.
Conclusion:
The system is everything I hoped it would be. In my 10 x 12 listening room I can get bass I can feel and balanced uncolored sound with a great image in the sweet spot. The system was well received at DIY Iowa 2013 and finished 2nd in the MWAF Open/Unlimited category in 2016.
About the Designer:
Ron was educated in electronics, worked as a machinist and machine repair tech in the hydraulics industry before becoming a Systems Analyst at a community college. He is now retired.
Parts Used:
Tweeter Raal 10-70D
Midrange BG Neo8-S 264-752
Woofer Vifa NE225W-08 264-1138
Bodzio Software’s Ultimate Equalizer
UltraTouch denim insulation
Acousta-Stuf polyfill 260-330
ASUS M5A78L-M LX PLUS Motherboard
AMD FX-8350 Black Edition Vishera 8-Core 4.0 GHz CPU
M-Audio Delta 1010LT sound card (NLA)
Midrange and tweeter amps – SMSL SA-36A Pro amplifiers 230-212
Woofer amp – Harmon Kardon HK3480 receiver
Midrange faceplate from Meniscus Audio
WOW. Those are the nicest DIY speakers i have ever seen. Not sure when i will be able to afford the drivers but when i can im going to have to make me a set of these.