Americanas


Designer:
nick santorinoes
Project Category:
Bookshelf Speakers
Project Level:
Advanced
Project Time:
20+ Hours
Project Cost:
$100 – $500
Project Description:
This was my theme entry into the Indiyana “Keeping up with the Jonses” event. It required a mid woofer with a coaxial mounted tweeter augmented with a woofer or subwoofer. So, basically, a coaxial three-way.
Design Goals:
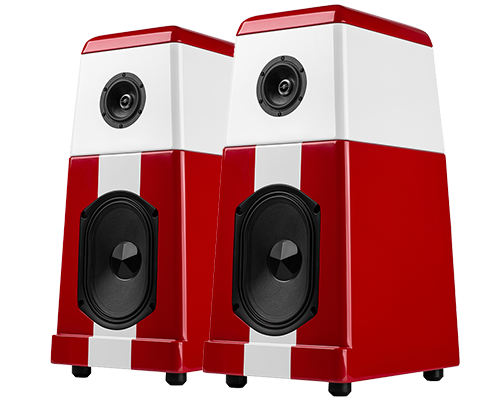
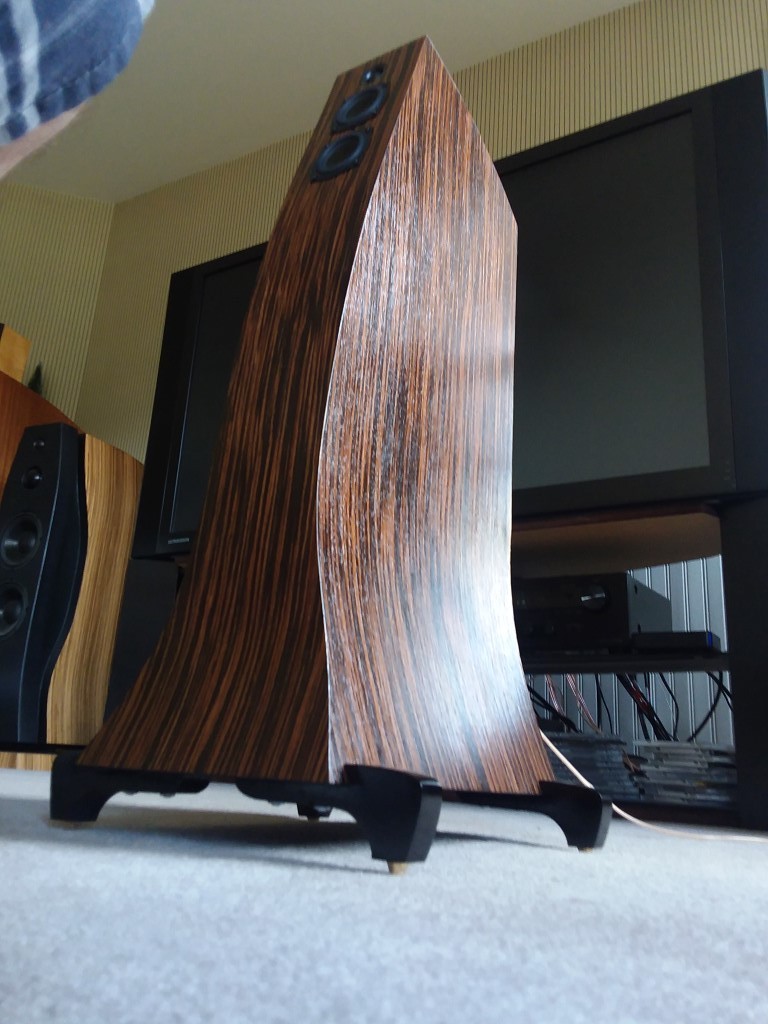
My goal was to build a full range medium sized speaker with a home-built coaxial driver. I had been eyeballing my wife’s reproduction of a 50’s popcorn machine as a visual inspiration for a speaker build. This seemed like the perfect time to bring my idea to fruition.
Driver Selection:
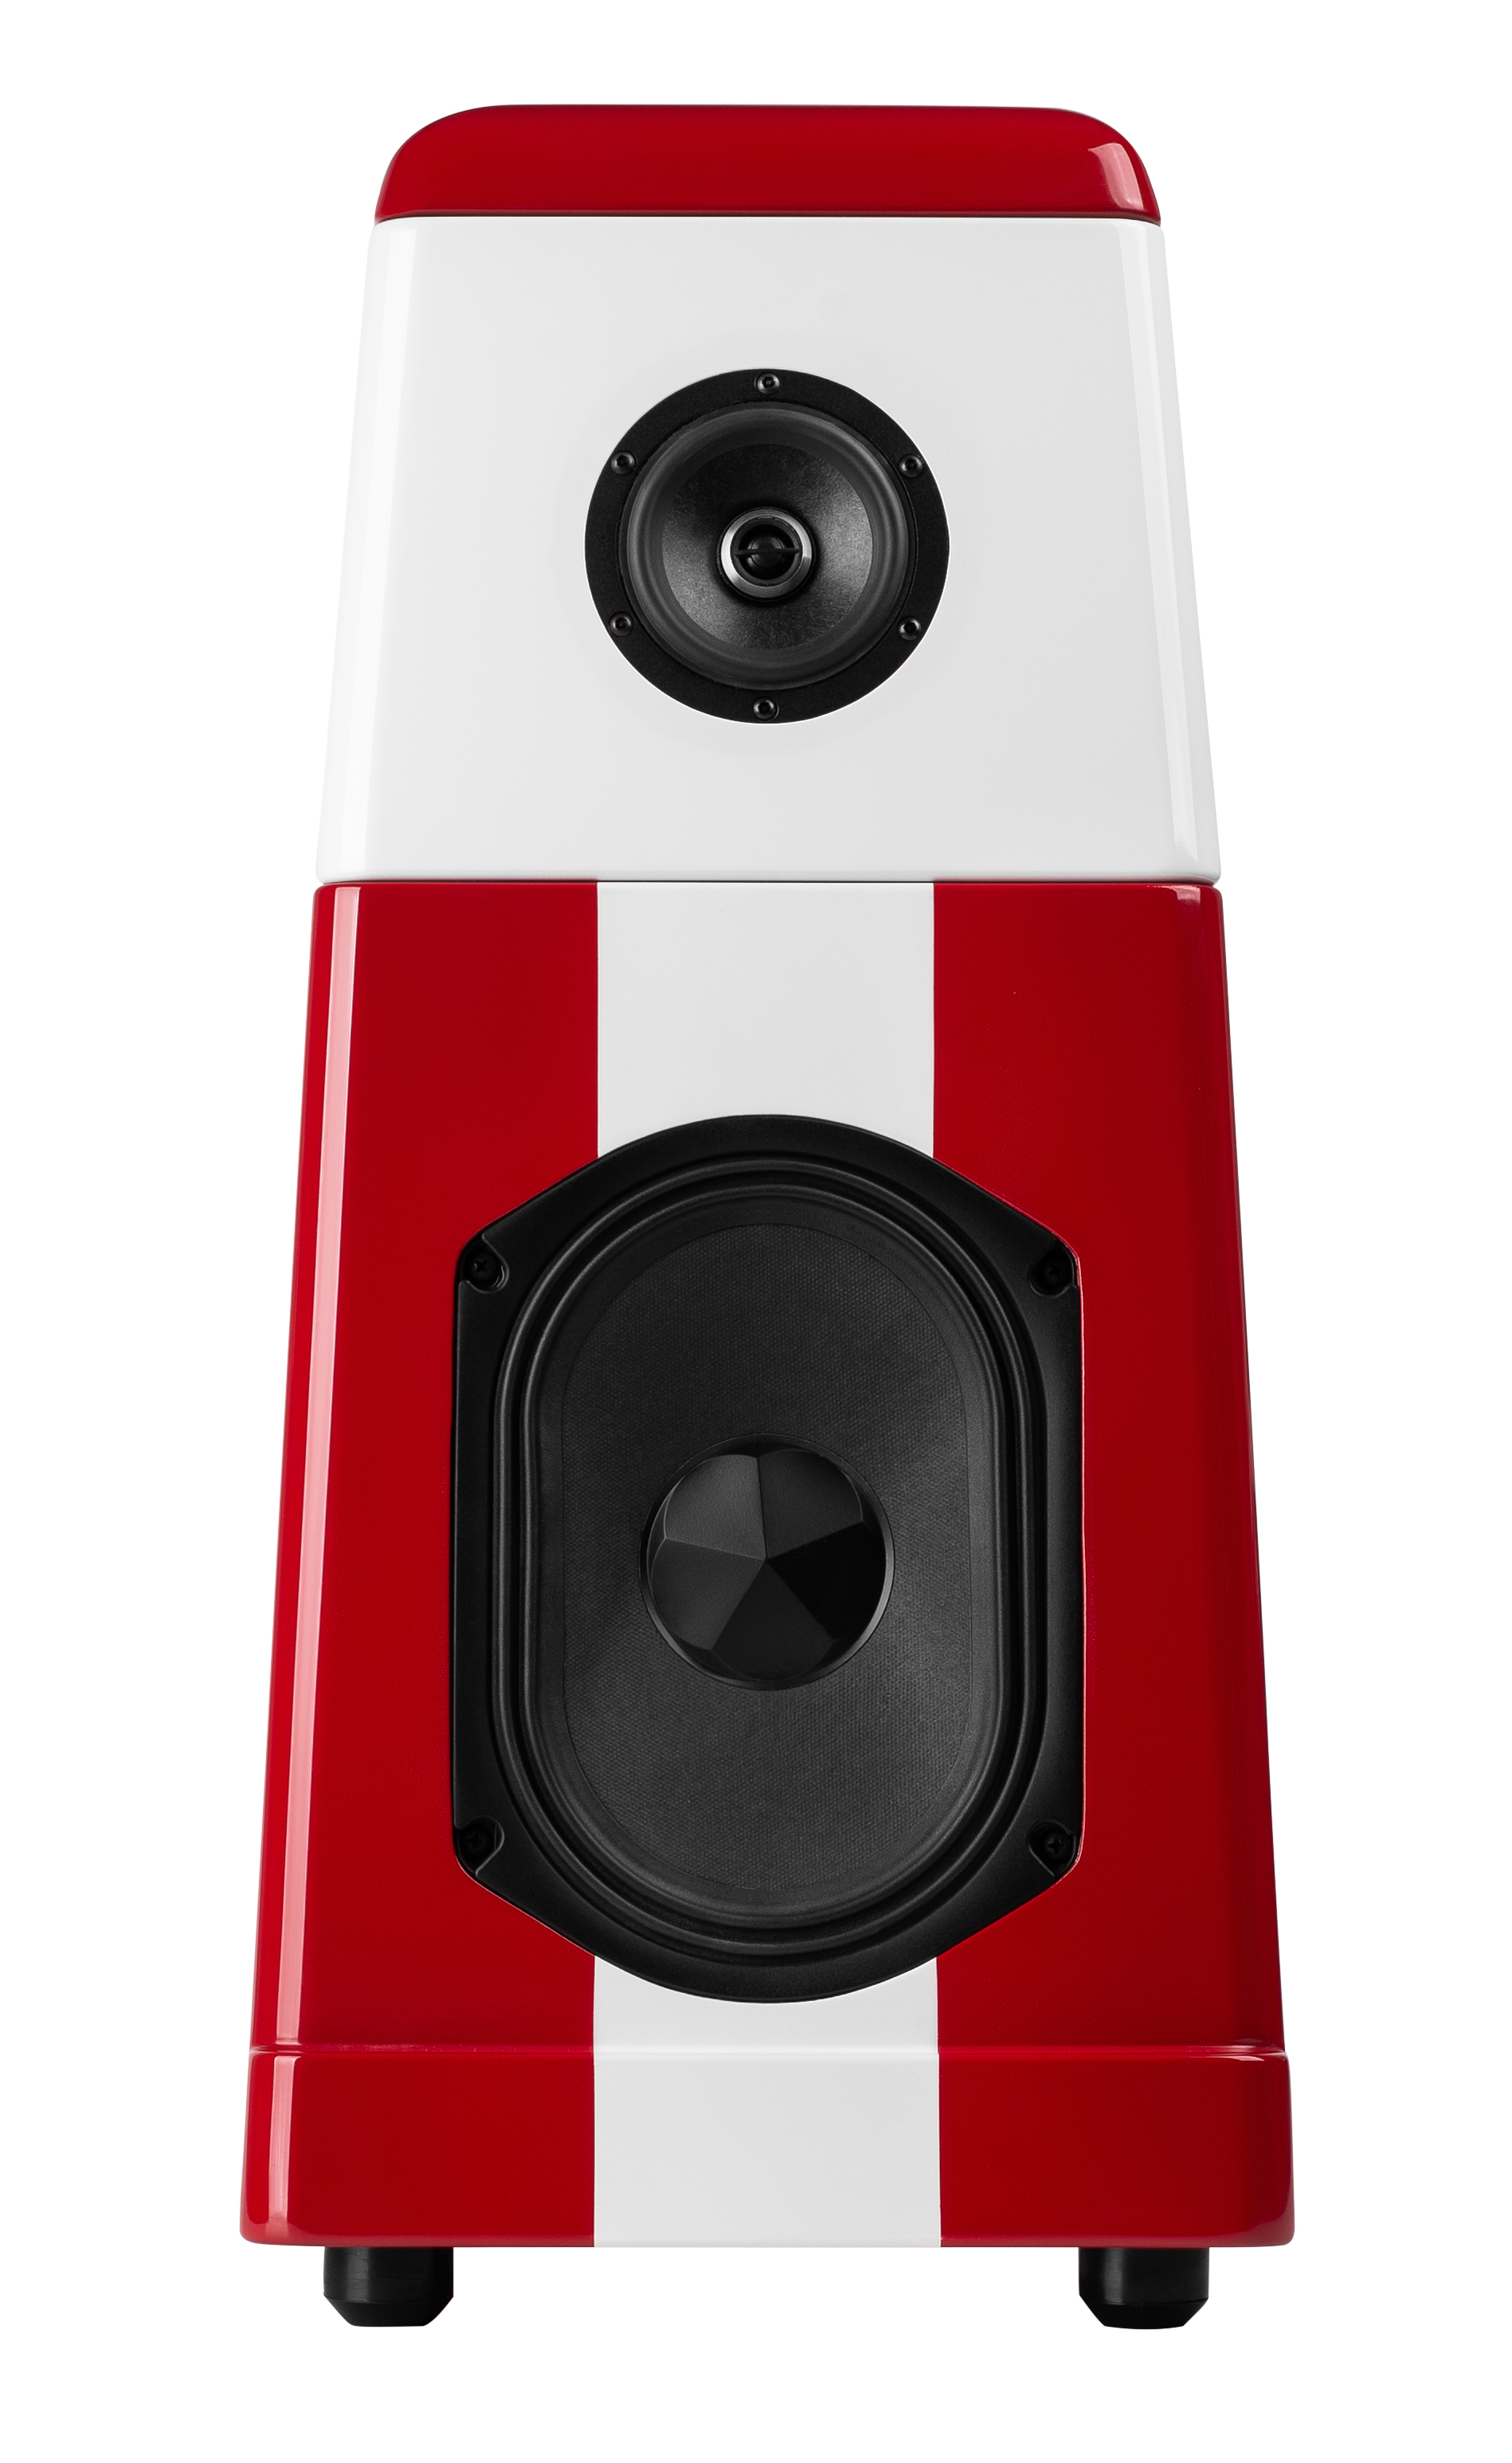
I started my search by looking for drivers with removable phase plugs. I know from previous experience with my “stink eyes” project that most phase plugs are fairly easy to remove and once removed provides space for the tweeter. I settled on a Dayton rs100p 295-369. Once the phase plug was removed I was able to get a good measurement and search for a tweeter that would fit. That brought me to the Tang Band 1761 264-841. The truth of the matter, that’s just what fit. Once I found my mid and tweeter, I then perused the stash of drivers on my shelf for a woofer that would fill the need both in performance and esthetic. Next I modeled several six to eight inch drivers, but kept coming back to the Tang Band W69 264-837 for its simulated performance as well as its unusual shape.
After choosing my drivers I set forth to combine the mid and tweeter into one unit. This required me to turn an aluminum sleeve on my lathe. I did this so that the combination of sleeve and tweeter would equal the diameter of the phase plug and would physically provide a smooth transition between tweeter and mid.
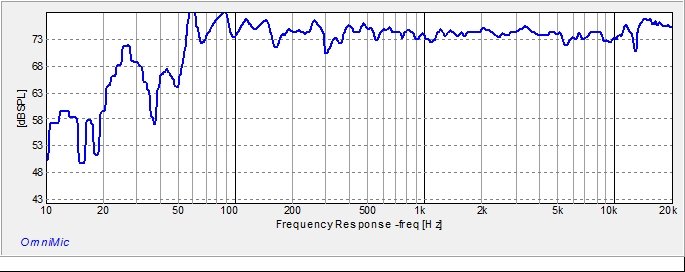
During initial accoustic measurements, the mid tweeter combination had a large suck out in the upper frequencies. After several attempts to mitigate the suck out, I devised a way to move the tweeter in and out in small increments while taking acoustic measurements. I found that at 0.08″, the previous suck out was reduced to less than two decibels and was now just a narrow dip at about 12.5khz. This required a new sleeve with a step in the rear to hold the tweeter 0.08″ off being fully seated in the driver.
Enclosure Design:
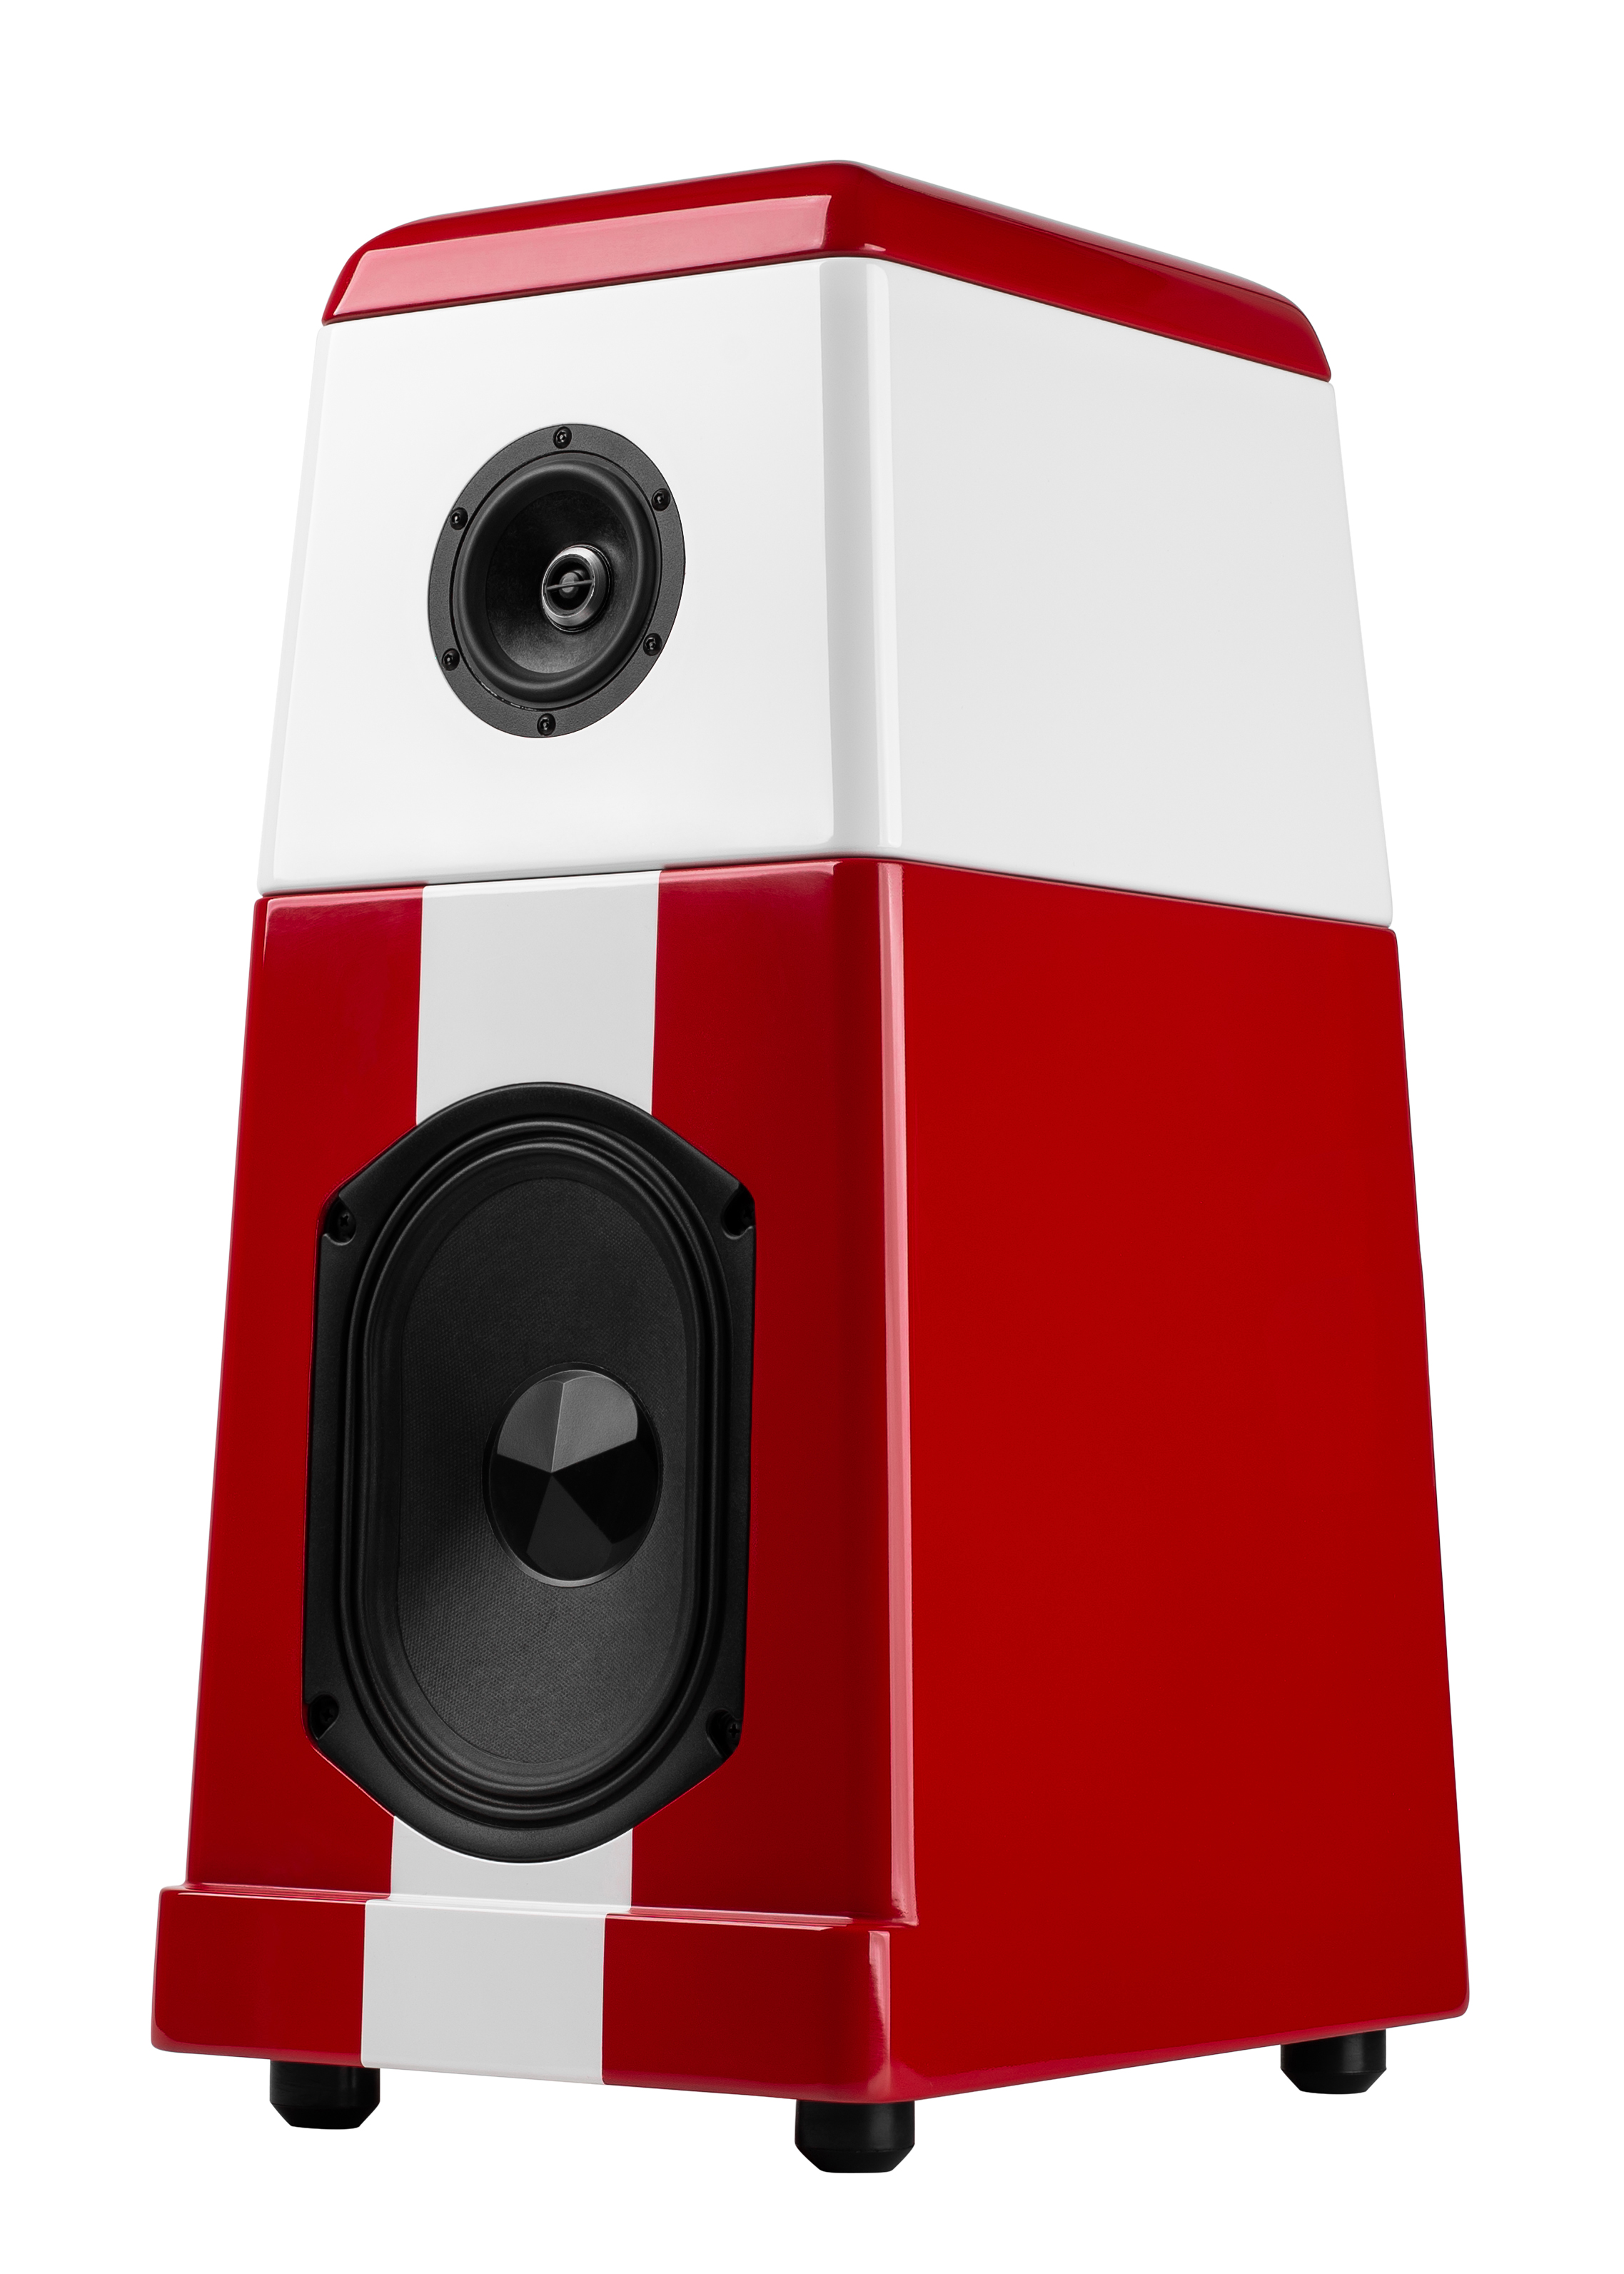
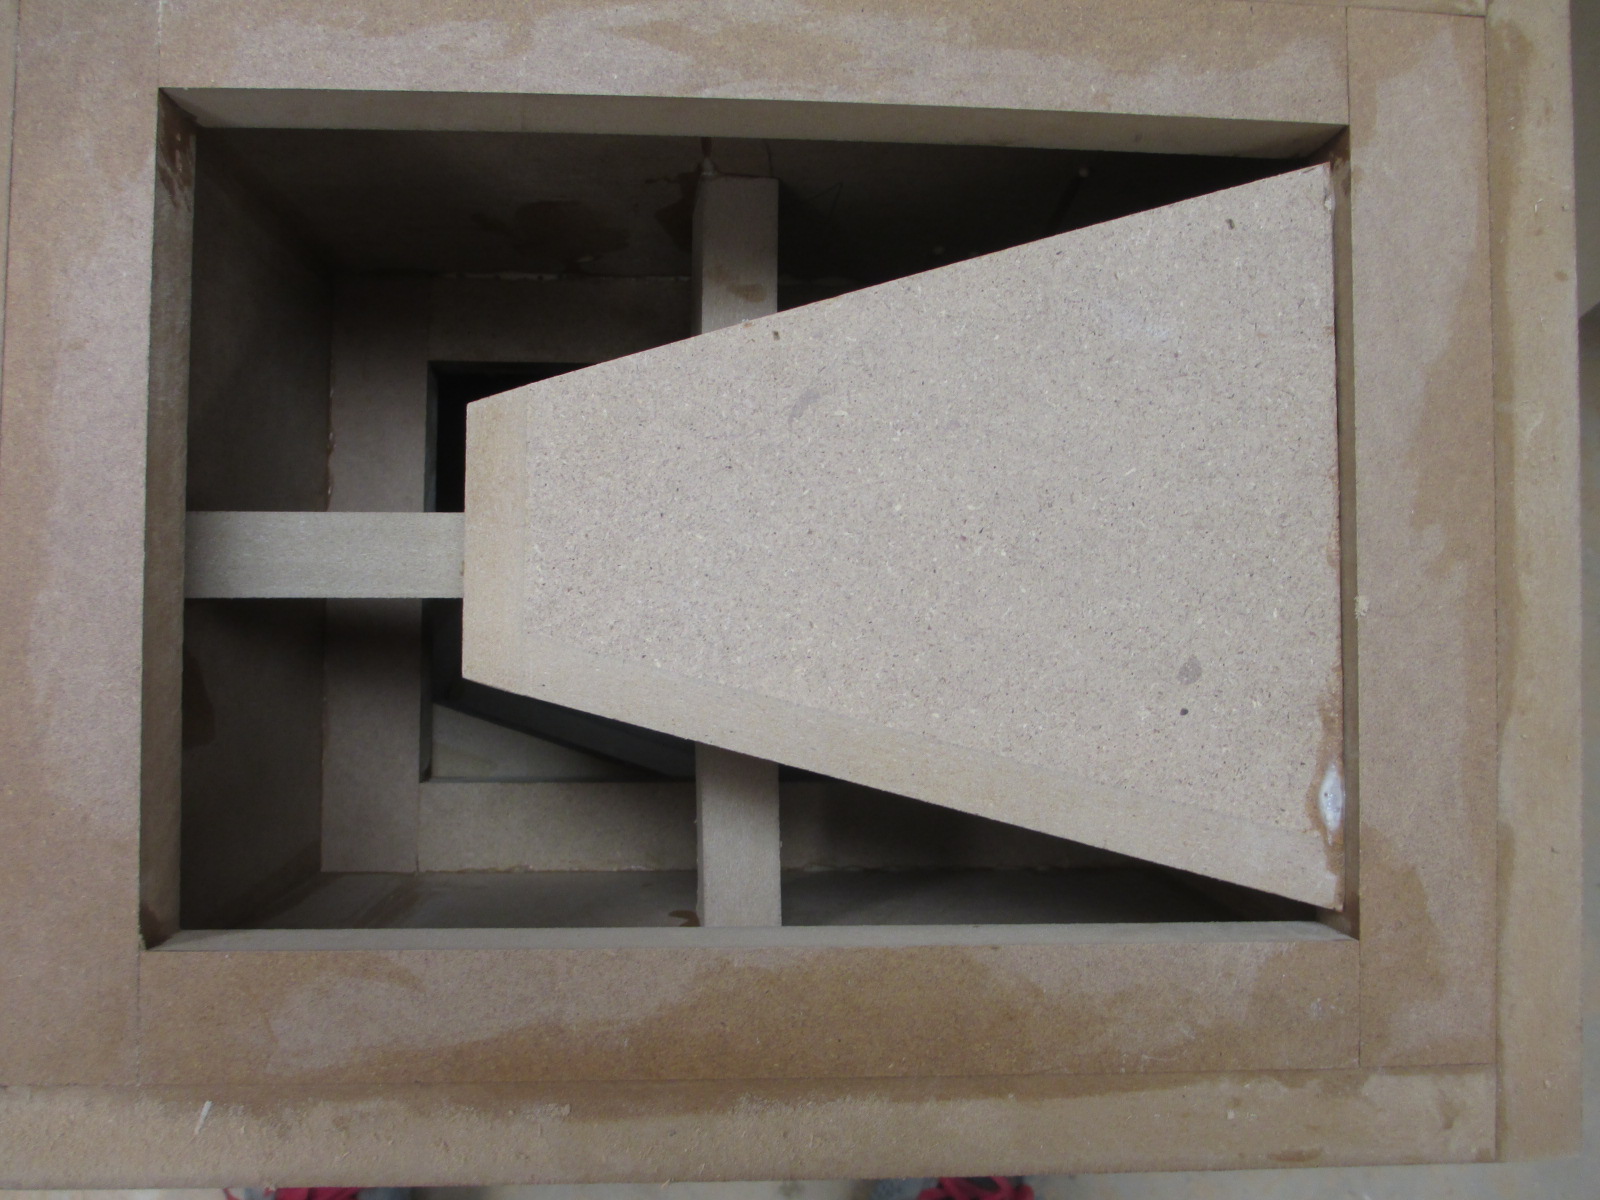
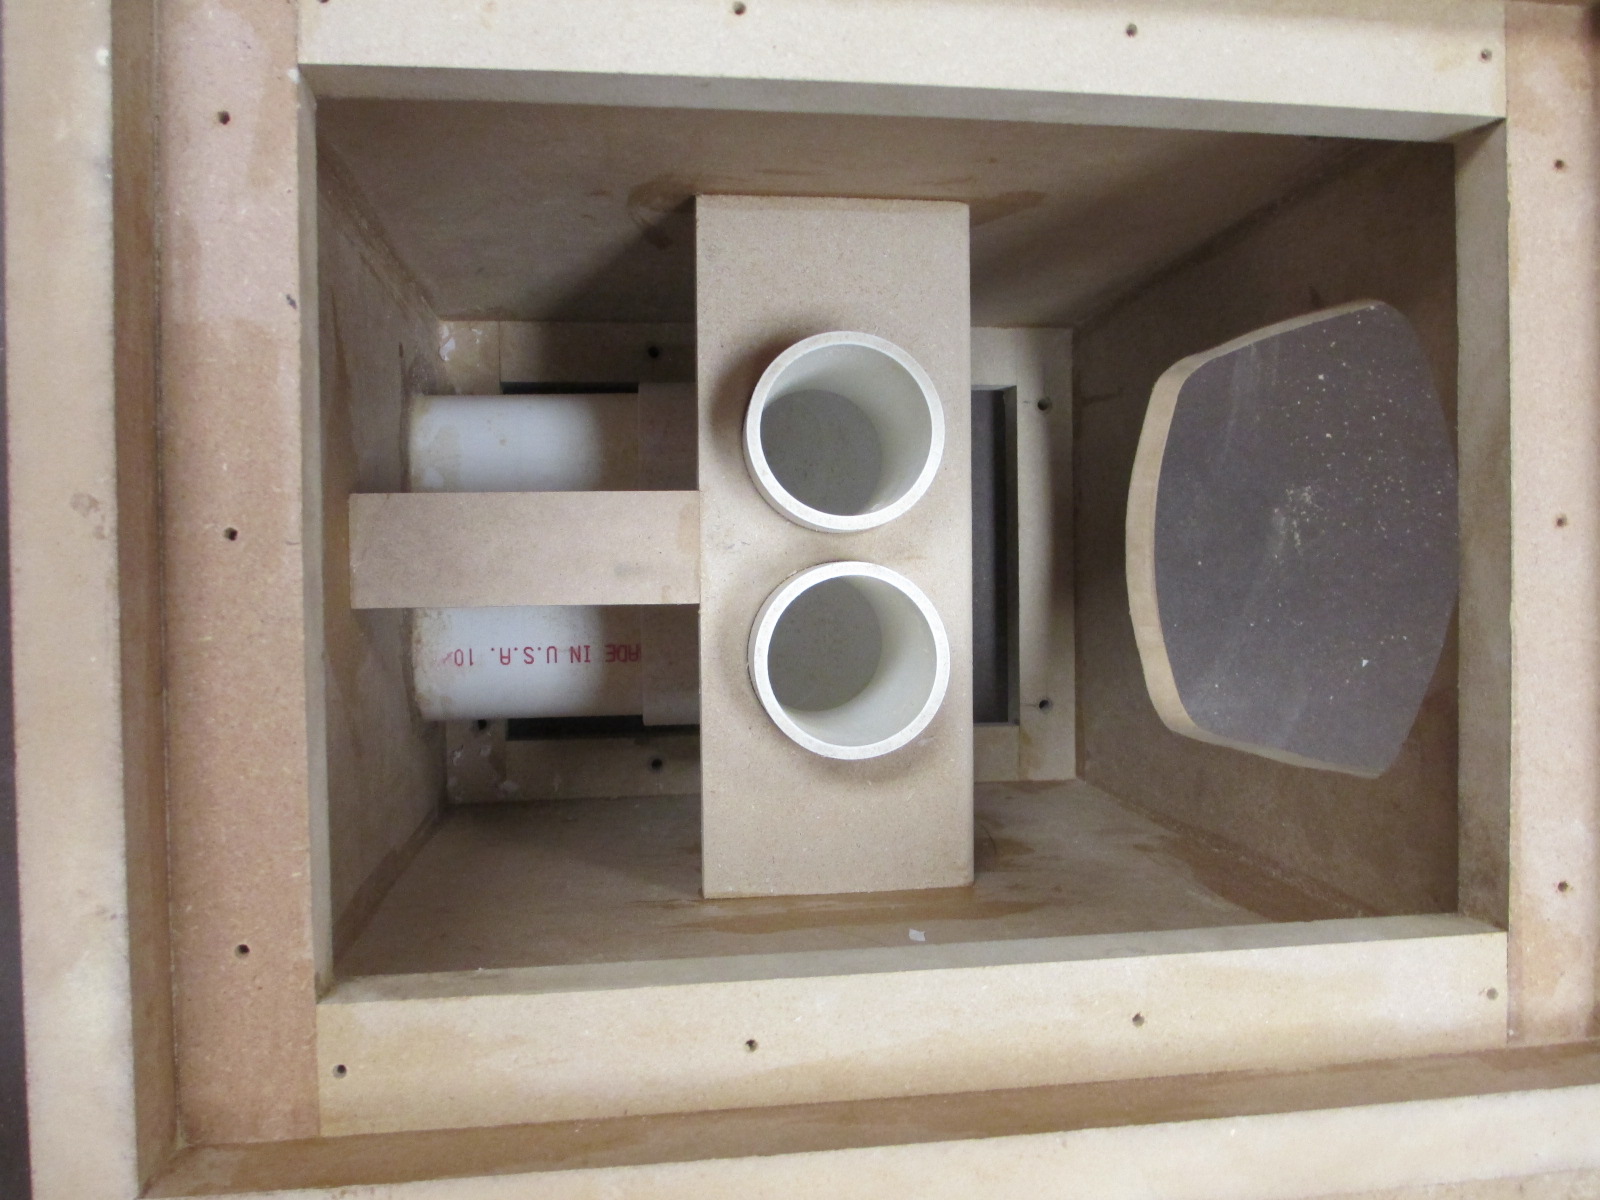
The enclosure is completely made of MDF, and is comprised of three main pieces. The bottom and middle section are both truncated pyramids with differing side angles, while the top could also be considered a truncated pyramid, it is only 1.5″ tall and therefore basically just a cap. I chose to build it in three separate sections for two reasons. The first reason was to give it the rounded edges where sections meet, in order to mimic metal construction, and the second reason was to make my life easier when it came time to paint. The bottom of the lower section measures 11″ x 14″ , the top is 9 3/4″ x 12 3/4″ and the height of just the lower section is 14 1/4″. The bottom of the middle section matches the top of the lower at 9 3/4″ x 12 3/4″, the top is 8 5/8″ x 11 5/8″, and the height of the middle section is 7 1/4″. The top cap is 1 1/2″ tall, again matching up to the dimensions of the piece below. The middle section has an internal truncated pyramid serving as an enclosure for the RS100p, which leaves an overall volume of 26L for the Tang Band w69. The w69 is tuned to approximately 36hz through a pair of 2″ ports 13″ long exiting in the rear.
Enclosure Assembly:
The entire enclosure as stated above, is constructed of 3/4″ MDF, with the exception of the internal mid enclosure, which is made up of 1/2″ MDF. The actual construction was time consuming and a bit tedious due to there being multiple sections that needed to be built, matched up and be connected. All three sections contain threaded inserts and are held together with 10-32 machine screws. The physical construction is straight forward in that the individual pyramids were cut and glued using titebond III. The top cap is composed of two layers of MDF with the center of the lower layer removed, forming a rectangular ring on the bottom. Once all three sections were complete, I bolted them together, got out the old router and and hit the four vertical edges with a 3/4″ round over bit. It was then time to take the cabinets back apart and round over all the horizontal edges using a 3/16th radius. The next step was to glue in the ports, radius the outside edges and fabricate a removable bottom to facilitate final assembly. The cabinets are finished in automotive paint. The steps are as follows: polyester primer, block sand, 2k primer block sand, base color, clear, wet sand, buff and polish.
Crossover Design:
For those of you who only like minimal parts counts in your crossovers, quit reading right now, because this one will give you nightmares or at least shaking your head thinking I’m crazy or don’t have a clue.
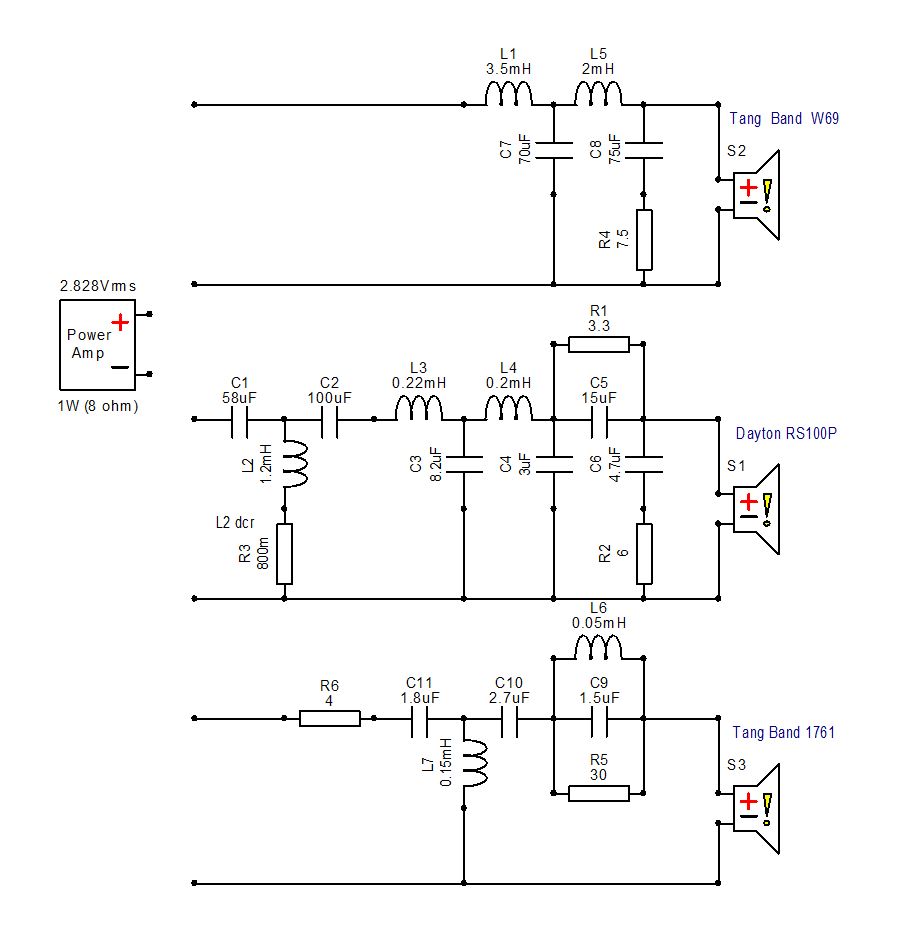
Starting with the tweeter, it’s pretty normal, requiring an electrical third order slope to keep it happy, and a notch filter for shaping, possibly due to the unusual application.
The woofer is also pretty standard except I normally wouldn’t use a zobel, but in the case the impedance shoots up fairly early and the compensation kept my inductor sizes down.
The midrange is where things became interesting. Removing the phase plug revealed a large breakup at about 10khz. The fourth order filter along with a zobel, dropped the peak down to an inaudible level. The 15uf cap and 3.3r resistor are there for shaping purposes. Throughout development of the crossover it would not be an exaggeration to say that I have way over 100 hours of listening time in trying different slopes, topologies, and just general adjustments. One other thing of note is that right before MWAF, I tried to improve the crossover, and came up with an alternative design that had the same tonal balance, but provided more detail. The problem was that is became fatiguing after a short time. So back to the original.
Conclusion:
Overall, I would have to say that these are very listenable for long periods of time, with no fatigue. while the drivers used are hardly high end, they do an admirable job working together creating a smooth sound with a good soundstage, and the W69 is surprisingly good in the bass department.
About the Designer:
I am an electrician by trade. I started tinkering with speakers shortly after getting my first real stereo in 8th grade, an MCS setup. I continued to build and tinker, upgrading stereo components and building speakers until my mid twenties, at which point I took a nearly twenty year hiatus before getting back into it full swing.
Project Parts List:
+ There are no comments
Add yours