
LCM – Little Californian Monitor


Designer:
Luke (zx82net)
Project Category:
Bookshelf Speakers
Project Level:
Intermediate
Project Time:
8-20 Hours
Project Cost:
$100 – $500
Project Description:
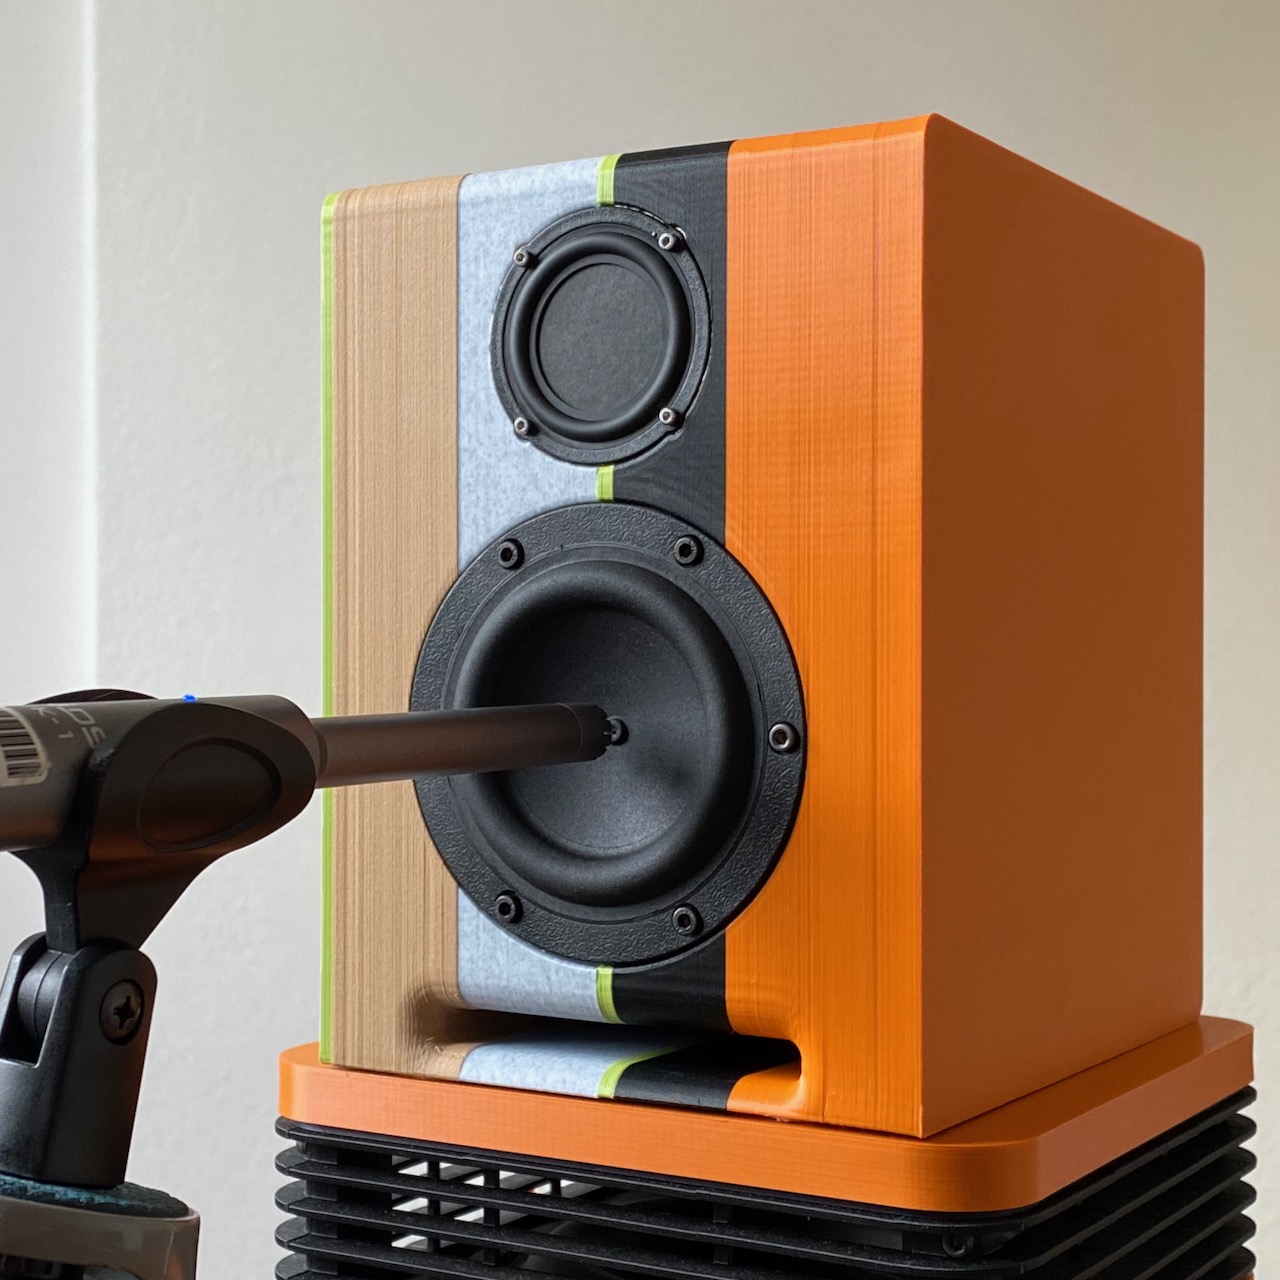
Tiny 2-way speakers with 40Hz bass response, suitable for desktop, shelf, or wall mounting and optimized for small to medium sized rooms. The enclosure can be fully 3D printed, or part 3D printed with wooden side panels. The 1.85 liter enclosure is tuned to 44Hz with a folded 55cm port. The assembled speaker is 14cm x 19cm x 17cm (5.5 x 7.5 x 6.7 inch). A 4 channel DSP amplifier functions as the crossover to split the signal between woofer and tweeter at 200Hz.
Design Goals:
To squeeze as much bass response as possible out of a package small enough to fit comfortably on a basic 3D printer, and provide a very wide listening sweet spot, so I don’t need to clamp my head in place to get a good sound stage at my work desk.
Driver Selection:
The low frequency section, Tang Band W3 1876S: #264-909
This 3″ driver is a legend, the star of many compact subwoofer designs and youtube videos, nothing else can match it in small enclosures.
The high frequency section, Tectonic TEBM35C10-4: #297-216
I chose the 35mm BMR driver for its wide dispersion and incredible frequency range, comfortably playing down to 200Hz.
Enclosure Design:
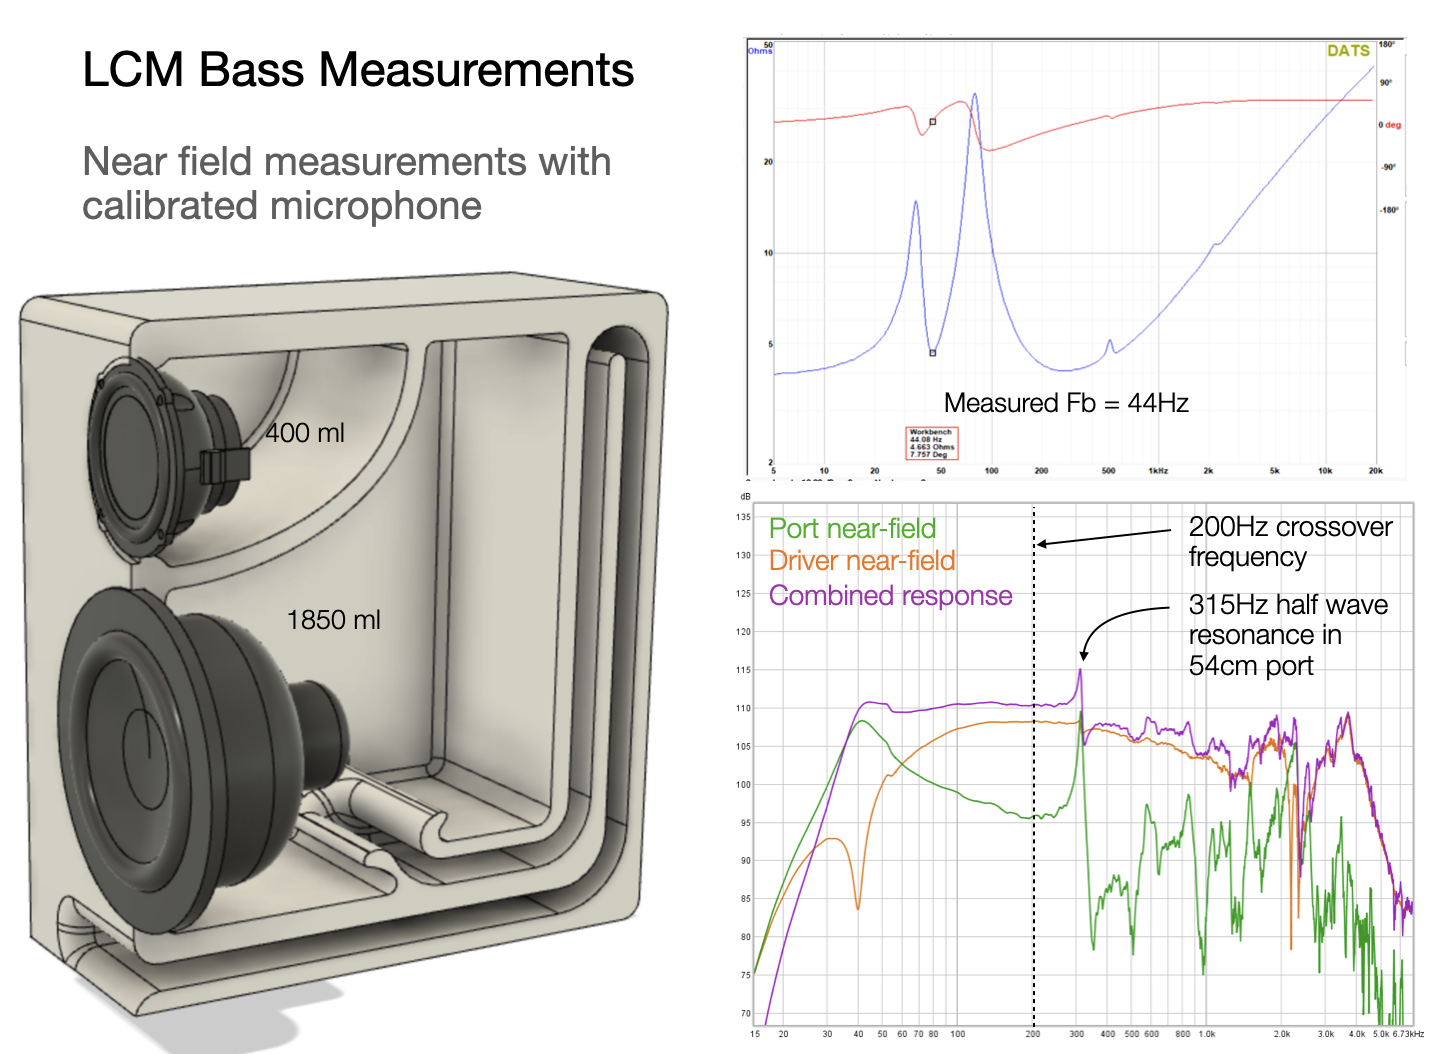
I modeled a range of bass reflex and passive radiator alignments in WinISD and found to get the absolute maximum bass response out of the W3-1876S I had to use a reflex enclosure with a very long port, about 55cm. Since the maximum dimension of the enclosure is 19cm, the port had to be folded several times to fit. A 3D printed slot port was the obvious choice. I wanted to avoid any resonances in the port, so I had to cut off the bass driver well below the first resonant mode, which is 315Hz. The mid-tweeter enclosure is 0.4ml and is a curved, roughly triangular compartment within the main enclosure. The enclosure could be 3D printed with a wide range of different plastics, but I used PLA, each half took around 20 hours, on a moderately fast printer.
Enclosure Assembly:
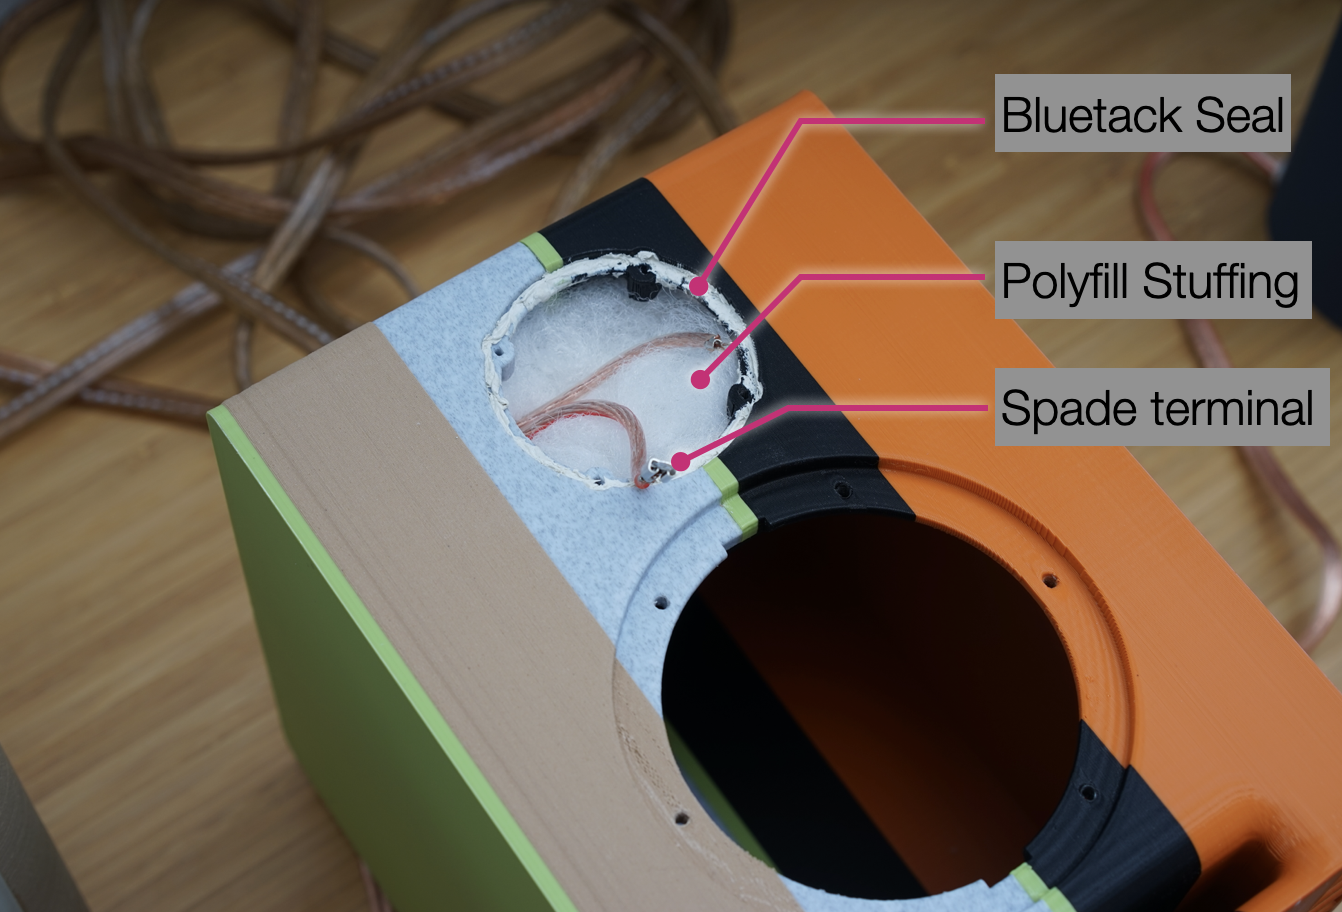
The enclosure prints in 2 halves which glue together with a tongue and groove joint. I used Gorilla Glue. The M3 and M2 screws self tap into the plastic. I used bluetack to create gaskets for both drivers, and to seal the holes around the cable exits. The HF enclosure is stuffed with polyfill, the bass enclosure has no stuffing.
Crossover Design:
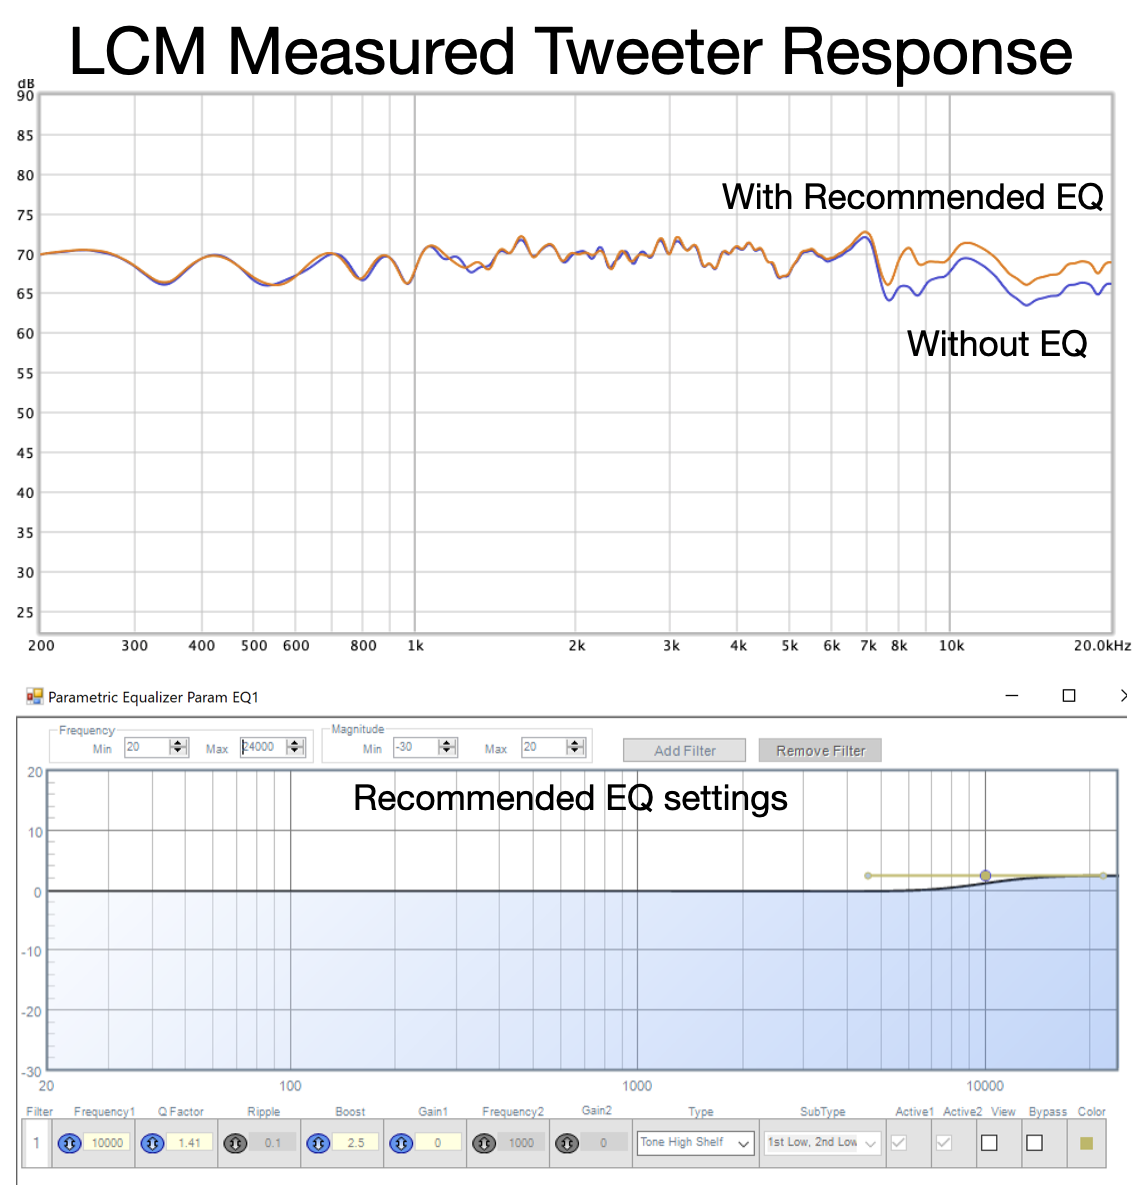
The crossover is provided by the DSP, its a 200Hz 48dB/octave Linkwitz-Riley with -6dB gain on the tweeter. I also used a +2.5dB high shelf at 10kHz to make the tweeter response level out to 20kHz.
Conclusion:
I’m very pleased with the results of this project. The bass output is quite incredible for the enclosure size and I love the clear sound of the BMR mid-treble driver.
All the 3D model files required to print this speaker can be found on my thingiverse page here:
https://www.thingiverse.com/thing:4980197
About the Designer:
I design cameras, but I like speakers too!
Project Parts List:
|
Part # |
Description |
Qty |
|
325-126 |
Dayton Audio DSPB-250 2x50W Class D Audio Amplifier Board with DSP |
1 |
|
325-505 |
Dayton Audio KAB-250v4 2 x 50W Class D Audio Amplifier Board with Bluetooth 5.0 |
1 |
How did you make the electrical connections? Where did you run the wires?
There are 5x7mm wide holes that in the left side which run through to the back of the enclosure. Run the cables through, seal with silicone. I like leaving ~10cm hanging out of the back of the speaker and putting lever terminals such as Wago’s on them.