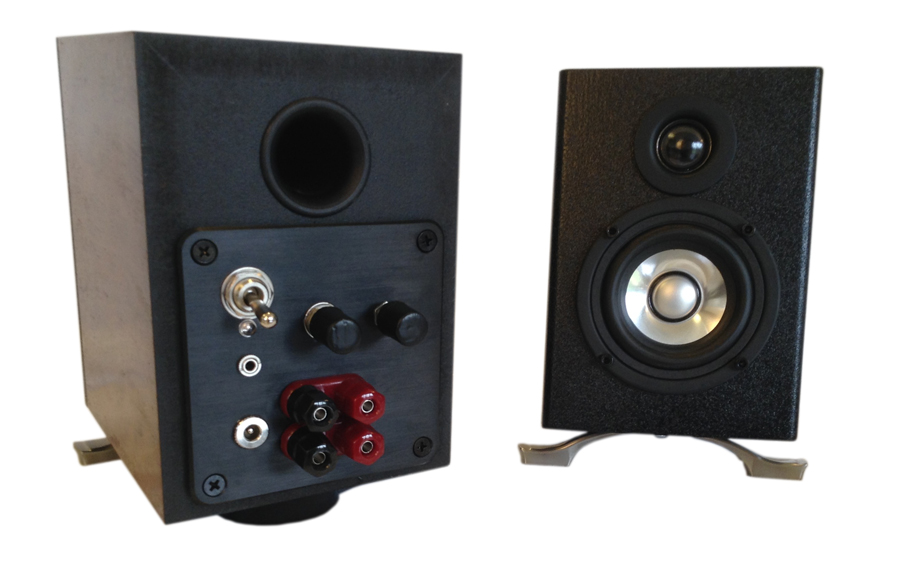
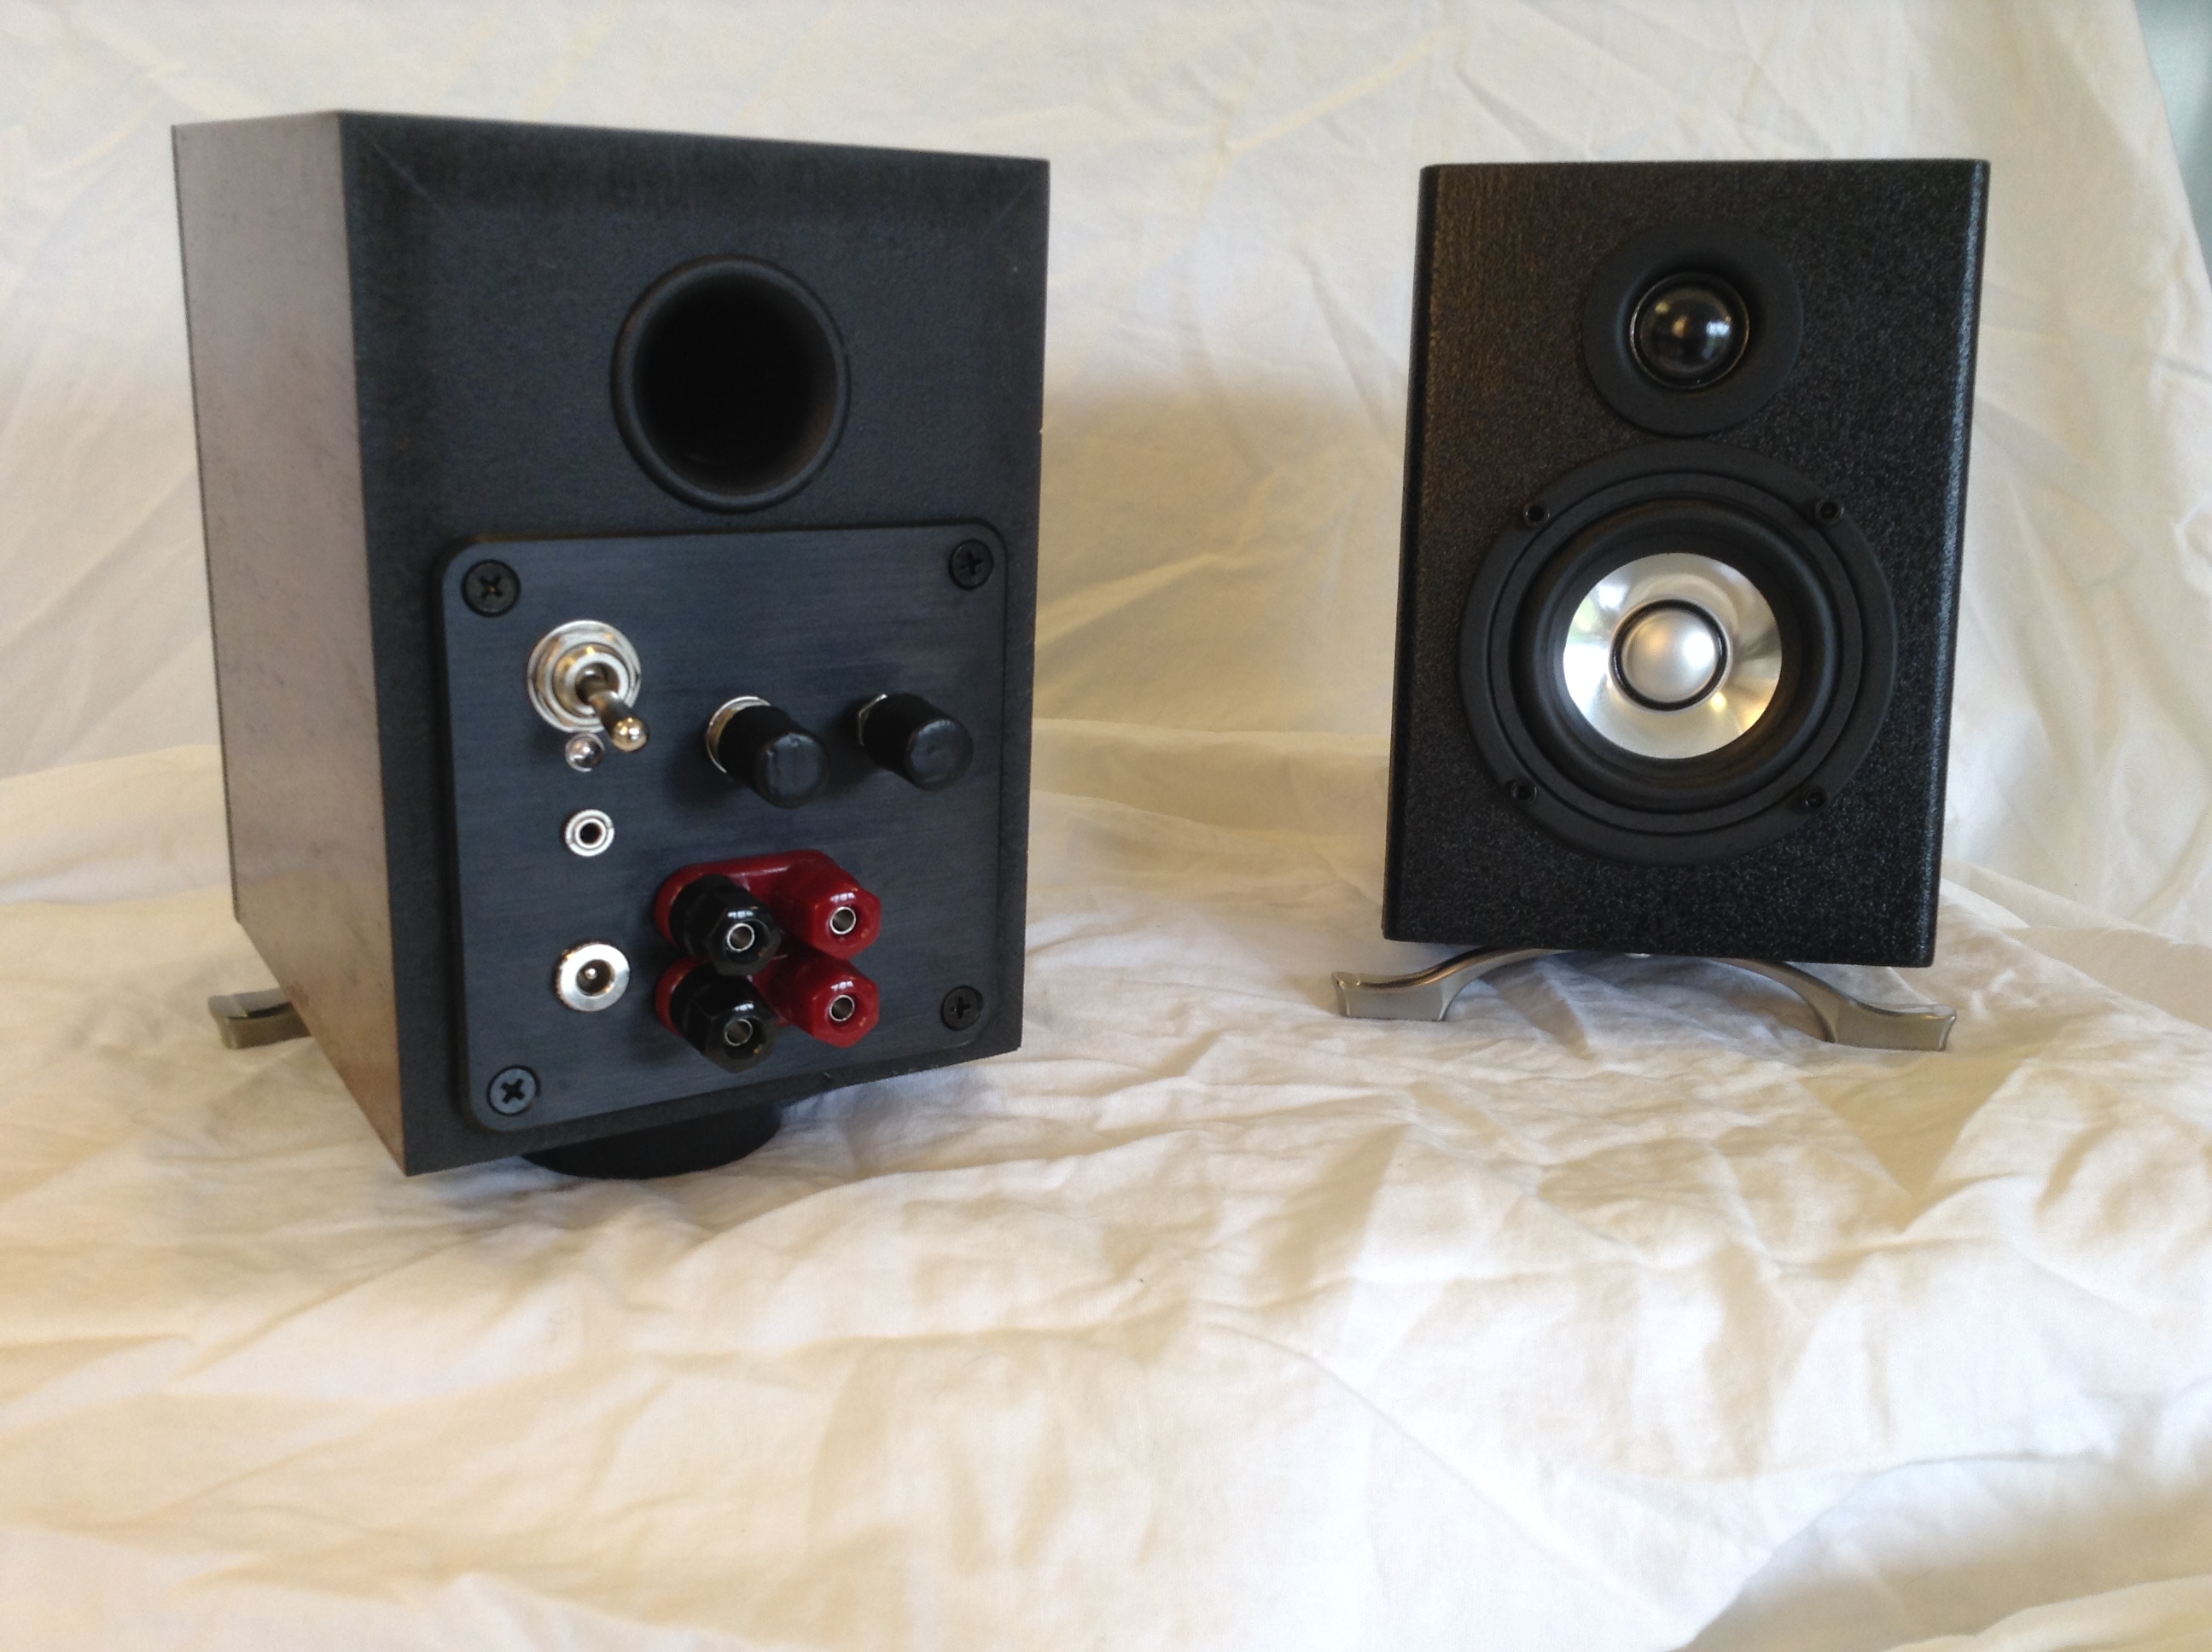
“Micro-B” 2.1 Plate Amplifier

Designer:
TomZ
Project Category:
Amplifiers
Project Level:
Intermediate
Project Time:
1-8 Hours
Project Cost:
Under $100
Project Description:
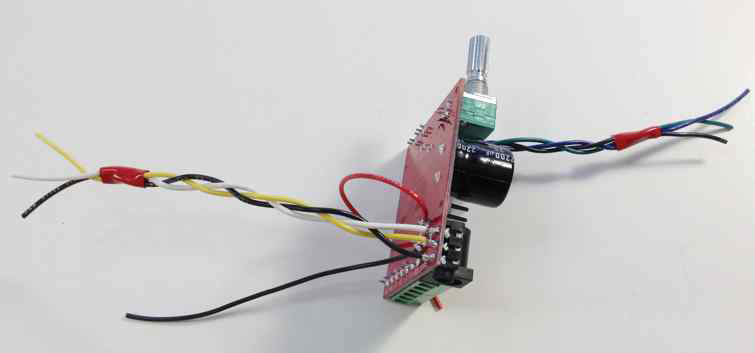
This project is based on the Parts-Express 2.1 amp board, Part # 320-608. As I saw this on the website and observed it’s specs — 15 watts for each of the stereo channels, and 30 watts for the subwoofer section — I wondered if it would work as the amp in a very small plate amp. After getting some positive feedback from the folks on the Tech-Talk board, I decided to design and build it, hoping it would produce decent sound in a ‘micro’ form factor.
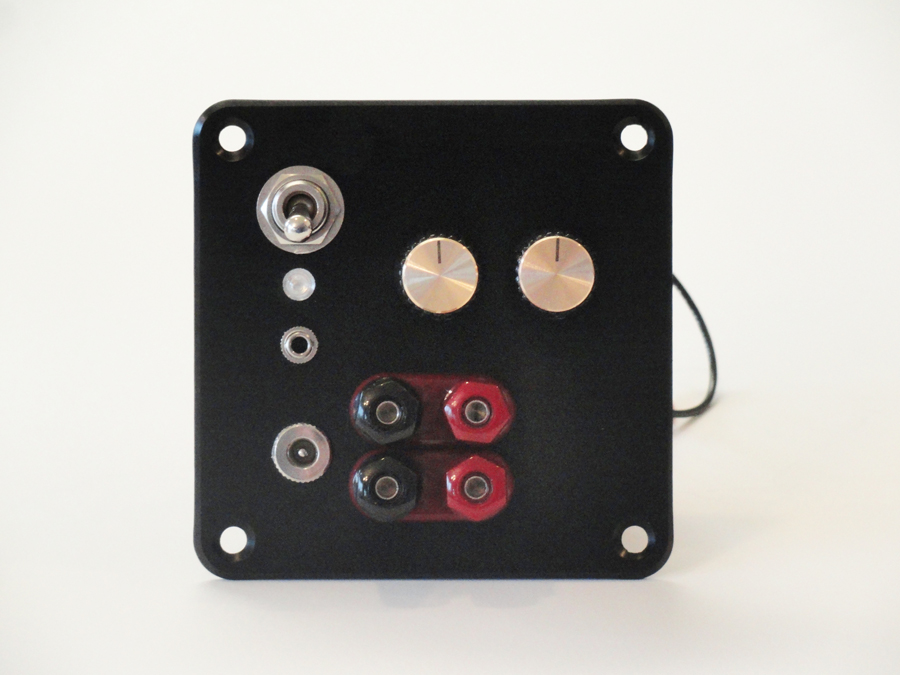
It is a true plate amp, although much smaller than any I’ve ever seen before… at 4″ square, and only a few inches deep, it will fit in almost any speaker you can imagine, but still deliver clear, powerful output to any small/medium 2.1 speaker system.
Design Goals:
I wanted this project to be able to fit into even the smallest of speakers, or a subwoofer, so it needed to be sturdy and airtight. I also wanted this amp to be able to play loud enough with most speakers to provide rewarding music quality, but to also be completely hidden out of the way.
Additionally, I wanted this project to be very good looking, so I used an aluminum plate as the foundation for this project and paid extra attention to the small details… and tried to come up with an attractive layout for the components as viewed from the rear. I also wanted to use all Parts-Express components if possible.
Enclosure Assembly:
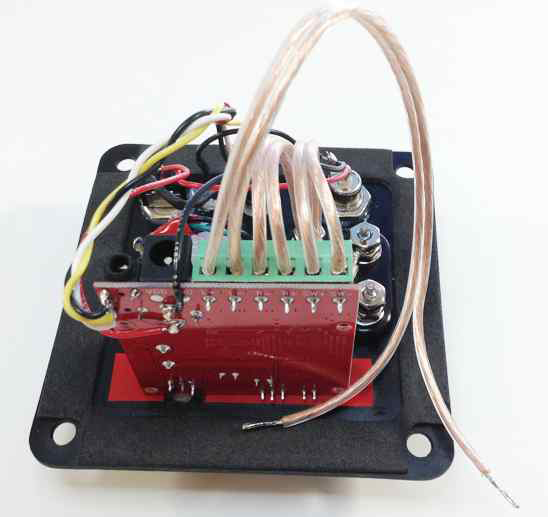
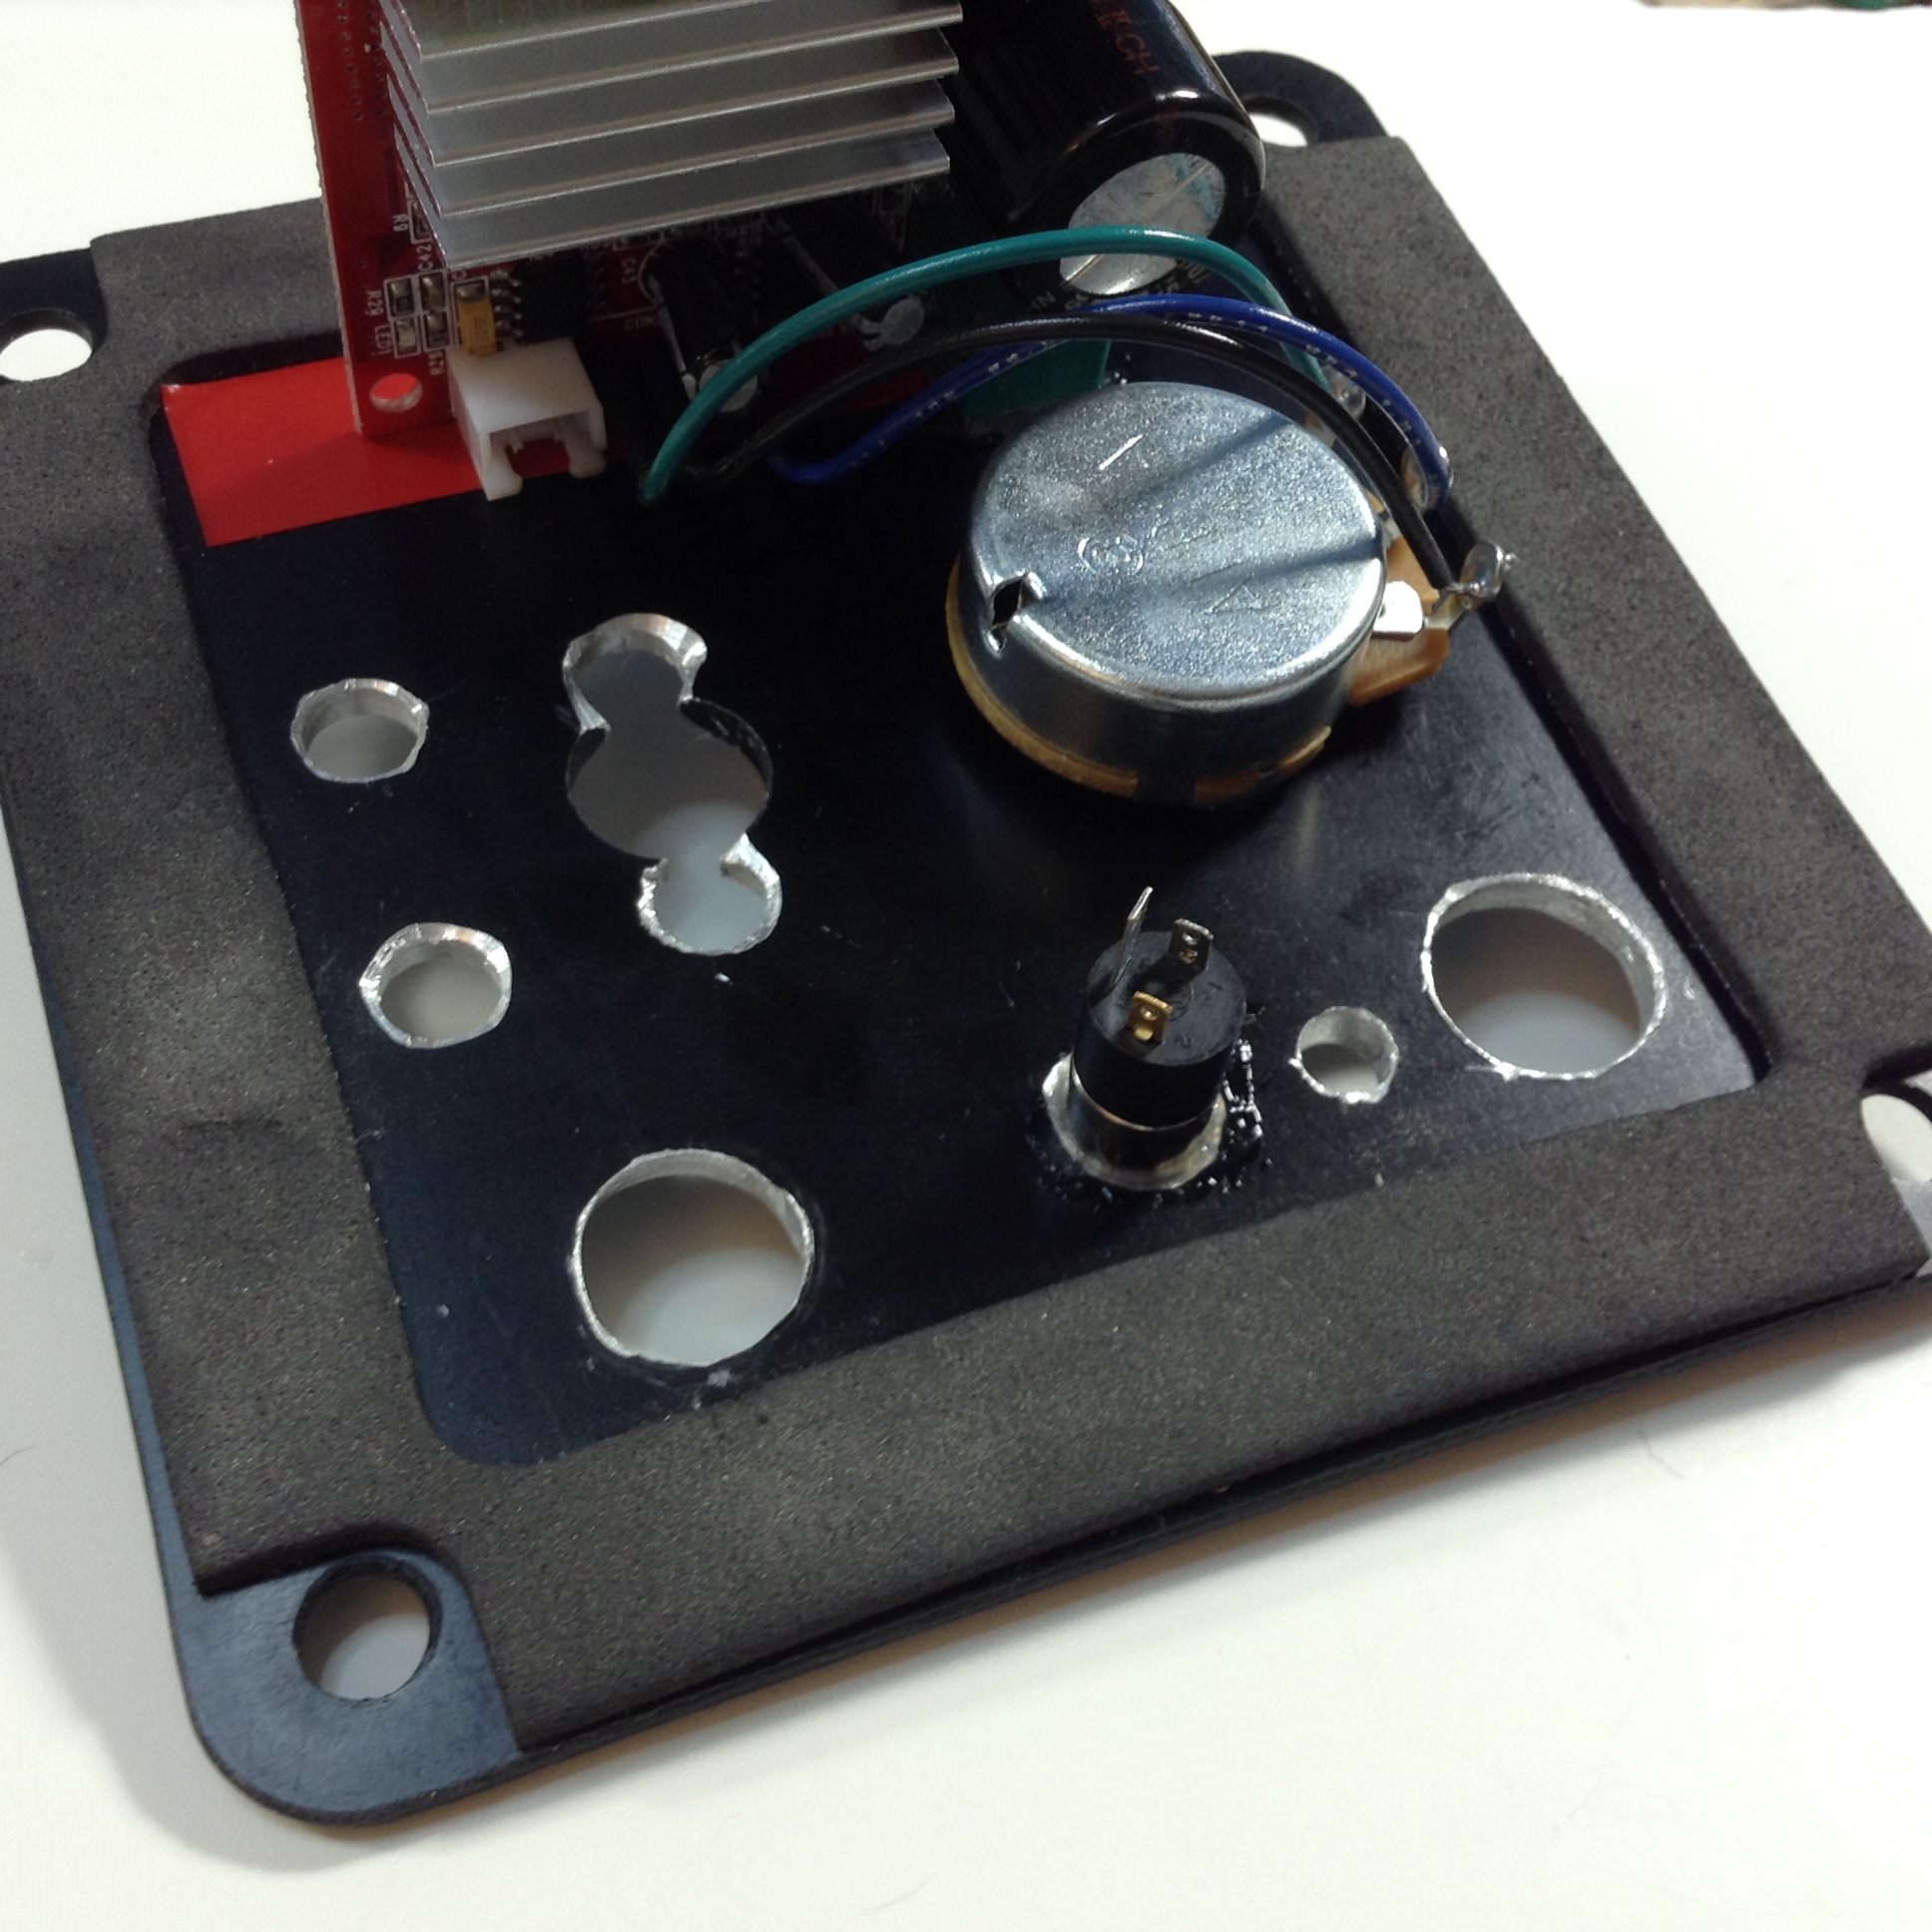
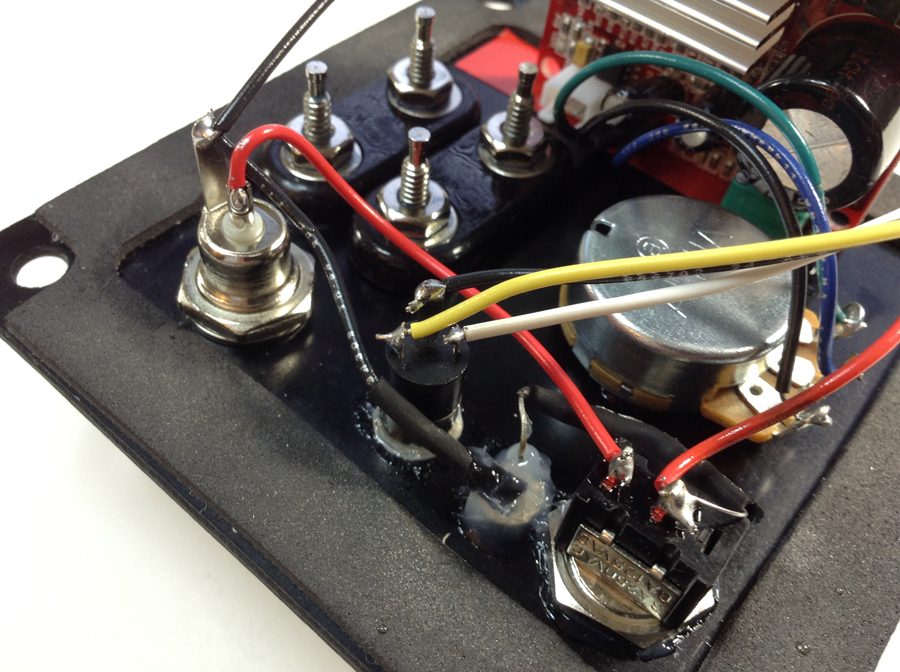
There are a total of 8 components that need to fit on the aluminum plate, and the plate that Parts-Express sells comes pre-punched with two notched holes, so I had to get creative to work around and with those existing holes. After designing and building several prototypes, I came up with a design that allowed all the components to fit on the plate with enough space around them to operate correctly. The two knobs for the subwoofer volume and main volume are probably the closest, but can still be easily adjusted individually.
A PDF is available with full instructions as well as a template that you can tape to the aluminum plate, which when center-punched — will show exactly where to drill the holes for every component.
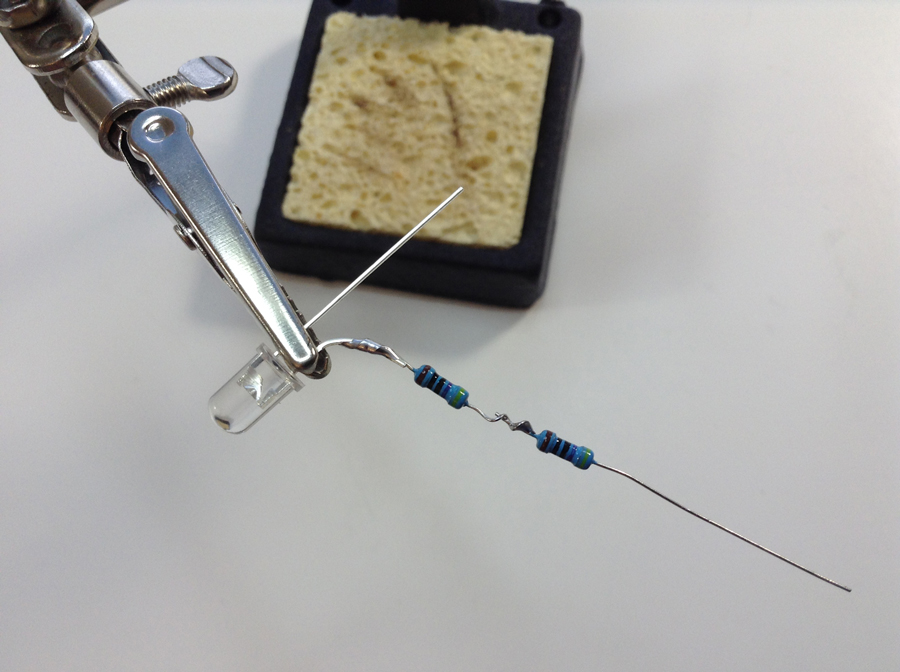
Each component is mounted with clear silicone to act as a sealant against air leaks, and the threads of each component are sealed with blue thread-locking compound to prevent them from loosening over time from vibration. I protected the aluminum plate from scratches with blue painters tape, and I cleaned the plate as I built it with alcohol and cotton swabs to keep the aluminum looking pristine and beautiful.
Tips & Tricks:
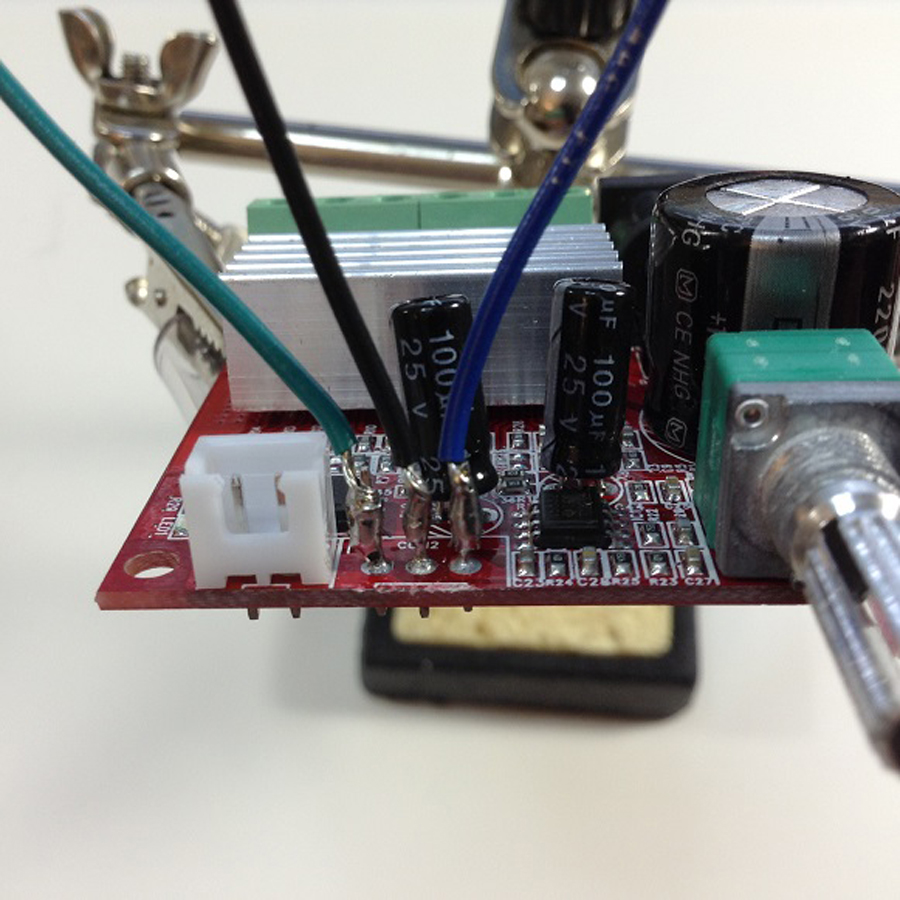
My first prototypes, and even the bare amp board seems to be susseptible to noise interference, especially in the bass, “.1” section of the amp. Hooking up the potentiometer to adjust the subwoofer made the noise issues worse. Looking for a solution, I received some good advice from the knowledgeable folks at the Parts-Express Tech-Talk board on how to reduce/eliminate these issues. First, I braided both the input and subwoofer level lines that are soldered to the amp board. This reduces their ability to act like an antenna and helped tremendously with noise. Also, I changed the amp potentiometer from the more commonly used 50k audio taper type, to a 10k audio taper potentiometer, and this helped to reduce noise as well. In the end, I can still occasionally hear a tiny bit of noise at various volume levels on the sub section only, but only in between songs and only when my head is right next to the subwoofer. Basically, the noise issues have been fixed, thanks to some good advice. Still, this amp board will pick up a bit of noise occasionally from nearby electronics or power supplies, for example, so be aware of that.
Also, regarding construction, I’ve built 6 or 7 of these plate amps so far and have broken several of the power switches and melted a few of the 3.5 mm stereo input jacks, so I would strongly recommend that you purchase two of each of these, they are inexpensive and it would be a shame to be almost done building this project and not be able to finish because of waiting for a $2.00 part to arrive in the mail.
Actually, the biggest tip I can suggest is to follow the PDF of the directions closely — there are pictures that detail each step and make construction almost fool-proof. I follow these directions now for each one I build and have no issues whatsoever.
Conclusion:
After building several of these plate amps, I have found them to be good sounding, and forgiving of low impedence loads. The specs suggest 8 ohm loads for both the stereo section as well as the subwoofer, but even with prolonged use at high volumes, I have found this amp board to run fine and cool with 4 ohm loads as long as the voltage stays at 16 volts. Using the maximum recommended 18 volts input may cause problems and I haven’t tested the board with anything higher than 16 volts, so I’m recommended you stick with 16 volts as the max.
In testing, I’ve used this amp to power anything from a set of Quark’s, to Neo Nano’s to Overnight Sensations, to even a larger set of D-3’s… and subs from the Voxel subwoofer to a larger Titanic MK2 subwoofer, and it had no problems or issues running any of these. Of course, because of the highish crossover frequency for the lowpass subwoofer section, smaller subwoofers will probably sound better; I’d suggest no larger than 5-6 inches or so, unless facing down — where upper-bass leakage will be less noticeable.
If you can follow the detailed directions and have 2-3 hours of free time and feel like building your very own 2.1 plate amp, this project will stealthily power a set of small to medium sized speakers and a small subwoofer very nicely, and you will have the satisfaction of knowing that you built it yourself.
About the Designer:
I’ve been interested in quality sound and building speakers
since childhood, starting when my father and I gutted the
speakers from an old stereo console unit and mounted them
in a few old wood boxes. Since then, I’ve built dozens of
speakers, subwoofers—and more recently—a few amplifiers.
I find it enjoyable to push myself to learn new things and
design and build ever more challenging projects!
Project Parts List:
Demonstrated at DIY-NY ’16 and were well received. Excellent small diy plate amp.
Where can I download the PDF instructions and template mentioned in the above article? I am building a table top arcade and this amp would work great for my project. What woofer would you suggest for this amp? I’d like to keep it to a 4 or 6″ size.
Thanks
Alan
Alan,
This is the link to the PDF writeup: https://drive.google.com/file/d/0BycPkA0iUgq_cjRFdDhtTm9uZWs/view
If that doesn’t work for some reason, search TomZ in the tech talk forum and click on the last link in my sig.
There are also video links there you can watch to give you an idea of how I went about assembling this project.
I used a 16V power supply at I think 4.5 amps. With that I was able to use 4 ohm drivers for both the stereo speakers as well as the sub. The .1 sub section of the amp is ‘just enough’, but if you go with an inefficient 4″ woofer you may be disappointed with the output. I used Paul Carmody’s “Voxel” subwoofer and that’s a perfect match. That uses the 5.25″ Tang Band subwoofer driver in a small shoebox size enclosure.
If your table top arcade format allows for a larger box for the subwoofer, maybe think an efficient 8″ or so subwoofer for maximum ‘punch’ if you have the space.
As an in-between, I came up with this: http://techtalk.parts-express.com/forum/tech-talk-forum/1273961-new-subwoofer-design-dayton-classic-subwoofer
It’s got decent output and reasonable size, using a 6.5″ driver.
Also, I can drive this setup fairly loud with a DVD or CD player as source, laptop too. I’ve been using an old Kindle or iPod as source, and they just don’t have the output to make this amp sing as well… just a FYI.
How hard is it to make it bluetooth?
Well, when I was originally designing this, I tried to include bluetooth as an option, but it quickly became obvious that it was going to be difficult to fit everything in there. In addition to another switch to toggle between bluetooth and the line-input, you would need to fit in a voltage reduction circuit somewhere as well as the amp runs on 16 volts and most bluetooth circuits operate on 5 volts. Between the bluetooth and voltage difference, it was clear that all of these devices would not fit in the same space. If you wanted to use the larger aluminum plate: http://www.parts-express.com/dayton-audio-dbpp-bk-double-binding-post-plate-black-anodized–091-612 You would have more room for additional components. As it was, things were costing just enough for it to still be considered a value, and be affordable. Adding an additional $15-$25 brings this up a bit higher than I wanted it to be.
Parts Express carries two dedicated bluetooth boards that I know of… this lower cost/quality one: http://www.parts-express.com/parts-express-bt-1a-bluetooth-receiver-module-for-wireless-reception-of-bluetooth-audio-sig–320-353 and this 4.0 aptX one: http://www.parts-express.com/sure-electronics-aa-ab41136-bluetooth-40-audio-receiver-board-aptx–edr-12-vdc–320-351 Add a switch to toggle between inputs and you would be there.
I tried to incorporate bluetooth originally because others suggested it, but I wanted to keep it more simple, and in the end, that’s what I went with. Plugging in a small cord isn’t too hard for a lot of devices. I realize that it would be nice to be able to transmit wireless from a phone to this, but it really didn’t fit. I wanted the plate to be SMALL! Really small, that way it could fit in the smallest of speakers, which would likely need a subwoofer to help on the low end, as this amp has included in it.
Thanks for the interest. If you do decide to build it, I’d love to see your progress, post up on the Tech Talk forum if you would.
Thanks,
Tom
Thanks!
Can you make it a blue tooth?
For the past several months ive been strongly considering building this. How well does that Class D board drive the W5-1138SMF? can you get good output without driving the amp into clipping?
George,
Personally, I don’t find clipping to be an issue, it just runs out of steam pretty much. If you used a higher voltage PS you might find clipping or distortion to be more noticeable, but I recommend using the PS voltage spec’d in the design. Output does depend heavily on your input source. In my bedroom where this system lives, I have it using an old Kindle Fire as the source paired with the “Quarks” and the sensitivity of those, matched with the output of the sub makes a good match. If your main stereo speakers were fairly sensitive, you might feel like your sub wasn’t getting loud enough though. But if you use a laptop or an actual CD player with a higher pre-out level, you could adjust things to where you wanted them. I myself use the subwoofer knob turned all the way up and it sounds about right to me. I believe that my Kindle Fire has a fairly weak output signal, using the laptop really makes it come alive. Hope this helped. TomZ
Here has incredible post for “”. Author share a superb ideas include all think that should be very helpful for everyone. Keeps all about very straightforward. Thanks for posting.
Nice sharing for how to do the install a subwoofer, amplifier and enclosure on the car or vehicle right location to perfect setting. It is a very helpful post for those who want to fix a subwoofer on their rider location.
Thanks for sharing about micro b 2.1 plate amplifier.