RSR’s


Designer: 6thplanet
Project Time: 20+ hours
Project Complexity: Hobbyist
Project Cost: $500-$1000
Concept
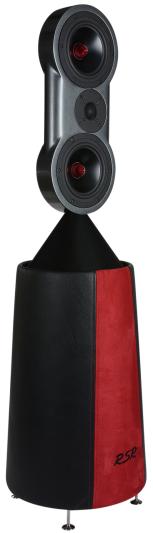
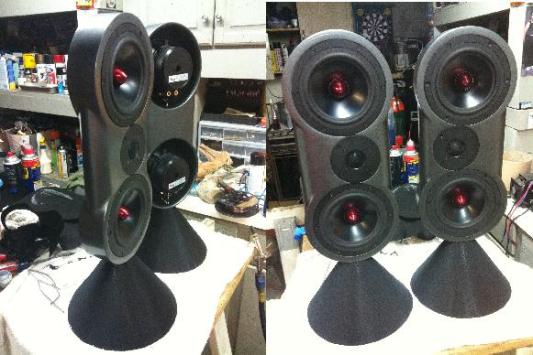
The idea of this speaker was to show case the RS line of drivers offered by Parts Express and inspired by my automotive background, predominantly the fondness for the Porsche 911 GT3 RS. I started with an MTM based off the RS180/RS28F combo. This was chosen because of my tent sale purchases from last year. I needed a bass section so the RS225 was incorporated into the design. I also had a couple NS270 passive radiators that were tent sale finds as well so those were thrown in there as well.
Design Goals
Create an Open back / omnidirectional speaker utilizing methods and finishes I had not done before. Also I wanted it to be strictly all Dayton speakers/parts as this was entered in the “Dayton” category of the MWAF show.
Driver Selection
Tweeter: RS28F-4
Midbass: RS180-4
Woofer: RS225-4
Passive Radiator: NS270-PR
Enclosure Design
I designed this speaker around the MTM using the RS180-4/28F combo. I wanted a self-contained passive 3-way speaker so I incorporated the RS225 for bass duties. This is in a bass reflex box using a passive radiator on the bottom, tuned to 34Hz.
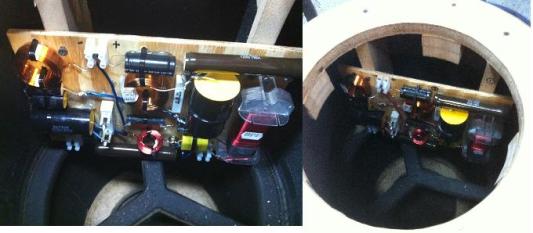
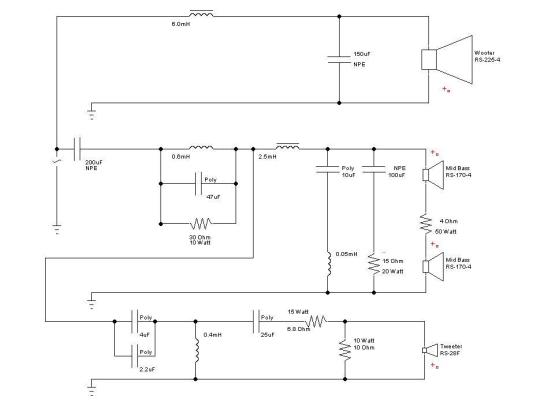
Amplifier/Crossover Configuration
Crossover points are 300Hz and 1.8 KHz. The woofers are 12dB LP electrical, the mids are 6dB HP and 12dB LP, and the tweeters are 18dB HP. There’s a parallel notch filter for the dipole peak as well as Zobel correction also tuned to help the OB peak. All the caps are Dayton audio as well except one in the LP section of the mids.
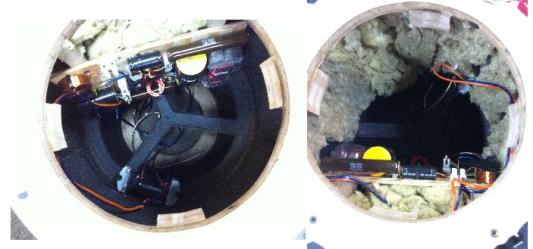
Enclosure Assembly
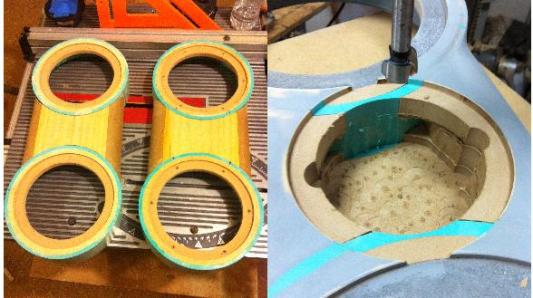
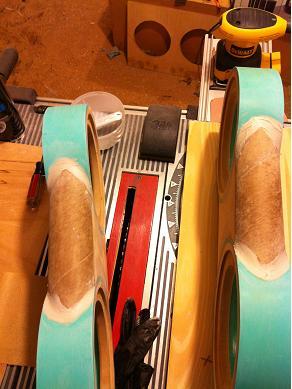
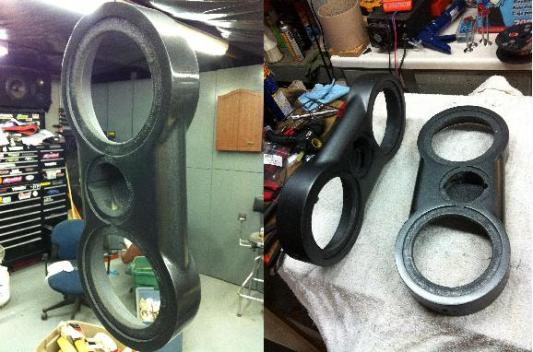
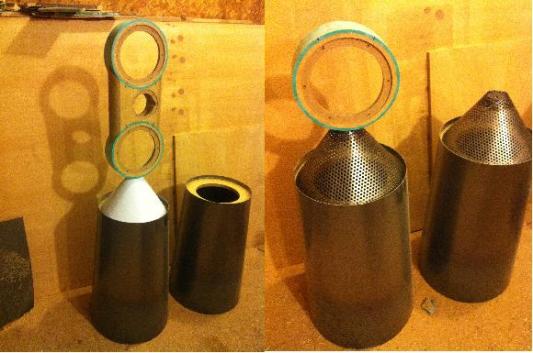
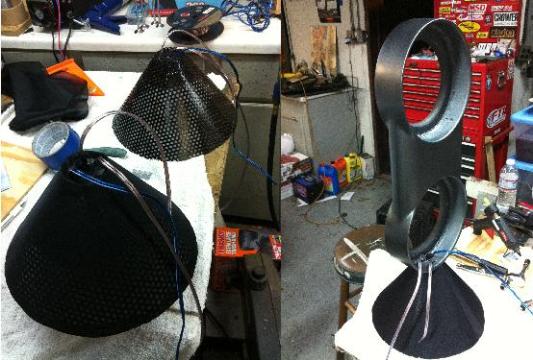
The upper open baffle assy. was built using 8 PVC pipe, MDF, and thick walled cardboard tubing. I wanted the mids to be open back so I used the PVC pipe and some MDF to make the rings in which the RS180’s were mounted. The connection in between the rings was constructed of 3/4″ MDF stacked 3 pieces thick. I cut the cardboard tube in half, rabbeted the MDF, and glued these to the outside edges of the stacked MDF. This was then cut to connect the upper and lower PVC rings together. After that dried I cut the recess and hole for the tweeter to go in. The hole wasn’t deep enough for the tweeter to fit so I had to use my drill press with a Forstner bit to deepen the hole for clearance. Next came the Bondo to smooth everything together. Finally it was primed and painted with automotive paint from Duplicolor. The wiring to the speakers is hidden from view by automotive carpeting on the inner backside of the PVC pipe.
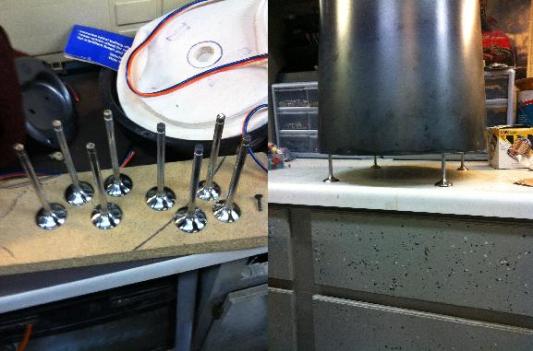
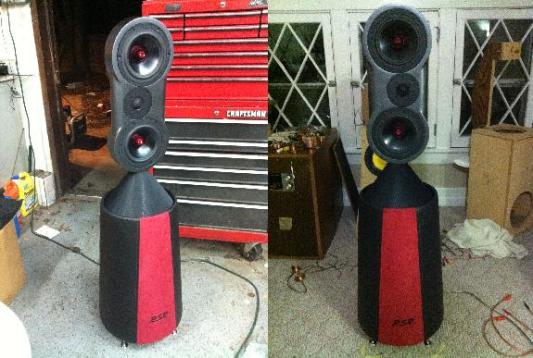
The lower bass cabinets were constructed from a rolled piece of 16 gauge steel. It’s a truncated shape that’s 10.5 at the top and 14″ at the bottom, standing 22″ tall. I had a shop roll form this for me as I don’t have the proper slip roll for such task. I cut a top, middle brace, and bottom out of 3/4″ MDF. These were ruff cut with a jig saw then I set up a jig on my table saw to put the correct angle on the end and spun them into perfect circles. This was a first for me and it worked perfectly. Next these parts were glued in the steel tube with poly based construction adhesive. After those dried I installed peel and stick asphalt shingle material as damping material to the inside of the tube and sprayed over that with rubberized undercoating to completely deaden and seal the whole enclosure. This yielded one of the most solid / nonresonate enclosures I’ve ever made. This was then wrapped in speaker carpet and upholstered in vinyl and faux suede. Also a first for me was the use of a sewing machine. My wife gave me some pointers, ran a couple stitches, then I jumped in and started sewing up a fury!! Luckily for me it all worked out on the first try. I took the covers to a shop to have the “RSR” logo embroidered onto them. Then stitched up the back and pulled them over the enclosures securing it with spray glue and staples. Roxul brand rockwool was used for interior damping.
The pieces that connect the upper open back units and lower bass cabinets are constructed of 18 gauge perforated metal. I used an online truncated cone calculator to get the pattern I needed for cutting the metal out to the correct size. Then I hand formed it into the cone shape and TIG welded it together. I then cut a piece of circular metal that fit into the top, welded that, and then drilled a hole to facilitate a way to bolt the perffed cone to the upper MTM assy. Before that was bolted together I also had to cut a circular piece of wood to mount the RCA jacks to. This connects the wiring from the lower woofer module that houses the crossover to the upper MTM module allowing the two to be separated. It was hot glued into place right below the metal piece that bolts the perffed cone to the MTM unit. I sewed up a cover for the perforated metal out of grill cloth using the same pattern I used to make that truncated cone.
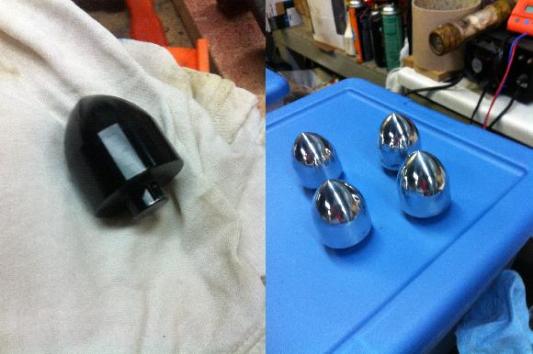
Last I used intake valves out of a cylinder head I had on hand to use as feet. These were removed and polished up on my drill press. That pretty much sums up the build of this speaker which took probably the better part of a year’s worth of work.
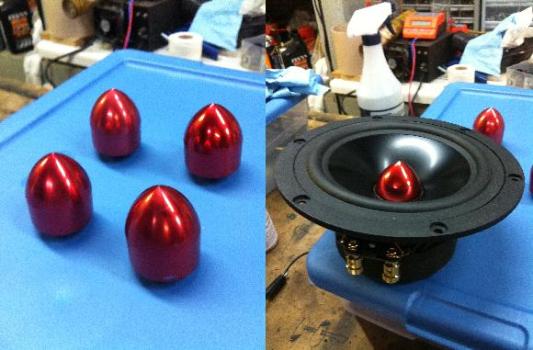
I’d also like to note the reanodizing of the phase plugs on the RS180’s. This was also another first for me. I watched a few videos on YouTube on how it’s done so I gave it a try. It took me about 4 attempts to get them right. If you’d like to try it, the phase plugs popped right out for me using a punch and a hammer from the backside of the speaker. Apparently they are just “super glued” in. I used a speaker box I had laying around to catch the plug in. Just cut a hole that the speaker will fit into as if you’re going to mount the speaker in, except turn it upside down facing into the box. Place a towel inside to catch the plug and hammer away! It only took one good hit to pop it loose. Then use Acetone on a q-tip to dissolve the glue on the pole piece and phase plug. I also watched a video on removing the anodizing. This uses common drain unclogging crystals also known as caustic soda, i.e.: Liquid Drain-O brand. After the stripping process, I used some 400 grit wet/dry sand paper to hand sand them, then my bench grinder with a polishing wheel to shine up the plug before the anodizing process. All the polishing materials can be easily bought at Harbor Freight.
Conclusion
After all was completed I had a couple bum tweeters. Sometimes the tent sale offers winners, some pieces…not so much. They were literally finished 3 days before the MWAF show. I had one day (Tuesday) to get a quick listen and realize the tweeters were no good. I installed a set of Usher 9950’s to verify everything else was working. The next day (Wednesday we had a storm come through and take my power out. Friday came and off to the show I went with intentions of buying a new set of RS28F’s to install the day of the show. I ended up replacing them with another set I purchased at this year’s tent sale 2013). This time it was a score! I didn’t have time to do much in final tweaking before the show and it showed up as the tweeters were a bit to “hot”. When I returned from the show I was able to adjust the level and tune the bass enclosures a bit. Over all these are complete successes. They sound great and look the part, too.
About The Designer
I’ve been into building speakers since I was probably 15-16 years old (now 38, how time flies!!I started out in the automotive side doing installs for friends and building a few home speakers here and there. I didn’t really get into it heavily till about 10-12 years ago. It’s still fun to learn new things in the sound domain as well as my construction skills. It’s great to have a place like Parts Express whose catalogs I’ve been ordering from since I was 15-16 years old…) to support DIYers of all types. Not only selling the parts, but their customer support, hosting the MWAF/tent sale, and the TechTalk board where I’ve been able to connect with fellow DIYers is about as good as it gets.
+ There are no comments
Add yours