My first DYI build


Designer:
Jon Laye
Project Category:
Subwoofers
Project Level:
Beginner
Project Time:
8-20 Hours
Project Cost:
Over $1,000
Project Description:
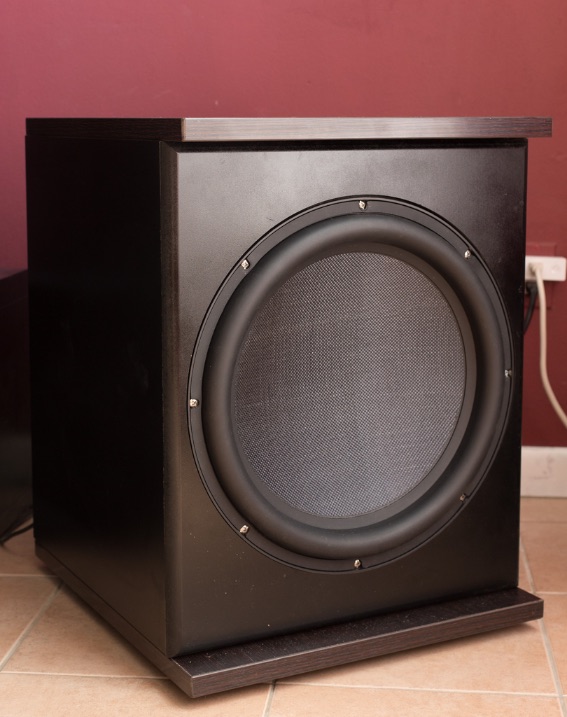
While stuck here at home due to COVID-19 I was starting to drive the wife crazy. I needed a project so the Dayton Ultimax 18, Denovo flat pack and Dayton Audio SPA1200DSP fit the bill. Being my first build I placed the order over the phone and while waiting for the kit to arrive I bought some bar clamps, paint, screws, nuts and bolts and all sorts of little things I would need. I decided I did not like the typical Duratex paint so I came up with laminate. I ordered a sheet of flat black Formica and ordered a custom grill for the front, which has not arrived yet. I also came up with the idea of an accent on the top and bottom and thinking about the Vandersteen 2Ce speakers I have now and the previous set from Acoustic Research which both have a wood accent for the top and bottom, I first thought of granite or quartz counter top material. Well, that gets expensive, so I ordered two custom counter tops from an office furniture company and I ordered them 20×22 inches which gives me a 2 inch overhang on the front. I also put hard rubber feet on the bottom, parts from a DJ speaker supply company. I tried to be careful with each step and enlisted a friend to help with the laminate, a friend with experience refinishing boats and had the router and bits for laminate. The two issues I had were first, I relied on the gaskets that came on the driver and plate amp. I had a hard time getting them to seal while playing a steady 20hz test tone. I added another gasket to the plate amp which solved that problem and while bolting down the driver using 2″ bolts into tee nuts I hammered on, the last one I knocked the tee nut loose on the inside of the cabinet. I removed the plate amp and used a really long screw driver to hold the tee nut down while tightening the bolt and finally it caught the wood. I still had to go back and tighten all of the bolts down really tight to eliminate air leaks from around the 18″ driver. But with enough force, nothing broke and the driver is sealed. Now comes tuning and set up but I am happy with the look and how the entire project came out for my first try.
Design Goals:
Strong, tight musical bass to upgrade from an SVS SB-2000
Driver Selection:
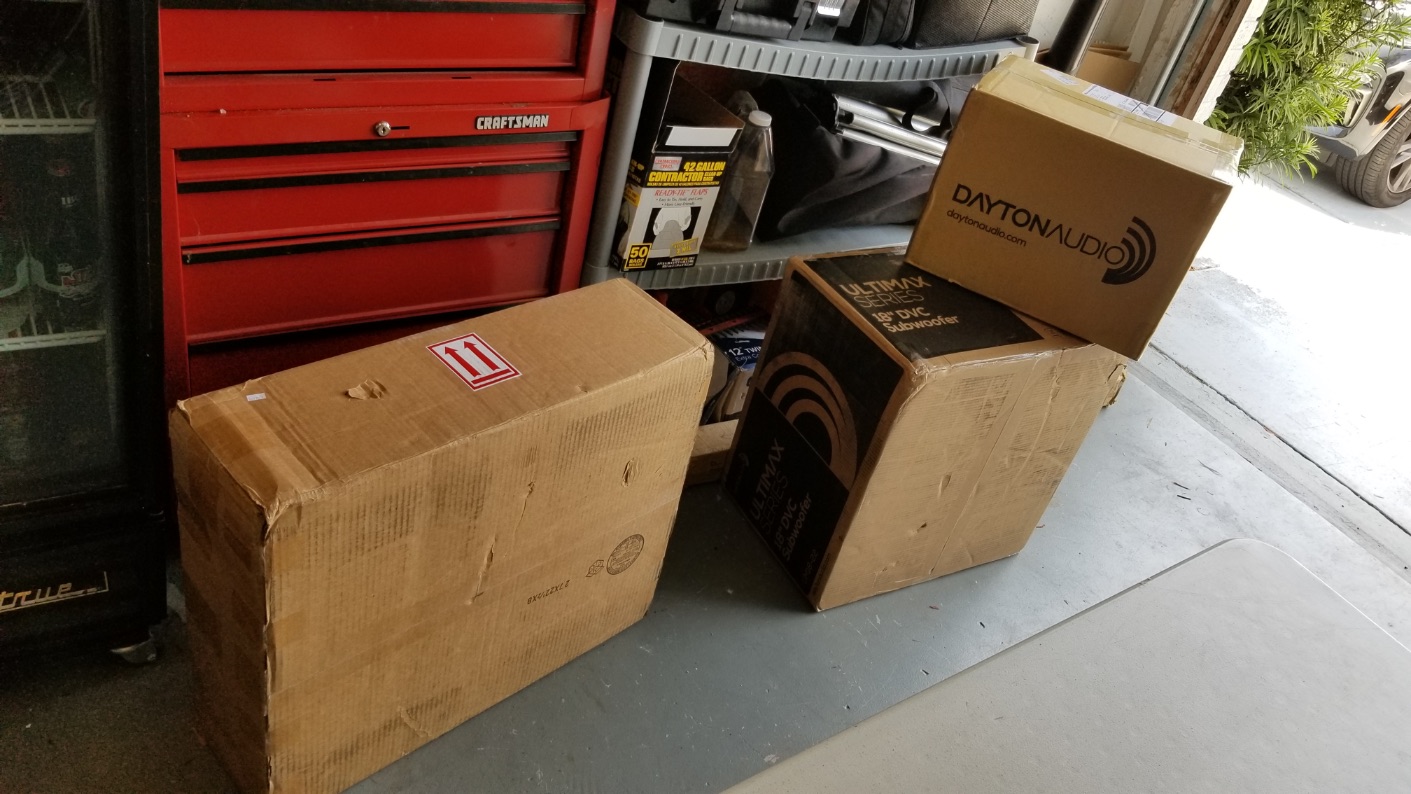
Dayton Ultimax 18
Enclosure Design:
Denovo 4 cu.ft. MDF enclosure
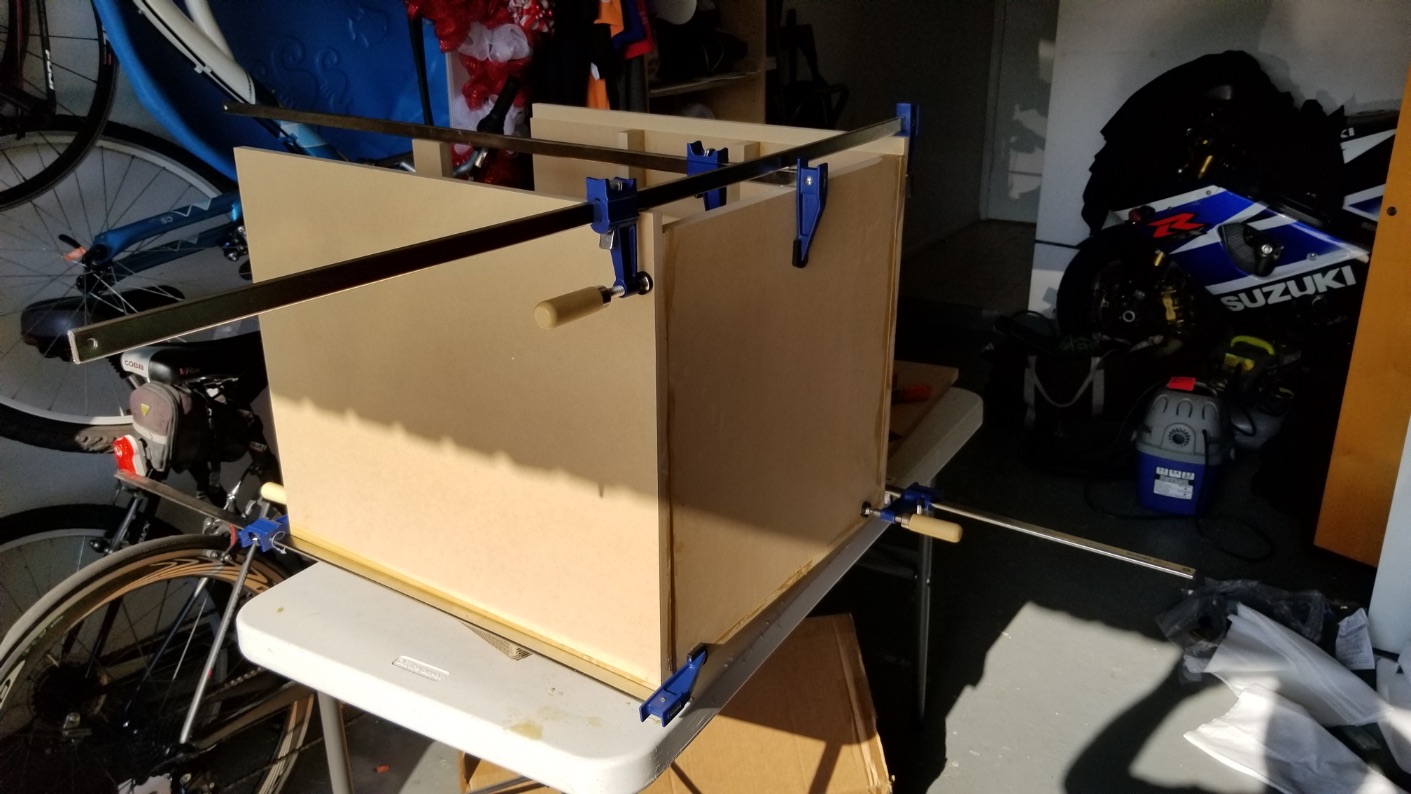
Enclosure Assembly:
Lots of Titebond III, various nuts and bolt, time, effort and banged up fingers.
Crossover Design:
DSP in the amp
Tips & Tricks:
I got by with 4 36″ bar clamps, 6 would have made things easier. My T-square never left my side and even though the latest Ultimax driver and plate amp come with gaskets applied, adding your own seal will save time. Also, by lowering the plate amp a couple of inches from center I only had to cut through one brace instead of two. I ended up spray painting the front panel black and it tok me about 6 coats while sanding with 2000 grit sandpaper between coats to get a finish I liked. Perhaps someone with more experience and skill with a spray can could do it with fewer coats.
Conclusion:
I am happy with the way this came out. The enclosure was really well made and parts fit together perfectly. I have not had a chance to really put it through its paces but will over the next week
About the Designer:
I am a temporarily out of work photographer waiting for things to calm down from COVID-19. I enjoy music and movies and upgrading to a serious subwoofer was an ideal project.
Project Parts List:
|
Part # |
Description |
Qty |
|
300-7089 |
Denovo Audio Knock-Down MDF 4.0 cu. ft. Subwoofer Cabinet for Dayton Audio 18″ Ultimax |
1 |
|
295-518 |
Dayton Audio UM18-22 18″ Ultimax DVC Subwoofer 2 ohms Per Coil |
1 |
might be a stupid question but whats the purpose of that looped connection you have plugged into the back? Im pretty new to this stuff, and simply curious.
y-jack to put a single signal in both channels. https://www.parts-express.com/rca-male-to-dual-rt-angle-rca-female–091-1045