The Pipe Project


Designer: Chris Perez
Project Time: 20+ hours
Project Complexity: Amateur
Project Cost: $500-$1000
Component Selection
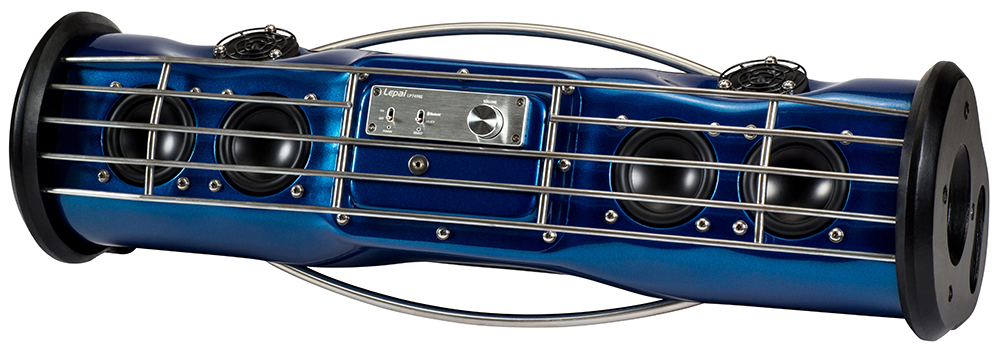
First, I needed power and plenty of it. The Lepai LP7498E amplifier fit the bill nicely. About 80 watts per channel, Bluetooth, and just two switches and a knob… nice and simple. Just so you know, this is not battery powered. It could have been, but I wanted the boombox to be light and run all day.
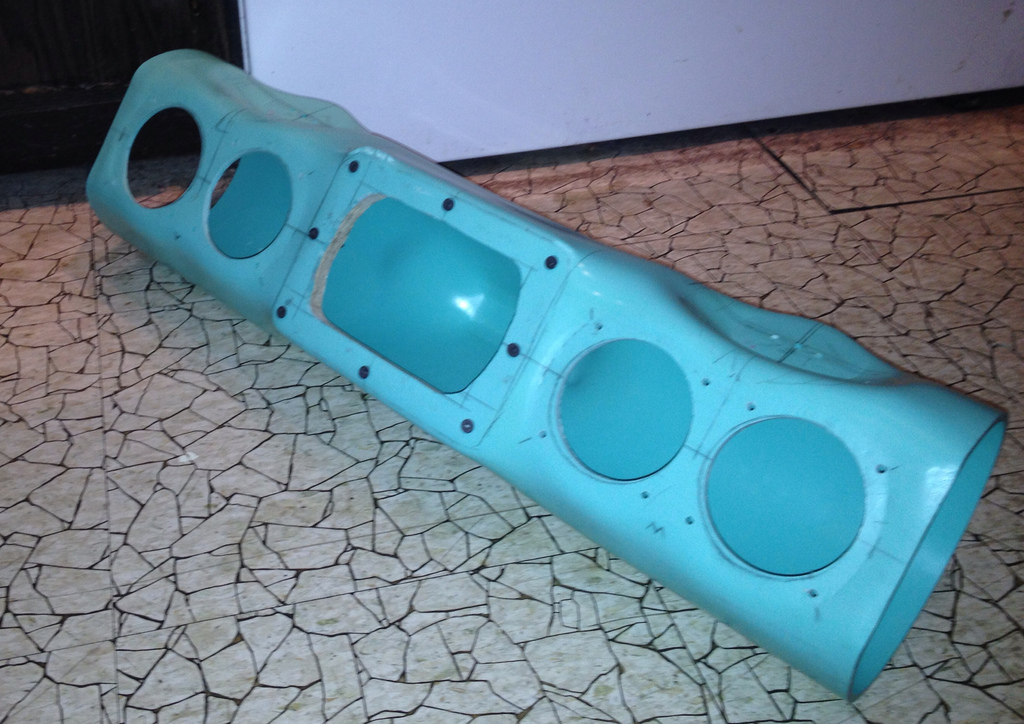
I chose 6″ diameter, solid core PVC for the enclosure. This light and rigid material also lets me show off my molding and design skills. Considering the woofers, I thought about using a couple of 5″ or 6″ drivers located in the ends, but then the whole thing would just look like a bunch of PVC, and that’s no fun! I was quite surprised with the specs that I found on a couple of 3-1/2″ drivers (I’ve never really looked into small woofers, I’m a bigger-is-better kind of guy when it comes to low end), and the price was great on the Dayton Audio ND91-8 drivers.
I’ve always wanted to try out the Vifa XT ring tweeters; I just never got around to it. I wanted something small, but with a low Fs for a crossover point that would minimize intermodulation. The Vifa XT25SC90 fit the bill perfectly. 2-1/2″ overall diameter and an Fs of 830—wow, that’s low!
Cabinet Design and Construction
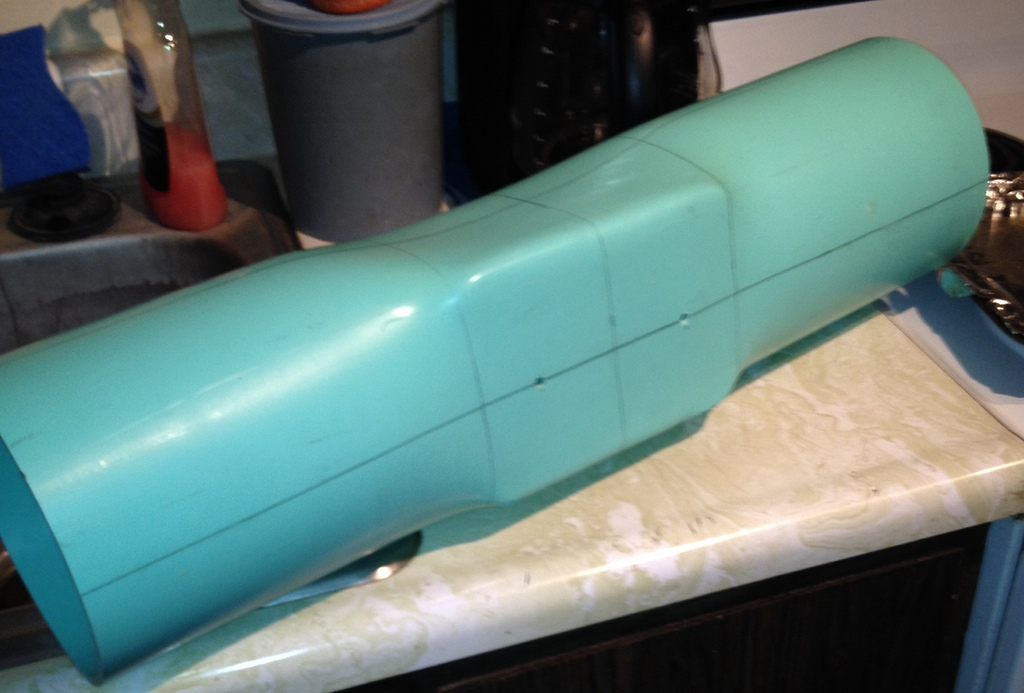
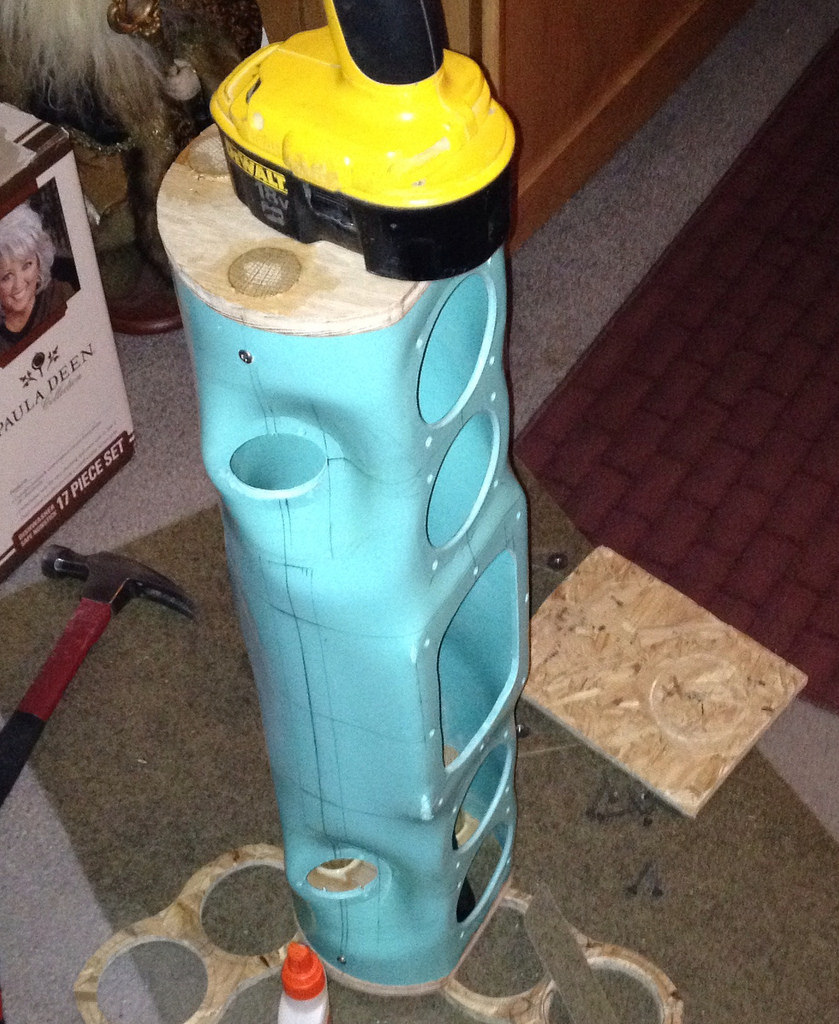
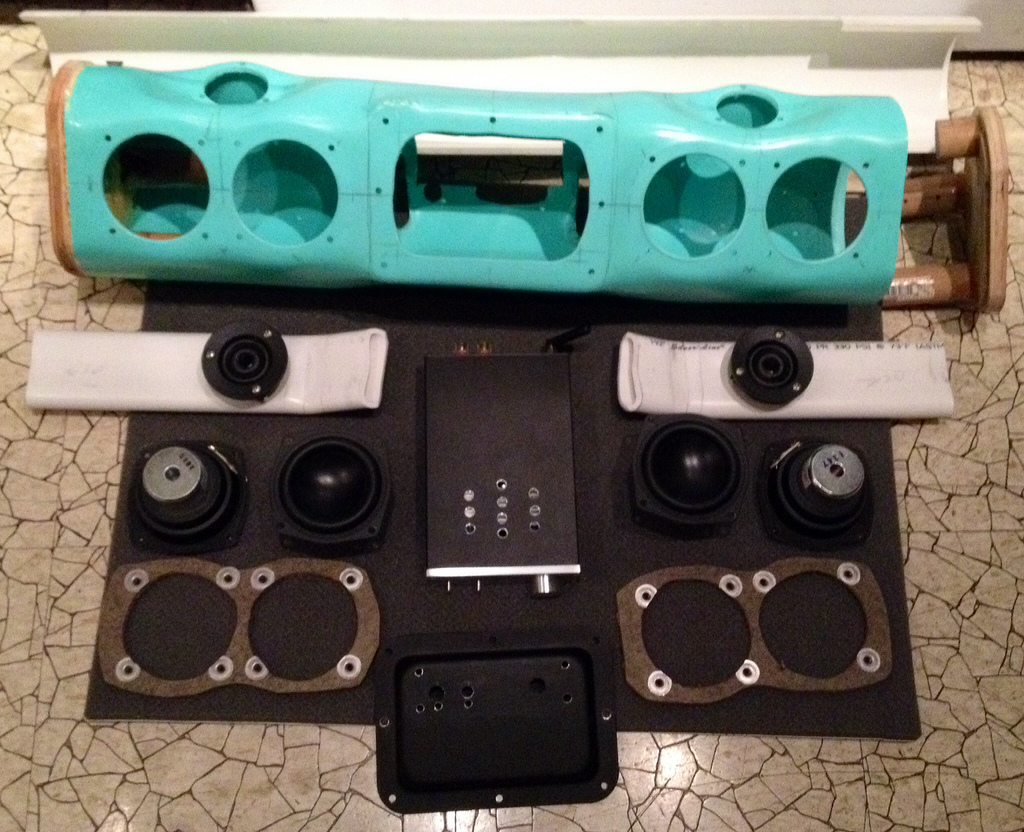
To begin, I molded a place to mount a steel plate for the amp. I used a heating blanket to do this, which made the larger PVC sections pliable enough to flatten with a piece of 1/2″ particleboard. A piece of bisected 4″ diameter PVC was incorporated to accommodate the amp’s depth, and it added 0.05 cubic feet of air space.
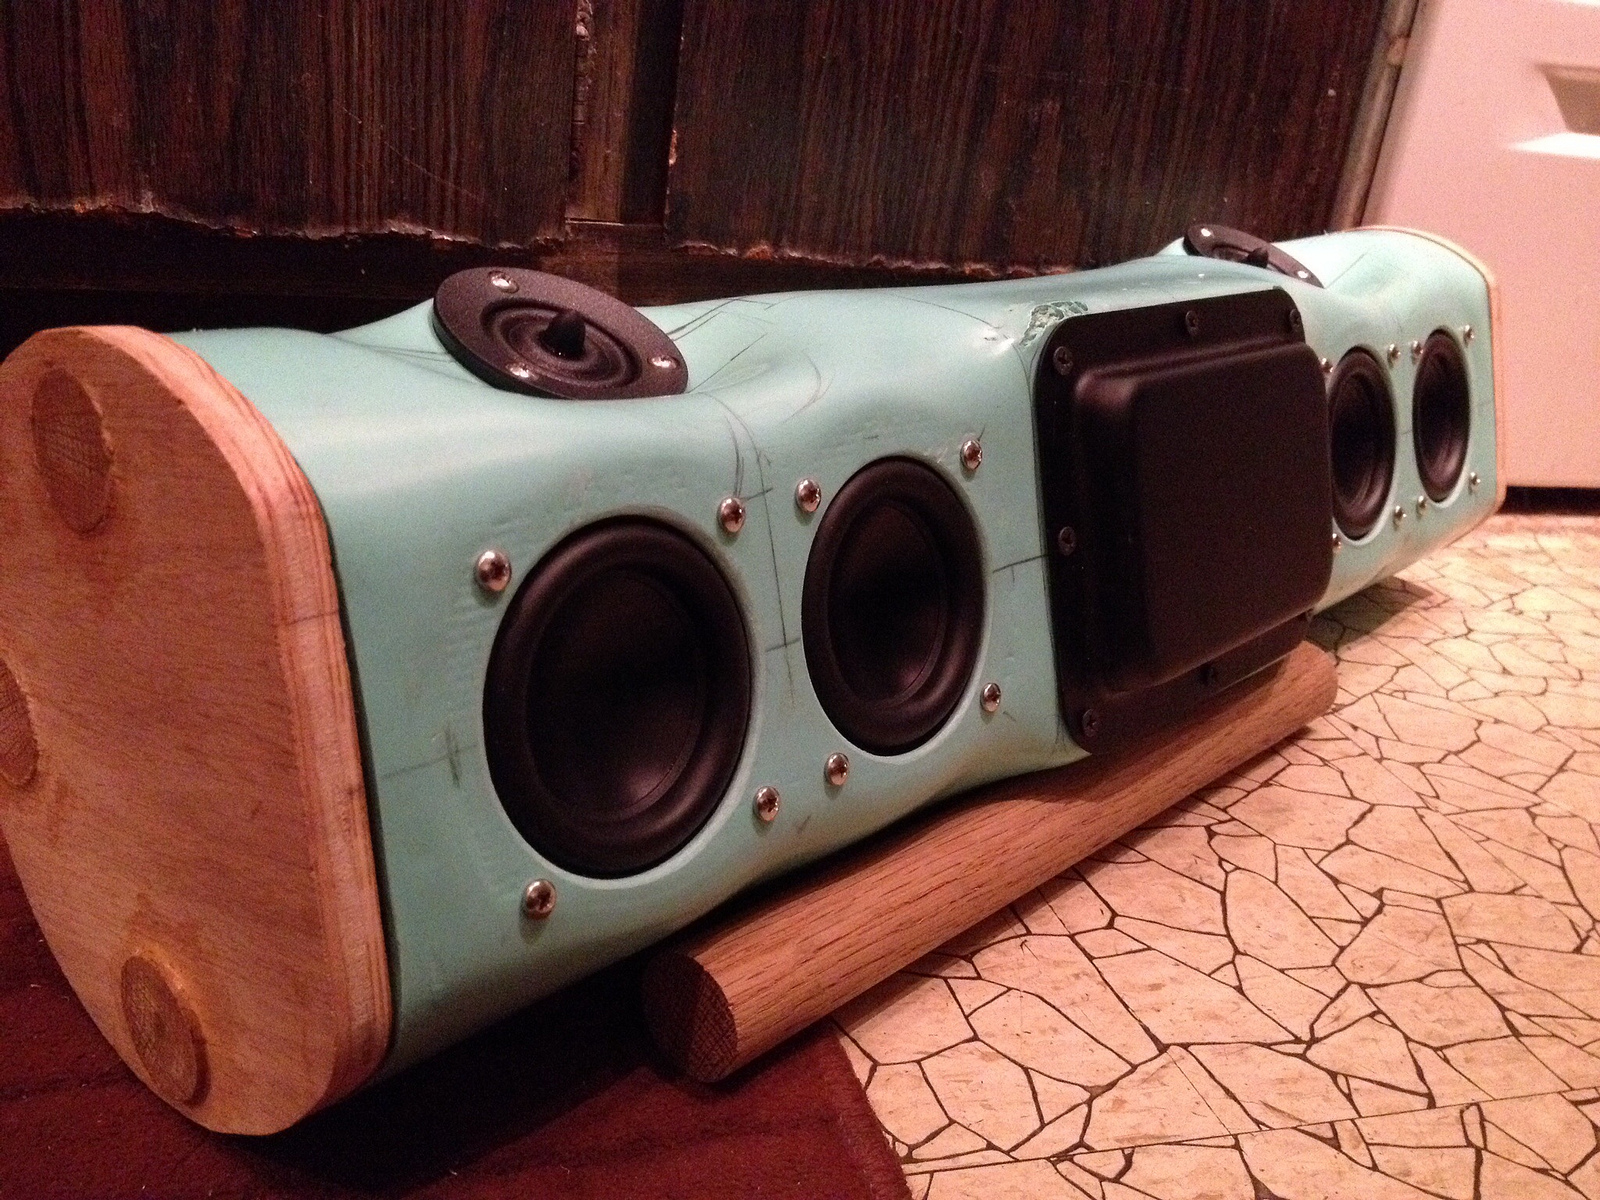
To hold the amplifier in place, I mounted it (and a stereo 3.5 mm jack) to a Penn-Elcom D2101K 5″ x 7″ blank dish. I sandwiched the reversed plate between the amplifier’s body and its faceplate.
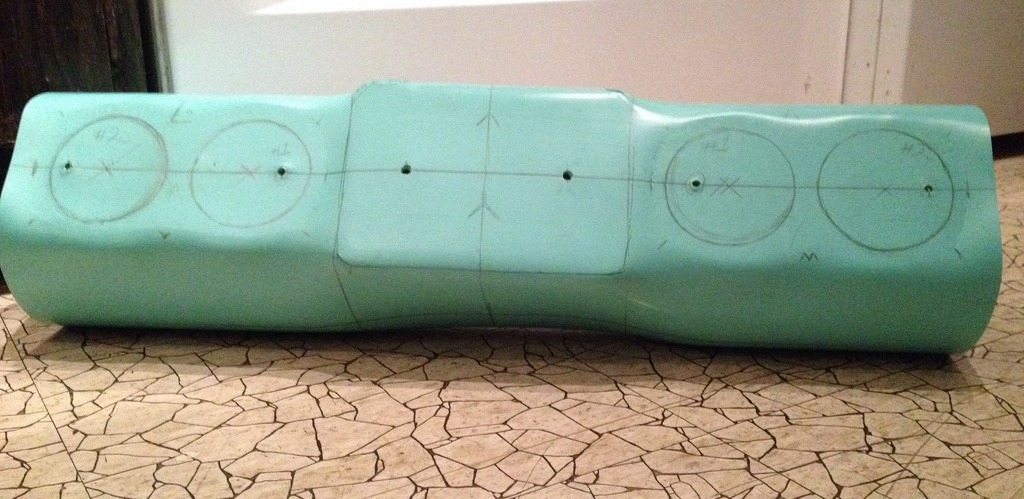
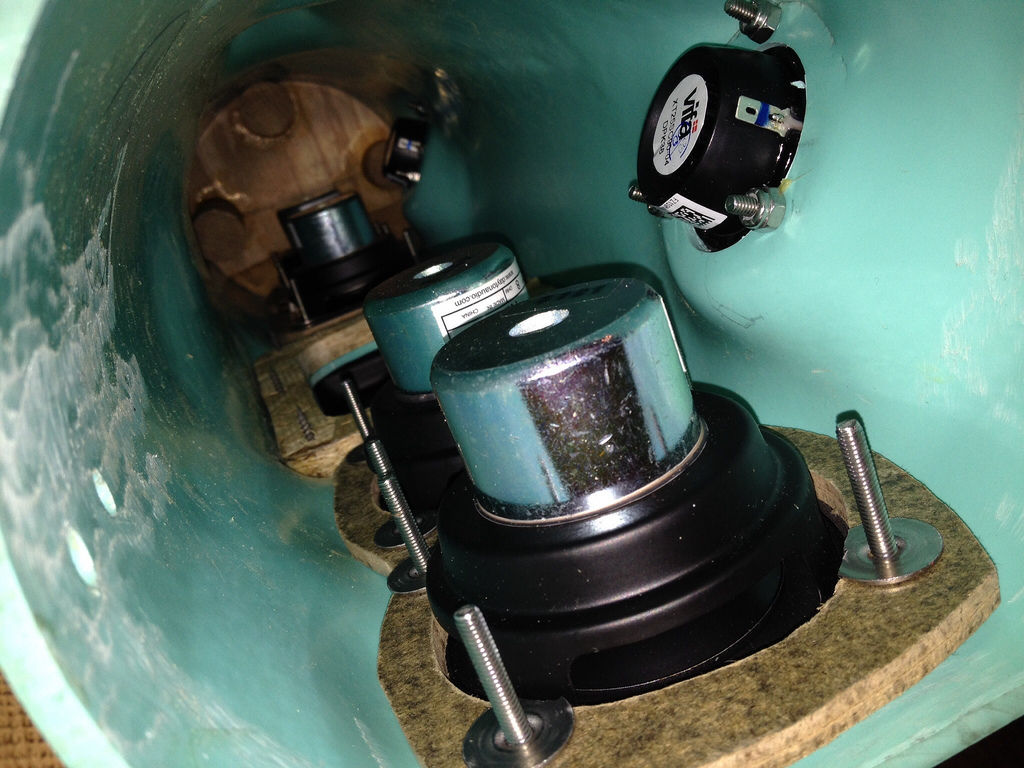
I molded spots for two Dayton Audio ND91-8 3-1/2″ woofers on each side of the amp, using a heat gun and a 1/2″ piece of particleboard. These fit together perfectly, with the speaker frames 1 mm apart. Rear-mounting these onto an internal plate really made them look nice, while distributing the weight evenly.
I molded a couple of spots for the tweeters centered above and about 50° off-axis from the woofers. 50° seems a lot, but when this is on the floor and standing about 10 feet away, the woofers and tweeters will both be about 25° off-axis. My choice of angle should help overall dispersion quite a bit.
I cut 1/2″ plywood end pieces for the pipe and used them to cap the enclosure. The ends are also the legs of The Pipe and support some weight. I ran a few 1-1/4″ dowels through the ends into the pipe to make the joint stronger.
The PVC cabinet is designed to be a ported enclosure for all of the woofers, and works out to about 0.40 cubic feet. To tune the enclosure and save as much space as possible, I took a section of 1-1/2″ PVC, heated it up in the oven, and squashed it down to a smiley face shaped port tube.
As it stands, there is about 3/4″ of surface area on the port. I tried different tuning frequencies, and settled on 35 Hz as being the best sounding while allowing the woofers to hit an f10 of 28 Hz. The final port length is 9-1/2″.
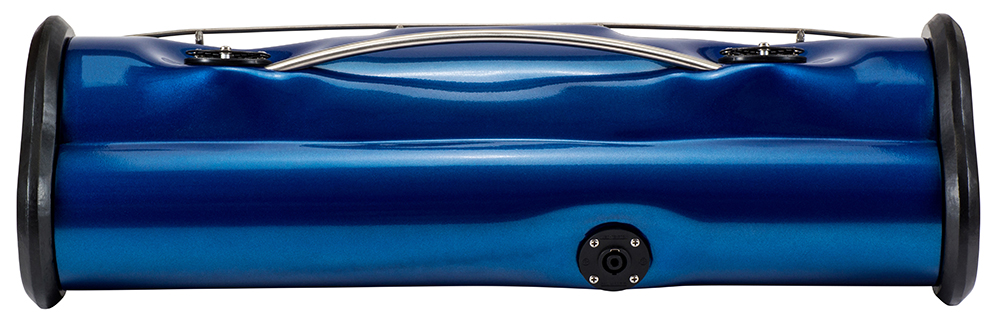
For transferring the power supply’s output into the cabinet and the amplifier—pro audio guys look away—I used a rear-mounted Neutrik speakON connector. Quick and easy to connect, and heavy-duty enough for the job sites I go to.
Crossover Design
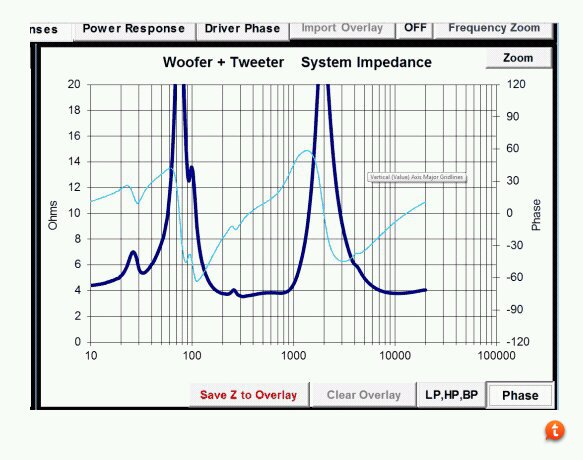
To begin the crossover design process, I took measurements with The Pipe on the floor and an Omnimic on a six-foot stand and approximately two feet from it—about 45° off-axis. I could have measured on-axis to make a prettier, flatter frequency response graph, but it wouldn’t sound that way from where I typically listen from.
After playing with a couple of different crossover options, I found that a simple 2nd-order filter for the tweeter and the woofer would work perfectly. The tweeters have two Audyn 3.9 μF caps (wired in parallel for a 7.8 μF value) in series, and a 0.47 mH 18 AWG Jantzen inductor in parallel.
The two woofers on each side of the amp are wired in parallel (which helps them keep up with the tweeters) and have a 0.95 mH 18 AWG Jantzen inductor in series with a 50 μF electrolytic capacitor in parallel. Altogether, this approximates a 1,500 Hz 2-way crossover.
Conclusion
To be completely honest, The Pipe sounded (and measured) pretty darn good without the tweeters connected. The highs were a bit muffled, and a bit of intermodulation distortion (also referred to as Doppler distortion) could be heard. Adding the tweeters and crossovers made The Pipe just sing. Bluetooth syncs and streams flawlessly, allowing me to keep my phone at my side while using it as the source.
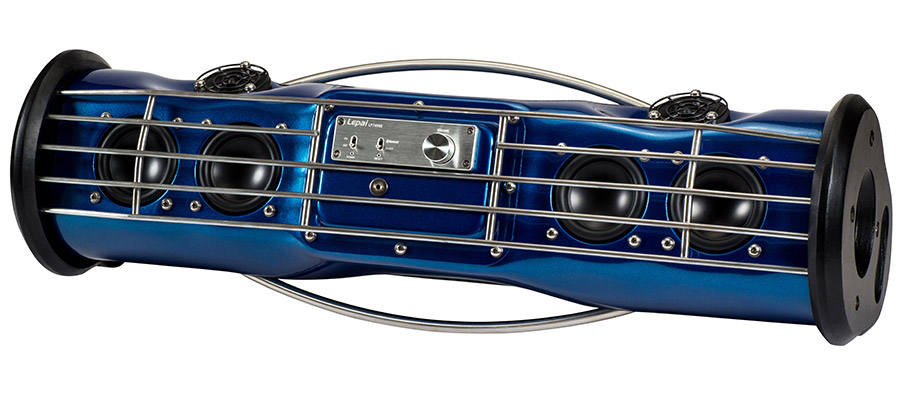
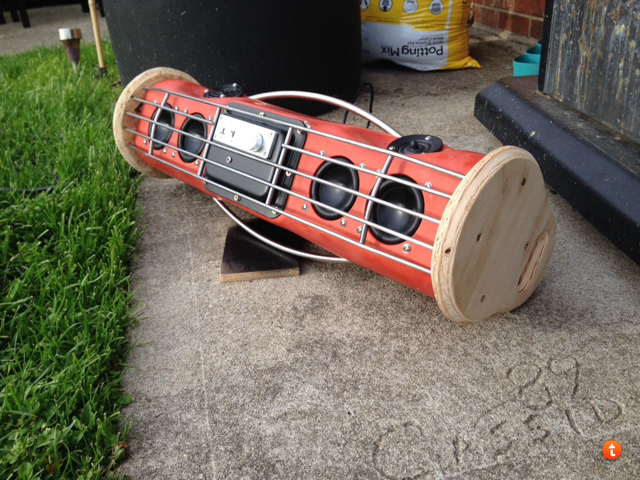
I added grills and handles to protect the speakers. The tweeter grills are repurposed computer fan guards, and the woofer grill is polished steel shelving that I had found at Mendelson’s Liquidation Outlet (www.meci.com). The PVC is finished in Rust-Oleum® Satin Finish Blue and Rust-Oleum® Crystal Clear Enamel.
About The Designer
Chris Perez has built, taken apart, and rebuilt speakers for over 20 years, and is a former Parts Express Technical Advisor. Chris’s creativity and attention to detail are second to none, and he usually finds ways for his speaker designs to bend the laws of physics.
Project Parts List
|
Part # |
Description |
Qty |
|
310-298 |
1 |
|
|
290-226 |
Dayton Audio ND91-8 3-1/2″ Aluminum Cone Full-Range Driver 8 Ohm |
4 |
|
264-1014 |
2 |
|
|
255-248 |
2 |
|
|
255-228 |
2 |
|
|
027-113 |
Audyn Cap Q4 3.9uF 400V MKP Metalized Polypropylene Foil Crossover Capacitor |
4 |
|
027-354 |
2 |
|
|
262-040 |
1 |
|
|
092-054 |
1 |
|
|
090-317 |
1 |
I can’t believe no one else has commented in this. This thing is gorgeous. Really nice work and attention to detail. I even picked up a nice tip about “pressing” the PVC.
I like your pvc molding skills…takes something simple and makes it elegant.
Q: What about expanding on this design to become an audio “soundbar”. Something that could handle two or four 4 or 5″ drivers?
I am enamored with the Beosound 35 and would like a crack at a low tech version but I simply don’t have the expertise to specify the parts.
Any thoughts here??
thanks
Borden