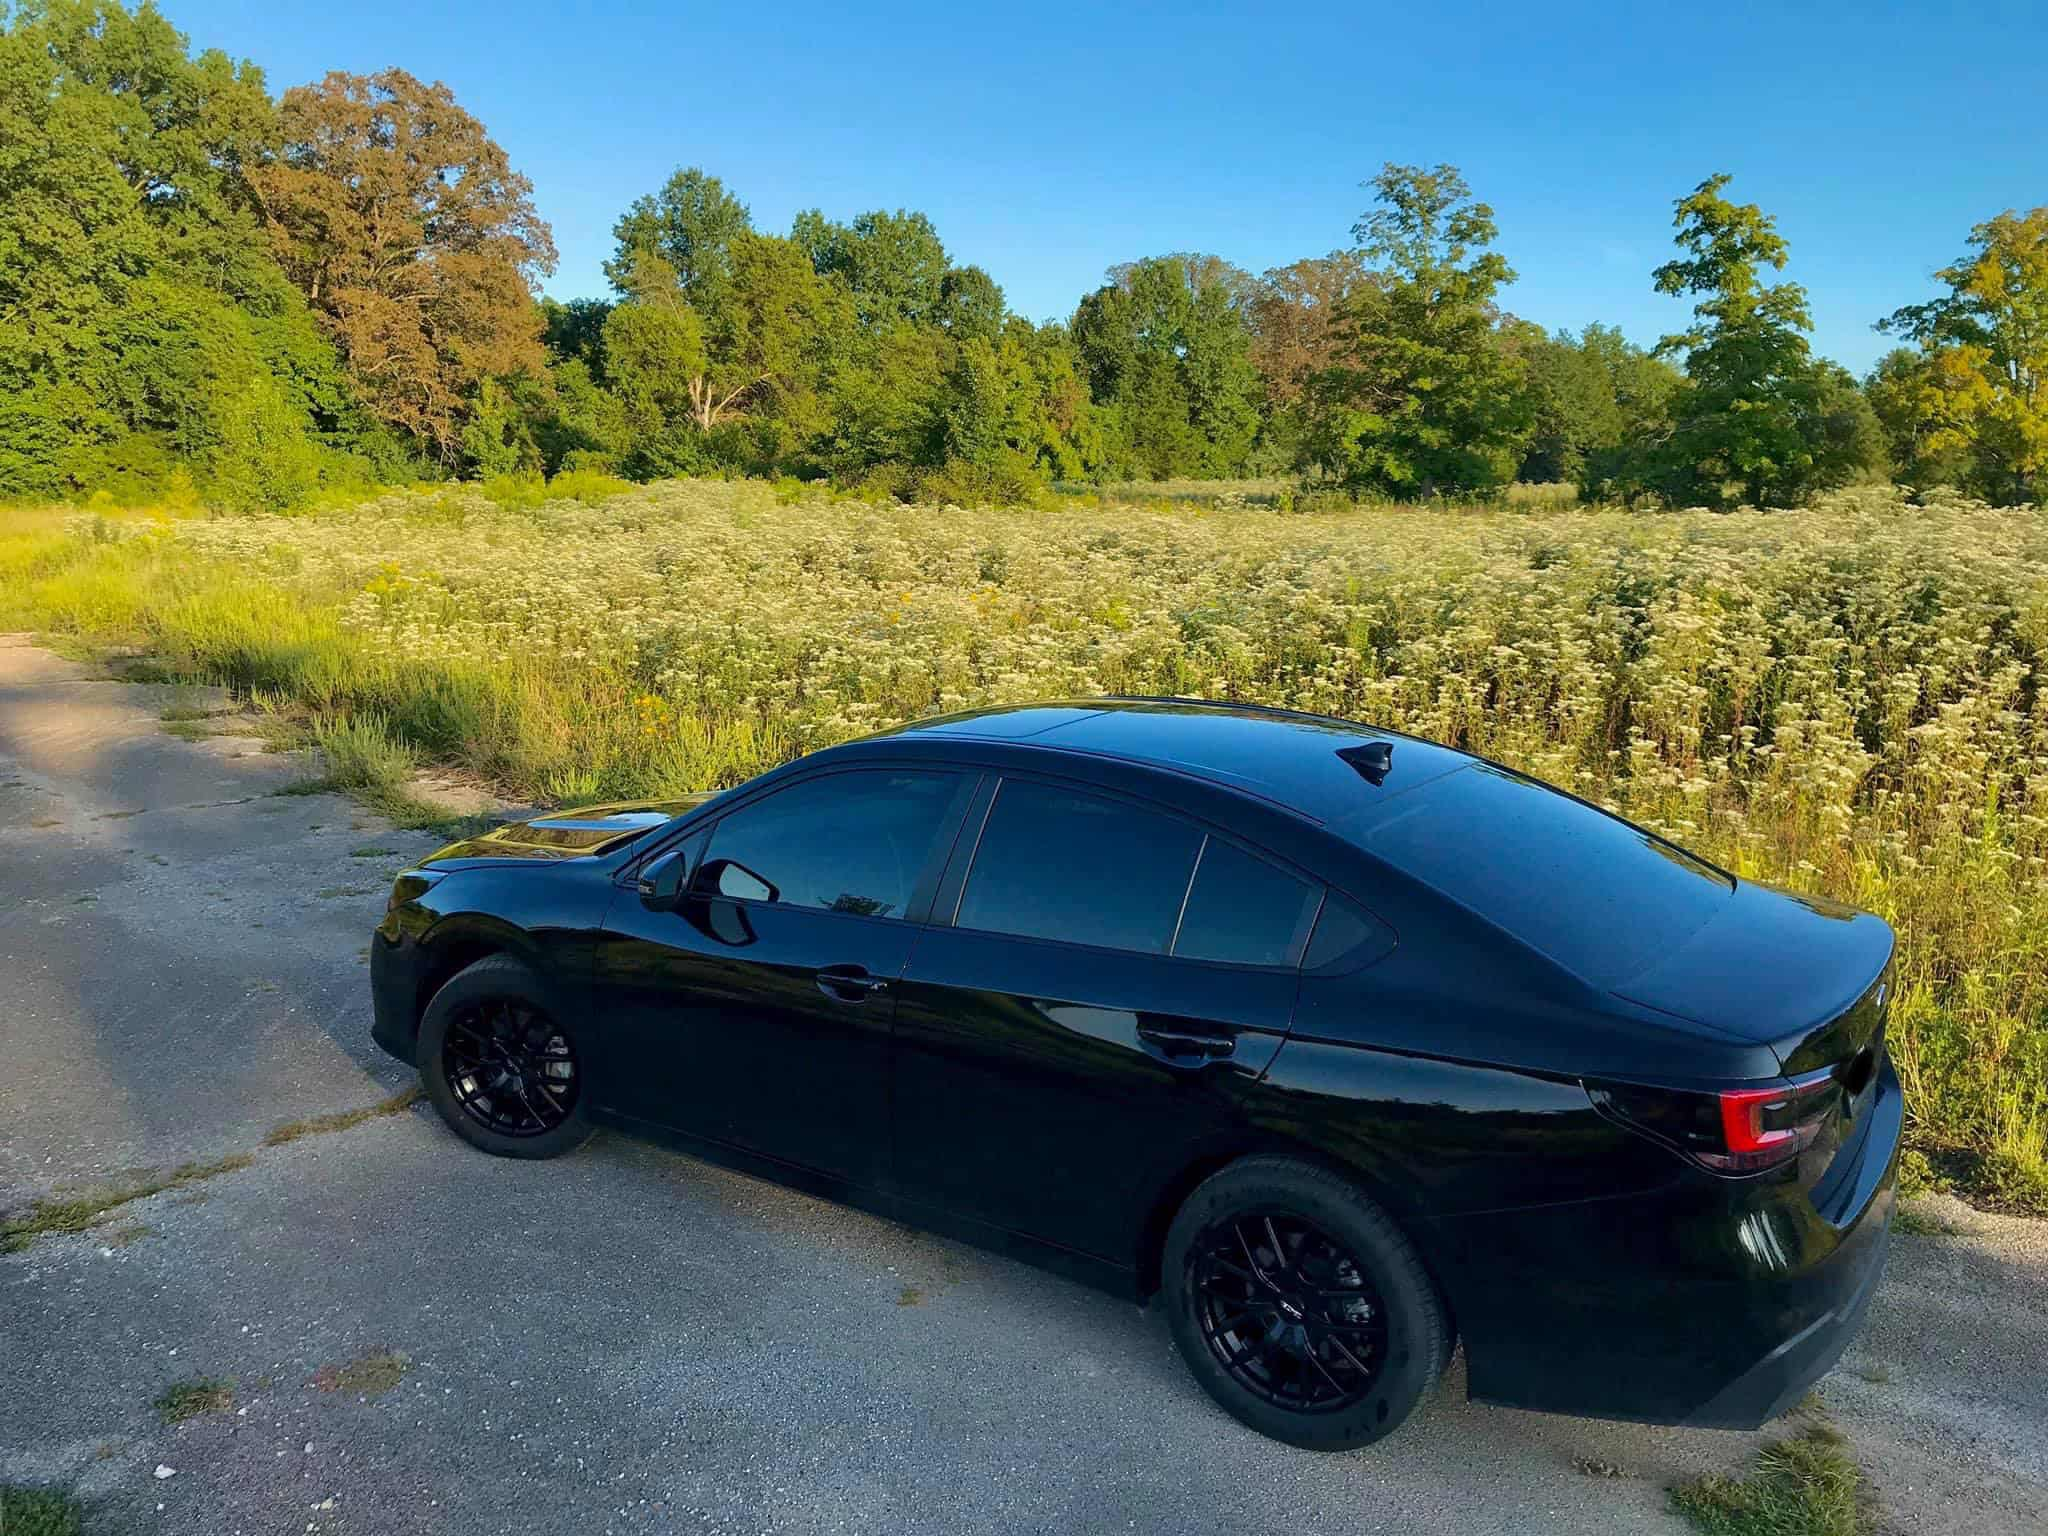
Subaru Legacy Subwoofer

Designer:
Alan
Project Category:
Car Audio
Project Level:
Advanced
Project Time:
20+ Hours
Project Cost:
$100 – $500
Project Description:
Car Audio Subwoofer
Design Goals:
For this project I wanted to supply enough bass for rock and pop to be played at a slightly bass heavy level, with enough headroom to never risk distortion.
Driver Selection:
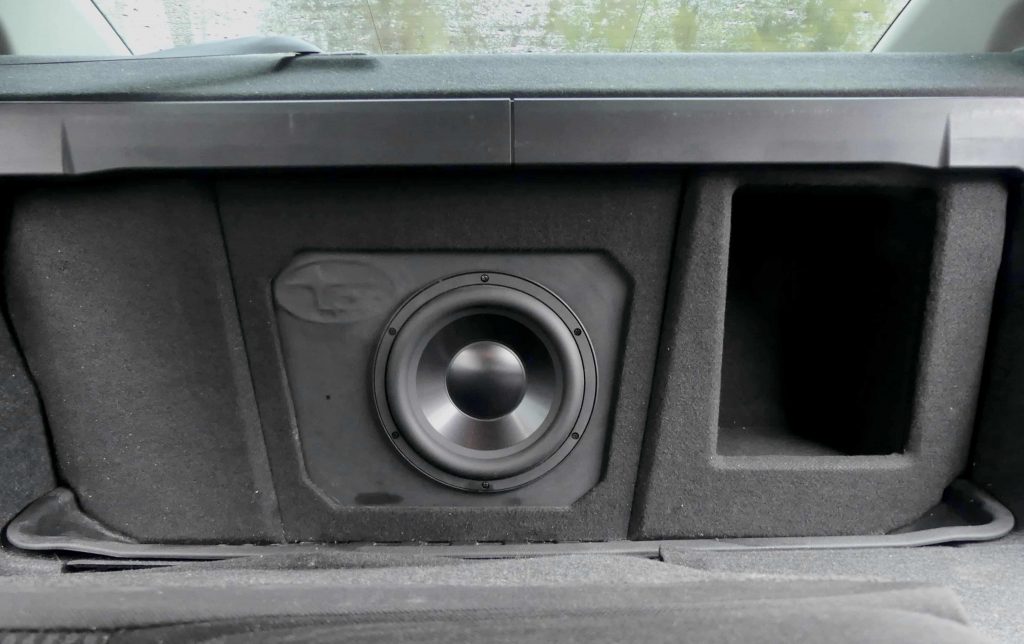
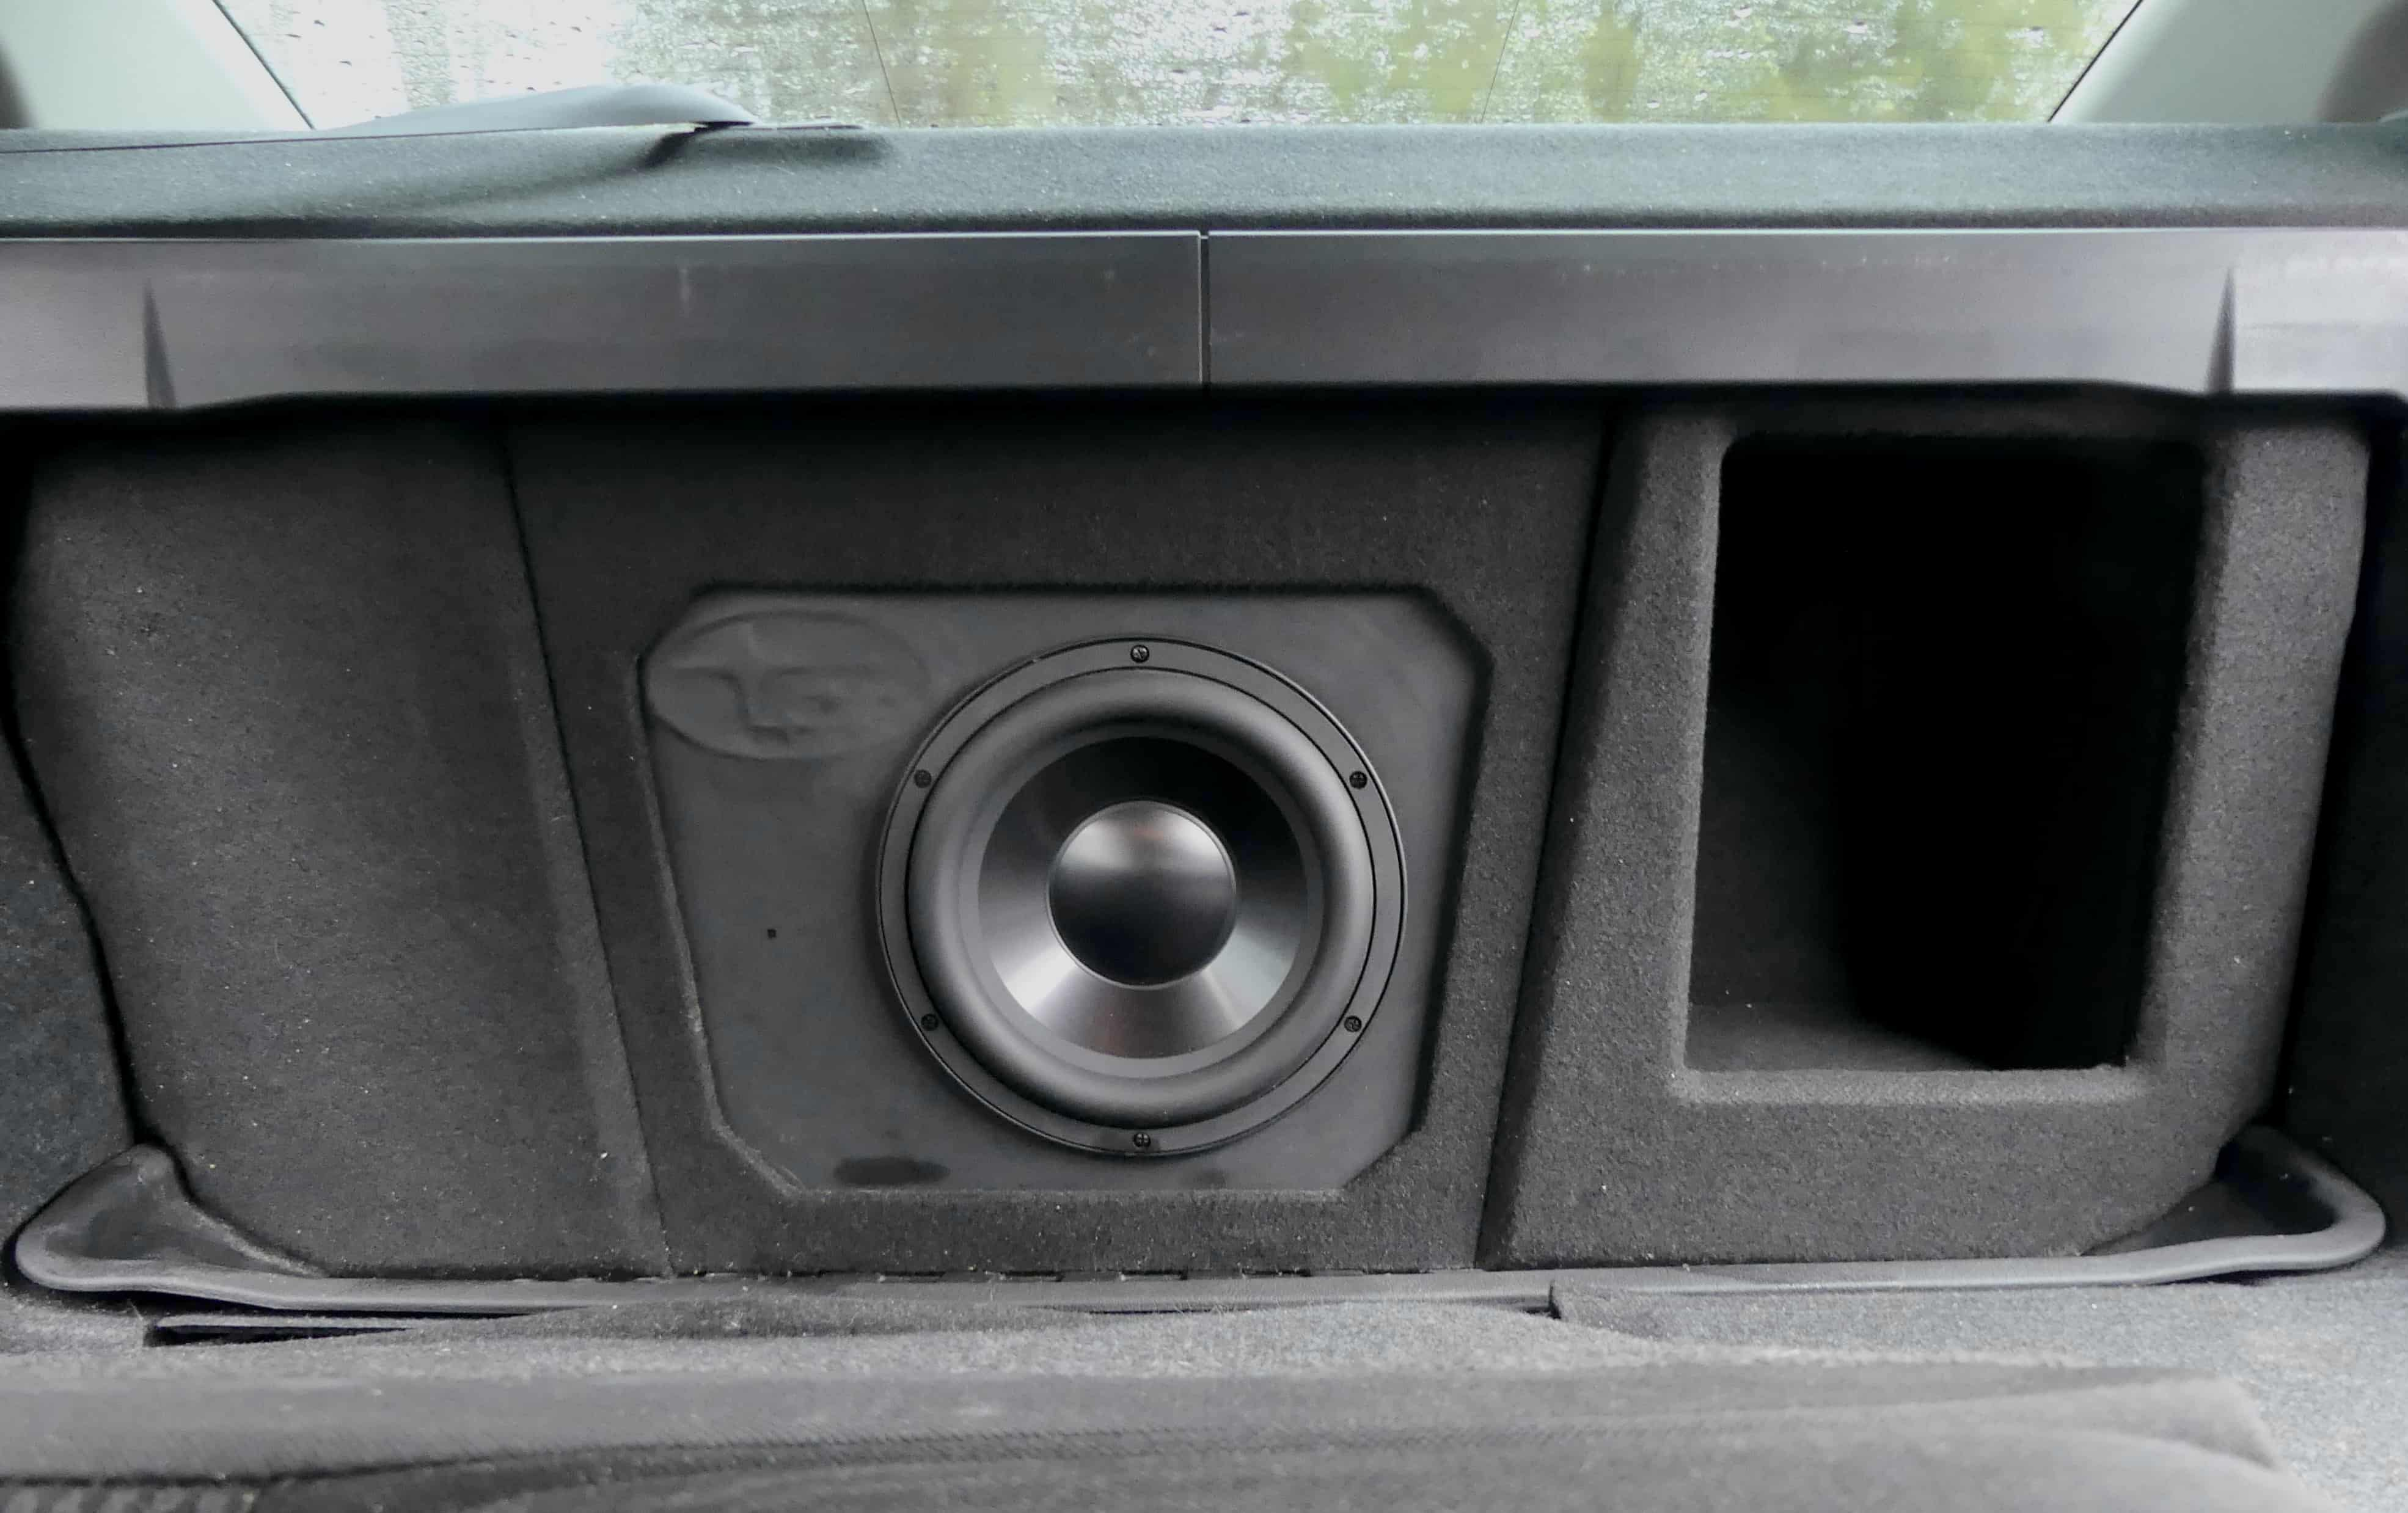
The Subwoofer used is the RSS265HO-44 (Part #295-463). I chose this speaker for the many reviews on the diy car audio website. With modeling in speaker box lite, I found that its response curve was very close to other subs I have liked in the past, from a small enclosure. This speaker has very low inductance and moving mass for its power handling, which usually translates to crisp fast drum hits. It’s also a perfect power handling match for my Kicker CXA800.1 at 2 ohm, rated 600 watts.
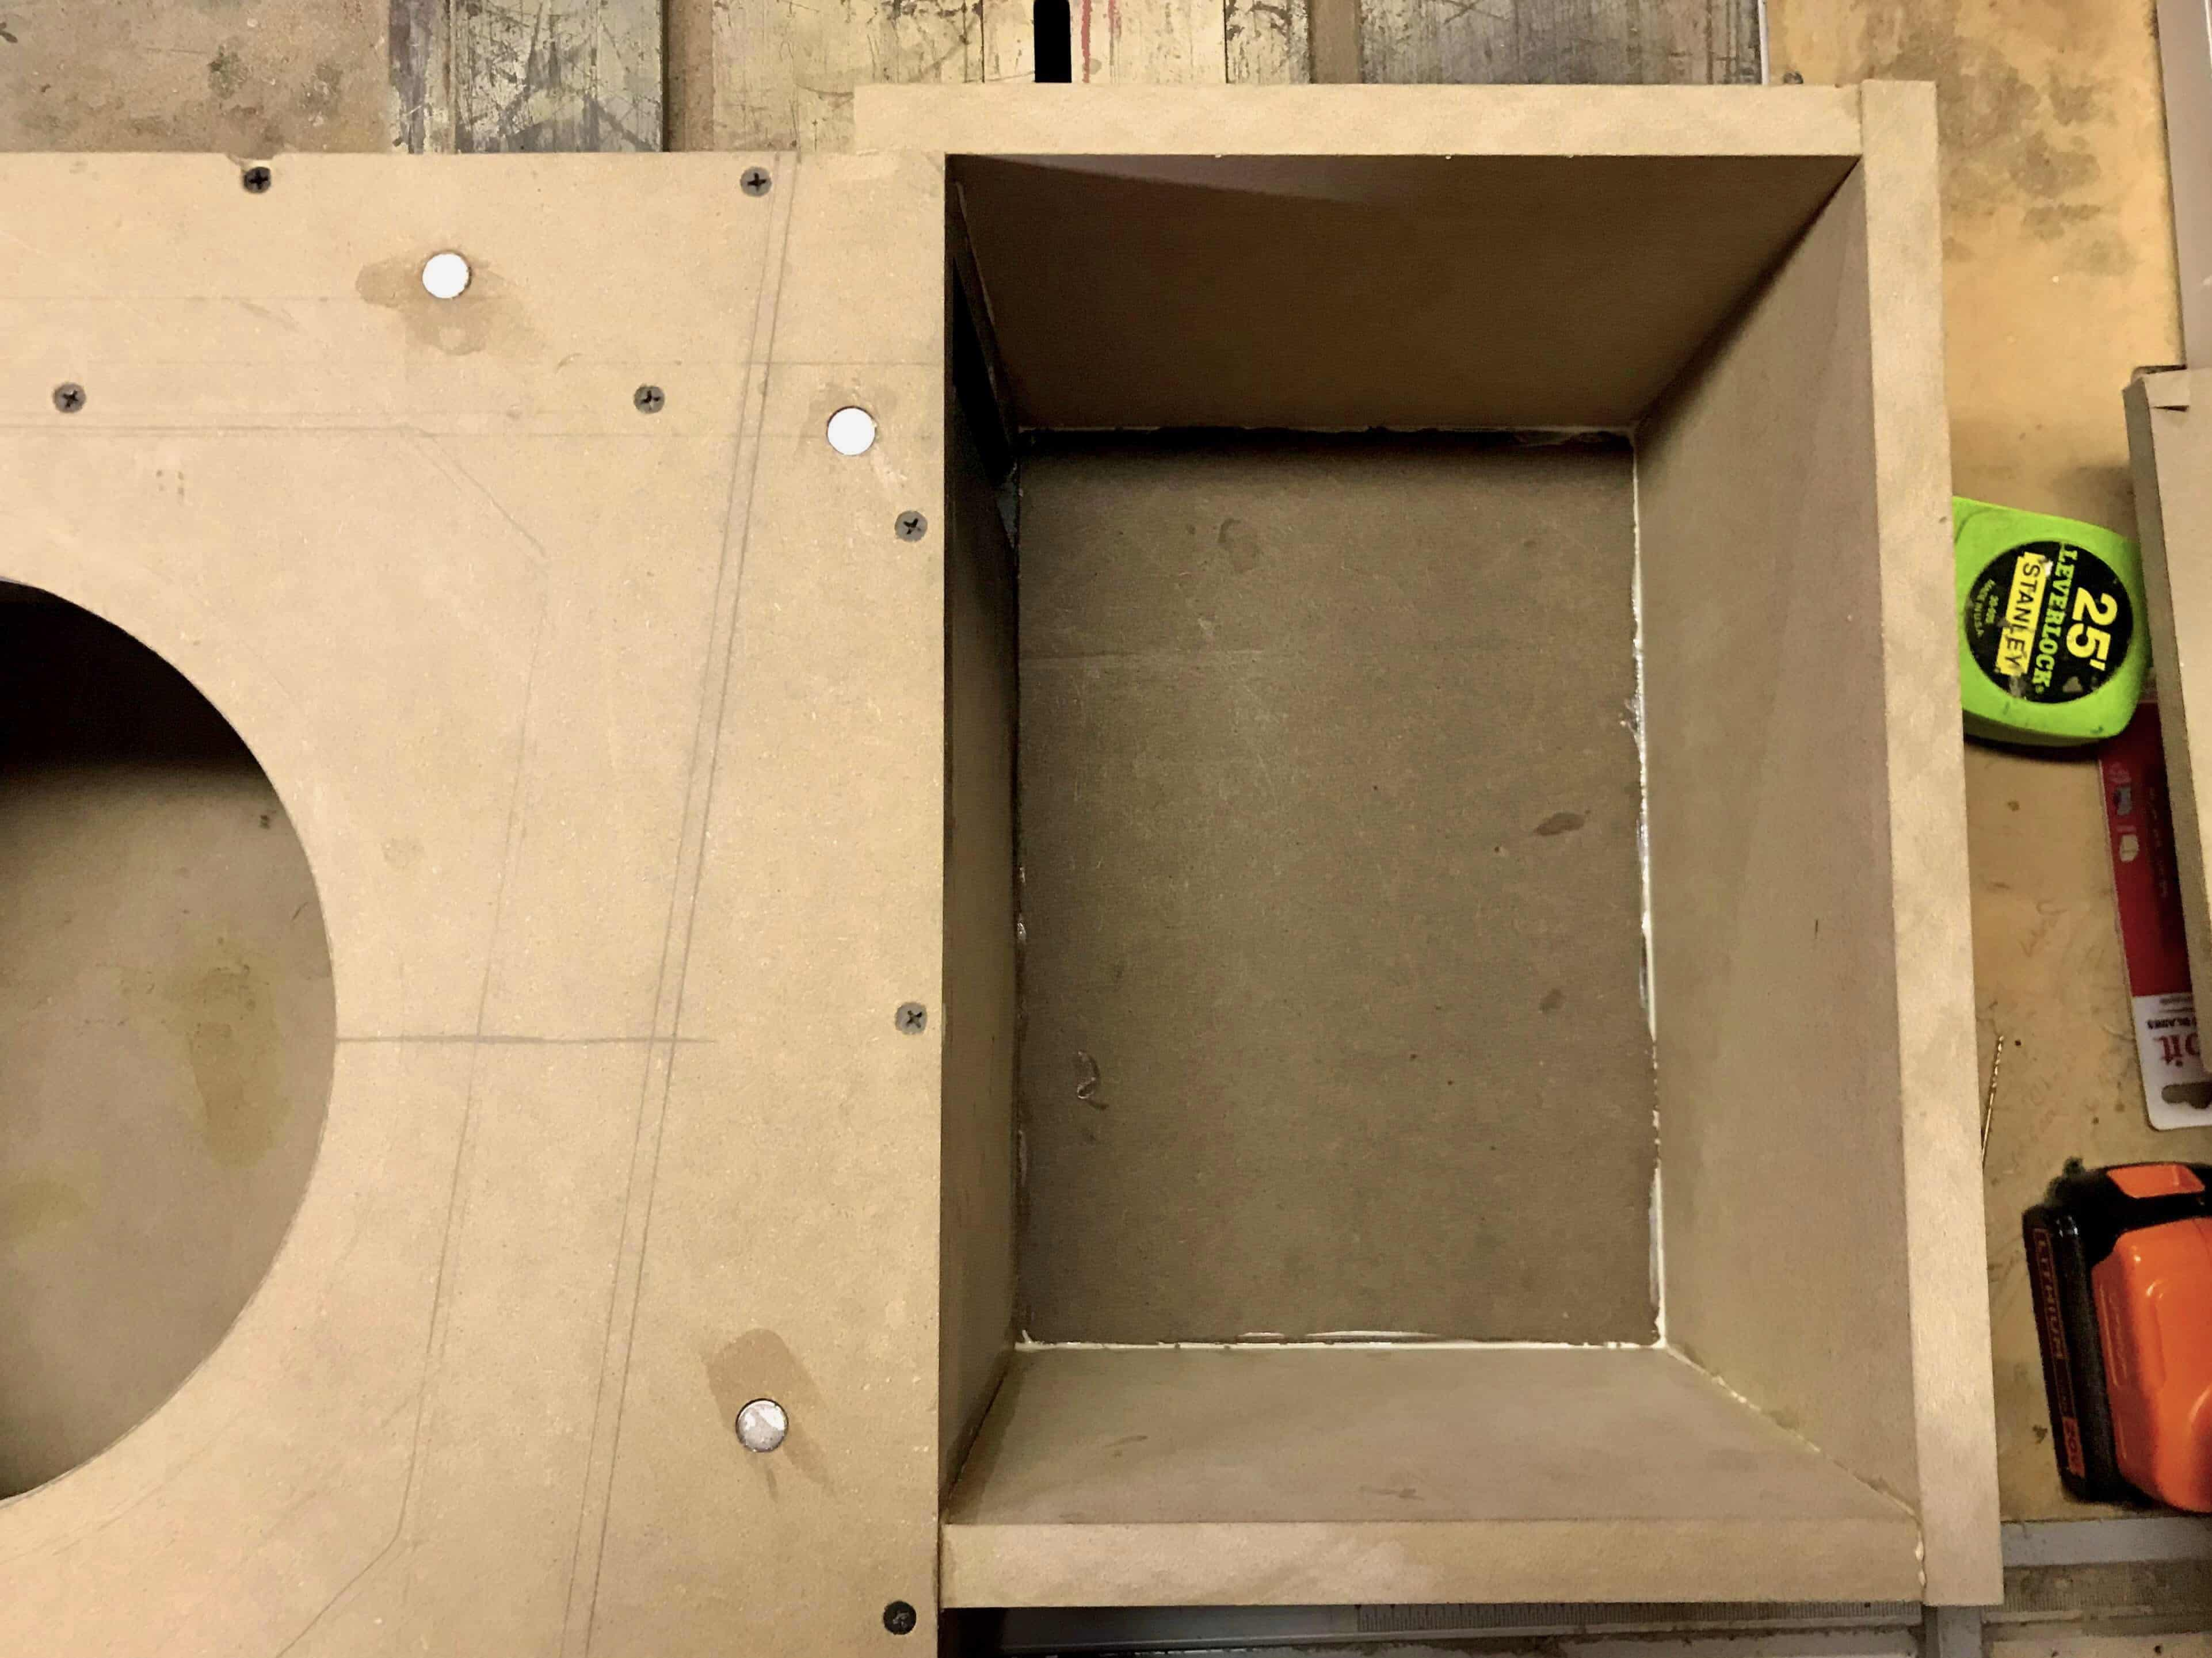
Enclosure Design:
I built a 1.37 cubic foot ported enclosure tuned to 31 Hz out of 1/2 mdf. I designed about a dozen boxes on paper before settling on one with a built in storage compartment. The port fires into the upper part of the storage box, and isn’t really visible with the trim in place.
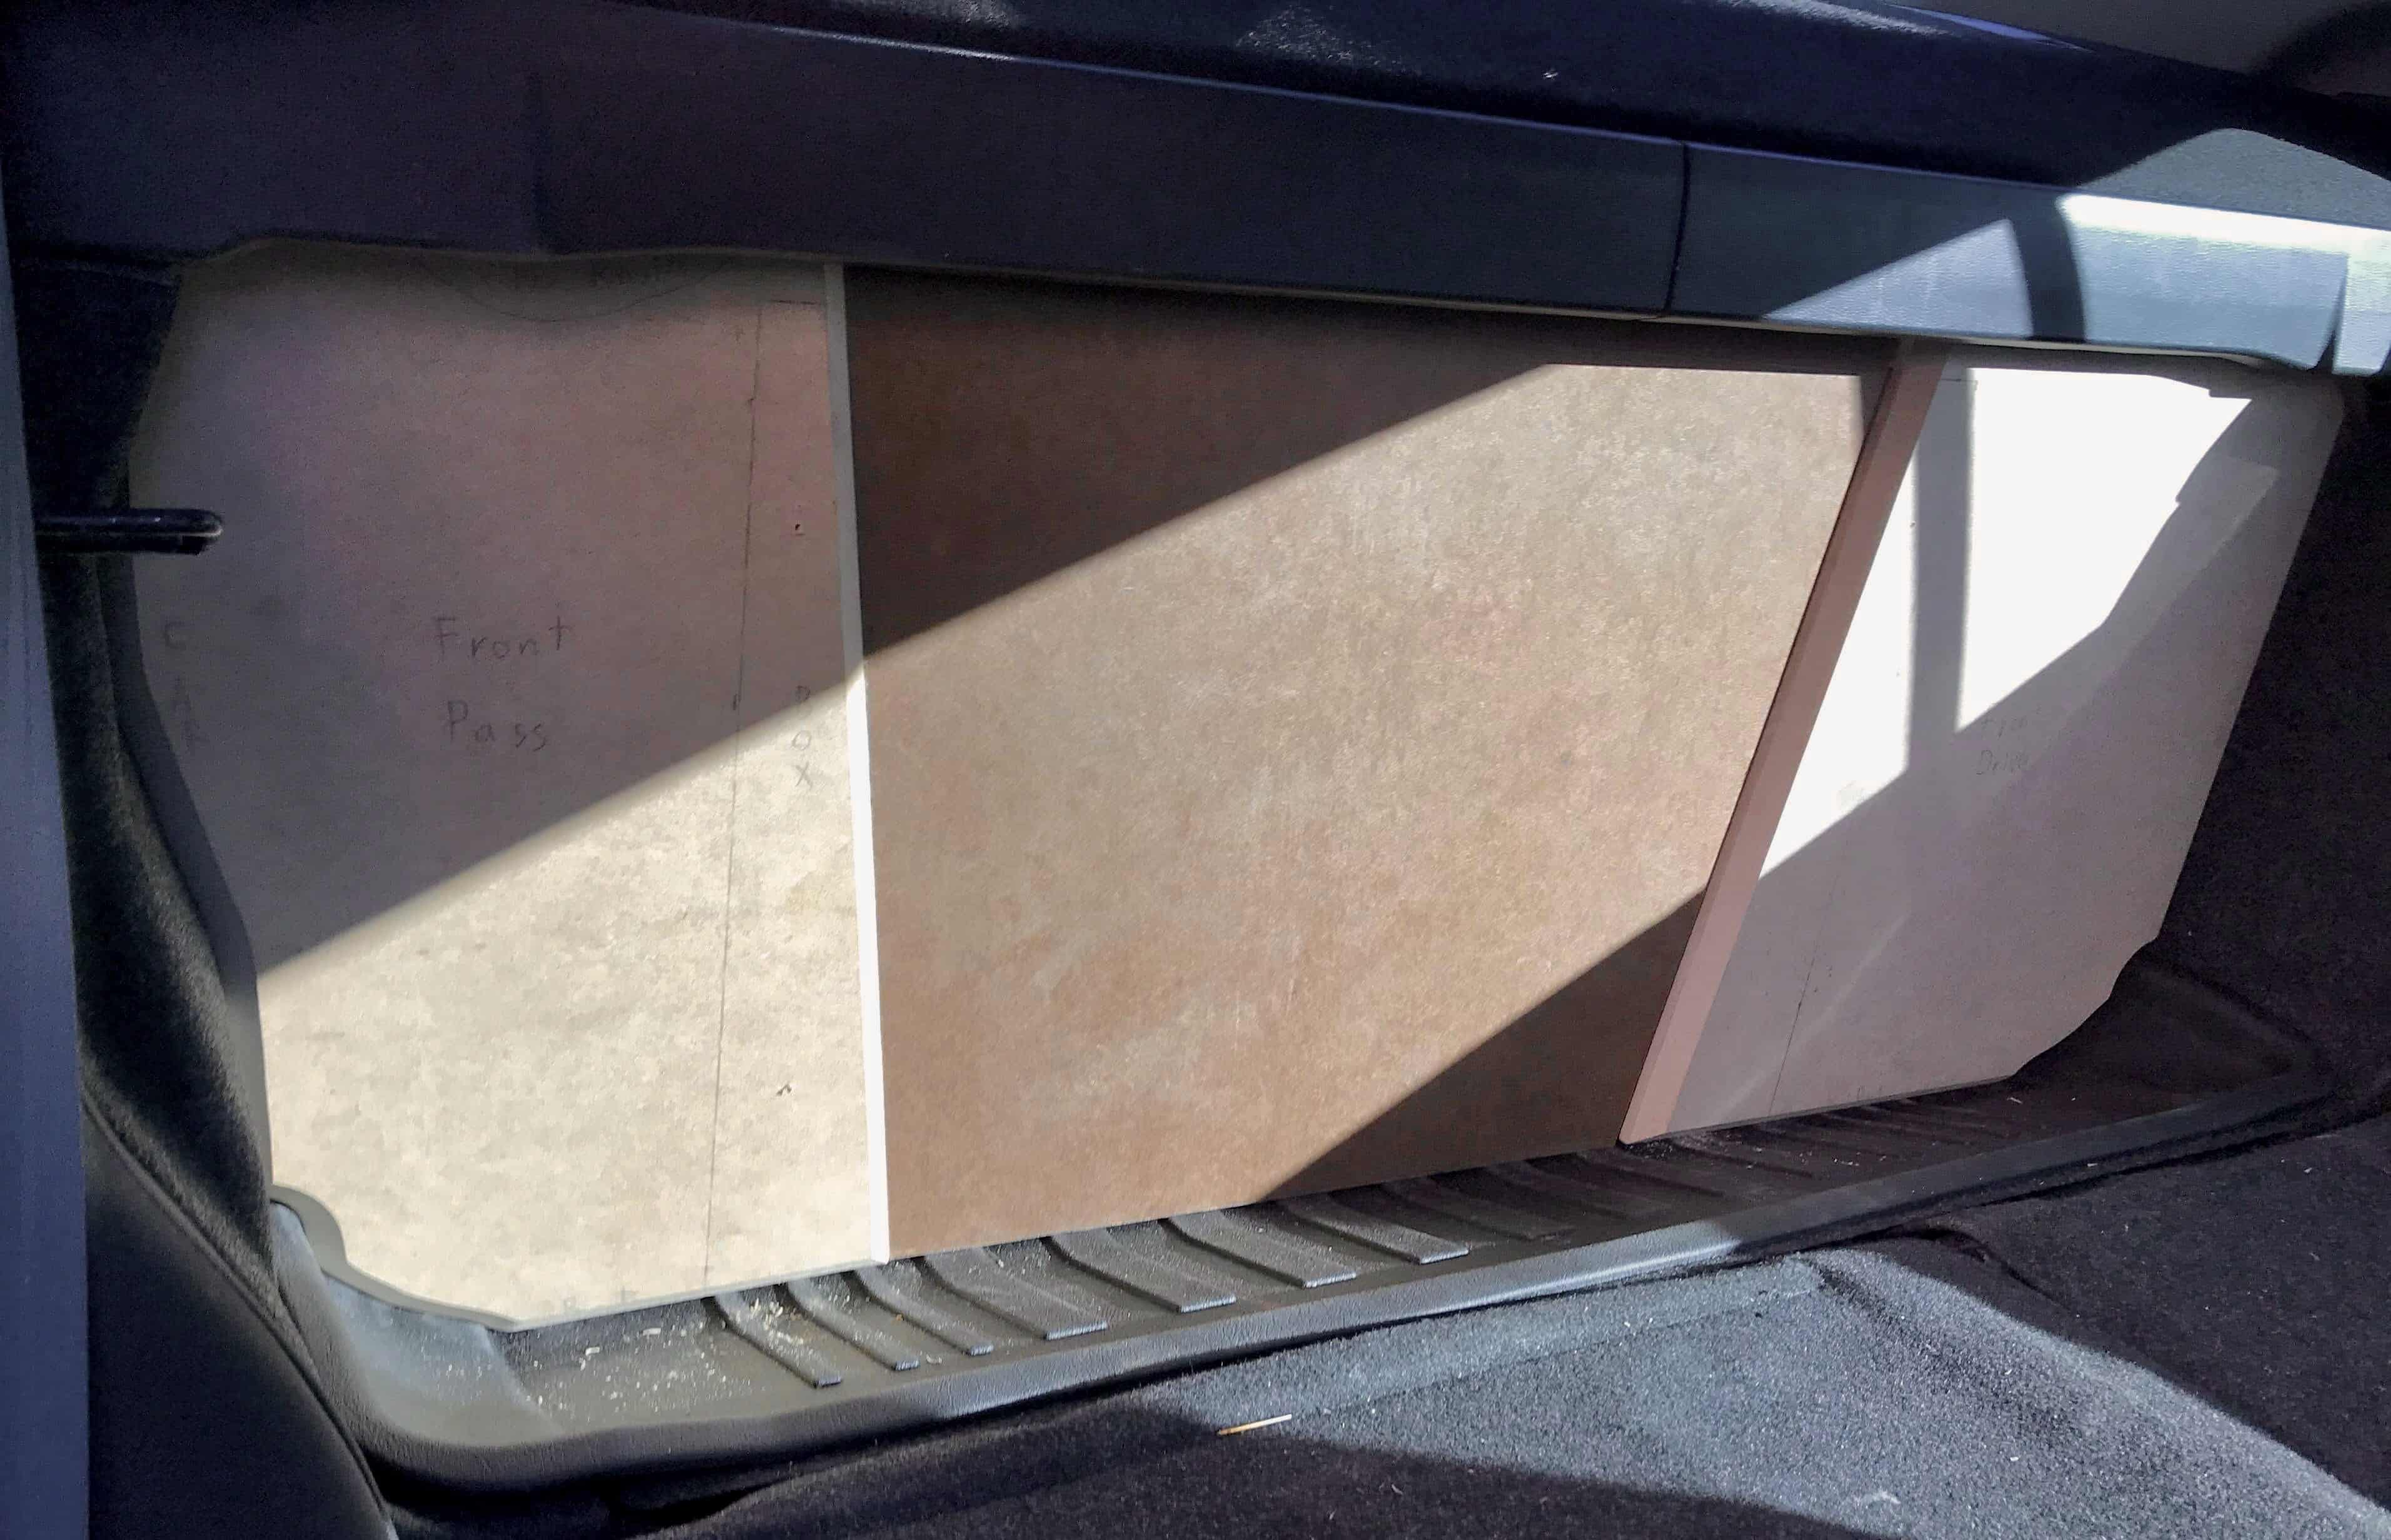
A false wall surrounds the enclosure, with colors and textures matching the vehicle as closely as possible. Also the angles and shapes of the trim panels is laid out to replicate the interior styles.
Enclosure Assembly:
The enclosure is built with 1/2 mdf, glued with tight bond II. All joints were clamped with drywall screws which were later removed to avoid scratches on the interior.
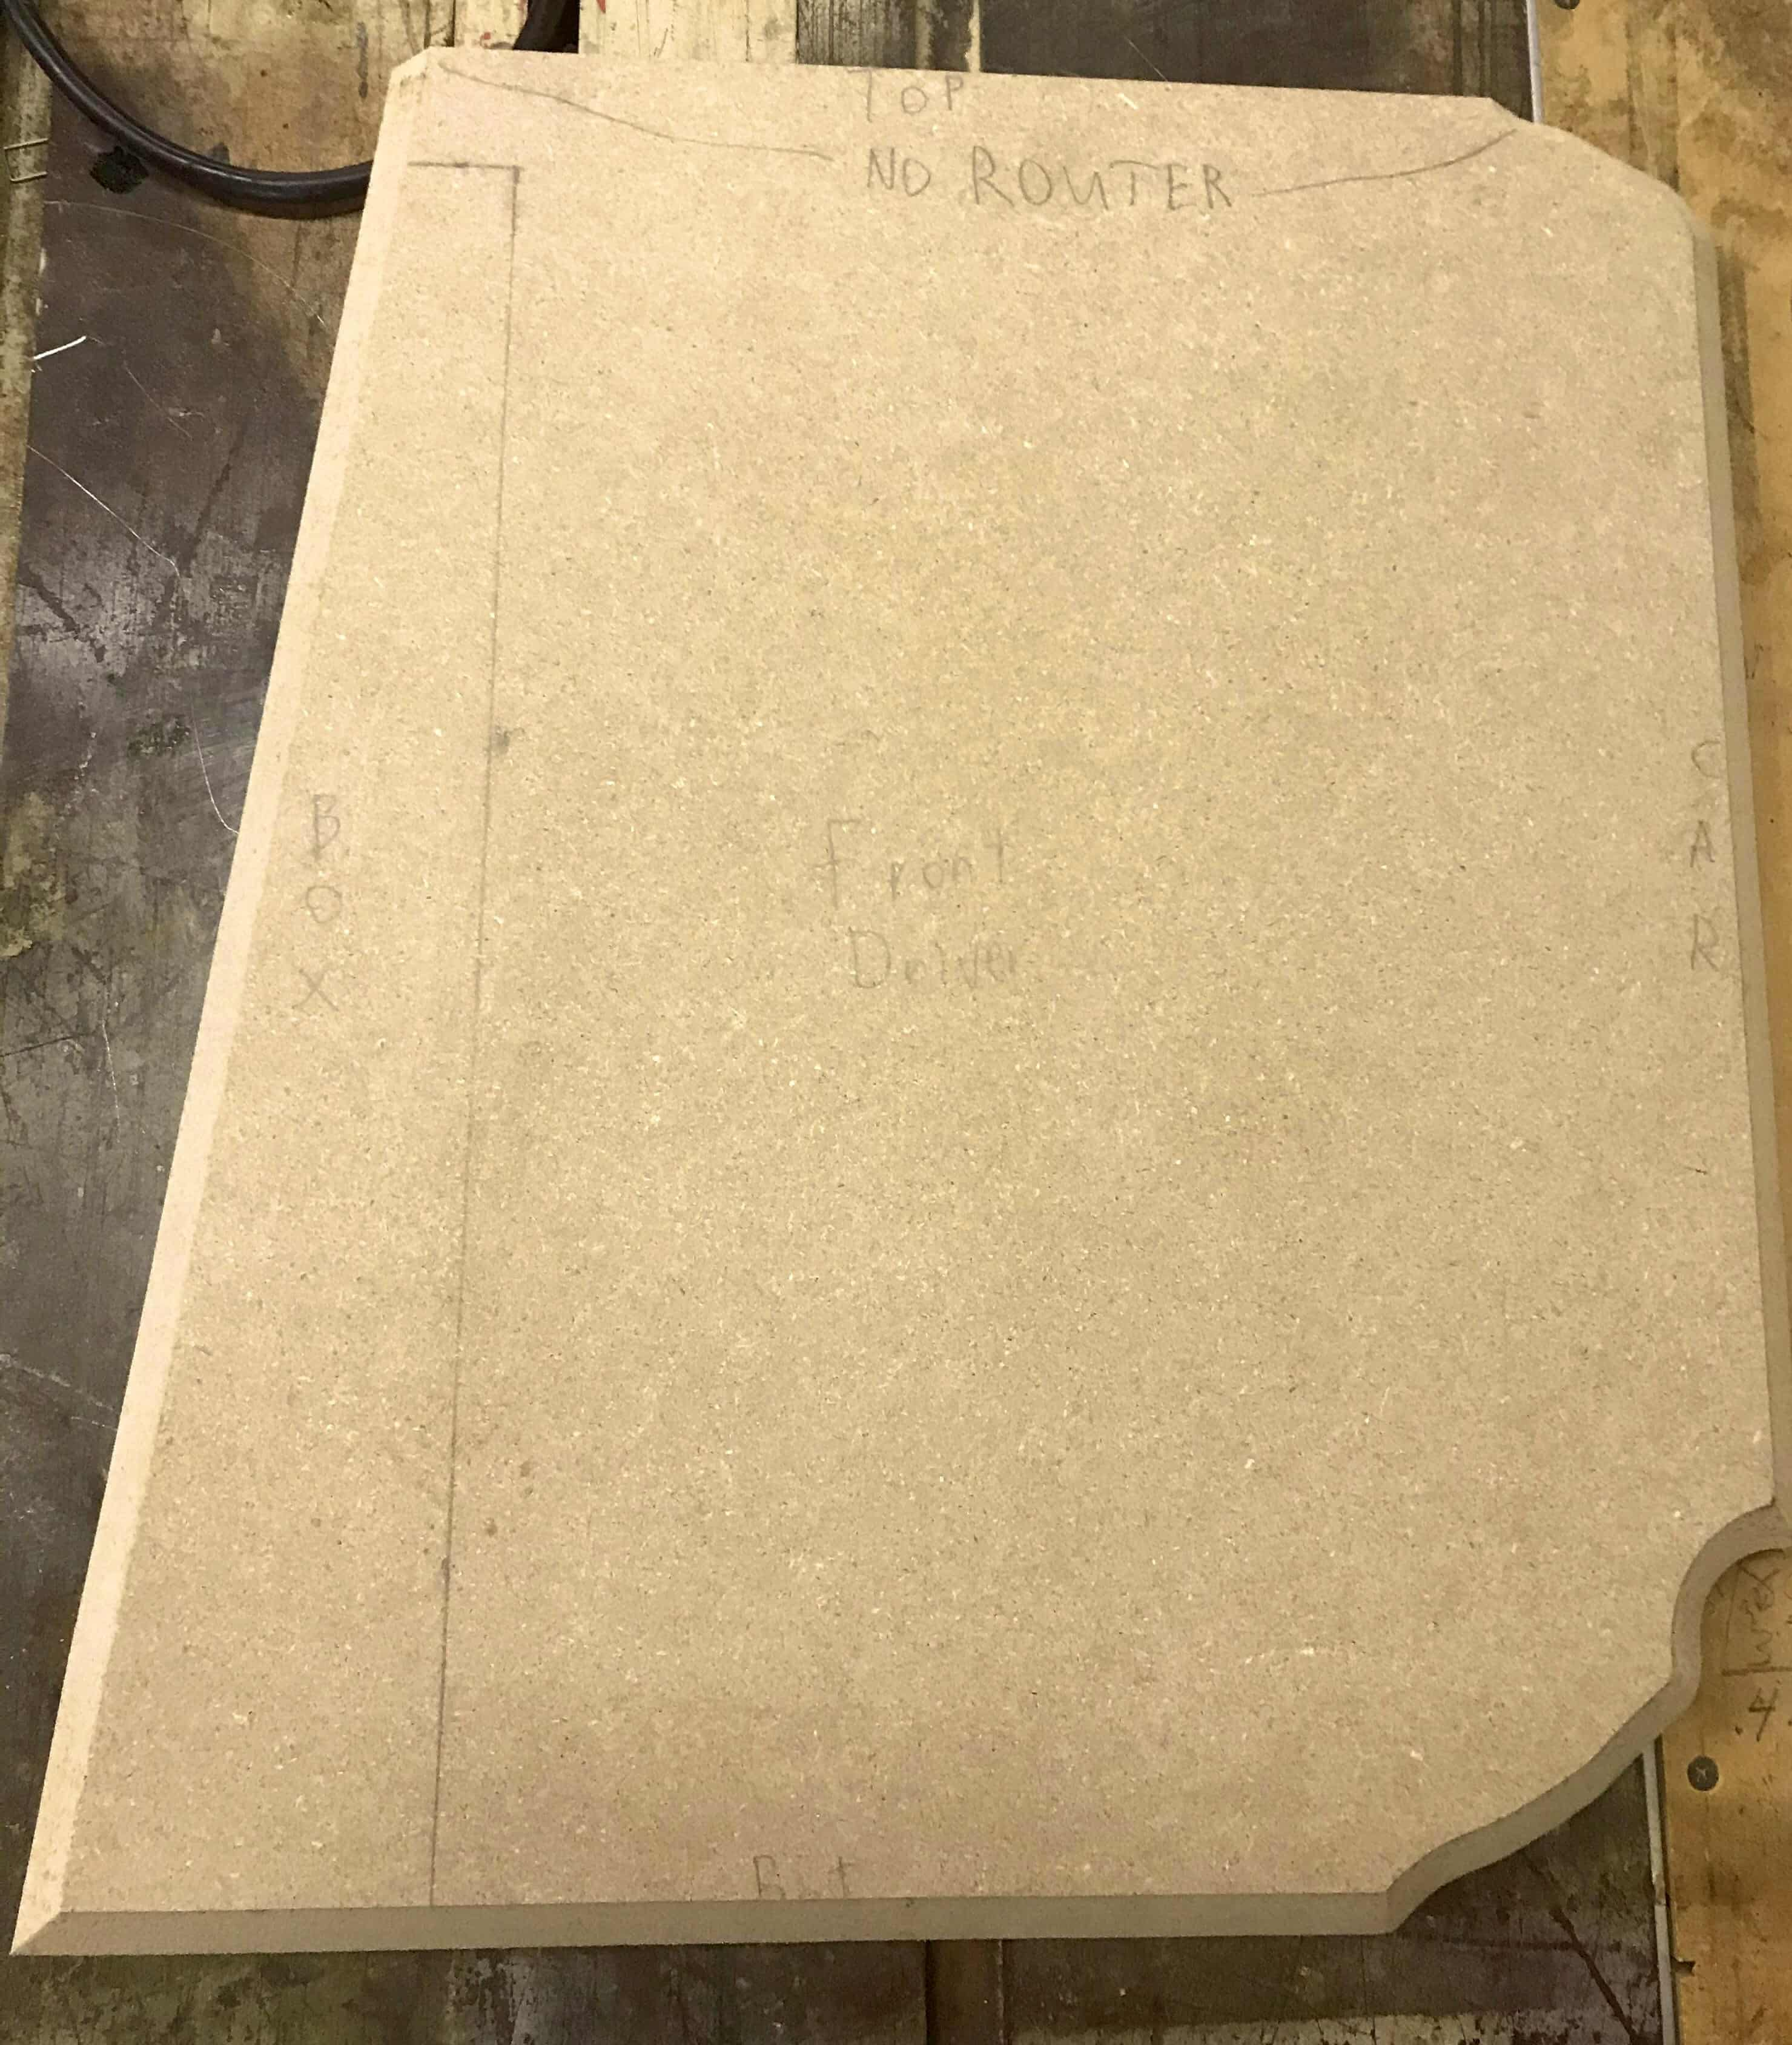
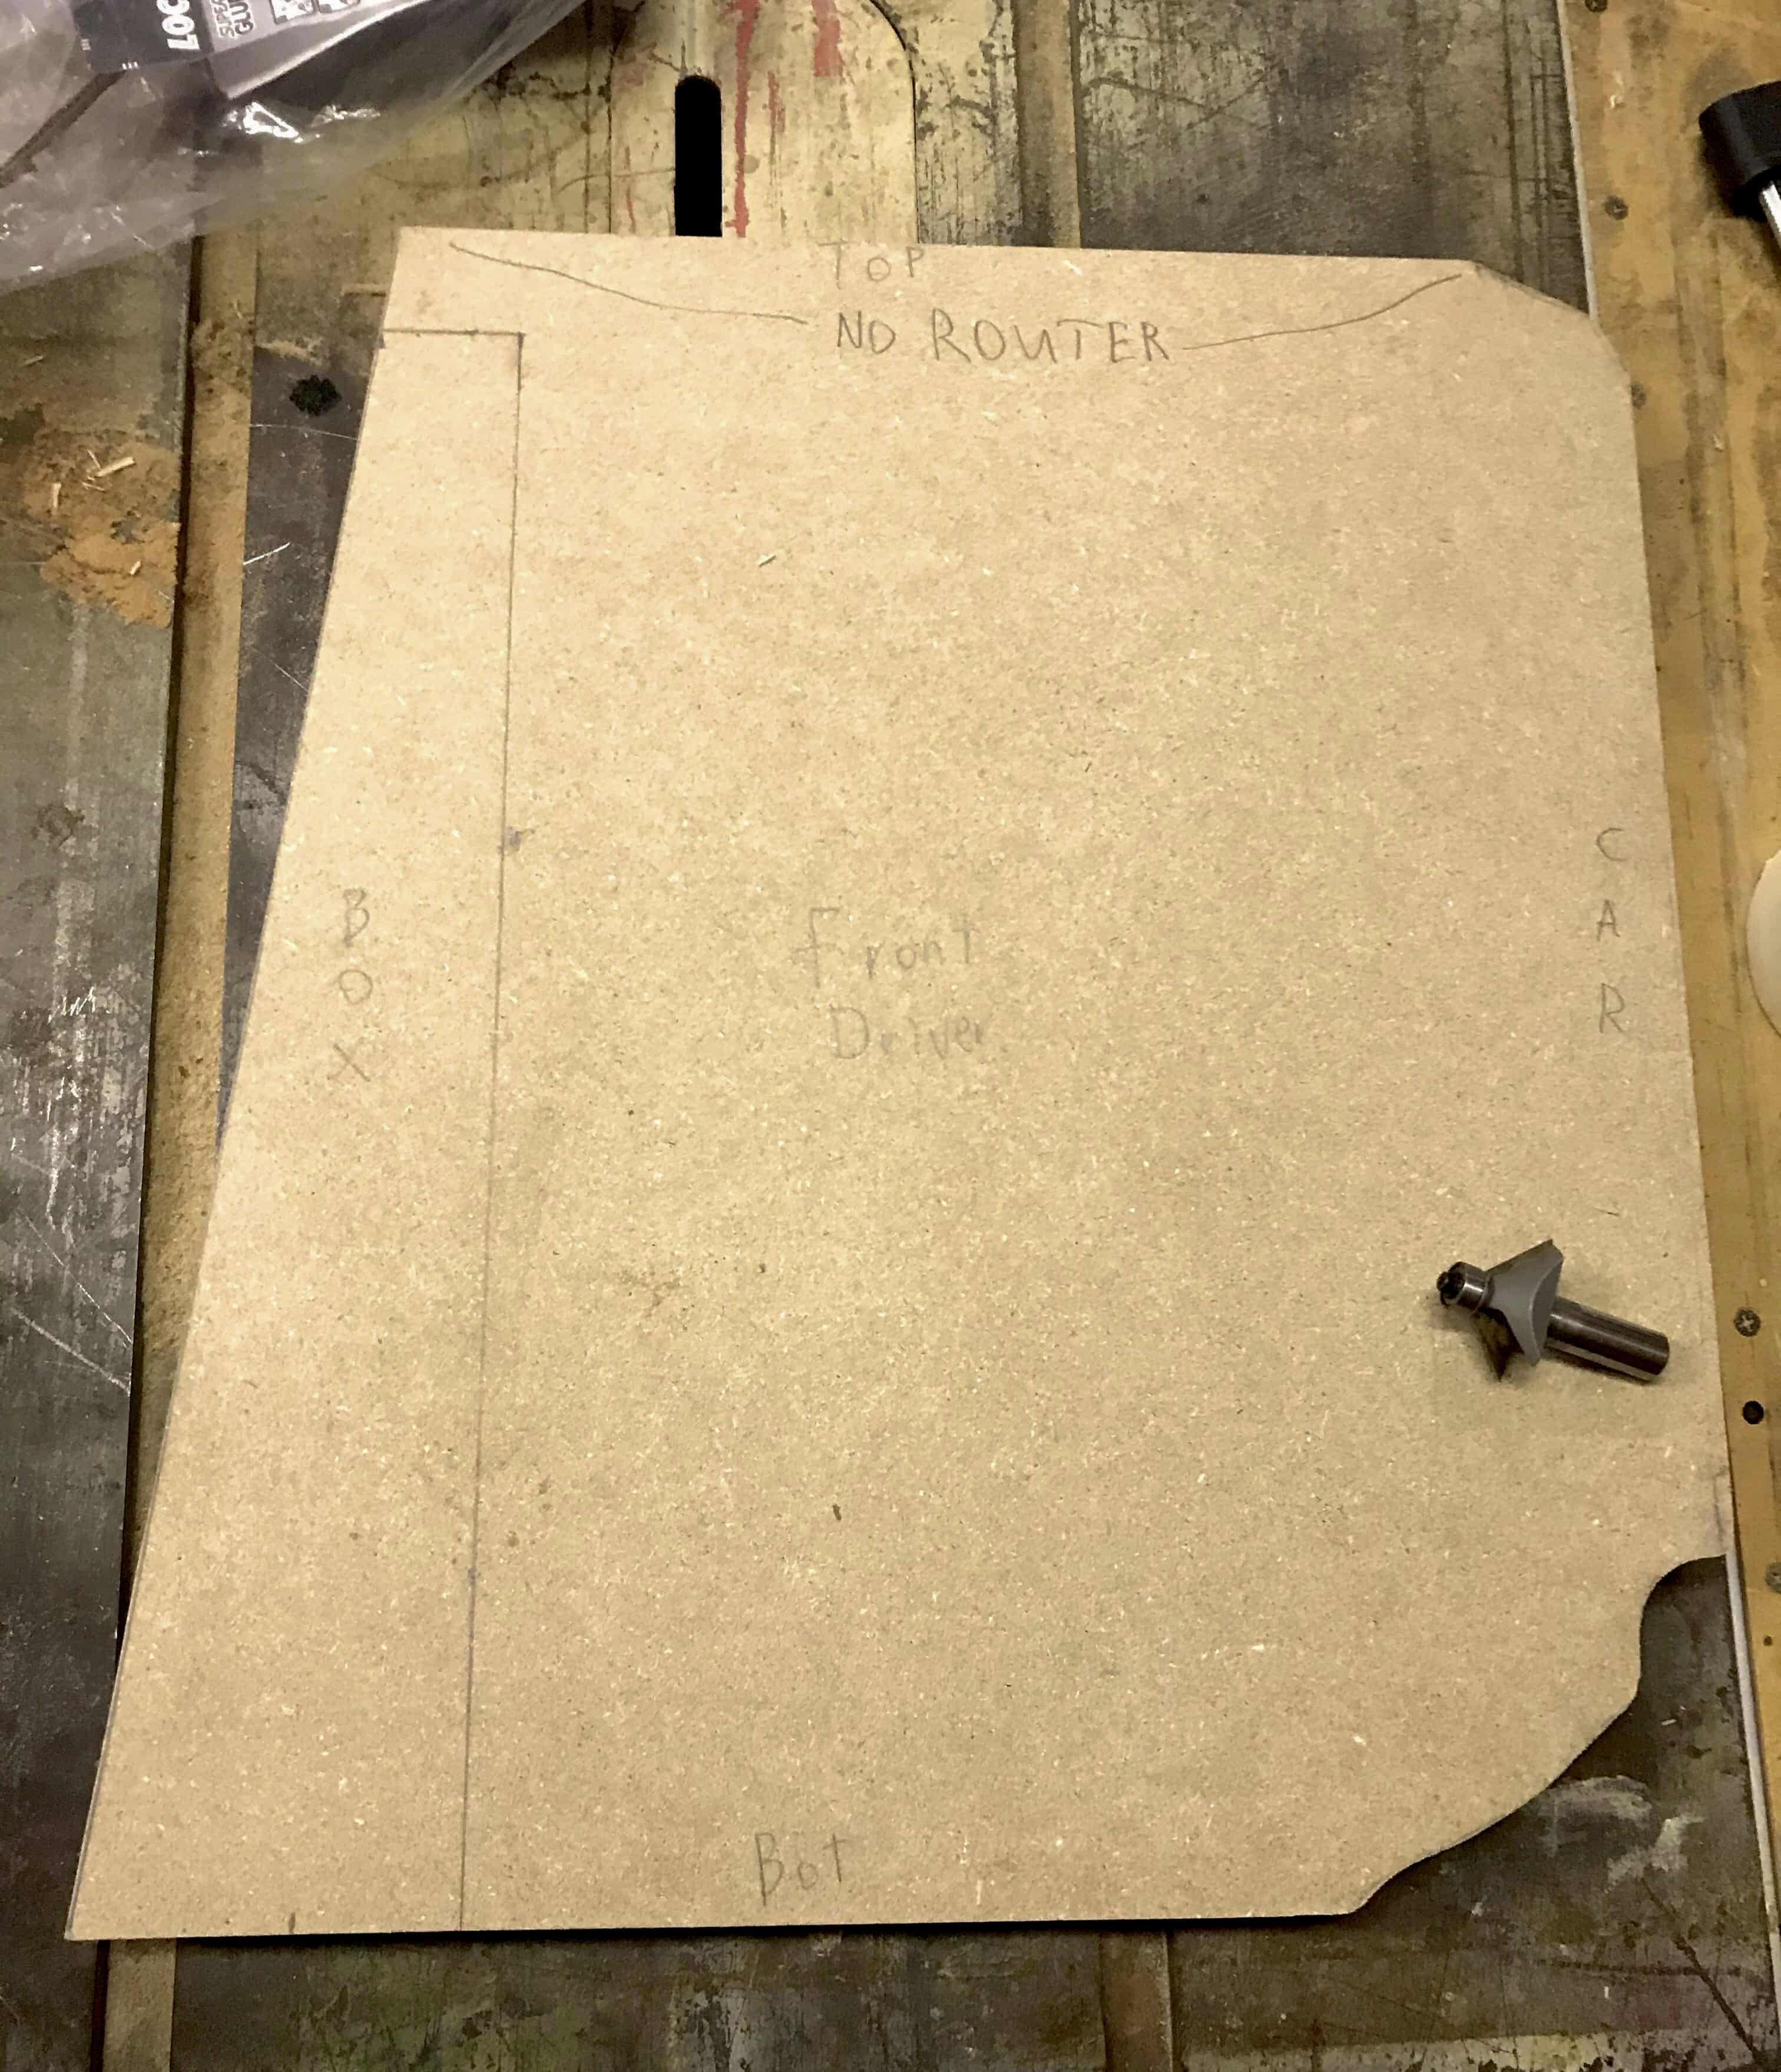
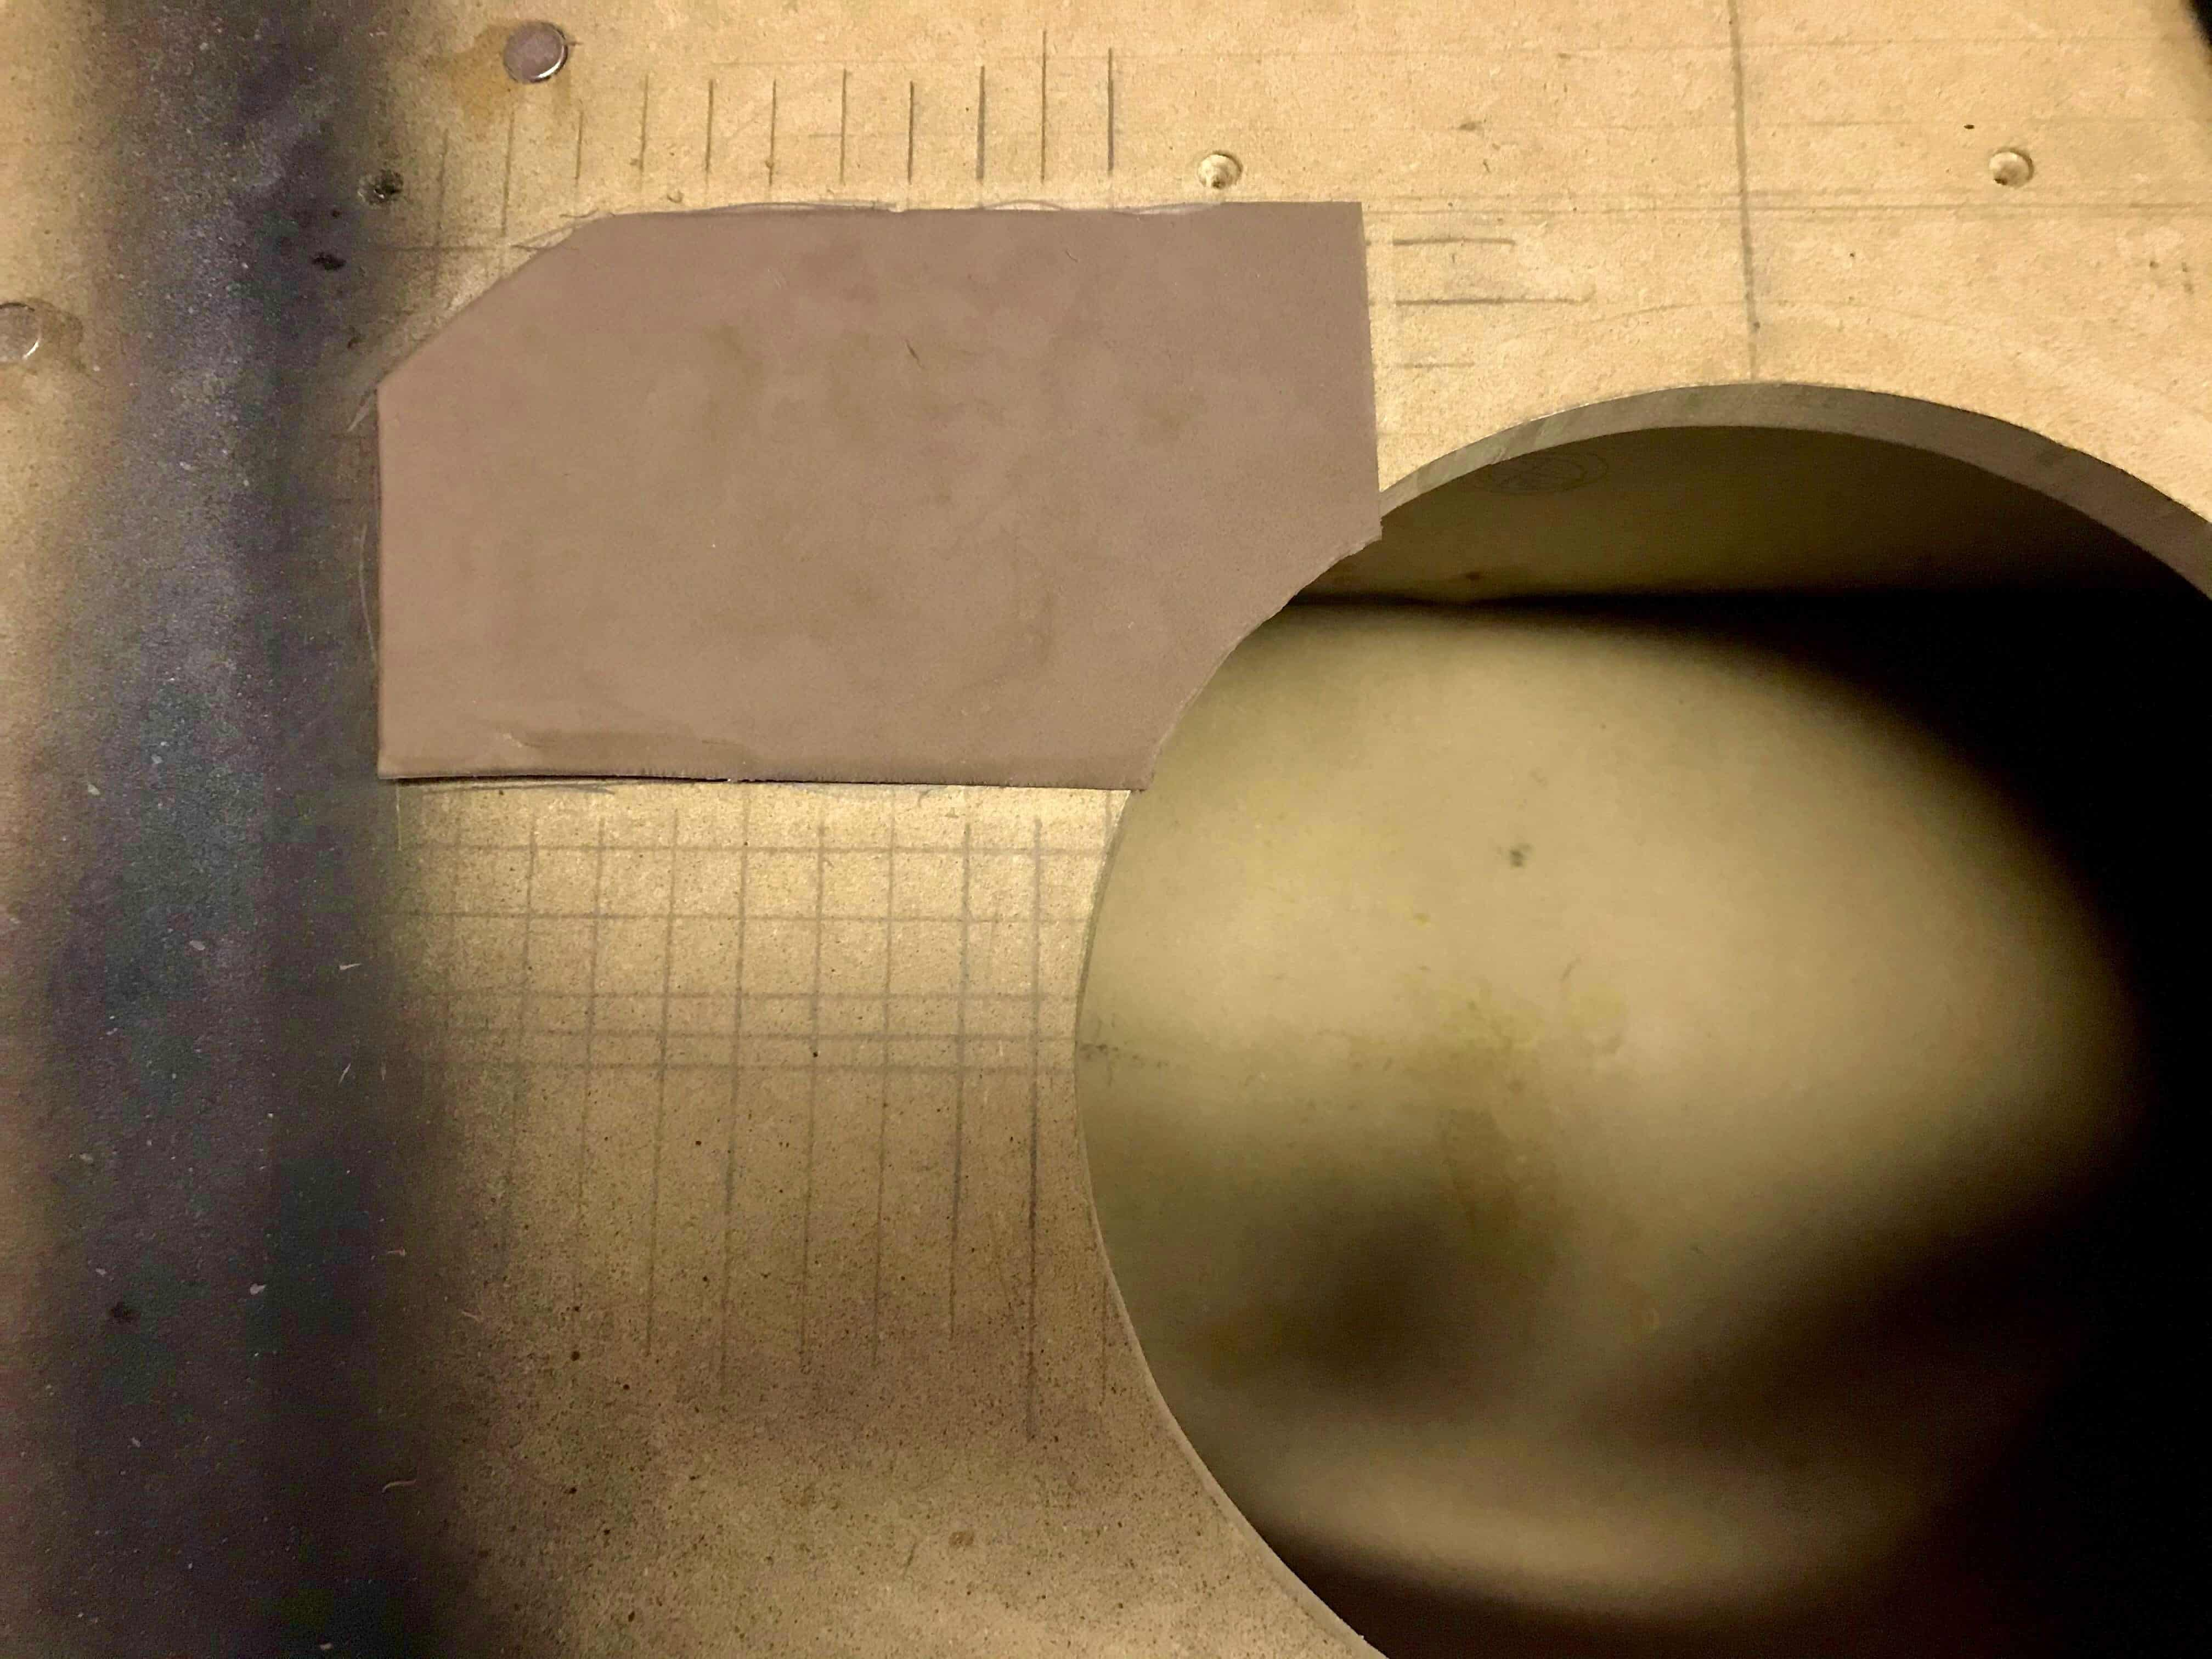
The shapes for the trim panels were captured by cutting strips of cardboard and making an edge template. I trimmed small pieces over and over with strong scissors until they fit the interior contour I was matching, then I super glued it to straight base piece of cardboard. Repeating this several times up the side starting from the bottom, I worked the profile about 4-6 inches at a time until I had a fully contoured edge. I then glued this to a full length cardboard piece to give it rigidity from top to bottom.
This shape could then be used to trace onto mdf, then cut the shape out with a hand held reciprocating saw. I cleaned up all the edges carefully with a table top drum sander, going back and forth to the car test fitting, marking any high spots with a pencil and re sanding. Most of the edges were then 45 degree beveled with a router for a better look, as well as easier fitment. Another consideration is all panels need enough space between them for the thickness of the material you will be wrapping them in.
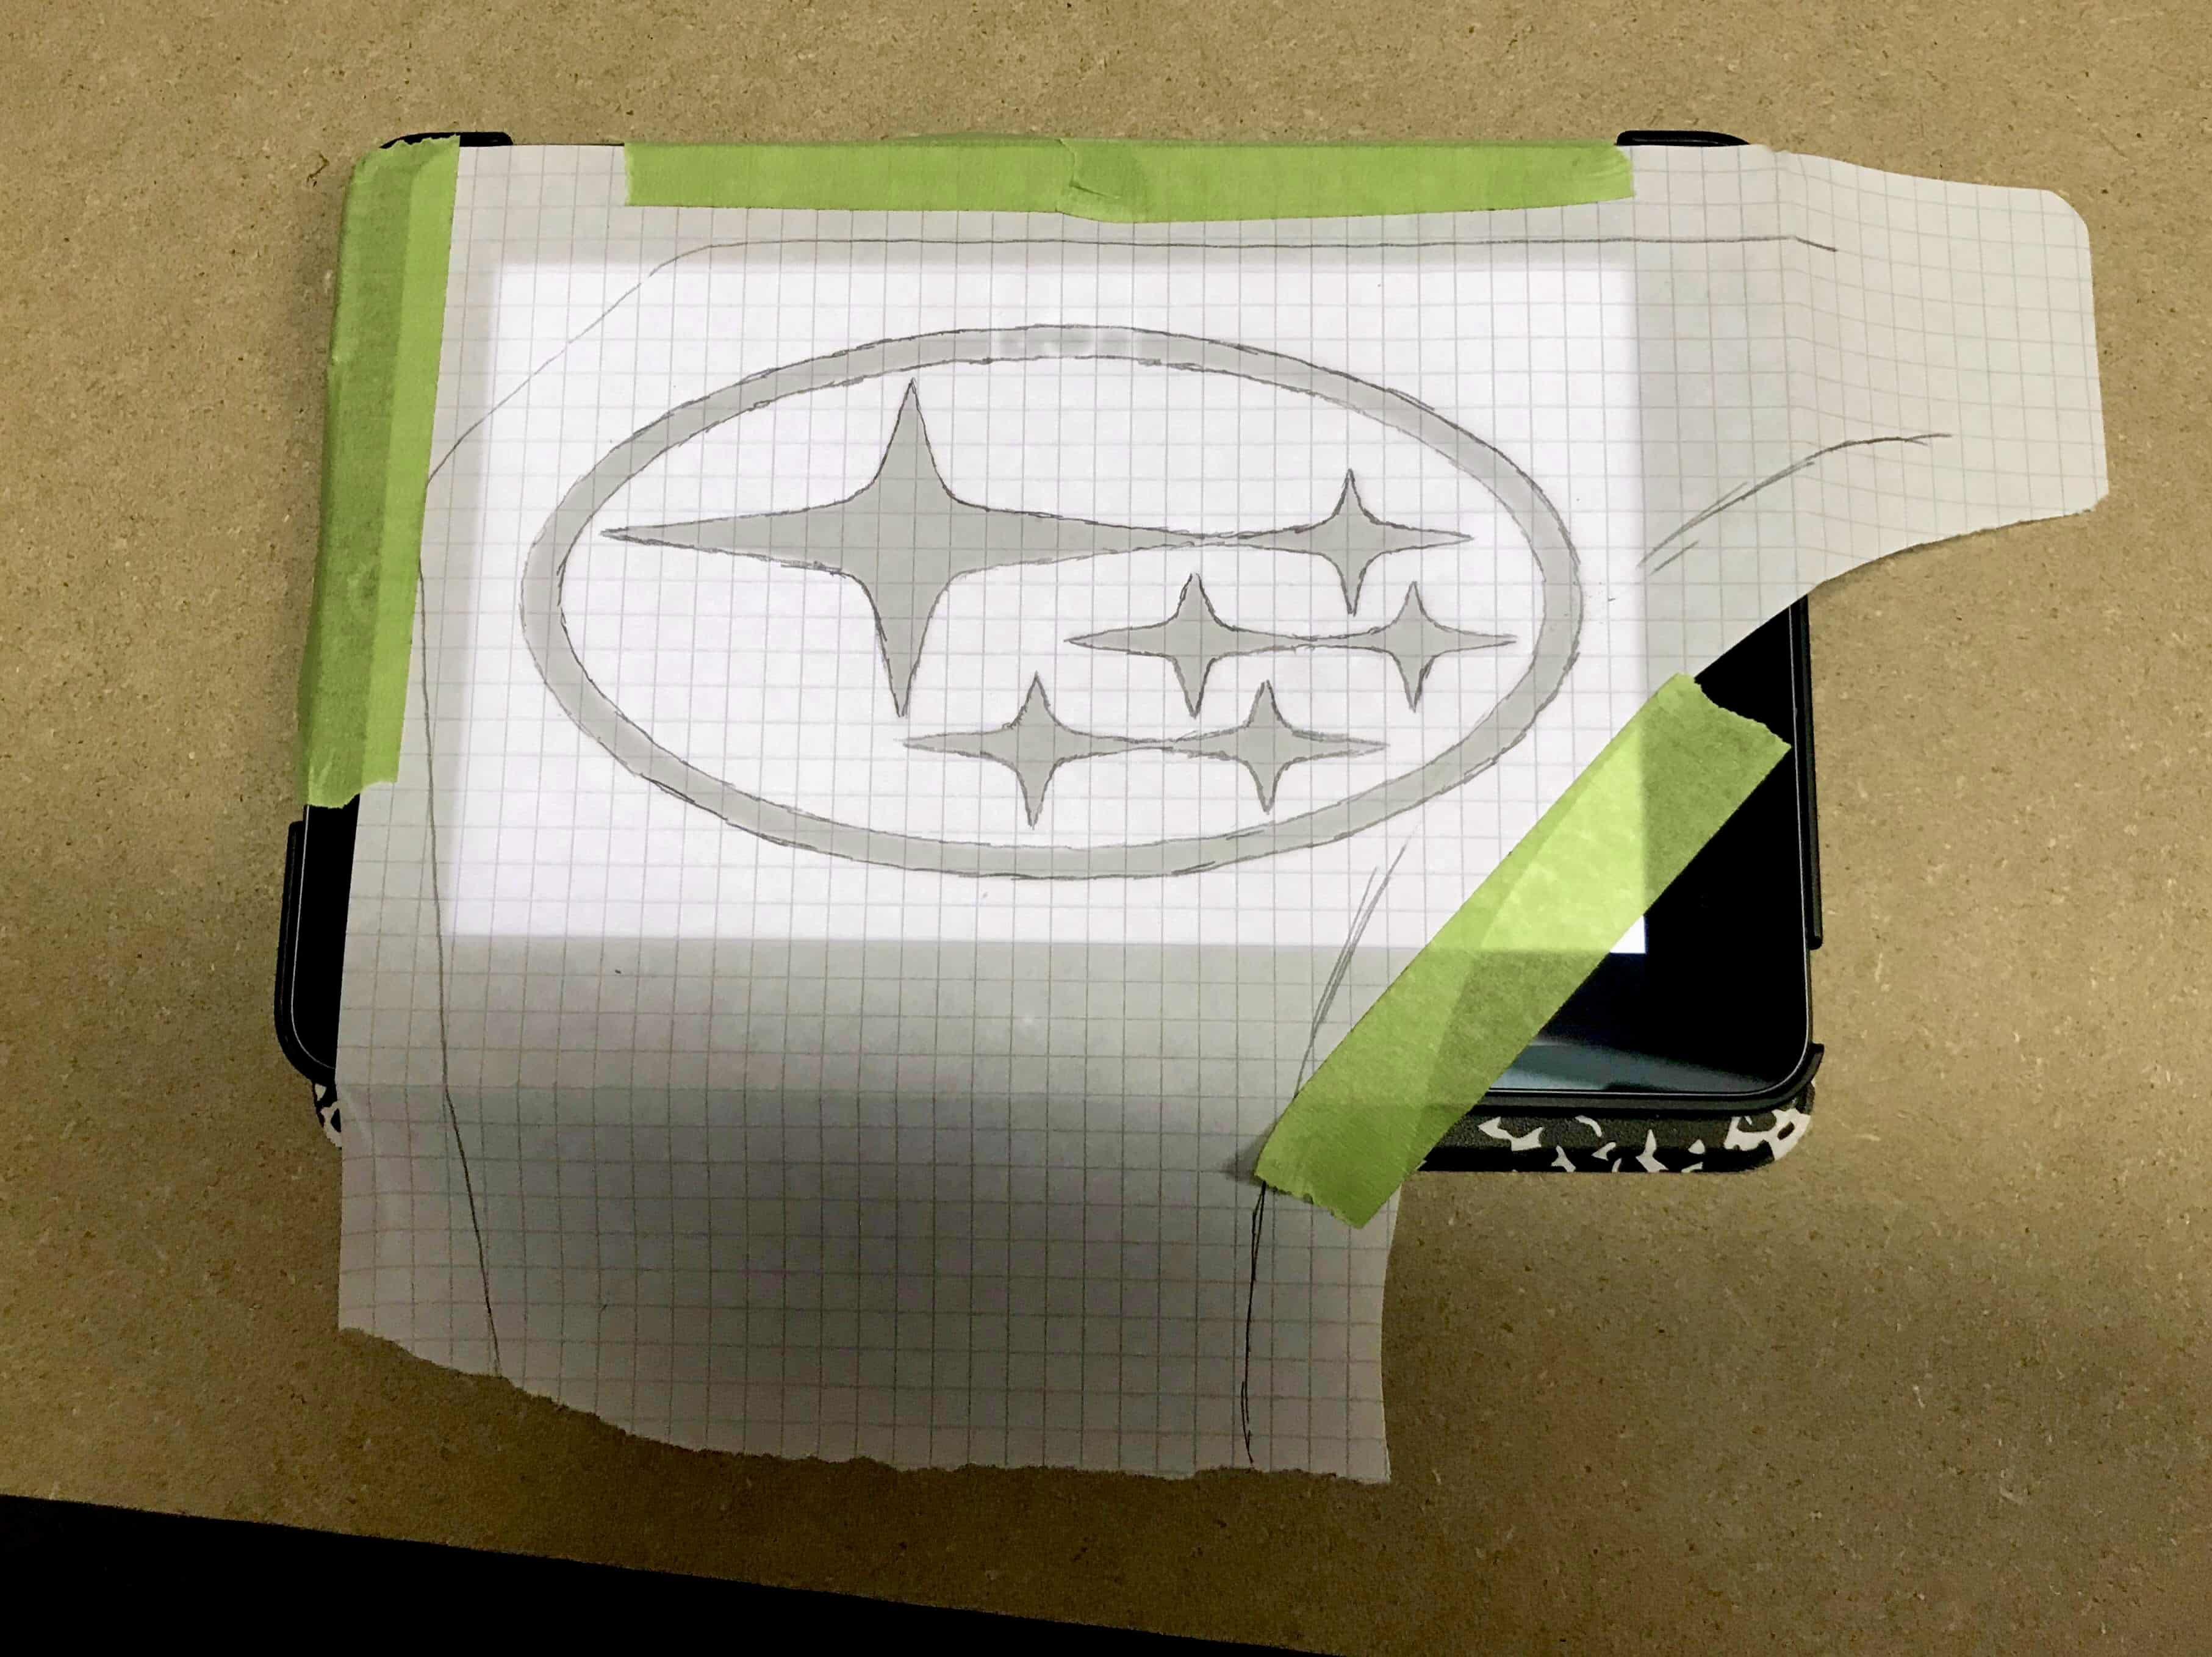
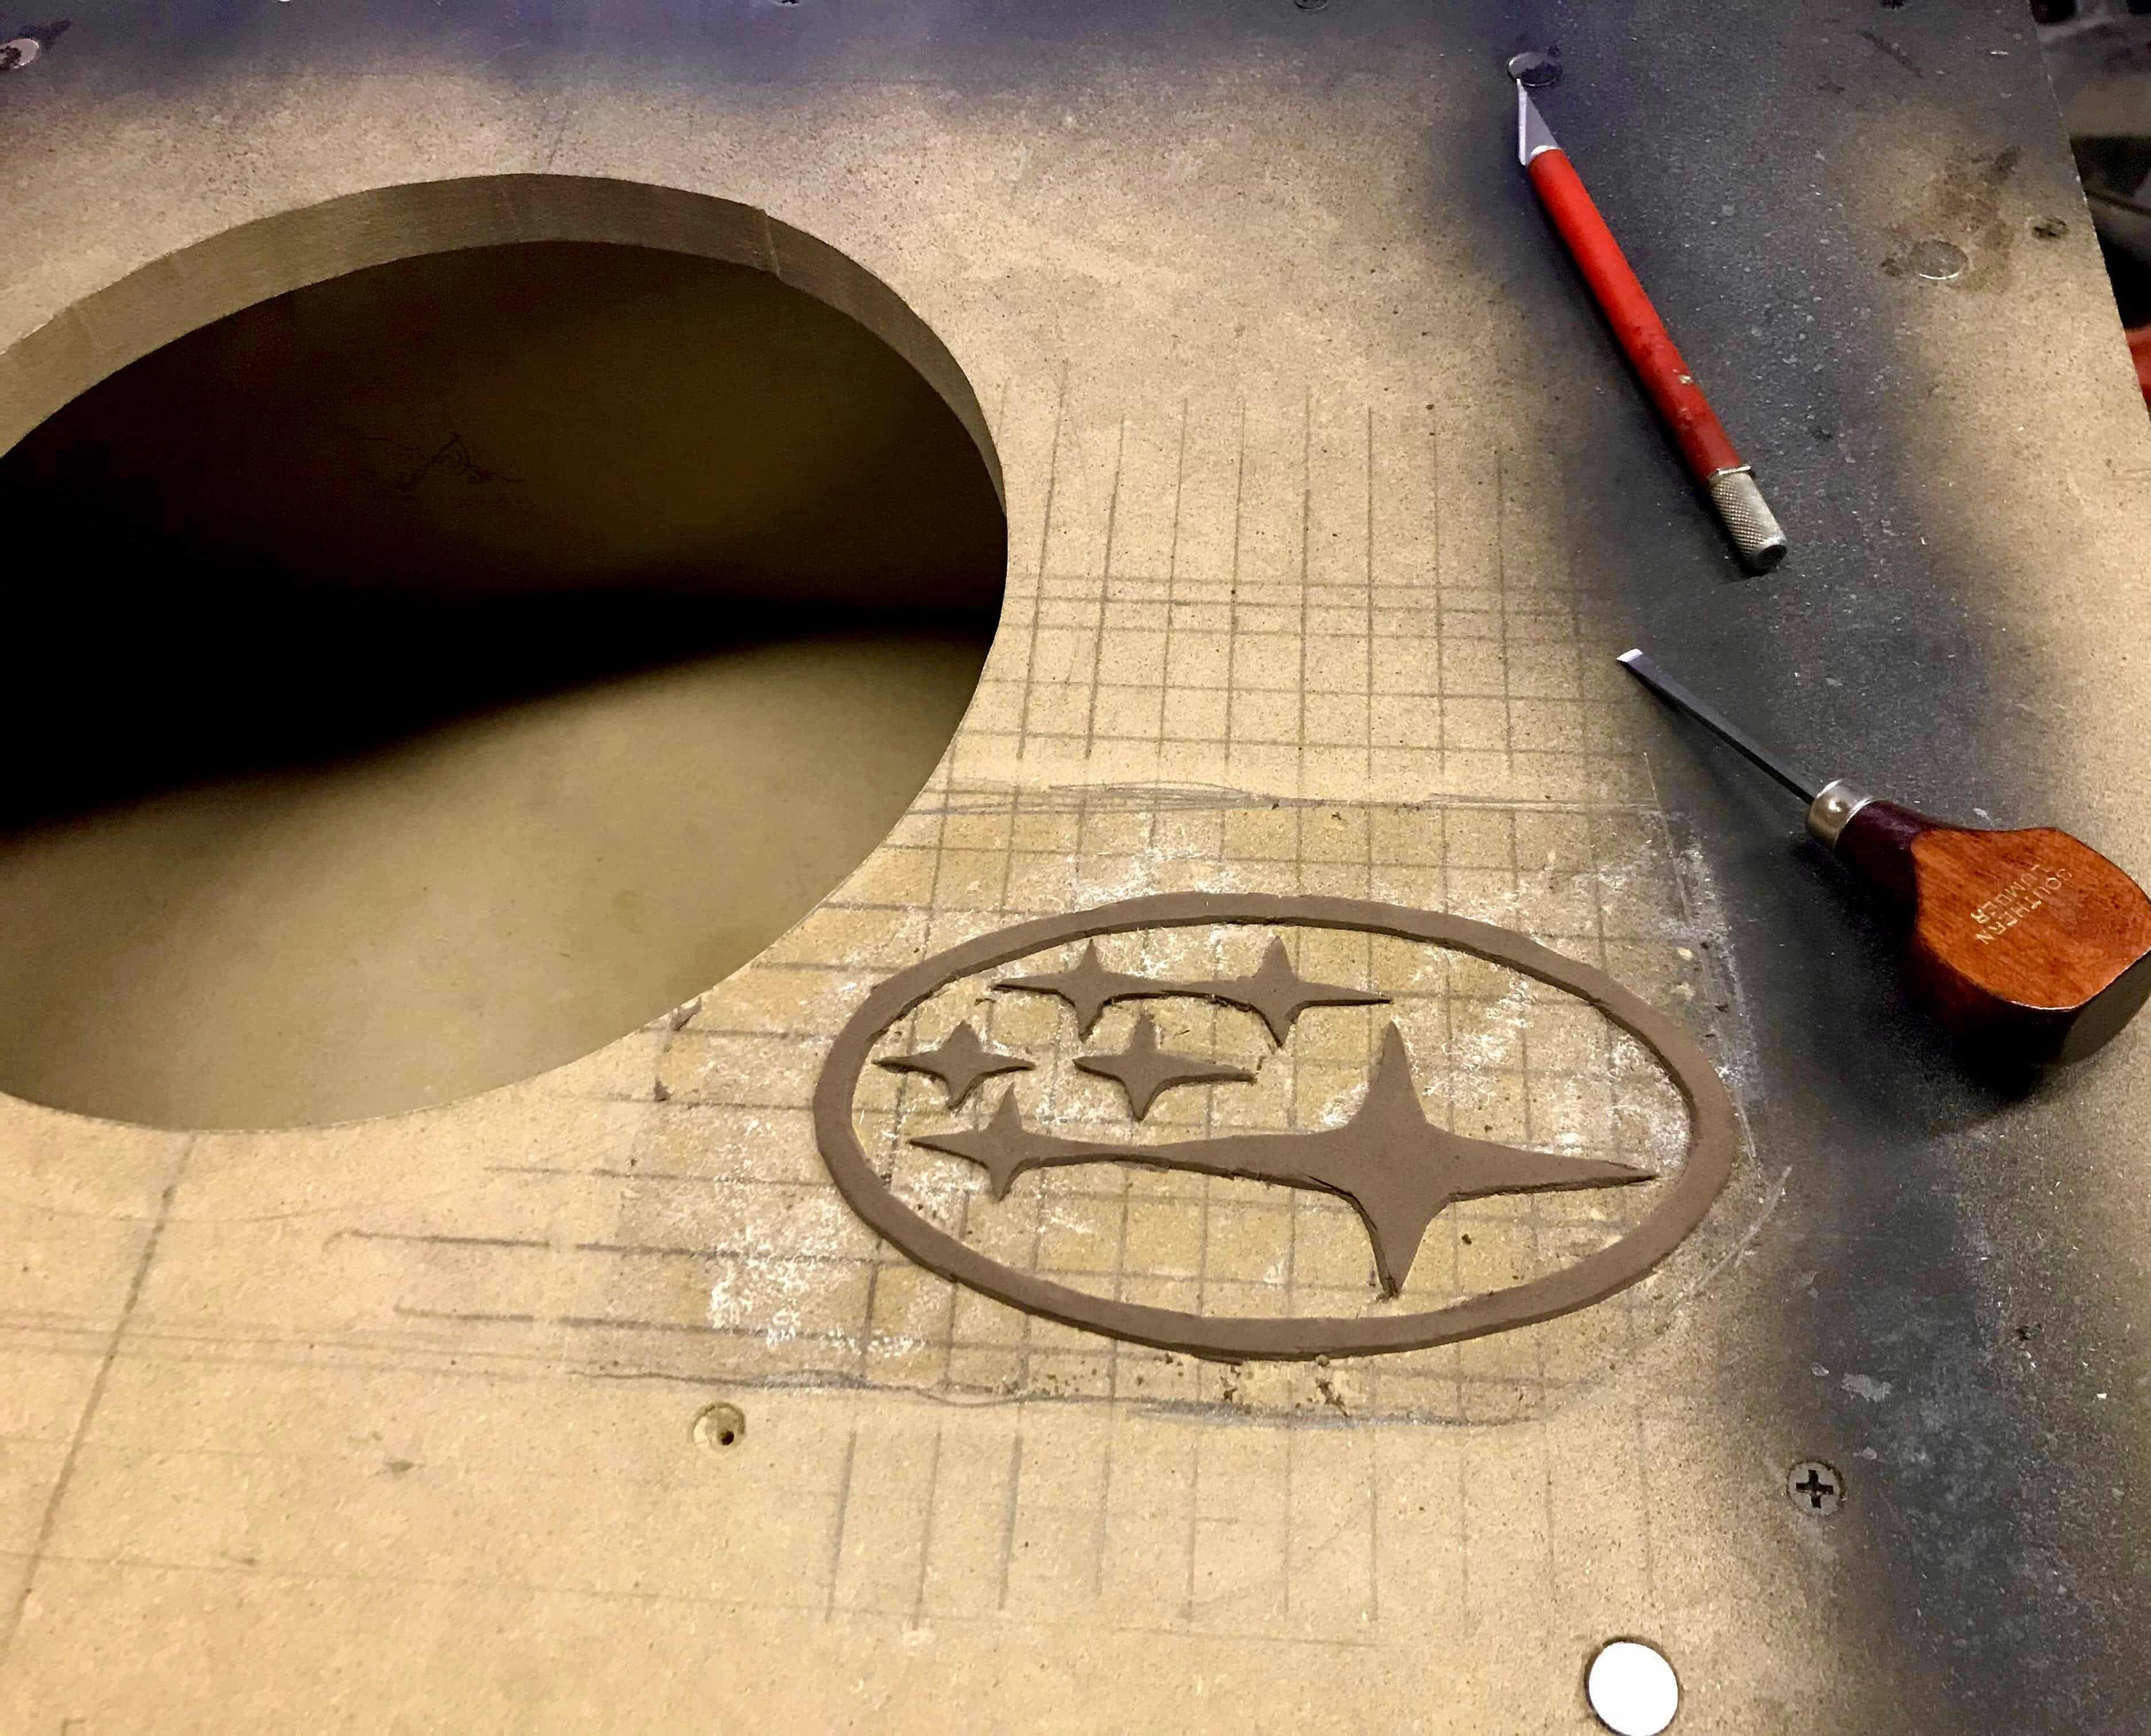
I also traced a Subaru logo with graph paper on my iPad, setting the image to be my background so it would stay up. This was transferred to some kids ‘construction foam’ I got from a craft store. I glued the foam to the box, taped on the tracing, then carefully and slowly cut the shapes with a razor knife. Once that was done, I removed all the negative foam with a razor blade and sharp chisel.
The carpet and vinyl were glued with contact cement, taking care to apply extra around to logo to hold the shape. Let the cement get bone dry! I can’t stress this enough.
When doing the logo I coated both surfaces with cement, then covered the entire box except the logo with wax paper. This allowed me to start working the vinyl down from the center of the logo out without it sticking to the box first. I worked all the edges of the shapes with a plastic spoon. Once the logo was done I slowly removed the wax paper, working down the vinyl watching for bubbles.
The trim is fastened in place with multiple counter sunk neodymium magnets. I lined these up by fitting everything in the car and drilling small pilot holes through the trim partially into the box. This gave me a center point to drill with a Forster bit to flush mount the magnet. Make sure your magnet polarization is the right way!
This type of trim is a long process and took the vast majority of the 5 days spent installing this.
Crossover Design:
I’ve played with the x over point quite a bit and it sounds great all the way up to my maximum 200 Hz. This speaker could easily perform as a mid bass in a home theater setup. I settled in on about 110 Hz because of a phase issue between my door speakers at 90, that seamed to blend it in nicely.
Tips & Tricks:
If I were to ever rebuild this box, I would delete the storage. It doesn’t get used very often. After more modeling I would change to 2.2 cubic feet tuned to 33 Hz with about 28-30 square inches port area. This should give me another 3 dB at 37 hz, and 1.5 from 31-57. The current box being tuned so low waisted a lot of energy below my 25 Hz subsonic filter.
Conclusion:
This subwoofer absolutely sounds awesome. Accurate and deep. It’s on par with any solid 500-700 watt 10 from brands like Rockford, JL, and Kicker SPL wise, and noticeable better on fast repeated drum kicks than any I have owned.
About the Designer:
I’ve been into car audio since 2001, the last decade or so I had other things going on. Recently I decided to rekindle the hobby, and this is my first project in a while.
+ There are no comments
Add yours