The Fatboys


Designer:
JavadS
Project Category:
Bookshelf Speakers
Project Level:
Intermediate
Project Time:
20+ Hours
Project Cost:
$100 – $500
Project Description:
This project was conceived after I decided to make the trip out to MWAF 2016 from my home in California. After looking over the competition categories, I decided to enter in the $200 or less category and everything went from there!
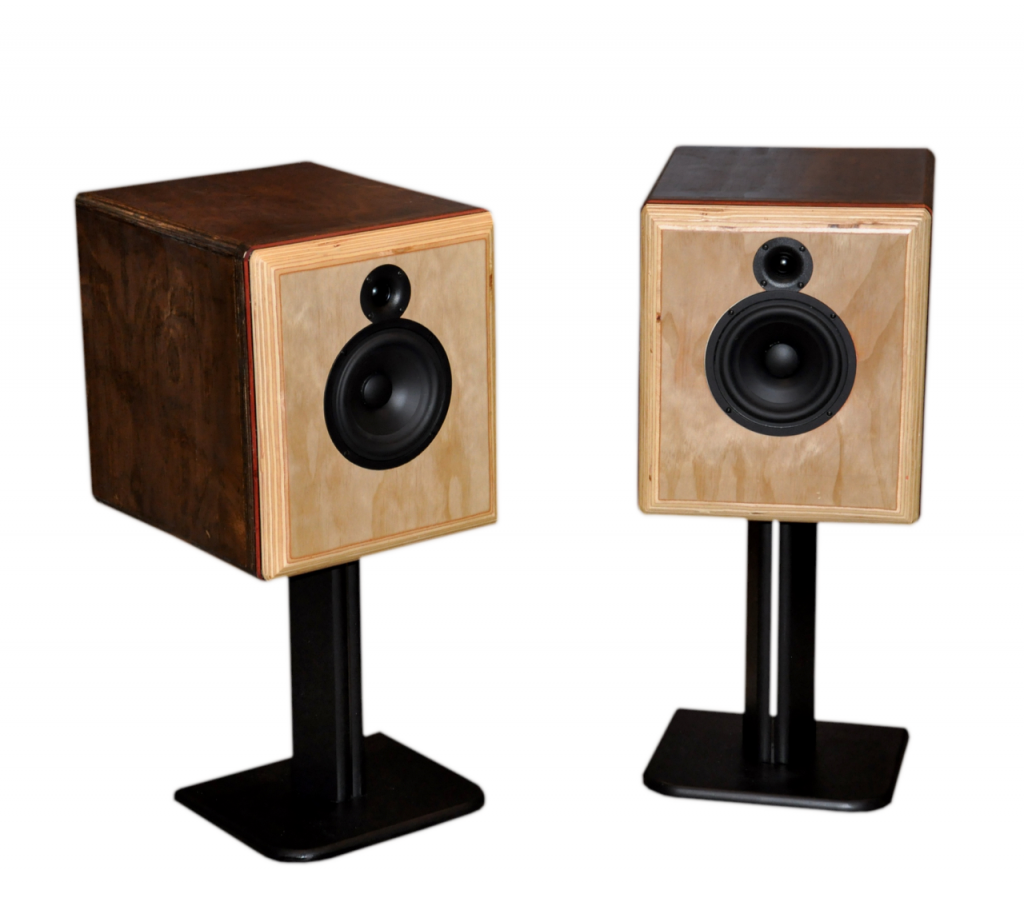
What I came up with was a 2-way “bookshelf” speaker with full range sound and ample bass, which drivers cost less than $200 to purchase and some really cool tech entered to make it sound like a much more expensive speaker.
Design Goals:
I had several design goals that I needed to meet:
1 – Make the best sounding speaker possible including flat frequency response, good clarity and excellent imaging. Part of that would be locating the tweeter and woofer w/in 1/2 wavelength of the crossover frequency to each other, as well as minimizing enclosure resonances and vibrations.
2 – Speakers that were portable, I decided to ship my speakers to Ohio and needed to be sure they weren’t too big or unruly.
3 – I wanted to do something special, something that used a lot of the new skills and concepts I’ve learned about this year, something that had a lot more tech that appears on the surface.
Driver Selection:
Since I was on a tight budget, I had limited choices, but often limiting constraints often spark the most innovation and creativity (See F1 racing for example!).
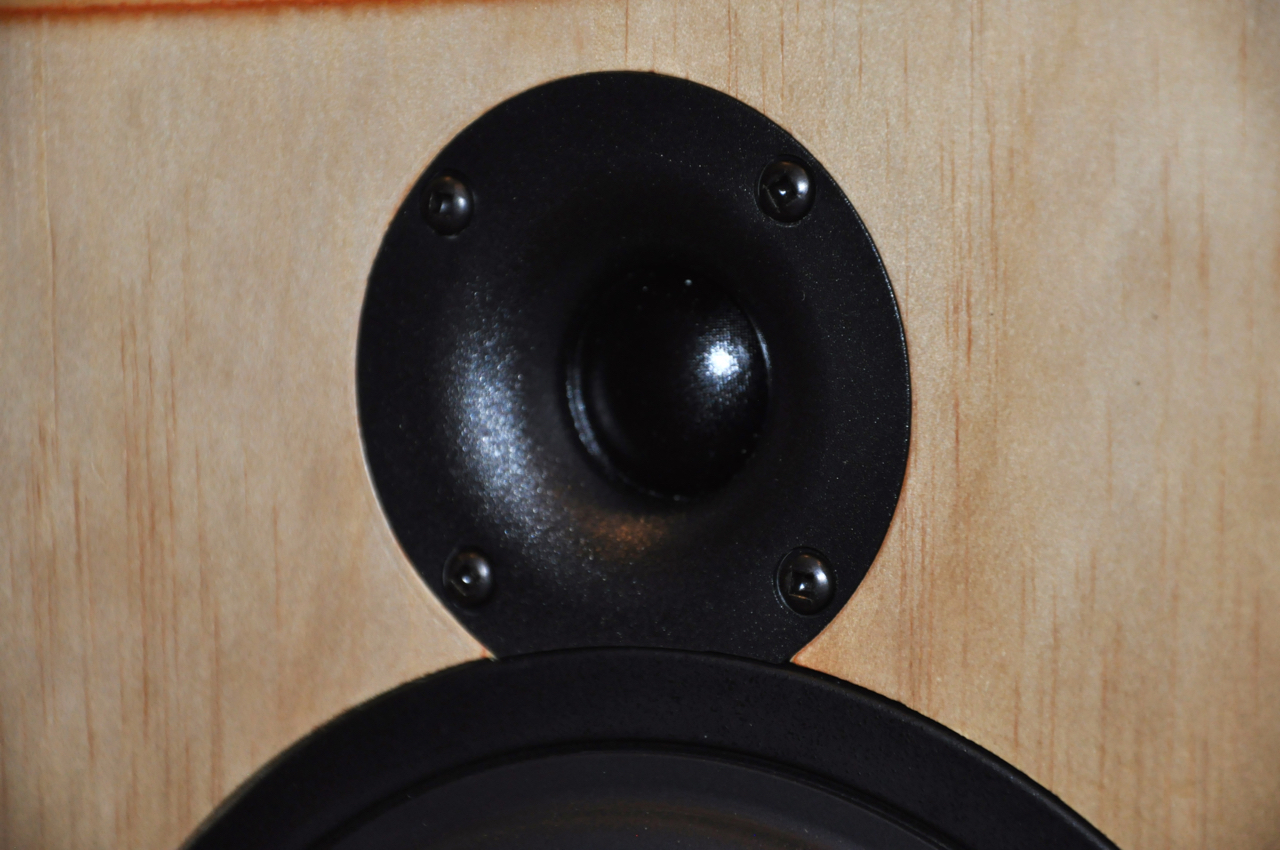
I was able to pick up the Vifa BC25SC06-04 1″ Textile Dome Tweeter #264-1028 for under $15 each, well rated tweeter with good smooth frequency response, most importantly it had a very small frame and looked like it would cross over well at around 2000hz.
For the woofer I was looking for a 6.5″ woofer that had smooth response past 2000rpm but was also able to produce great bass in a smallish enclosure, thanks for a Parts Express sale I was able to pick up the Tang Band W6-1721 6-1/2″ Underhung Midbass Driver #264-874 for $75 each, boom I was in business! I was truly enamored with the massive motor assembly and couldn’t wait to get my hands on this beast!
Enclosure Design:
I wanted to achieve several things with the enclosure:
1 – Lightweight – so I could travel with them, considering a driver that weighed in over 5lbs alone, this would be important. I decided to use 3/4″ Arouco Plywood, this is a dense and high quality plywood with minimal voids, it is very flat and strong and really nice to work with. The pine veneer is very thin which demands care if you’re not going to paint or veneer your enclosure, which I did not. I did not use any bracing as to keep the weight down.
2 – Low Resonance – to allow the cleanest and uncolored sound from the drivers, and since I wasn’t going to be using bracing, I needed to get creative. Along came CLD or Constrained Layer Dampening, you can google it to read more. Basically this is an anti-vibration technique that adds dampening to a stiff layer such as a sheet of plywood by sandwiching a soft layer of rubber between two stiff pieces. After doing some experimentation, I found a nice technique that worked well and attached the baffle to the enclosure in an isolated fashion.
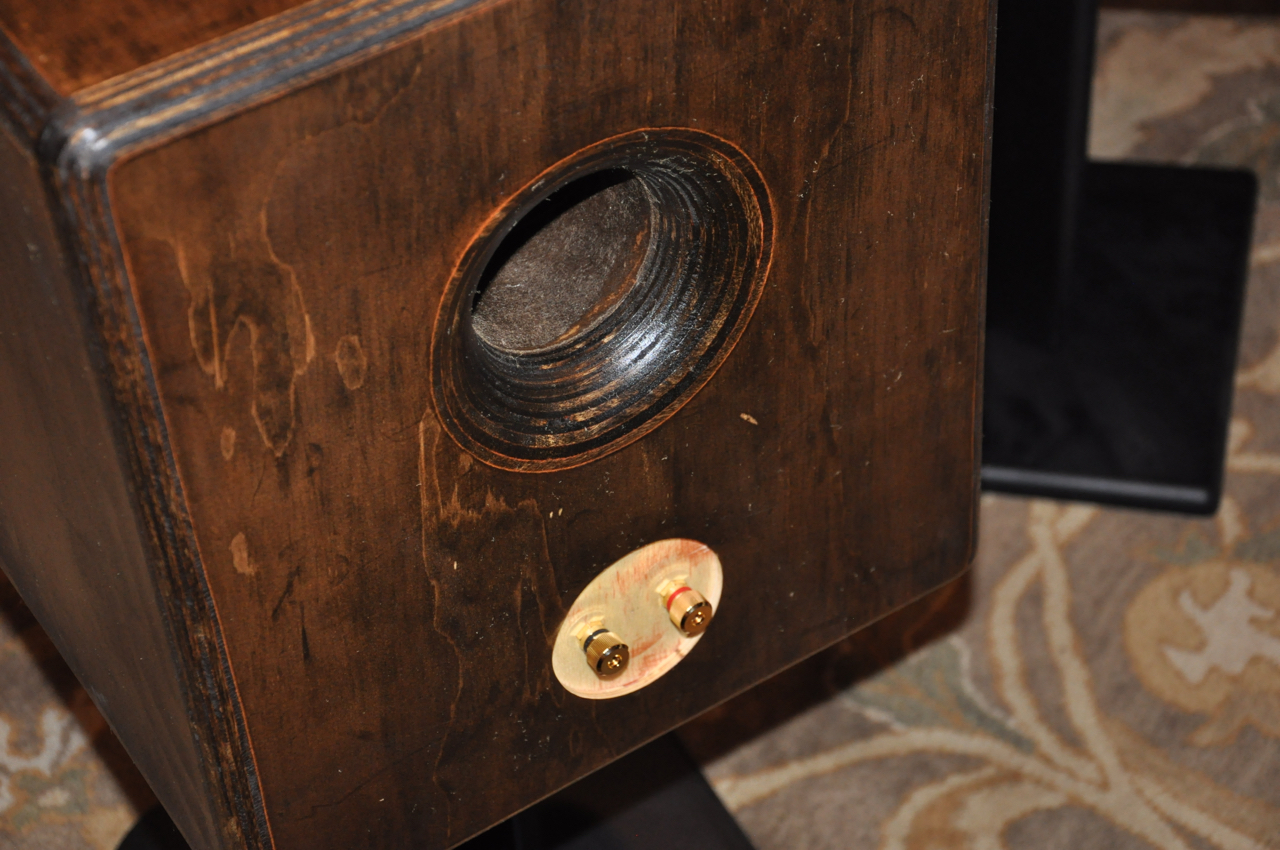
3 – Good Bass – The TangBand woofer modeled well in a 1.3 cubic foot enclosure, I wanted to make it smaller but the modeling looked really good and should rival the average 8 or 10″ subwoofer. I included a amply sized 3″ port with generous 1.5″ radii on the inside and out. I ended up tuning the port to 43hz for the best performance, length around 5″ or so.
Enclosure Assembly:
Assembly of the basic enclosure was quite straight forward, I built a box from 3/4″ plywood, there isn’t any metal in the assembly of these, all seams are glued with Titebond II Premium wood glue.
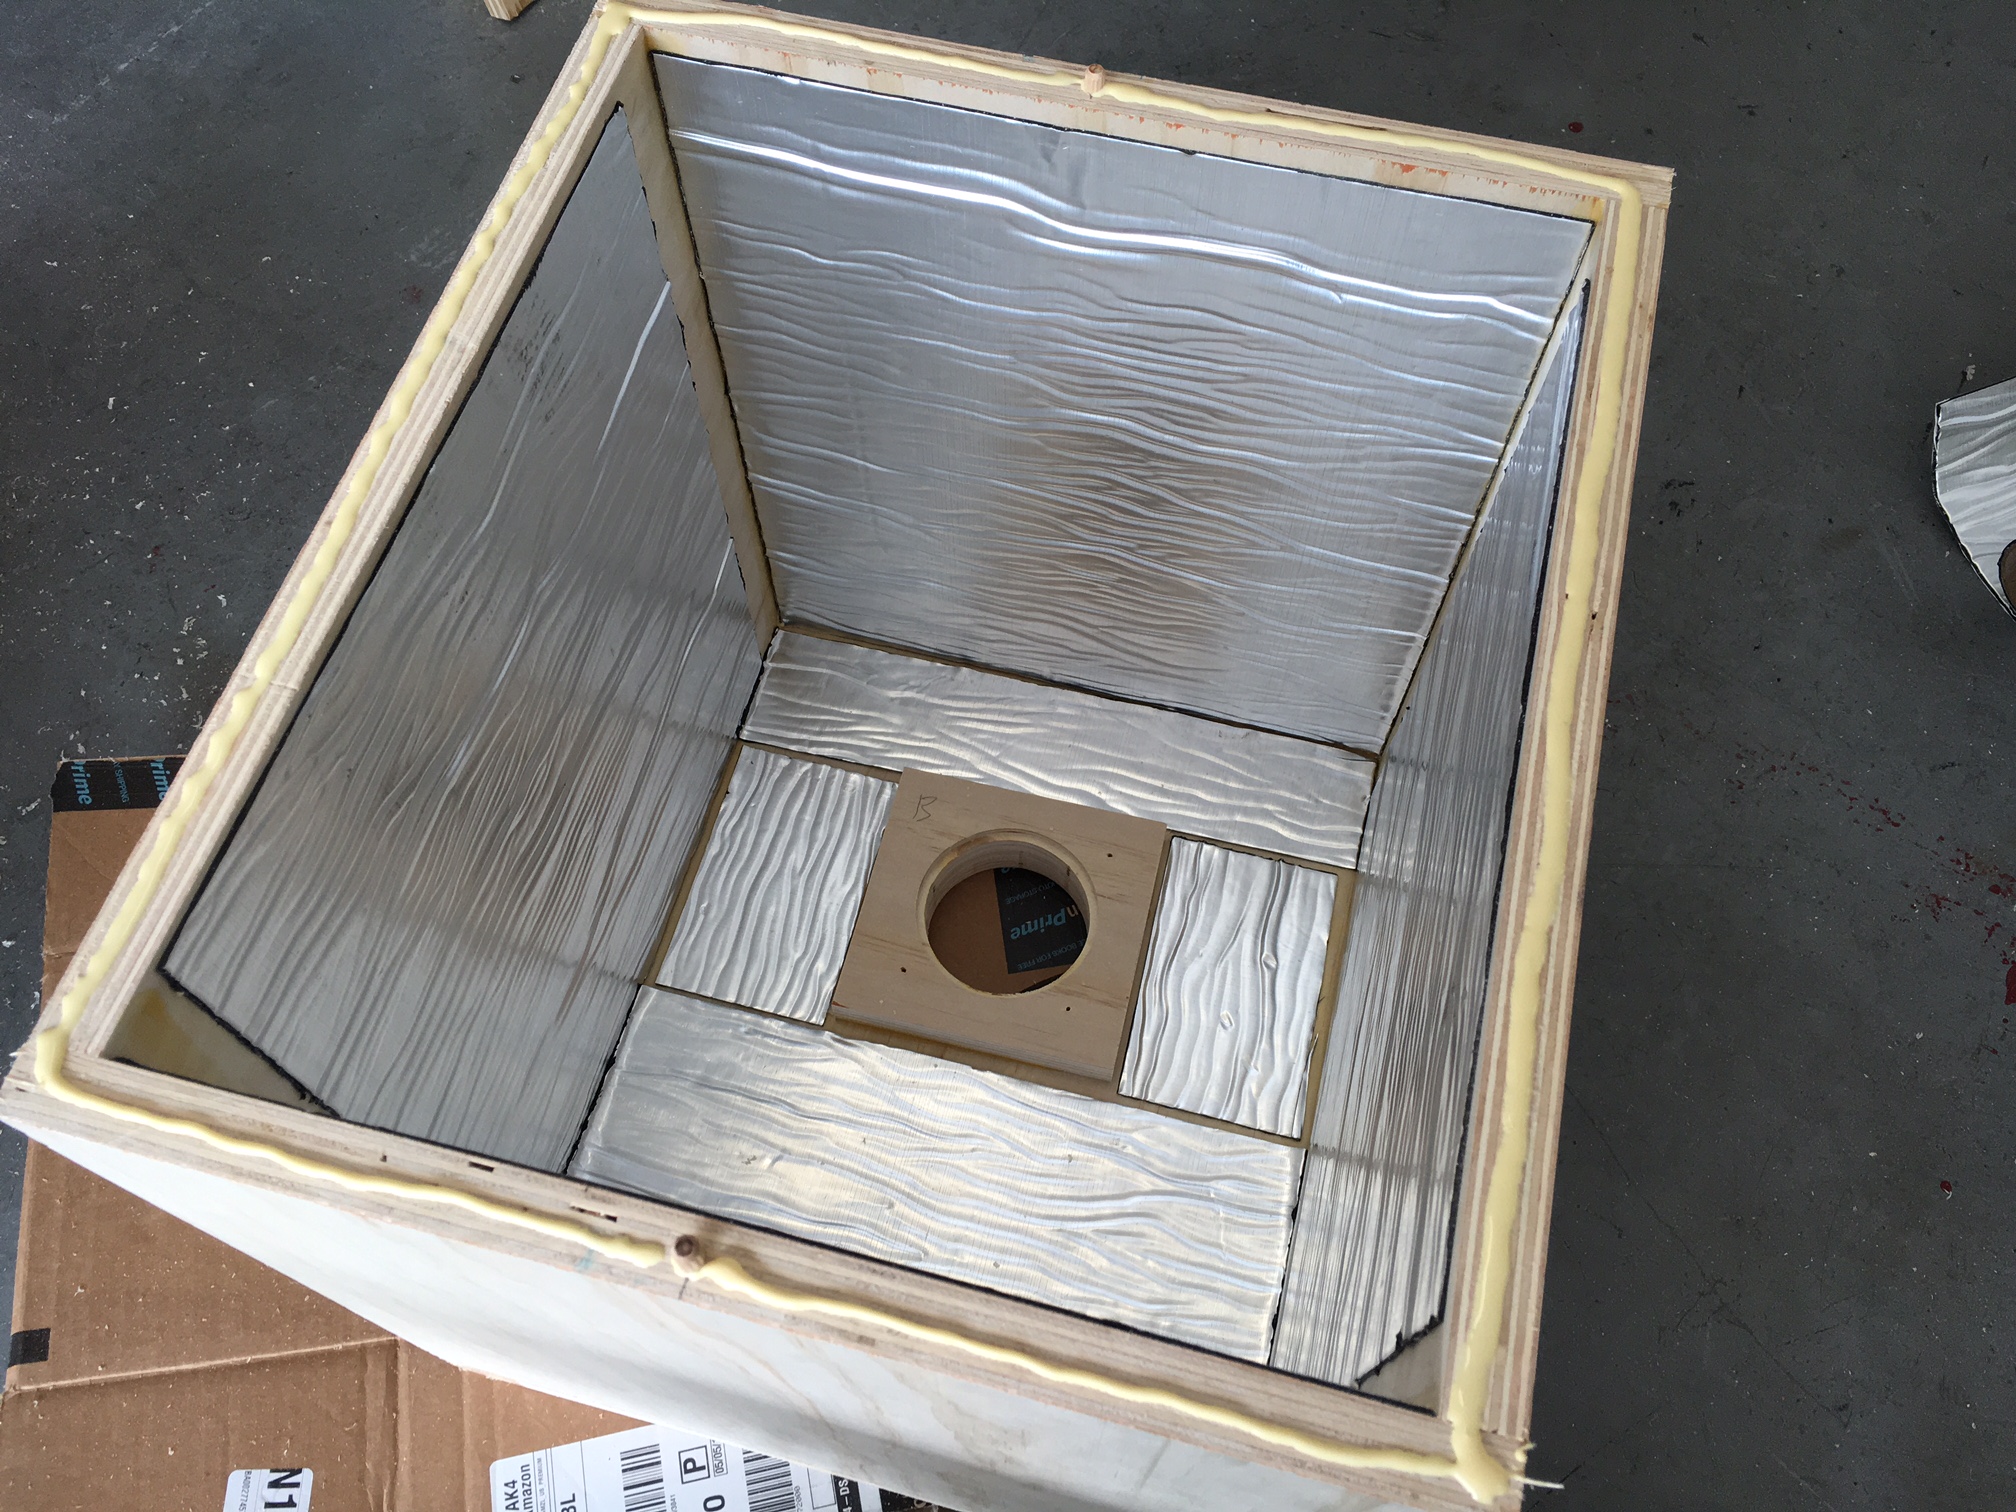
Where things got complicated was the front baffle! Once the basic enclosure was made, I cut two intersecting holes in the base front baffle, these would be the breathing/clearance holes for the woofer and tweeter.
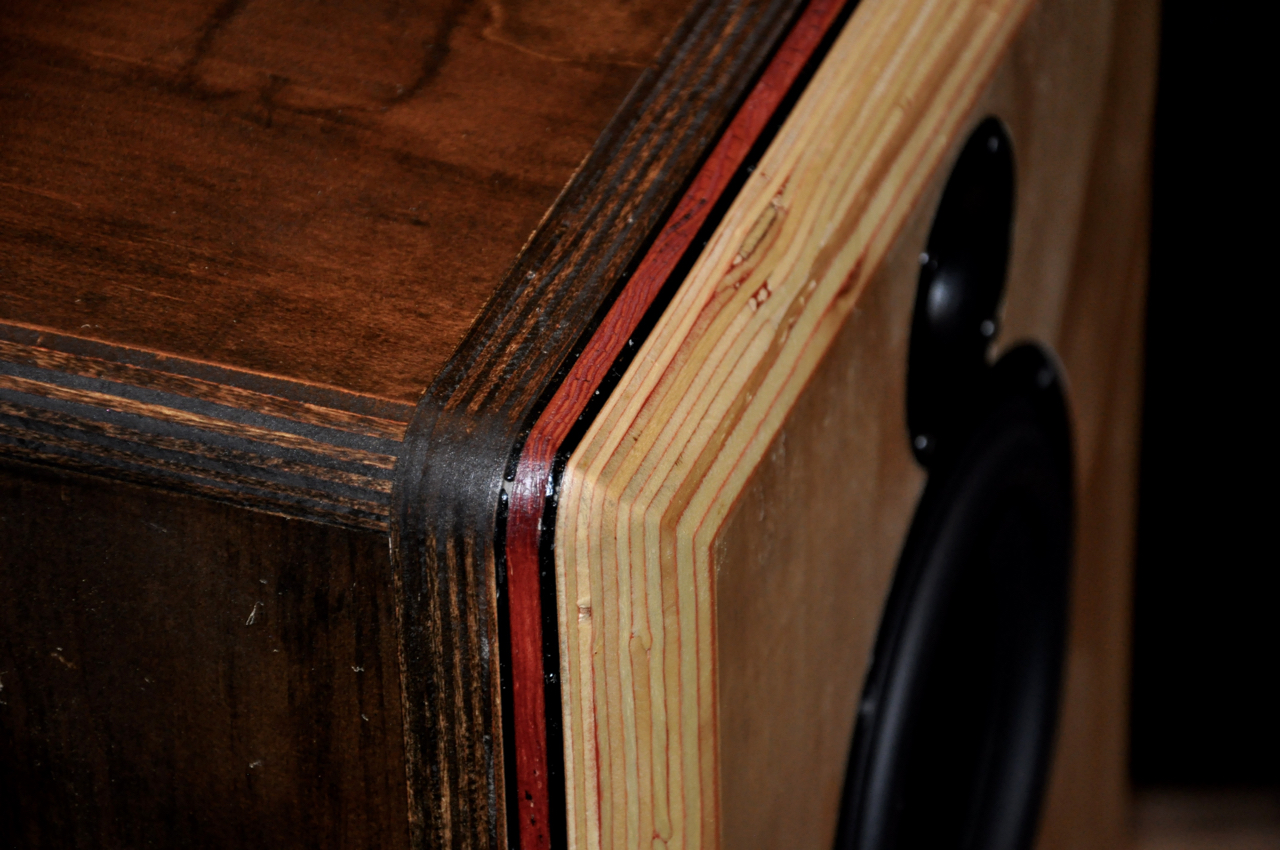
Once that was finished, I smeared on a 1/16″ layer of 50 durometer polyurethane adhesive, once dry this remains quite pliable or elastic and works well to create the CLD effect needed to dampen vibrations. On this layer of polyurethane adhesive I bonded a layer of 1/4″ birch plywood, then onto that another layer of adhesive and the final front baffle. What I ended up with was a 1/4″ layer sandwiched by two layers of viscoelastic polyurethane adhesive. This created a very acoustically dead front baffle, a rap on it with a metal wrench results is a dead thud vs. the resonant musical note you’d normally get from a piece of wood.
To continue the CLD treatment, I treated the inside of the enclosure with a foil CLD sound deadening material, this adds CLD to the inside plywood walls and greatly dampens the panel vibrations. I also glued a layer of 1.5″ open cell egg crate foam to all inner surfaces as well as added some poly fill (tuned by ear) to create a smooth and mellow bass sound w/o any boominess or resonance.
The last trick I used was to bring the already small framed tweeter even closer to the woofer center by routing the woofer frame into the plastic tweeter frame by about 3/8″, this brought the driver centers to about 1/2 wavelength of the approx 1700hz crossover frequency, which helps minimize diffraction and lobing.
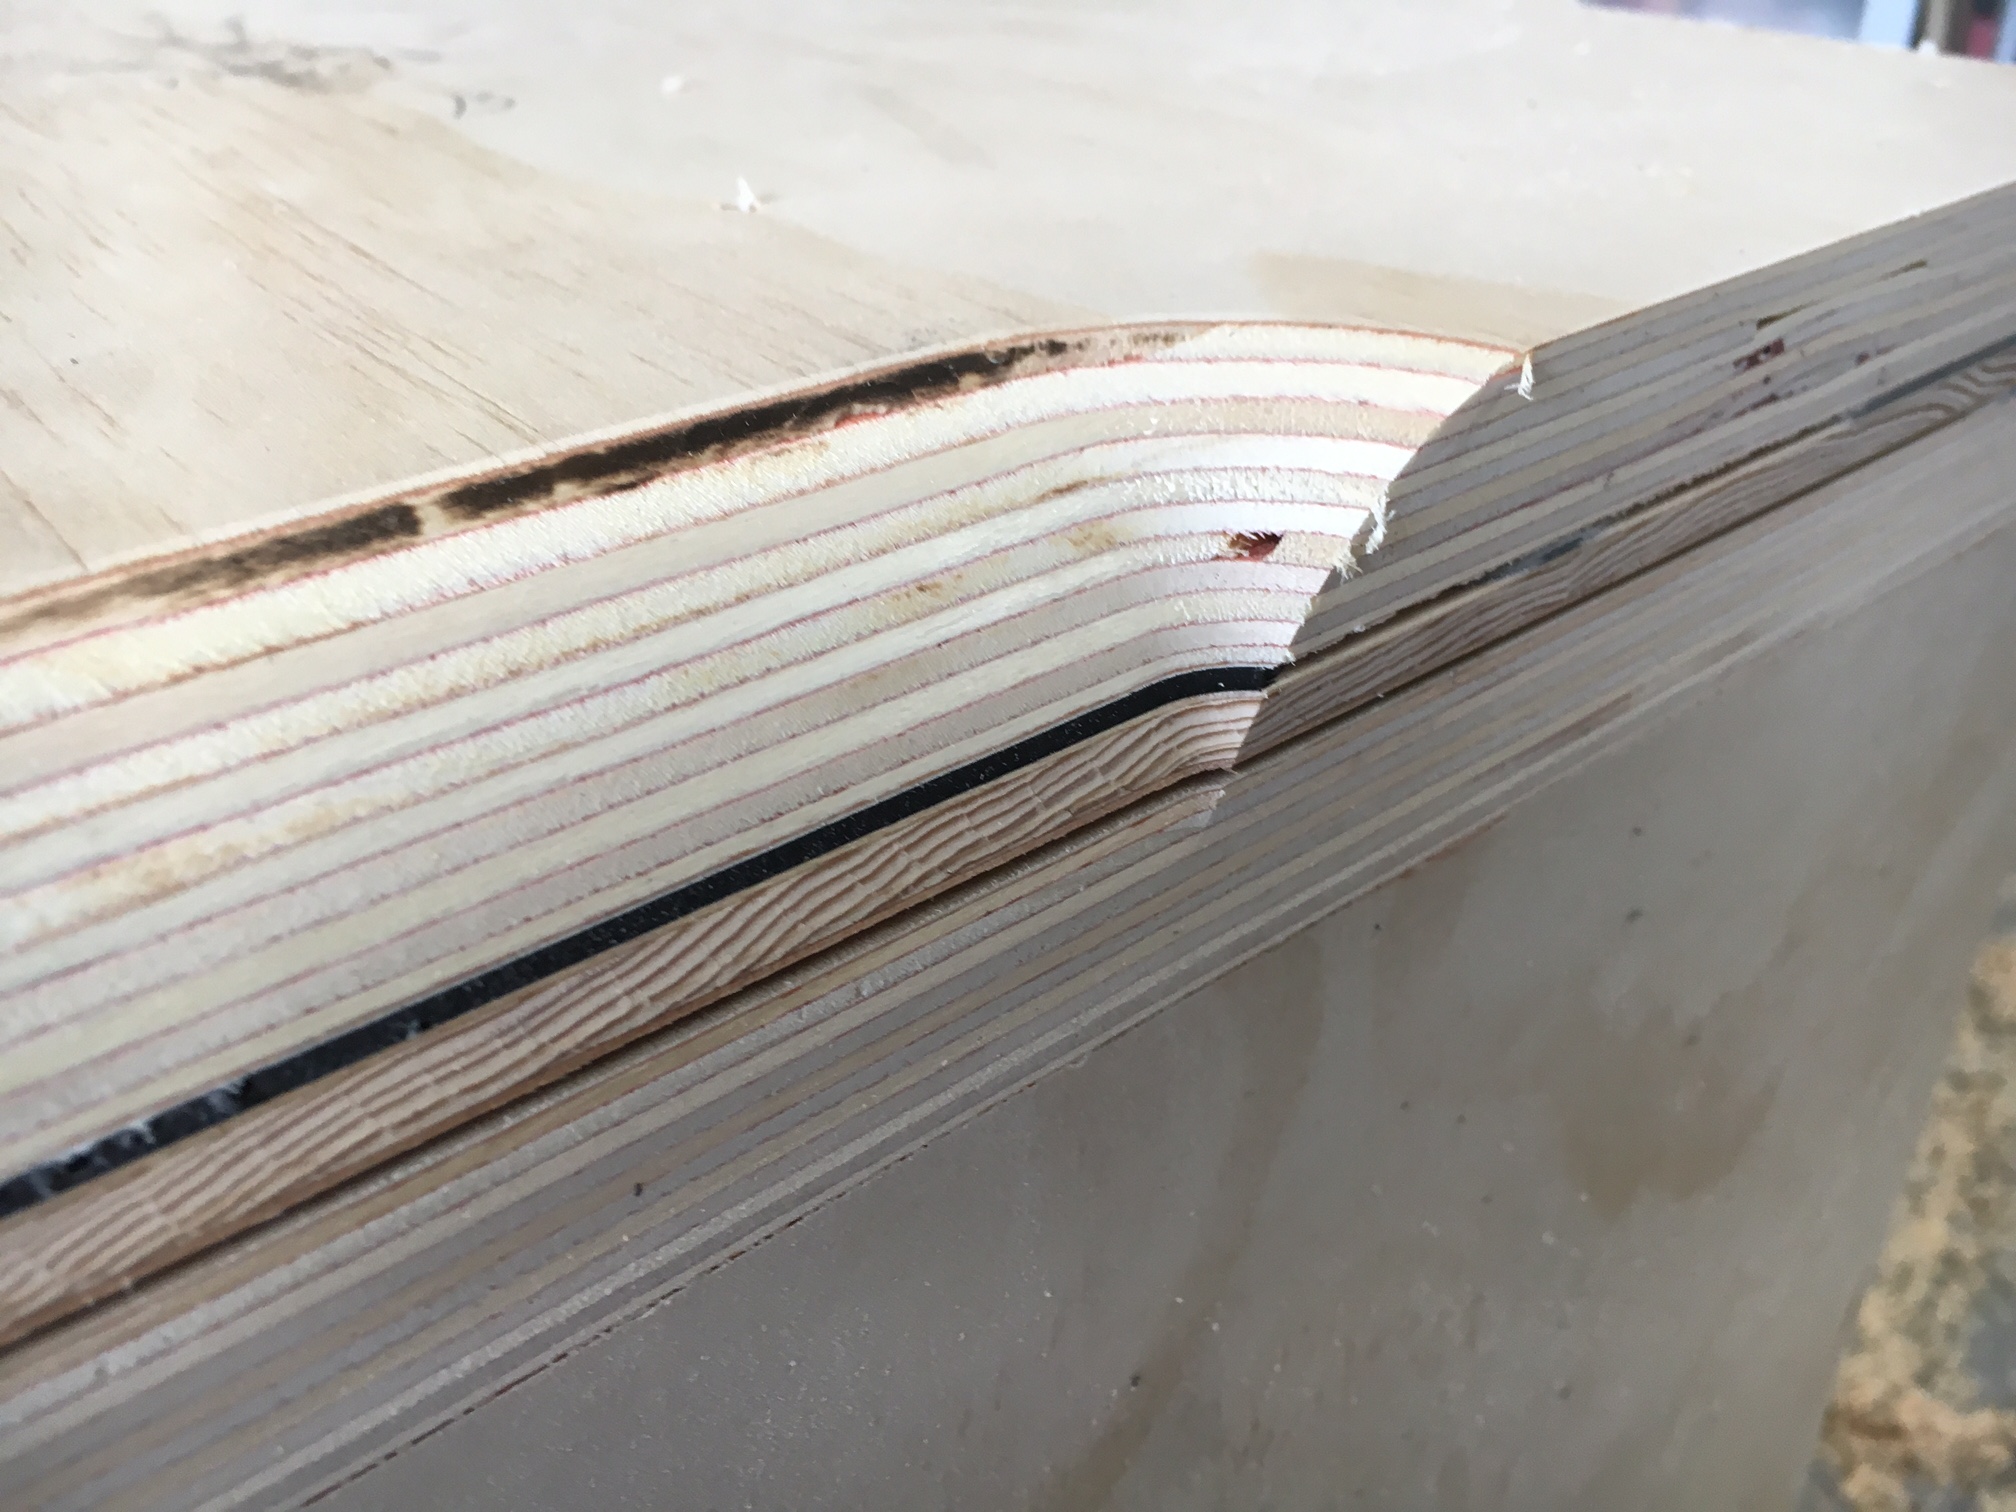
I personally love the look of plywood so I always show off the seams with pride and finish them off nicely. In this case I sourced a 1.5″ radius router bit and modified my router to allow it to be run, this guy is a handful but it makes very nice big radii! The front baffle was treated with this large radius to reduce the effects of diffraction on the front baffle. The port also got a 1.5″ radius to eliminate turbulence, the rest of the enclosure got a 3/4″ radius.
The back of the enclosure was stained with Minwax Espresso stain, then the 1/4″ layer on the front baffle was stained red to highlight it, and the front of the baffle was left unstained. The whole enclosure was sprayed with Minwax semigloss polyurethane to finish.
Crossover Design:
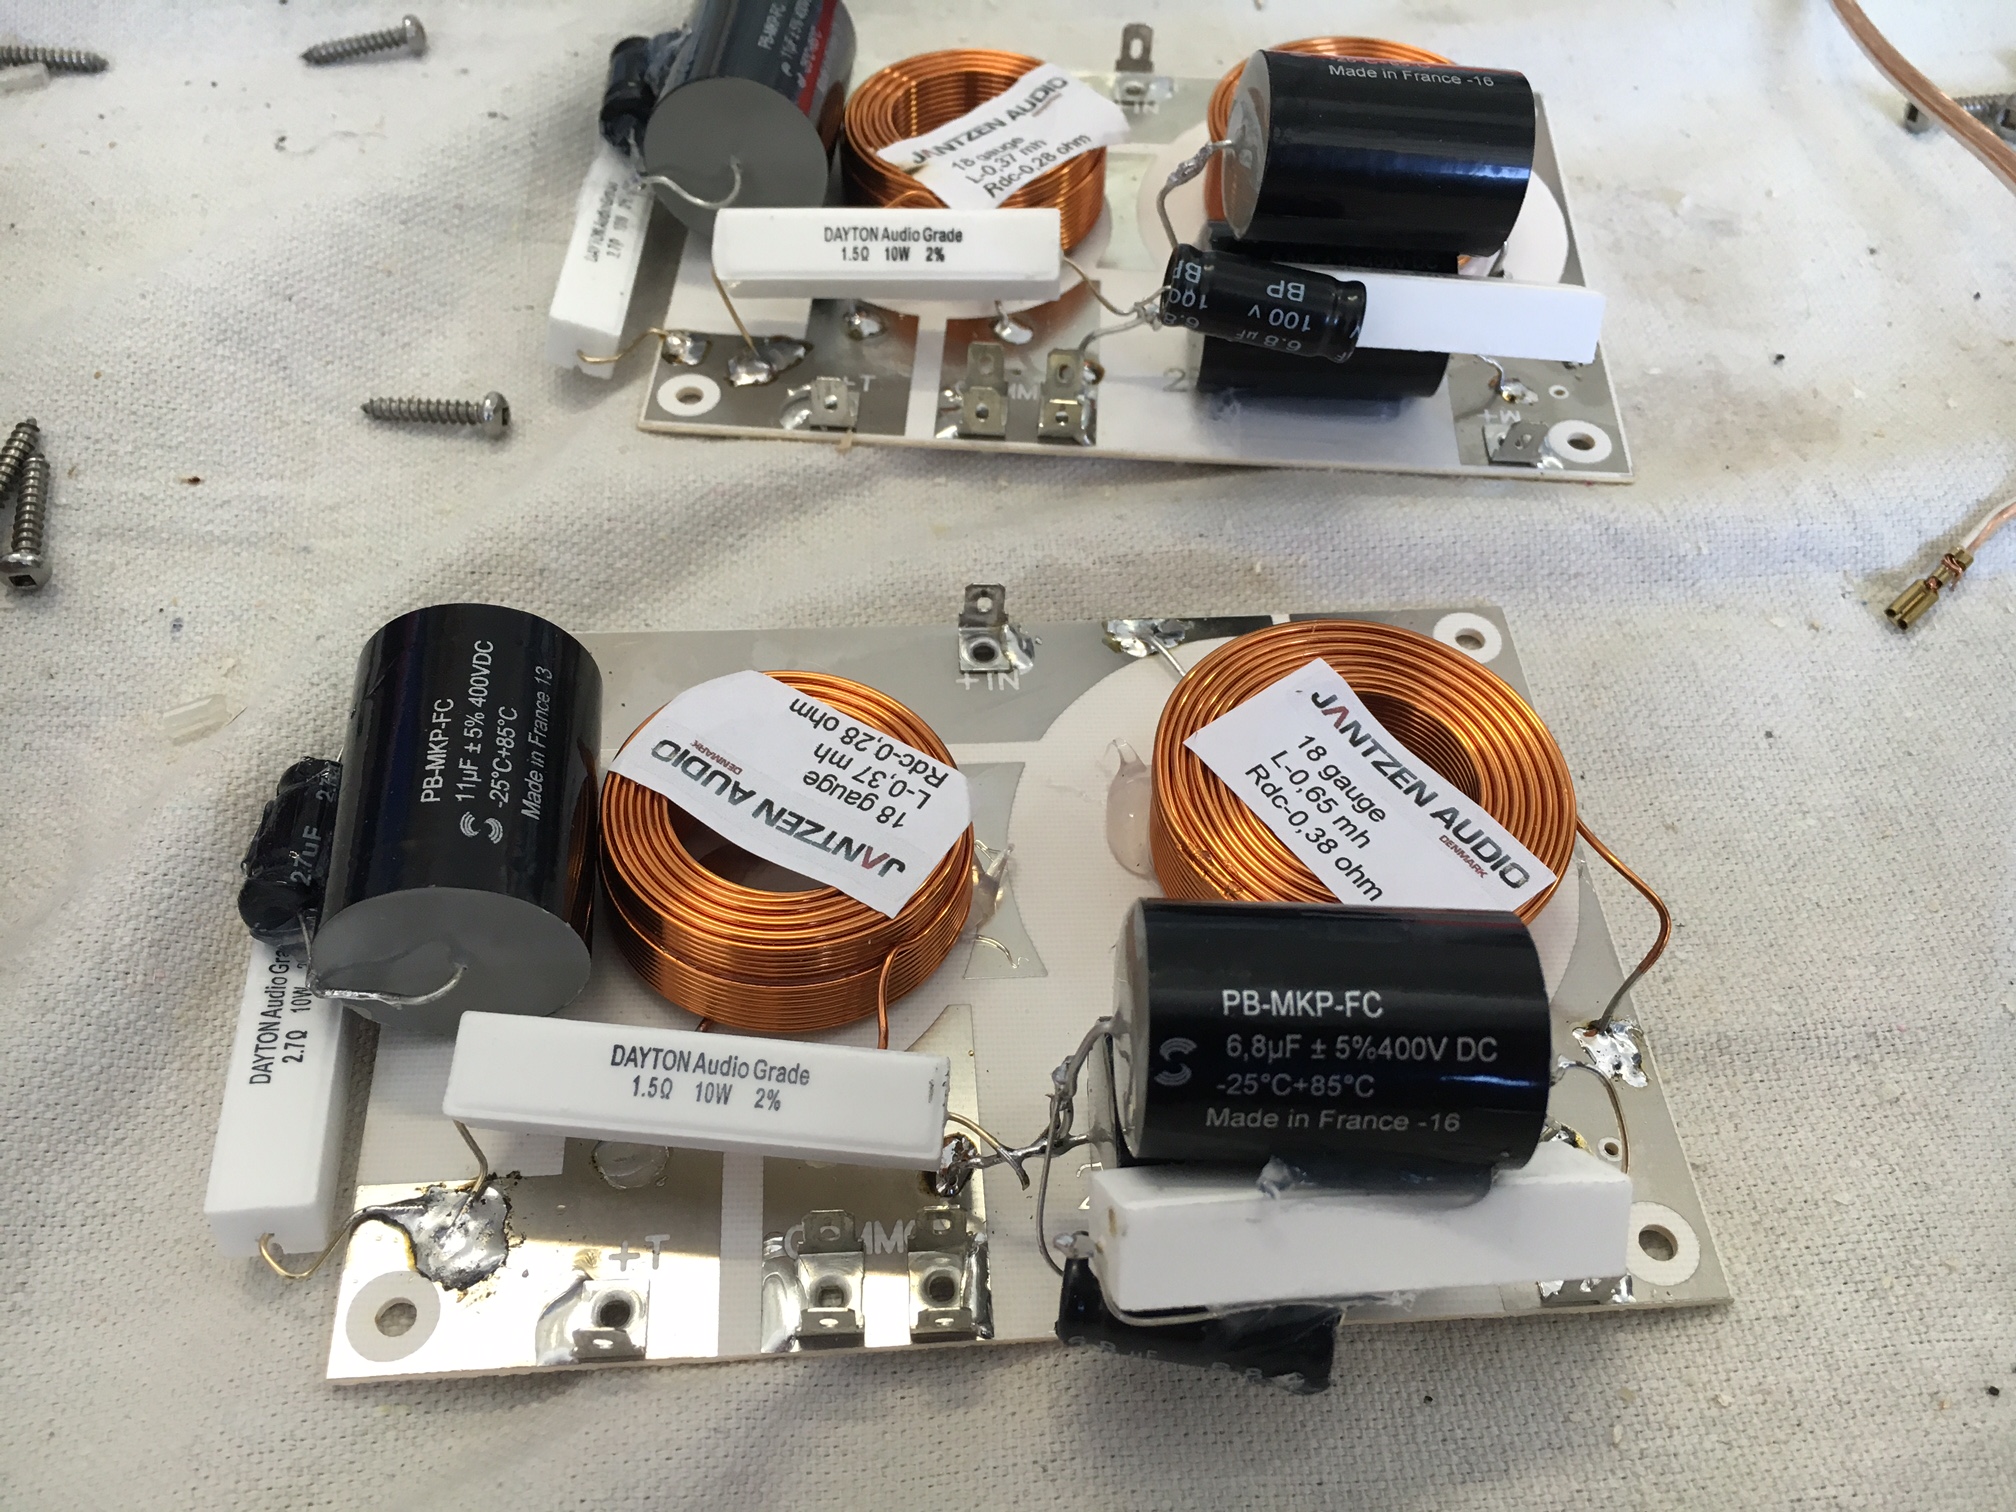
I modeled the passive crossover several different ways, this was the most effort I’ve ever put into a passive crossover and I am really pleased with the results! Initial modeling showed a 12db Bessel on the woofer of about 1800 and the tweeter of about 2000 would give flat response, so that’s where I started.
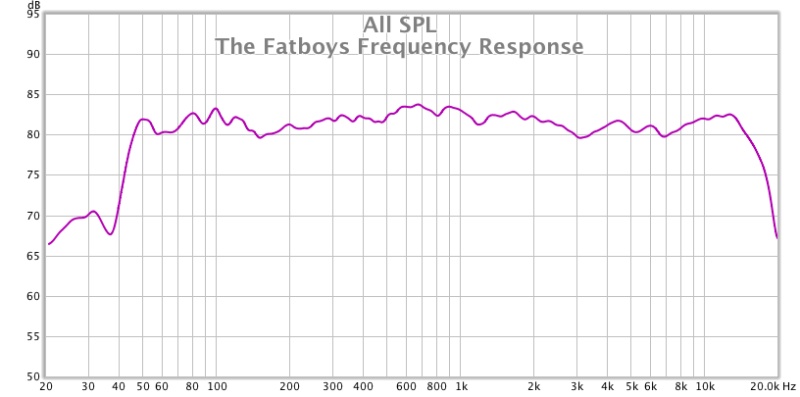
Initial frequency response measurements showed the tweeter about 6db hot of the woofer and with a very rising response to 10kHz. Adding a zobel smoothed out tweeter response noticeably, I padded the tweeter about 5db down and after playing with component values, was able to get a very smooth response of about +-2dB from 40-20kHz.
I lost track of the exact components, but leave a comment below if you’d like help replicating one, I need to pop one out of the box and write down the final values.
Tips & Tricks:
Many are outlined above, but here are a few more:
1 – I highly recommend using the red corner clamps pictured in the box construction, they make assembling the box a breeze and save a lot of time.
2 – Test everything on scrap so when you do it on your final piece, it’s not an experiment. Once I prove it works on some scrap material, then I’m confident to do it right the first time on my final piece.
3 – Get a good mic measuring system like Omnimic or similar, ears are only so good for tuning a speaker but they’ll know it once it’s tuned correctly using measuring equipment!
Conclusion:
I am very pleased with these and they scored a respectable 7.2/10 at MWAF, considered “above average”. But most importantly, these sound very good in my listening room, they don’t need a subwoofer and can play loud bass in room to 30hz, as much as many 10″ subwoofers I’ve heard. Imaging and clarity are excellent, these speakers belie their size and can really fill a room with virtually realistic sound.
About the Designer:
Javad Shadzi manufactures high performance auto products during the day and speakers during every other waking minute he can steal away when he’s not spending time with his incredible wife and 4 children.
Project Parts List
|
Part # |
Description |
Qty |
|
264-874 |
Tang Band W6-1721 6-1/2″ Underhung Midbass Driver |
2 |
|
264-1028 |
Peerless by Tymphany BC25SC06-04 1″ Textile Dome Tweeter |
2 |
|
091-1245 |
Dayton Audio BPA-38G HD Binding Post Pair Gold |
2 |
|
260-130 |
Crossover PC Board 2-Way 12 dB |
2 |
+ There are no comments
Add yours