Noah’s 8’s
Designer: Noah Hopson
Project Time: 8-20 hours
Project Complexity: Hobbyist
Project Cost: $100-$500
Driver Selection
Since I was loosely basing my plans on a previous design, and I wanted deep bass extension, I knew that I would use the Dayton 8″ classic woofer and the Dayton 1 1/8″ classic silk dome tweeter. Both of these drivers have won the praises of a wide group of DIY builders, and I felt comfortable investing in them, especially with the great service I have had with Parts Express in the past.
Enclosure Design
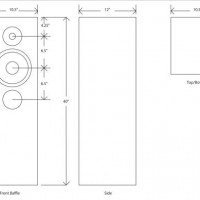
Using Bassbox 6 pro, I modeled several ported enclosures, and by toying with dimensions and some of the stock ports that were available, I was able to come up with a design I thought would be suitable. A box built using 3/4″ MDF and external dimensions of W=10.5″, D=12″, H=40″ with a 2 7/8″ diameter port 5″ long gave a Vb of 2.058 ft^3 and an F3 of about 34hz. I planned on starting with minimal stuffing, but playing with different amounts to find the right amount. The basic design of the enclosure is available as a PDF. Project Edit: Due to availability, the port tube has been replaced by a 2-3/4″ diameter, 4-3/4″ long port. This enclosure design makes it easy to get all of the dimensions the same when cutting out the wood, since the front, back and sides can all be cut 10.5″ by 38.5″ and the top and bottom will both be 10.5″ by 12″. My planned crossover point was 2000hz so I set driver spacing at 6.5″ c-c with the drivers all surface mounted in the centerline of the baffle, with the tweeter centered 3.5″ below the top of the baffle before the top was installed or 4.25″ from the top of the finished speaker and the port 6.5″ c-c below the woofer.
Amplifier/Crossover Configuration
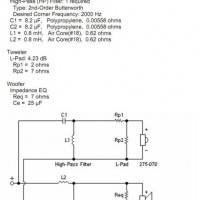
I used X-over 3 Pro to model the crossover network by importing the measured driver data from Parts Express. I had worked with crossovers for car audio, but this is by far the most complex and sophisticated crossover that I have done. My main goals here were to maintain flat response and flat impedance above 4 ohm from about 34hz up while minimizing the parts count and trying to take advantage of any bulk part discount that I could, in order to be able to afford higher quality components. What I came up with is a second order Butterworth crossover at approximately 2000hz for both the woofer and the tweeter. I also ended up using a 4.2db pad on the tweeter and an RC impedance compensation network on the woofer. The crossover components were all soldered end to end and zip-tied or fastened with epoxy to pieces of pegboard which were then attached with silicone to the bottoms of the enclosures. The exact circuit schematic from X-over 3 Pro is available as a JPG image.
Enclosure Assembly
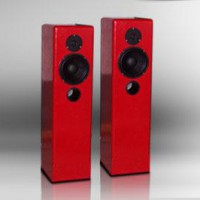
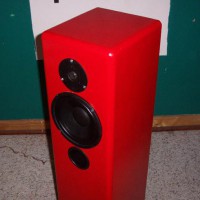
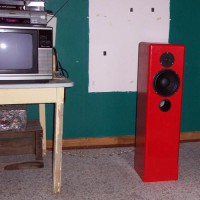
In order to save money and a little weight, the MDF was given up in favor of some very high quality 3/4″ birch plywood. One sheet of plywood was cut into two 38.5″ long pieces in order to cut the 8 10.5″ x 38.5″ pieces necessary for the front back and sides of the boxes. This was done using a tablesaw set up for making such large cuts. The tops and bottoms of the boxes were then cut from the remaining wood. The baffles were marked for the drivers, and the holes for the woofers were cut using a jig saw with a down cutting blade. The holes for the tweeters and the ports were cut using a 3″ hole saw and finished with the jig saw. The tweeter hole had to be trimmed to accommodate the terminals and the port tube hole had to be enlarged slightly. The enclosures were then partially assembled using wood glue and brads for the front, back, and sides. The tops were then installed using wood glue and screws, though the screws were removed once the glue had dried. The crossovers were to be attached to the bottom of the enclosures, and being my first design, I wasn’t sure enough of them to have them permanently installed. This led me to decide to make the bottoms of the enclosures removable. They are attached with #10 3 1/2″ screws and sealed with a gasket of vinyl foam tape. The edges of the enclosure, I routed using a 3/4″ radius bit down to about 4″ from the bottom. The edges were all sanded and wood filler was used to smooth the seams. Since I did not want to spend a lot of time on finishing the wood, I decided to paint the boxes. I used latex primer and paint and applied the paint with a hand brush to give them a rough kind of finish that will be easy to touch up, but relatively durable. They are painted what I will call an alarming color of red that matches no furniture I have ever seen. Good art isn’t supposed to match your furniture. The inside of the box is lined with 2″ thick polyfill-like material on the top, back and sides down to about 8″ above the crossover board. If I had to do it again, I might order the egg crate foam and use that, but the stuff I used was free and works pretty well. If anything, the boxes could use just a little more stuffing.
Conclusion
I spent a very frugal amount on these speakers in my opinion. The total for the drivers and crossover parts including the port and binding posts came to just over $120 plus shipping. Even with box materials, these could be built and finished as I did for considerably less than $200 making them very competitive with name brand offerings. It is also my opinion that they produce excellent output, though I ask that you keep in mind that my opinion is one of an admittedly inexperienced and low budget fan of home and car audio. I don’t own multi-thousand dollar audio equipment, so these very well may be the best speaker system I have ever had in my house. That said, I will give my assessment: the drivers seem to blend very well, and even with the tweeters surface mounted I don’t hear any sibilance or peaks, nor do I sense that there is an audible dip in the midrange. Both male and female vocals sound natural both singing and speaking, and piano and acoustic guitar sound delicate and musical without being harsh or ringing. Upon first listening, driving them with my newly restored Marantz 2220b receiver, I was also immediately impressed with the depth and clarity of the low end. Electronic music sounds even and unstrained with powerful bass, and bass guitar heavy music sounds clear and uncolored. As a stereo home theater setup, these definitely exceed my expectations in clarity of dialogue and the depth of the audio effects even without a subwoofer, and I think they would be well suited for use as the main speakers in a multi-channel home theater setup.
About The Designer
I am a mechanical engineering student, and a junior at Grand Valley State University in Grand Rapids, Michigan. I have been doing DIY car audio for several years and this is my first foray into home audio. These speakers were designed on my own time and for my own use. I am happy to assist in any way if you have any questions, but I am not claiming to be an expert of any kind, certainly not an expert when it comes to speaker building. If you build these I would love to hear any constructive criticism or ideas for future improvements, as at this point they are in their fist iteration. Noah Hopson (2005)
Project Parts List
|
Part # |
Description |
Qty |
|
295-310 |
1 |
|
|
275-070 |
1 |
|
|
260-409 |
1 |
|
|
091-340 |
1 |
|
|
027-426 |
1 |
|
|
027-438 |
1 |
|
|
004-2 |
Dayton Audio DNR-2.0 2 Ohm 10W Precision Audio Grade Resisto |
1 |
|
004-7 |
Dayton Audio DNR-7.0 7 Ohm 10W Precision Audio Grade Resisto |
1 |
|
255-044 |
1 |

Nice build! Those woofers are really good for the money.