The Esoteries (ES-3’s)
Designer:
Tom Zarbo
Project Category:
Tower Speakers
Project Level:
Intermediate
Project Time:
20+ Hours
Project Cost:
$500 – $1,000
Project Description:
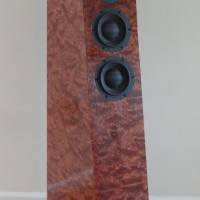
This is a mid-size tower speaker using very high quality speaker drivers in a TMM slanted-baffle design layout.
Design Goals:
Most of the speakers I design and build utilize drivers that are more modest in price than those used in this speaker. However, I’ve always wanted to do an ‘all-out’ speaker system to see what was possible with higher-end drivers. This was my chance to build a ‘special’ set of speakers that will hopefully grace my home for many years to come.
Driver Selection:
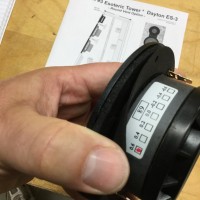
After hearing both Esoteric woofers in several designs, I wanted to try them out for myself. Wanting to build a narrower mid-sized tower, I decided to double up on the smaller 5 1/4″ woofers while hopefully maintaining adequate bass capabilities.
I had a set of unused silk domed Reference Series tweeters in my stash already. The silk domed RS tweeters seem to be less used than their aluminum domed brothers, so I thought it would be a good chance to see what they could do in a high-end system.
Enclosure Design:
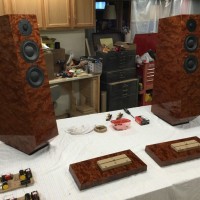
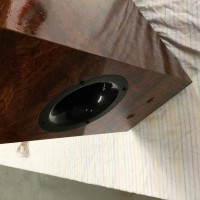
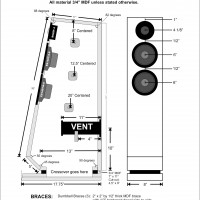
My goal for these cabinets was to build a unique looking, but still fairly easily constructed cabinet that would stand out in a crowd of normal box-type speakers. I wanted this cabinet to be able to be built by others fairly easily with fairly basic woodworking tools that many folks would likely have in their woodshop. The cabinet is around 41 liters, vented with a 3″ by 11″ Precision Port tuned to 32 Hz.
Enclosure Assembly:
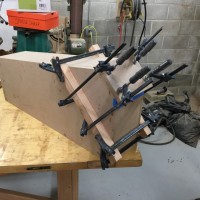
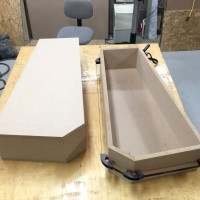
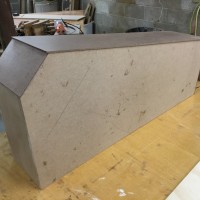
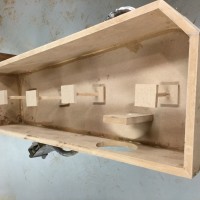
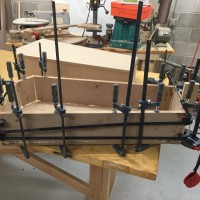
The cabinet with its angles may look difficult to construct, but it’s not hard if you have a compound miter saw or table saw. Included in the pictures is a cabinet drawing with all the dimensions and angles needed to reproduce the cabinet. I made the side slabs slightly oversized and trimmed off the excess with a straight cutting router bit after the sides were glued on. I used strap clamps to hold the top, bottom, back, front, and front angle pieces in place during the glue-up process. I suspect carefully tacking these pieces together with an air-gun and brads would work as well. Those pieces were also glued to one of the side pieces at the same time. After some clean up and applying caulk to the inside seams, I glued in the side-to-side and vent braces. Then I glued on the second side panel using polyurethane glue to help seal things up.
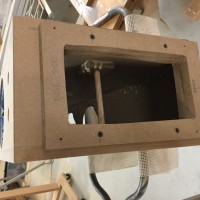
All that was left was to build the base, transition piece, and machine the driver/port recesses and cut-outs with a circle jig and router.
Crossover Design:
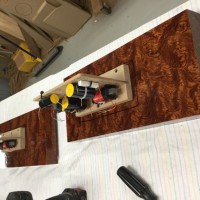
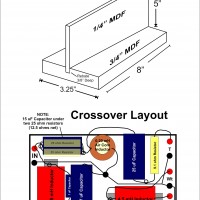
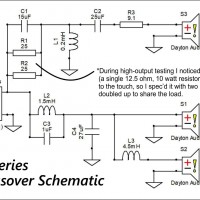
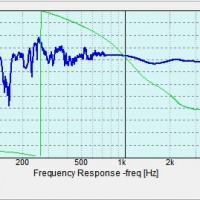
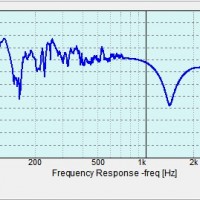
The woofer filter is second-order LR with an additional .5 filter on the lower woofer. The tweeter filter is third-order LR. There are a few response-shaping bits added to take care of some dips and peaks in the drivers natural response, as well as level matching on the tweeter. The crossover point is approximately 1,700 Hz and uses 10 parts. This is a 4 ohm speaker.
Tips & Tricks:
In order to minimize the chance of the end grain of the MDF showing through the veneer in the future, I applied 1/8″ HDF (High Density Fiberboard) to the front, top, and lower angled front pieces of the cabinet as well as 1/16″ Maple veneer to the back.
Conclusion:
My goal was to build a higher end, or ‘reference’ type of speaker using the best drivers the Dayton Audio brand had to offer. I’m happy with the results and I feel that the clarity of these speakers, even at higher levels speaks volumes about the level of refinement and quality of construction of these updated Esoteric woofers.
About the Designer:
I’ve been dabbling in speakers since I was a teenager when I built my first set of speakers. They were probably not the best sounding speakers, I had little to compare them to… but I had been bit by the bug — and have been striving for better sound and more creative cabinet designs ever since.
Project Parts List:

Awesome design and craftsmanship! I’ll bet they sound fantastic! The wood/veneer is beautiful!
Thank you, The veneer is nice looking, but kind of expensive. I got it from VeneerSupplies.com
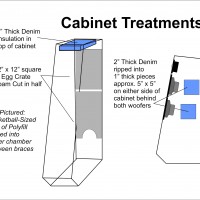
I’d like to know more about the 2″ thick denim on each side of the woofer.
1. Where did you get that idea? 2. I realize it is to absorb early reflections , but why denim? 3. is the denim stacked to make 2″ thick? 4. Is it loose (hanging) and just fastened at the top? 5. Does it work? have you tested it?
Any help is appreciated. Thank you in advance.
-David Wagner
Wagner Audio
David,
The denim insulation I used is “Ultra Touch” Denim Insulation I purchased online from Home Depot. It’s pricey stuff but it won’t make you itch. It comes in 2″ thick rolled bats.
If memory serves, I used spray adhesive to secure it to the sides of the cabinet, possibly a few staples for insurance?
I did not measure or try the speaker out without the insulation. I felt that given the close proximity of the woofer to the side walls, some ‘softening’ would be helpful. Just make sure it doesn’t impede airflow in any way.
Where do you get your veneer?
Is there another tweeter that can be used that will work the same. The one you used is unavailable!
Bob,
I got the veneer from VeneerSupplies.com. Fairly reasonable and excellent quality. I used paper backed and used the iron-on method.
I’m aware that the RS silk tweeter I used is no longer available. You may be able to source one from Ebay… or Parts Express may be able to find another manufacturer for the Alum. and Silk reference series tweeters (hopefully) in several months.