Act 3
Designer:
Neil Davis
Project Category:
Loudspeakers/Cabinets
Project Level:
Intermediate
Project Time:
8-20 Hours
Project Cost:
$100 – $500
Project Description:
Act 3 is the third in a series of designs that will result in a compact yet potent wireless 2.1 active system that can be used for computers, TV’s and other entertainment equipment. Act 1 was a subwoofer using a Dayton Audio B-REX cabinet with two Tang Bang W5-1138SMF subwoofers and a Yung SD-100 plate amp. For Act 2, we came up with a 6-channel plate amp with WiFi and DSP. And now we get to build something a bit simpler that can take advantage of the DSP horsepower in that plate amp. The details of the software will get addressed in Act 4.
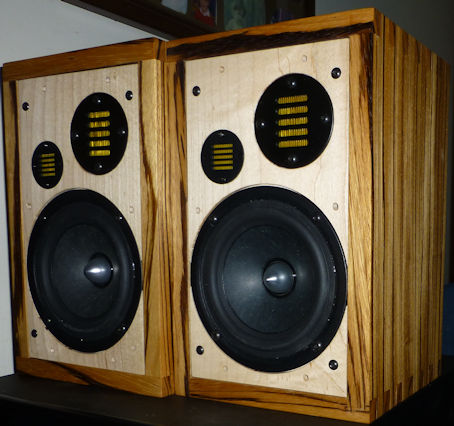
Act 3 is two sets of speakers that are interchangeable–that is, either set could be used with the plate amp described in the Act 2 project. One set uses a cabinet made from locally-grown cherry and the other set is built using solid zebrawood. Both speakers use the same connector and channel assignments for the DSP, and by simply reprogramming the DSP from a cell phone, either set of speakers can be used with the subwoofer and amplifiers. Although these are active speakers, one of the speakers has an interesting twist by using an unusual AMT tweeter combination with a passive crossover at 5000Hz.
Design Goals:
The overall design goal for the Act series is to create a DIY version of the Sonos, Heos or Bose active WiFi speakers, but with better audio quality. Act 1 gave us a medium-power subwoofer to fill in the area below 80 to 150 Hz. The main design goal for this phase, Act 3, is to develop a generic satellite 2-way active speaker, where the design supports a wide range of 3” to 5” woofers with many different tweeter options. We will show two different variants of interoperable speakers—where you can quickly plug in one or the other, and select the DSP profile that optimizes each variant. Another design goal is to show what can be done with real hardwood cabinets that can have a high “spouse approval factor”.
Driver Selection:
One of the nice benefits of using separate amps and DSP in active speakers is that driver selection tends to be a lot less critical than with passive designs. If you use drivers that behave reasonably well in their assigned frequency band, you can usually use them successfully in an active speaker, even though they may be difficult to work with in a passive design. So, this was an ideal opportunity to draw on my stash of drivers in the attic and put some of those unused Christmas presents to good use.
The cherry cabinets used some SEAS Excel W14CY-001 woofers purchased many years ago, along with the Tymphany (Vifa) NE25VTA-04 aluminum tweeters. The Excel woofer uses a magnesium cone with prominent breakup modes in the 10KHz area, and it has a well-deserved reputation for being a “difficult” driver to work with. However, a steep 8-pole crossover at 2KHz or so will completely suppress those breakup artifacts. And this relatively low crossover point is not a problem for the ¾” Vifa tweeter, especially with that steep filter.
The tweeter selection for the zebrawood cabinet was one of those ideas that gets stuck in your head and won’t leave you alone. Every time I looked at those zebrawood stripes, I was reminded of the AMT drivers that PE is carrying—the AMT mini-8 and the AMT-2. However, neither of those tweeters was “ideal”, as the mini-8 didn’t extend low enough to integrate well with a 4” or 5” woofer, and the AMT-2 suffers from some “beaming” for frequencies over 5KHz due to the relatively large size of the diaphragm. So, I decide to use both tweeters, with a passive crossover at 5K between the two. This passive crossover was a simple 2-pole Butterworth filter. Because the AMT impedance is almost entirely resistive, I was able to use textbook values for this crossover.
The zebrawood cabinets were just the right size for the Dayton RS125 4” driver. I had a couple of speakers that I intend to rebuild that already had the RS125 driver, but I decided to save those cabinets and drivers for Act 5, or “Curtain Call”, as it will probably be called. Since there aren’t too many other drivers with the right dimensions, I ended up buying the MCM 4. 5” driver, 55-5655, to give that new driver a listen. In retrospect, the RS125 would have been a better choice, since the MCM driver is now a special order item.
Enclosure Design:
Both cabinets were sealed, in the 4L to 5L range. This internal volume results in an F3 of 90Hz to 120Hz for the drivers that were considered for these cabinets. Since these will be used with a subwoofer and an active crossover for the subwoofer to woofer transition, the box dimensions are not critical. In fact, I simply used the amount of wood I had to determine the box final dimensions, and just scaled everything to achieve a “golden ratio” (1.6) of height to width.
If the drivers and cabinet were a bit smaller, using a 3” to 4” driver, it might be worth looking at a vented cabinet design to extend the response to allow a low crossover to the subwoofer. Alternatively, some additional filtering could be provided in the DSP to electronically extend the response.
Both cabinets used a removeable front baffle that is affixed using tee nuts and machine screws to cleats glued to the internal cabinet walls. The removable baffle makes it easy to service the drivers or to repurpose the cabinets with a different set of drivers. The speakers still need grills, but I’ll make some simple covers later.
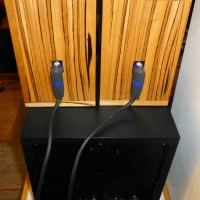
A key design feature is the use of Neutrik Speakon connectors. They are reliable, easy to use, and they allow swapping in different cabinets without worrying about polarity and getting the right channels to each driver. I always count from the top and use the 1+ and 1- pins for the tweeter and 2+ and 2- for the woofer. Mounting the connectors is easy: just use a plate made from a 2” by 3” strip of ¼” wood, and then drill the 24mm hole and mount the Speakon to the plate. Cut a 1-1/8” by 1-1/2” opening on the back of the cabinet, and then mount the plate to the inside of the cabinet with the connector sticking through the opening. The connector should be at the “bottom” of the rectangular opening with the latch at the top so there is some room at the top to insert a fingertip to release the connector. If you use a right-angle Speakon connector, it will stick out about ¼” from the back of the cabinet, making a very nea t and compact connection. Make sure the top of the rectangular opening is at least 5 inches above the cabinet bottom so there is room for the connector and the wire.
Enclosure Assembly:
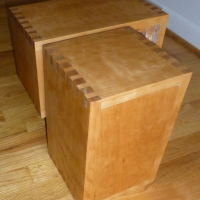
As already noted, one of the cabinets used locally-grown cherry from our cabin in Western Maryland. This wood has a large amount of figure, so it would be classified as curly cherry, yet it is very stable and easy to machine. When used with a penetrating finish such as tung oil or boiled linseed oil, the wood takes on a rich depth that creates refraction patterns of dark and light that move as you change viewing position. This interesting and visually appealing scattering of light is called chatoyance.
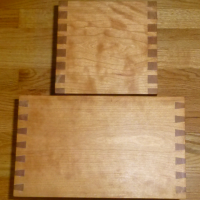
I had purchased a Porter Cable dovetail jig a while back and decided to use it for the first time for these cherry cabinets. Dovetail joints are amazingly strong, and are overkill for ¾” wood. I did some test runs, and got some perfect 90-degree angles that were amazingly strong even without glue. But the strength wasn’t the objective here: dovetail joints simply look cool. It takes a couple of test runs to set up the depth and tightness, but the instructions with the Porter Cable jig are thorough. After a few good runs, I did all the tails and pins and then spent about 20 minutes cleaning up the router shavings. The best way to work with the dove tail fixture is to have a friend hold a dust extractor hose under the material as you use the router. Otherwise, be prepared to be coated in a heavy layer of shredded wood.
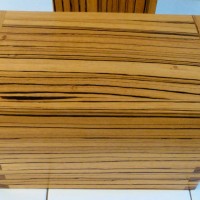
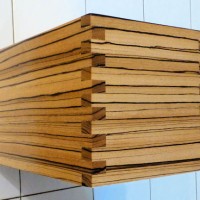
The zebrawood was quite different from the cherry, in that zebrawood is not straight and stable, and it does not machine well. This started out as a 2” thick plank that I sliced down the middle on a band saw. By the time I reached the end of the plank, the wood curved by over ½” along its length—there was a lot of stored tension that got released. This time I used the box joint templates rather than the dovetail template to keep the cut lines parallel to the grain.
After squaring up the pieces on the table saw and cutting the box joint fingers, I had to use clamps to get the pieces to fit into each other. Zebrawood has a lot of tension built up from the light and dark bands having different hardness and expansion properties, and making square joints with this wood is a real challenge. However, this time the box joints were not just decorative—they did a good job of forcing the corners to fit and stay square during gluing, and the interlocking fingers should keep those joints stable and strong. The zebrawood also tends to splinter in long strings—it doesn’t machine as nicely as other hardwoods. But going over the box joints with a razor blade helped remove all the fine threads left by the router.
With a couple of coats of penetrating sealer/varnish, the zebrawood starts to show its beauty and richness. The light and dark areas absorb the finish differently, but by using lots of coats (about 10) with fine sanding (1200 grit) in between, the finish starts to look uniform.
Crossover Design:
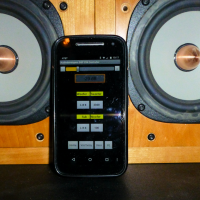
The key to achieving the goal of satellite design flexibility is the DSP on the plate amp. The DSP uses the popular ADAU1701 chip, but with a local CPU host that can calculate the filter coefficients from simple commands sent from a cell phone. So, if we change drivers or crossover points, our generic design can be tweaked and optimized by simply sending some commands from our cell phone.
There are many benefits from using DSP and dedicated power amps for each driver, but the main benefit is that it simplifies the crossover design. Specifically, the designer doesn’t need to deal with the complexity of passive crossover design. Passive crossovers interact with the driver impedance, so the designer needs to have reliable impedance measurements. Since the impedance of a typical driver changes with frequency, and because many drivers have different impedance curves, the passive crossover network needs to be designed for a specific set of drivers, and will only work well with those drivers. For an active system, the driver impedance curve is irrelevant, as the low impedance output of the amplifier completely “swamps out” the driver impedance. We still should measure the amplitude response of the driver, but for many drivers that are “well behaved” in the intended frequency range, even the amplitude response of the individual drivers can o ften be ignored.
The DSP crossover for the woofer and tweeter can be selected from a simple menu that currently includes 5 different crossover types (one-pole Butterworth; 3-pole Butterworth; 2-pole Linkwitz-Riley, 4-pole Linkwitz-Riley, and 8-pole Linkwitz-Riley). The crossover frequencies can be selected from 7 different frequencies (1200Hz, 1600Hz, 2000Hz, 2400Hz, 2800Hz, 3200Hz, or 3600Hz). Similarly, the subwoofer to woofer crossover can be selected from 4 different types and 5 different frequencies. These menu options are in a look-up table, and could easily be changed by either changing the code or downloading a custom table.
The DSP also provides baffle step compensation, selectable from 8 different frequencies ranging from 300Hz to 1000Hz, and 7 different levels from 0 to 6dB. Additionally, there is a 9-band equalizer that can be used to tailor the frequency response. And the volume of each driver can be adjusted over a 10dB range.
These DSP functions give us a lot of control over the drivers, and the settings are saved in non-volatile memory (EEPROM). So, we can optimize the settings for a given set of drivers and save those settings, and recall them later. By using a standard connector for the satellite speakers, we can quickly connect different cabinets that have different drivers, and simply recall the optimize settings for each speaker. There is a lot more discussion about the software and DSP control in the Act 4 write-up, which is the next one in this series.
Tips & Tricks:
Solid hardwood cabinets can look beautiful, but make sure you select the wood wisely. The wood needs to be thoroughly dried to be stable, and some of those exotic woods with interesting grain patterns—such as zebrawood—can be difficult to work with. It’s also helpful to consult one of those wood shrinkage charts to understand the amount of movement likely for different species in varying humidity conditions. Some hardwoods may not be suitable for areas that have large changes in humidity, particularly if the cabinet has large panels.
Dovetails or box joints aren’t really needed with strong modern glues, but they can useful for wood that tends to curve and for thinner wood where the gluing surface is small. However, they look nice and they help showcase the solid wood construction. The dovetail template is essential for those joints, and the template is easy to use. There is a lot of end-grain cutting with dovetails, so make sure you have sharp router bits and use a hardwood that doesn’t have excessive tear-out. I ended up cutting some extra end panels for the cherry cabinet because the wood split off two of the end pins. Take your time with the router and don’t try to cut out the tails or pins too quickly.
Conclusion:
After that complicated Act 2 project, this one is a refreshing break. But that’s the nice payback from using a DSP in the plate amp: the speaker design is easy, with no custom passive crossover to worry about. And we can use a wide range of drivers, and even use some of those hard-to-work-with drivers that take too many components to tame into submission. And we get to work with nice woods, which beats the drudgery of wiring any day.
The woodworking takes time if you are starting with rough cut wood, but by using precut and sanded lumber this project can be completed quickly. The cabinets can also be made from MDF, of course, and finished in many ways, or you could use prefinished cabinets or knock-down kits. But since these are the speakers that will likely end up on the desk on next to the TV, it’s worthwhile to use materials and construction methods that look nice.
The goal of this project was to describe a generic satellite design that can be used with the Act 2 sub/DSP. We’ve shown two different variations, and in the next article (Act 4) we’ll show how to load the software into the CPU to control the DSP and we’ll provide the instructions for downloading the cell phone app.
About the Designer:
Neil is a member of the PE speaker builder design team (SBDT).
Project Parts List:
|
Part # |
Description |
Qty |
|
275-095 |
Dayton Audio AMT Mini-8 Air Motion Transformer Tweeter 8 Ohm |
1 |
|
275-092 |
Dayton Audio AMT2-4 Air Motion Transformer Tweeter 4 Ohm |
1 |
|
092-053 |
Neutrik NL4MP-ST Speakon Connector 4 Pole Panel Mount |
1 |
|
092-192 |
Neutrik NL4FRX Speakon SPX Right Angle Cable Connector 4P |
1 |

Very attractive speakers. Well done.
Hi nice work on the speakers! Can hardwood be used for bigger speakers? Will it affect sound quality? Can you point me in the direction where I can get more info. I am interested in building cabinets with plywood sides and back but hardwood fronts.. 15″ woofers 3 way.. Something with some kick. Thanks for any input you can offer 🙂
Thanks for sharing such a nice information with us. By the way can you please tell me if hardwood be used for bigger speakers?