Sound, Meet Light
Designer: kctess51
Project Time: 8-20 hours
Project Complexity: Amateur
Project Cost: $100-$500
Driver Selection
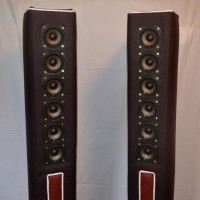
I needed something that was small enough to mitigate comb filtering effects, cheap enough to stay in the budget even with many drivers, and with low enclosure volume requirements. I went with the buyout Tang Band W3-881SI because it was cheap at $8 each, had good T/S specs, and was small enough that comb filtering wouldn’t set in too early, fulfilling the role of what I was looking for quite nicely. Also I like the gold and black cone.
Enclosure Design
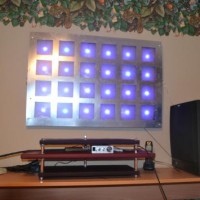
As I said earlier I decided to go with towers, and because I didn’t need them to play too low went with a closed design for simplicity, considering that this was my first project. I made them tall enough so that the drivers would be close to ear height when I was standing or sitting for good axis response over the listening area. I designed a way to incorporate my lights by inlaying a sheet of diffused plexiglass in back about half an inch from the back of the box and using LED strip along the length.
Amplifier/Crossover Configuration
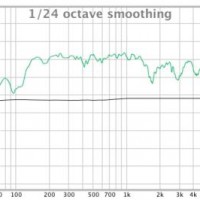
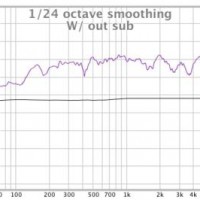
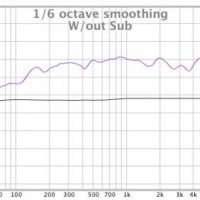
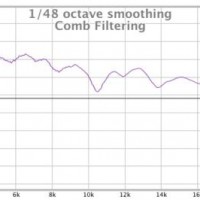
I originally planned on using the Parts Express pre-made 3 way crossover but decided to use an active crossover instead for simplicity and adaptability. They are technically full range speakers but they really need some help on the low end and could use some extra sparkle on top from some tweeters. I have a sub which helps down low and eventually I will add some tweeters to flatten the upper range which is subject to some comb filtering as seen on the response graphs. I needed a cheap amp to fit my budget and didn’t need all that much power because the arrays are pretty efficient. I went with the Lepai Tripath TA2020 amp, while it’s not the best, it sounds pretty good and was cheap enough that I won’t feel bad about replacing it.
Enclosure Assembly
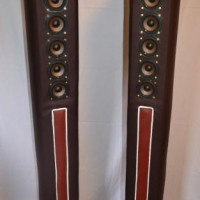
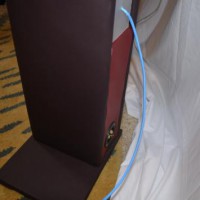
This part took, simply put, forever. Making the box with MDF (3/4”) went pretty well, but finishing it, which I had to do before I could put the drivers in took an incredibly long time. There are probably near 1000 staples and nails in each box, thank god for our pneumatic guns, they made the whole thing possible. This was the first thing I’ve ever upholstered so there was a bit of a learning curve but once I got the hang of it it went a bit faster. One thing that was tricky was making sure I had enough pressure to separate the staples, but not so much that it went all the way through the vinyl, as it did in many places. Thankfully the places where a staple went through are not very visible. I put some batting underneath the vinyl to make it a little bit more squishy, I imagine that this also helps a little with box resonances too. I used maroon vinyl for the accents, dark brown for most of it, and white piping to go between the colors. The overall effect is very nice and very retro. I love how they look and am glad I spent the extra time to finish them the way I did. I don’t have a grills, which makes them a bit fragile and me very (very) protective of them. Luckily the drivers are high enough off the ground that I’m not in danger of kicking them or my dogs doing something to them. I do close my door when I leave though just in case my cat decides he needs to sharpen his nails and my vinyl looks too good.
Conclusion
I am very happy with how these turned out. I love how they look and the sound is amazing. It is the second best sound system I’ve ever heard, the first being an (adult) friends ~$2000 system, also home made, though admittedly I haven’t heard all that many really good systems. I am excited to get the driver for the LEDs because then I will be able to do some cool audio effects such as beat detection controlling the lighting. The speakers sound great, with a very good soundstage and clarity. The highs are in need of some attention, but as soon as I can I will add some tweeters so I’m not too worried about that for now. Even my parents like them and can see that they are leaps and bounds better than all of our other store bought systems, and that I’m not insane for spending that much and making my own speakers, which is a plus. I hope you guys like them as much as I do!
About The Designer
I am currently a high schooler (junior) with an unhealthy addiction to making things. It started out with lighting projects, which lead me to use LEDs in the design, and has recently manifested itself in audiophile audiophoolery. I am constantly looking for something new to work on, and budget to do it with (the tricky part). Now I am looking into making some electrostatic panels for fun as a secondary system. The total cost of this system came in right around $400 which is about $100 over my original budget but I think it was worth it. I also enjoy skiing and mountain biking, when I’m not too busy building something.
Project Parts List
|
Part # |
Description |
Qty |
|
299-113 |
1 |
|
|
248-4708 |
1 |
|
|
310-300 |
Lepai LP-2020A+ Tripath Class-T Hi-Fi Audio Amp w/Power Supp |
1 |

+ There are no comments
Add yours