Alarm Clock
Designer:
Bobby Kinstle
Project Category:
Freestyle Speakers
Project Level:
Advanced
Project Time:
20+ Hours
Project Cost:
$500 – $1,000
Project Description:
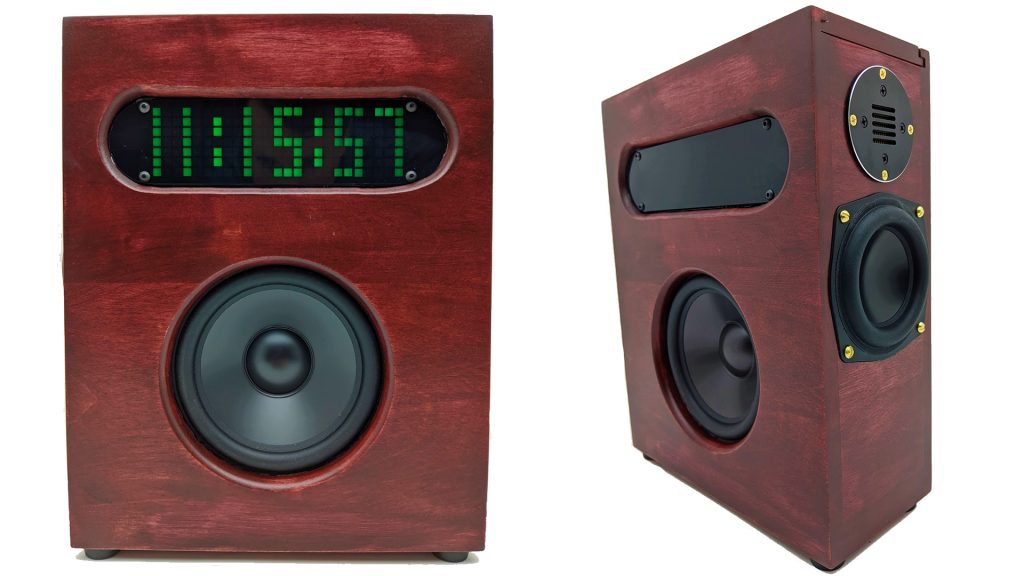
Last summer, after my son’s sixth birthday, he casually asked me for an alarm clock to wake him up in the mornings before school. Over this same summer he really started taking an interest in music as well, so I decided instead of buying an off the shelf alarm clock, I’d build something special for him to use and enjoy for many years to come. It started out as an FM radio, and then I tried to do HD radio only to discover its impossible for a lot of really terrible reasons, and finally settled on building a clock with amplified speakers with analog an Bluetooth inputs so that it would work with an external source, in this case an amazon echo input, so that the music source can keep pace with the inexorable forward march of technology and digital media delivery. From here the project was quite simple and I let my son pick out any digital clock that he liked to mount in the box.
Design Goals:
The design goals were to tell the time, play high quality music, be compatible with multiple music sources, and have a programmable alarm clock. I also bought the volume knob for the amp so I could set an upper limit of loudness my son could select with the external source. If Bluetooth proves unreliable, I can use the analog input instead.
Driver Selection:
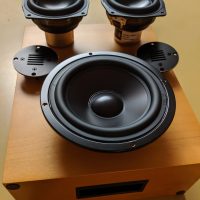
Given the extreme small size of the enclosure driver choices were limited. I originally considered a 2.1 design with 2 way stereo mains and a powered subwoofer, but the box was just too shallow to mount a speaker of sufficient quality. After running many different calculations on speakers that would fit, I realized the Dayton ND91 aligns well with using passive radiators. I’ve never used a passive radiator before, and the concept was a bit daunting, but after reading up on the math involved, I was able to find a nearly perfect match between using a pair of ND91’s and a Dayton Designer series 5” passive radiator with 7.2g of weight added. The ND91’s long excursion lets them belt out shocking bass even as low as 55Hz but they do pay a penalty in reduced midrange performance at high volume levels and heavy bass. This is a common issue with long throw woofers and something you’ll just have to accept. The effect isn’t deal breaking and frankly not an issue at alarm clock listening levels.
When it came time to pick the tweeter there were many good choices, but I decided if I’m going exotic with a passive radiator, why not jump right into the deep end with an AMT tweeter too? The AMT tweeter had a 3dB higher sensitivity than the ND-91 woofer, so I used the 8 ohm tweeter with the 4 ohm woofer to balance it out without burning off any power with resistors. Sweeps transition very smoothly between the woofer and the tweeter. I expected the AMT tweeter to be super sharp and possibly harsh, but it turned out much smoother than I expected. This combination is clear but the response is pretty flat and not overly bright as small speakers sometimes can be.
Enclosure Design:
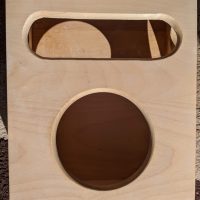
The enclosure is based on a birchwood box I found while cleaning up my mom’s estate. It had a nice finish on it and was very solidly built. It appears to be some sort of document filing box as the inside is exactly letter sized and it had a plastic pull handle on one end (which is now the bottom). A sliding panel at the other end allows access to the inside and fits very well but needed some gasketing to make a good seal. In the end I needed to lock it down very tightly because the ND91’s can generate impressive pressure levels inside the enclosure that bounced the lid around pretty hard and sounded like popcorn popping in a kettle.
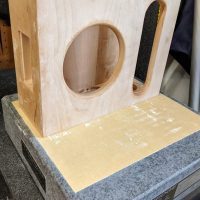
Since the original finish was scratched, I decided to refinish the box. This turned out to be a much bigger pain than I expected. The original finish was a color gel stain sprayed on top of a hard clear coat. Chemical strippers and a lot of scraping eventually got them off. Since the box was small, I attached a few sheets of sandpaper to a flat granite surface plate and sanded the sides *extremely* flat. Nothing says quality like perfect flatness. Staining was also problematic as the birch doesn’t absorb stain very well and I ended up using a gel stain finish. I’m not fully happy with how that part turned out but my son loved it and that’s really what mattered. After that I applied 4 coats of semigloss lacquer with a light sanding in between coats and a light polish with fine steel wool at the end.
Enclosure Assembly:
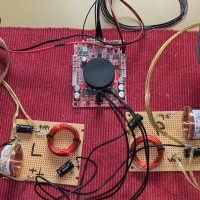
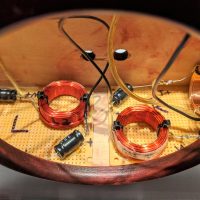
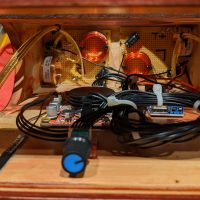
After cutting holes for the drivers, connectors, and the clock I secured the crossover boards to the bottom with generous helpings of hot glue. The power and AUX input jack screwed into the back side and sealed with hot glue. The amplifier board secured into the rear wall with wood screws and standoffs as well as the volume knob. I added a DC/DC converter to accept wide input DC and output 5V on a USB plug to power the clock and secured it with Velcro if I need to replace it later. The clock assembly fit into the slot and I used generous amounts of black silicone caulk to seal the edges on the back side. The passive radiator is glued on the backside with Loctite construction adhesive. Lastly, I secured the drivers with brass screws to break up the overwhelming blackness of the project.
I realize the glued items sounds like a one way trip but since I can only work on things through the small access door, it really was the only way to secure certain things.
Crossover Design:
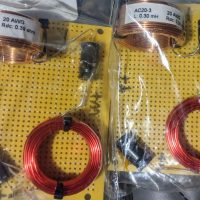
For the crossover I made a simple second order (12dB slope) 2 way Butterworth design set to 6Khz. Since the tweeter and woofer are different impedances, I had to adjust the component selection accordingly, however as I mentioned above, I did not use any impedance matching resistors as I was able to make the SPL rating the same by using different impedance drivers. I hate using resistors in crossovers and especially hate burning off power in a small enclosure that already contains an amplifier. I would not run a slope less than 12dB with an AMT tweeter. The coils and caps were glued to FR4 PCB material using an industrial strength hot melt glue gun. This is much stronger than craft hot glue but be warned it will blister your skin if you touch any of the liquid product.
Tips & Tricks:
1. Use the highest voltage power adapter the amp can support to increase dynamic headroom on class D amps. Use the volume as a gain control by setting the source to it’s highest level playing music, then adjust the amp volume knob to be a little louder than you’d ever want it to be, and the only use the source’s volume control to adjust playback after that. This will give you the lowest idle hiss from the amp while supporting the range you want and not run the risk of clipping.
2. Dremel makes a jig for cutting grooves and circles with their rotary tools. This jig is super sloppy and should not be used to cut anything other than drywall and even then you’ll need to cover it with a flange. Use a real router for cutting wood. The results are so much better, no matter how inconvenient it is.
3. Hole saws can cut a pretty clean hole if you clamp the work down and load the hole saw into a drill press. Take your time.
4. Confirm your wood is compatible with your stain BEFORE applying it to the project.
5. Solder connections when possible. All others crimp tight fitting connections.
Conclusion:
The project turned out very well for the effort. It plays far louder than any alarm clock has any business playing and at far higher quality than even premium alarm clocks on the market. I wouldn’t call it high fidelity, especially at high volume levels, but in general I’m very happy with it. It plays pretty solid down to 55Hz. Having the speakers on the sides of the box means placement is critical. It works best in a corner, or in the middle of a wall and has no difficulty filling a bedroom with music. My son is ecstatic about the clock, and he loves using the voice controls to program it and play music.
Here are a couple of videos I made with a good quality microphone to demo the system.
About the Designer:
I grew up in the Mojave Desert in a small community of scientists, craftsmen, and engineers. We were the kind of people who didn’t accept “it’s impossible” or “you can’t do that”. If I want something that doesn’t exist, I’ll just make one. Now I’m a thermal engineer in the computer industry and I currently hold eight US patents.
Project Parts List:
OTHER COMPONENTS:
9-36V Buck voltage regulator with 5V USB output
5.5mm Power jack threaded panel mount receptacle
Scientific brass slotted weight, 5g
Amazon Echo Input
Walmeck DS3231 DIY Dot matrix clock kit
16Ga speaker wire
4 Screw down rubber feet
Lots of various bits and bobs

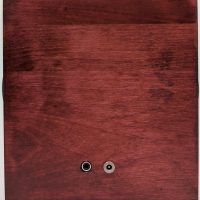
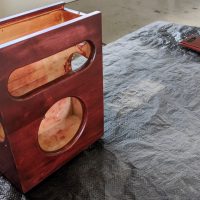
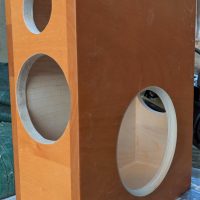
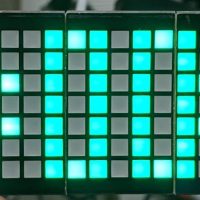
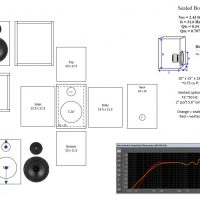
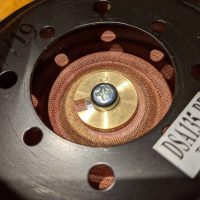
Since the submission I also added some felt sheets inside the box lightly glued to the wood and the inside of the lid. I also changed the way the lid seals to the box. These changes tightened up the bass decay, removed an echo that happened on certain drum beats, and also improved the volume of the deep bass notes.