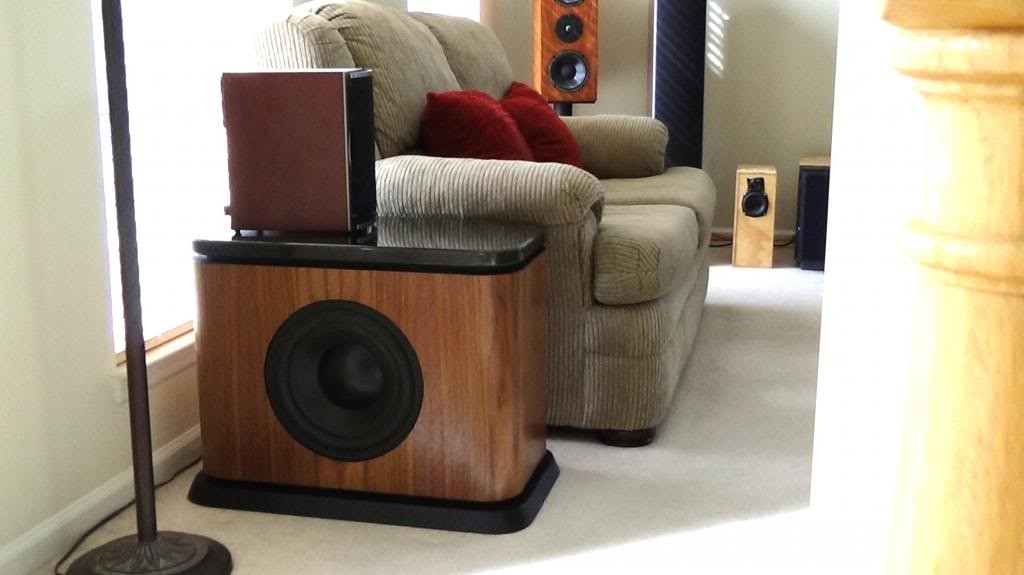
The Granite Titanic’s
Designer:
Thomas Zarbo Jr.
Project Description:
I had two 12″ Titanic MK2 subwoofers from a previous project that needed a home and I decided to build a dual-sub setup. This design uses quality materials and is also dual-use… the subs also serve as end tables.
Design Goals:
I wanted these subwoofers to be modestly sized, but also to look unique and higher-end. I wanted a durable, but beautiful top for these subs since they would also serve as end tables… and after consulting with a local kitchen remodeling center, I decided to have two granite ‘toppers’ created for the tops of these cabinets. I priced solid surface materials such as “Corian,” but because they came only in 1/2″ thick pieces, they would have to be built up to the finished size and would actually cost more than the two granite toppers I ended up using.
I also wanted to go smaller in size, and for these subs, that meant sealed. I ended up using a Crown 1,500 watt pro-amp to power these subs with, and with the built in crossover/processing available on that amp, I was able to get outstanding low-end output, even in a sealed cabinet.
Driver Selection:
As I stated previously, this project happened because I had two older Titanic MK2’s that needed a home. I actually started out with 4, but used two in projects for friends and relatives. Although a few generations old, the Titanic MK2 12″ subwoofer has high excursion and plays fairly clean, even by today’s standards. They are meant for home theater and don’t mind pounding out low bass all evening long if needed.
I suspect that the 12″ Ultimax driver would be an almost direct replacement for the ‘discontinued’ Titanic driver since it’s knock-down cabinet that PE sells is approximately the same volume as my boxes.
Enclosure Design:
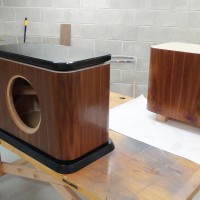
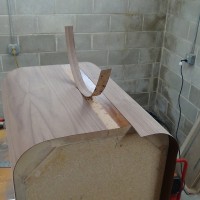
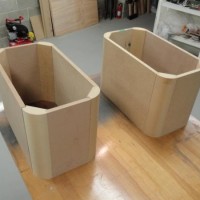
The design for the enclosure is straightforward except for the extremely large 3″ roundovers on the corners. I don’t have a router bit big enough to make a 3″ roundover, and even if I did, I wouldn’t dare use it! That’s over a 7″ wide piece of very sharp metal spinning inches from the fingers… and folks on the Tech Talk board are already aware of my slight phobia [intense respect] of the router table as it is. I purchased the 3″ roundovers from an online supplier who makes them out of several layers of glued-up MDF. They come with rabbits on each side ready to accept a 3/4″ piece of material. These large roundovers give this speaker project an unusual and kind of classy look in my opinion, and they are easy to work with. Just cut pieces the same length as the sides, glue and strap clamp together, keeping the cabinet square. The Walnut veneer I used for these had no trouble whatsoever conforming to the large curve on these boxes.
I chose the dimensions of these boxes carefully… They are wide enough to look like they belong on the side of a sofa or recliner, shallow enough depth-wise to be placed near a wall and not intrude much into the living space, and tall enough to hold a table lamp or surround speaker at a good height.
The cabinet dimensions are 14″ deep, 26″ long and 21″ high including granite toppers. There is a 1/2″ thick MDF ‘spacer’ between the cabinet and the top, and between the cabinet and the base which is inset approximately 1/2″. This provides a nice ‘break’ between these elements. Also, this gap hides the slight differences in dimensions between my cabinet and the granite pieces.
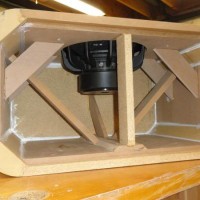
The cabinet is constructed of 3/4″ material, Particle board and MDF which mates with the prefabricated roundovers as outlined above. I also elected to further line the cabinets with 1/2″ MDF for added stability. Bracing was added to further stiffen the enclosure as pressures inside the cabinet are fairly extreme at high volumes… and I wanted a ‘dead’ cabinet
Except for the base, everything not veneered was painted with a quick coat of Rustoleum ‘Painters Choice’ laytex, which can be brushed on easily, dries quickly, and best of all – adheres and seals MDF and Particle Board end grain.
The company I used to get the two granite toppers also rounded the edges with a 3″ radius, to match my cabinets, and they also created a small bevel on the top so there would not be a sharp angle on the top of the granite topper. They also did a wonderful job of polishing it, it looks like a black glass mirror — pictures don’t even do it justice. The down side is they cost $300 for both of them. I believe them to be worth it, however as this is a project we will keep for years to come.
If you don’t want to spend the money on real granite tops for these, a pretty good second choice is to glue up a 3/4″ and 1/2″ piece of MDF, and machine it similar to my granite toppers. Then apply lots of BIN Shellac base primer to the tops to get them perfectly smooth before applying the paint of your choice. If care is taken, they can be wet sanded and polished to a super-shiny surface similar to the sheen of these granite toppers. It’s a lot of work though, and they will offer almost no protection against moisture and dings.
Enclosure Assembly:
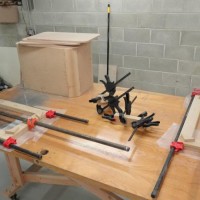
I used Gorilla Glue (polyurethane glue) for most MDF panels. I like it because of its ability to fill in tiny gaps and it’s squeeze-out means no caulking is necessary. Cabinets that fit well are air tight when glued up with Gorilla glue. Clamping the enclosure with strap clamps worked well and with either the top or bottom glued up at the same time keeping the box square during clamping was a breeze.
Crossover Design:
The crossover is taken care of in the Crown amp, and there are enough options in the menu to be able to get great bass in almost any room situation. Using the previous generation Crown amp, I needed to use an ART Cleanbox to get the subwoofer LFE output gain raised enough for the Crown to work with it; but the newer Crown 1,500 watt amp has built in swichable gain, so that is not an issue anymore.
Tips & Tricks:
The base is slightly about 1/2″ wider than the cabinet all around at the top, and it tapers to create a larger base than the main cabinet at the bottom. I sealed the base very well before painting it with Rustoleum textured paint. Lots of light coats is the key… if it is too thick it will run, and you will have to start over. I top coated with several coats of gloss black and it looks fantastic. It’s held up fine for the 2 years or so we’ve had them.
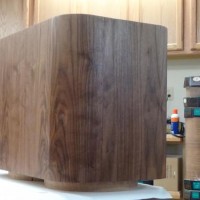
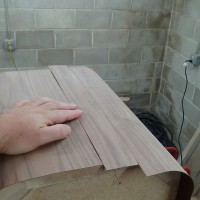
Also, the fact that these cabinets do not have corners means that you will have no natural spot where the veneer will end at. I used two main pieces on each cabinet, one for the front, another for the back. I then placed another matching piece of veneer large enough to cover the remaining 2-3″ gap, and made two cuts with a sharp utility knife cutting through both layers of veneer in one pass. Lifting up the underlying veneer on both front and back pieces yielded an raw piece of cabinet exactly the same size as the patch I just made. I applied glue to the remaining strip of veneer and ironed it right on. As the veneer shrunk from the heat, a small gap was created in a few places. Using color matching wood filler took care of the gap, and after a through sanding and several coats of wipe-on poly, you can’t even see where the filler piece of veneer is.
Overall, I can say my wife and I really like the look and sound of these cabinets, and we have received many compliments on how they look and perform. The substantial cost of the granite toppers made us think hard about spending the money, but in the end, we have created two beautiful and functional pieces of furniture that we plan to keep for many years… so in that light, the extra money was more than worth it.
About the Designer:
I was a graphic artist in the newspaper industry for over 16 years before going back to college 10 years ago to pursue a degree in teaching. I currently have a master’s degree and have taught preschool in southern NJ for 7 years. I’ve had to continue learning in life to stay viable career-wise, and I’ve enjoyed the learning process regarding designing measuring and building speakers as well. If you were to ask me ‘so, what do you do?’ I would probably answer “I’m a teacher,” but inside I know the truth… I’m a speaker builder. The first set of speakers I built all by myself were probably not the best sounding – especially since they were 3-way speakers with nothing but a single capacitor on the tweeter, but at age 14 or so, I thought they were fantastic… My father and I repur

Wow! A work of art.