Buddy Boy Speakers

Designer:
John McBurney
Project Category:
Bookshelf Speakers
Project Level:
Beginner
Project Time:
20+ Hours
Project Cost:
Over $1,000
Project Description:
I was really wanting a pair of high-end studio monitors like any of the ATC three way designs. These are shockingly expensive easily $50,000 for a used pair in good condition. They seem to be a goal that stretched so far into the future it might never happen. I had a really nice pair of Stan Mount mini monitors, JM /focal Electra 905s. I became somewhat dissatisfied with the tweeter performance which I found to be somewhat harsh. I had recently moved and had a small dedicated listening room and dove had first into digital room correction utilizing miniDSP DDRC 24 and Dirac. But I became increasingly convinced that I could only push this so far. I thought very seriously about building a high-end kit speaker, but even that appeared to be “in the future” financially. So I decided to re-engineer what I had.
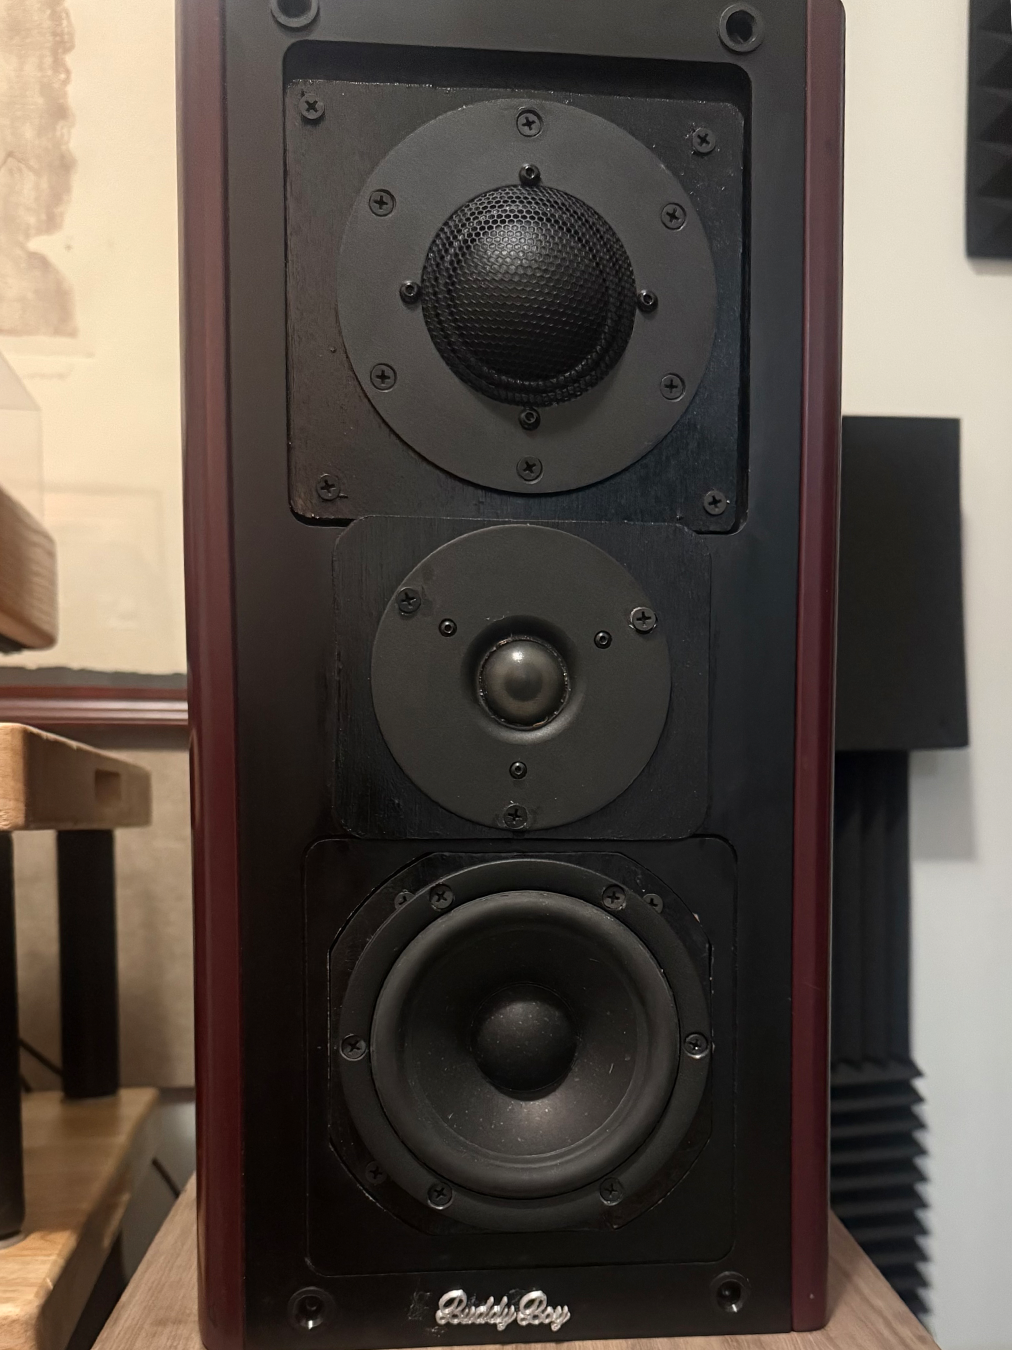
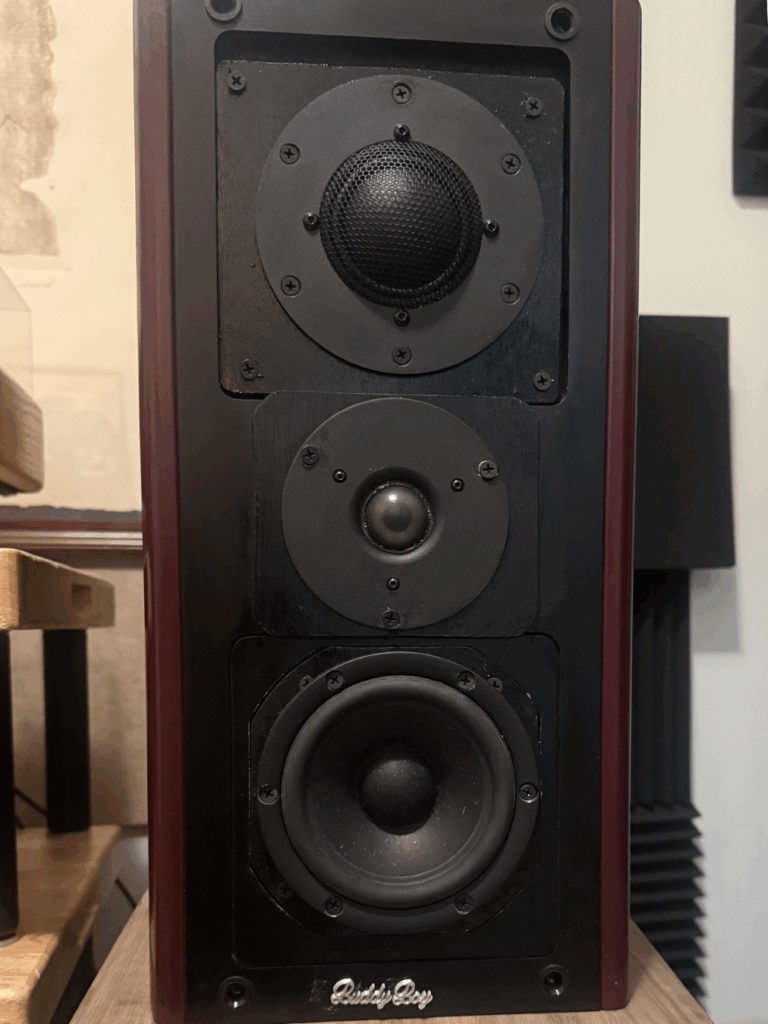
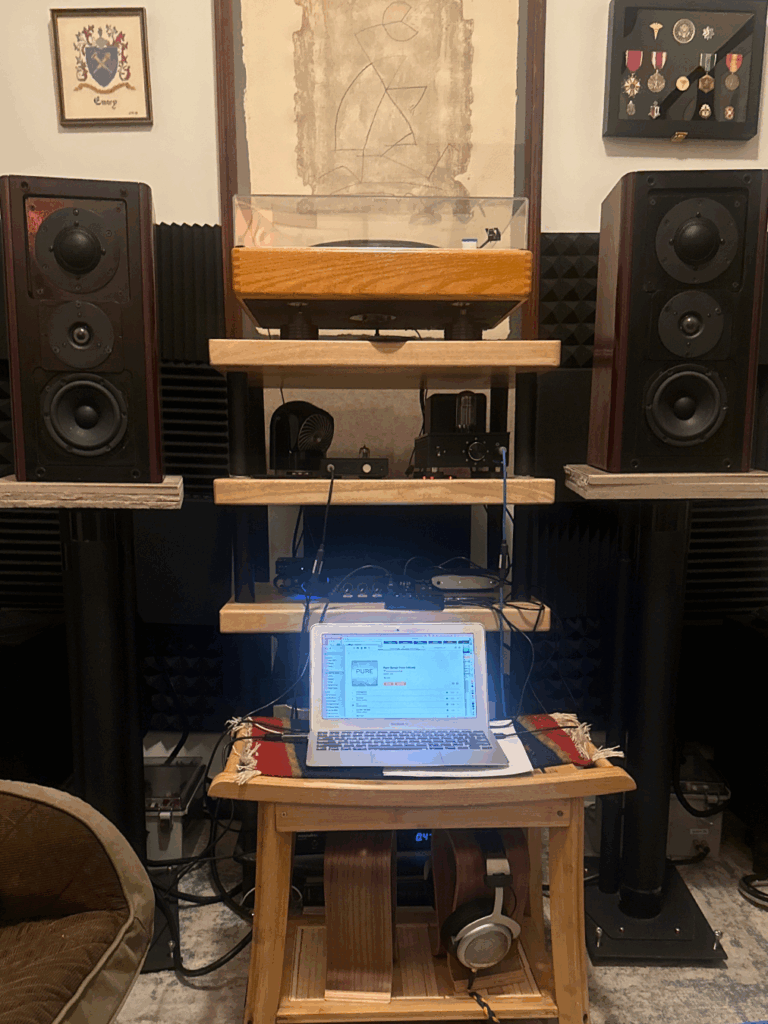
I converted my MTM 2-ways into three way mini monitors inspired by ATC. Anyone familiar with the ATC three-way monitors knows that they utilize hand built, silkDome tweeters and mid range. Thanks to the help of the technical experts at Dayton Audio, I was able to do this including building my own custom third order crossovers and results are spectacular. Full disclosure these three-way mini monitors are in fact part of a very well integrated four-way system that includes dual sealed 10 inch passive subwoofers.
Since the only remaining parts from my original JM Lab speakers are the enclosures. I can’t very well say I have JM lab speakers anymore so I have rechristened them Buddy Boy speakers in honor of my blue heeler, Buddy Boy. The speaker model is K-9. Our motto “only the best woofers.”
Design Goals:
Distortion free imaging, especially of voices and strings keeping costs under control realizing as much of what I already have as I could.
Driver Selection:
Morel CAT 308 fabric, dome tweeter 277-082
Dayton Audio RS52FN-8 reference fabric dome mid range – eight ohm 285-020
Satori MW13P-8 5” midwoofer
Enclosure Design:
JmLab (now known as Focal) Electra 905
Crossover Design:
3 way third order. Parameters were determined by designed from DIY audio Excel based calculator. This is a classic 18 DB per active Butterworth crossover design nothing fancy.
Conclusion:
These monitors are jaw droppingly good. The people that I have had listened to them ranging from the tech savvy Young audio files in our apartment building to the principal trumpet of the local symphony. Come away, saying that they sound better than any speaker system they’ve ever heard. The imaging is, as one would expect with heavy emphasis of dome tweeter and mid range is outstanding. Because of the unusually broad useful range of the Dayton Audio mid range driver (500–8 500 Hz) I was able to design my crossover so that there was no significant crossover activity in the most critical part of the frequency spectrum. Crossover frequency 850-6800 Hz. Admittedly the construction of the third order crossover all a lot of blood sweat and tears but the final outcome means that I’m able to effectively manage my crossover points and keep my drivers safe. Crossover with the subwoofers is done through mini DSP with a digital crossover at 100 Hz, 48DB per octave.
I’m very satisfied by the audio performance and the sweeps in REW looked pretty darn good. I do have a prominent 60 Hz room mode and I am planning to construct a tuned limp membrane attenuator to help deal with this. In the meantime, I’ve done custom Subwoofer equalizations , phase, alignment, and time alignment designed using artificial intelligence (yes believe it or not you can upload your REW sweeps into ChatGPT and get pretty intelligent results back)
Tips & Tricks:
Make use of other things you already have. Trust your instincts. Plenty of people told me this couldn’t be done. Have very clear design principles.
Move your crossover to an external project box, this gives you plenty of room to do the point to point wiring, keep your inductors at a safe distance to prevent magnetic interference.
Think creatively. When I found that fitting the large coils and the even larger capacitors neatly on the top of the circuit board, I decided to move the capacitors and the.inductors who opposite sides of the circuit board. Circuit board is than elevated inside the project box on spacers which are bolted to the circuit board.
About the Designer:
I am a retired neurologist. My background and electronics is more conceptual as I am a board certified electroencephalography and medical director of several EEG labs and epilepsy monitoring units. The principles of amplification and logged to digital conversion, capacitance and inductance how much the same and recording, micro volt potentials from the scalp generated by the brain as they are for accurate reproduction of audio signals. My father and grandfather were both master electricians and I have a lot of experience climbing in attic and under houses to help them growing up.
Project Parts List:
| Part# | Description |
| 277-082 | Morel CAT 308 fabric, dome tweeter |
| 275-085 | Dayton Audio PT2C-8 Planar Tweeter – 8 Ohm |
| 285-020 | Dayton Audio RS52FN-8 reference fabric dome mid range – eight ohm |
| Satori MW13P-8 5” midwoofer | |
| Multiple inductor and capacitors | |
| I used Dayton Audio 1% capacitor whenever available | |
| Gorilla Wood Glue | |
| I utilized Dayton Audio air core “perfect layer“ inductors whenever possible |
+ There are no comments
Add yours