
DIYRM-A-NWS
Designer:
Andrew Hudson
Project Category:
Bookshelf Speakers
Project Level:
Intermediate
Project Time:
20+ Hours
Project Cost:
$500 – $1,000
Project Description:
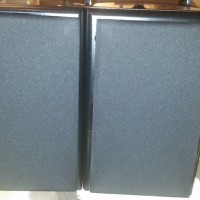
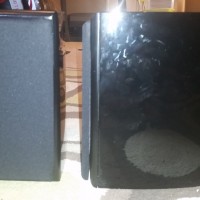
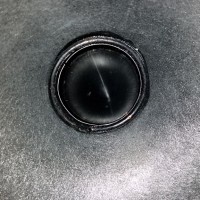
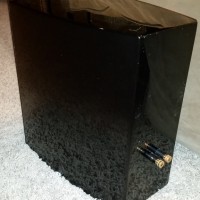
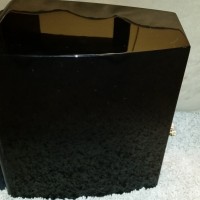
This is my first speaker build. I have modeled my design off Scott Hinson’s published DIYRM-A design. The NWS is for “no woodworking skills”. I loved everything about Scott’s design, but I did not have the time, tools or the patience to fabricate my enclosures from scratch like he did. I selected the Dayton Audio, 0.283 ft^3, curved cabinets in piano black (P/N 302-701).
Design Goals:
• A small, sealed (acoustic suspension), bookshelf speaker
• A high WAF (wife approval factor)
• An F3 of ~80 hz to pair with an existing Polk Audio 8” sub that I have had for many years
• Using a silk dome tweeter (personal preference)
• A tweeter with a low Fs so that I could use a low crossover frequency. After readings Scott’s excellent design summary (http://goo.gl/XboqRW), I learned that this would improve the integration of the drivers and the soundstage.
Driver Selection:
Dayton Audio RS150P-8 6” woofer (295-363)
Dayton Audio RS28F-4 1-1/8” (275-140) silk dome tweeter.
Enclosure Design:
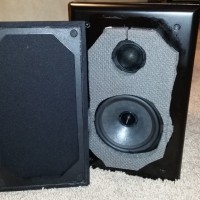
As I learned the hard way, during this process, just because you buy a pre-fabricated enclosure does not mean that no tools or woodworking skills are needed. Doing the driver cut-outs in the front baffle proved to be quite a challenge for me. Even though I made a couple of practice runs on some scrap wood, my cut-outs and countersinks were still far from perfect. Being a perfectionist this bothered me, however since the Dayton enclosures are supplied with grill covers, I will be the only one who ever knows how ugly things are underneath. If I ever build another set of speakers, I will invest in a proper plunge router, a Jasper jig and will spend more time building templates/guides.
Enclosure Assembly:
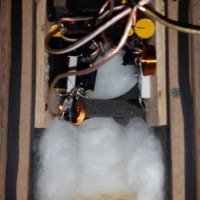
I added mass to the woofer, following the procedure outlined by Scott. I lined all interior surfaces of the enclosure with Sonic Barrier 1/2″ Acoustic Sound Damping Foam (260-520). Following this, I calculated the remaining internal volume of the enclosures which started at 8L. After subtracting the volume for all internal components, I was still sitting at about 6L. Once again, probably due to my inexperience, I spent a lot of time worrying about the final Qtc of my design. I ran calculations in Unibox and Bagby’s Woofer Box. This proved a frustrating experience as results were all over the map depending on what leakage and absorption factors were chosen. I was ok ending up with a little lower Qtc than Scott’s ~0.8 since I knew I would be pairing my speakers with a sub from the start. After much deliberation, I finally decided to reduce the volume by ~1 more liter using non-hardening modeling clay. The resulting internal volu me of slightly less than 5L produced a Qtc of right around 0.7, based on my best guess for leakage and absorption factors. I also loosely filled the enclosures with Acousta-Stuff (260-317).
My last area of struggle was worrying about diffraction off the wooden frame of the grills supplied with the Dayton enclosures. Scott had used some leftover damping foam around the tweeter in his design. He also lined his grill backer board with foam. I ended up blending both concepts and covered the face of the baffle with foam. The result, from a visual standpoint, was absolutely hideous. However, once again, the grill covers came to the rescue.
Crossover Design:
Being an engineer and just naturally curious, I was uneasy just blindly trusting Scott’s crossover design. I attempted to duplicate his modeling using Jeff Bagby’s free Passive Crossover Designer. This was unsuccessful since his spreadsheet, while excellent, does not quite have the flexibility to model a design this complex (or at least I could not figure out how to). I was successful, I thought, in building a duplicate model in XSim. However, for the life of me, I could not duplicate Scott’s calculated acoustic and electrical crossover points. I am sure the error was on my part and was related to driver acoustic center offset. I finally gave up and, in the end, trusted Scott’s experience.
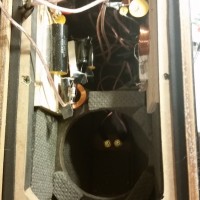
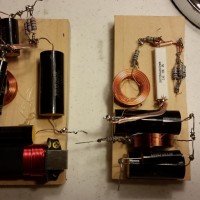
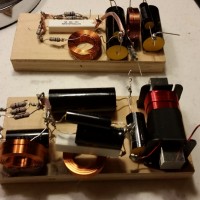
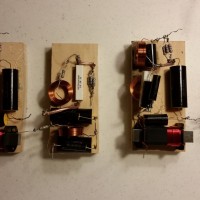
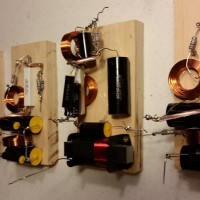
I was surprised at the difficulty of assembling the crossovers. Being my first build, my soldering skills were embarrassingly poor. I ended up working on these for months since I was only able to spare a couple of hours a week. I have no way to test the assembled crossovers or speakers, for that matter, so I really have no way to no if I built them correctly. Once the crossovers were assembled, I had to figure out how to mount them in the enclosures. The stiffening brace in the middle of the Dayton enclosures, made this a challenge. The woofer’s crossover was fairly heavy and I did not want to rely on hot glue alone. The angle for screwing the crossovers to the side walls was just too tight. I ended up screwing them to the lip in the front, supplemented with hot glue to the sidewalls.
Conclusion:
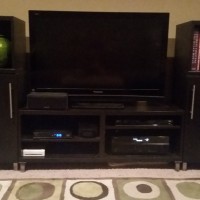
After more than six months or research and off/on work, I finally finished the speakers and connected them into my existing system. They are driven by a Yamaha RXV377 home theater receiver that delivers about 85W per channel. My listening area is small, but I am not using these speakers in a true near field set-up as Scott recommended. My set-up is an 8 foot equilateral triangle with the tweeters being at ear level. Fortunately, my receiver has a Straight mode that supposedly by-passes as many internal components as possible to minimize interference and distortion. I listen in this mode, with the sub’s crossover set at 80hz and the level just adjusted by ear.
Being my first speaker build, I was not sure what to expect. I have been into car audio for 25 years or so and have an embarrassingly expensive aftermarket system in my car. However, my exposure to truly high end home audio components is very limited. All I can say is “wow”. My wildest expectations were exceeded. These little speakers emit a wall of sound that appears to be about 12 feet wide and 6-8 feet tall. The sweet spot is fairly wide and forgiving. Two people can sit comfortably on a couch and the soundstage and imaging are outstanding for both. The integration with the subwoofer sounds nearly perfect to my ears. I have not run the receiver’s parametric analysis and I am not sure I ever will. I am beyond happy with what I hear now.
The only downside is that these speakers are going to require me to change my listening habits. No more streaming from my phone to a little Bluetooth receiver that I have connected to the Yamaha. No more compilation CD’s full of 128 kbs MP3’s. The sound, as compared to playing an audio CD in the system’s Blu-Ray player, is just unacceptable. CD quality sound, however, just blows me away. The accuracy of instrument sound reproduction, the ability to hear the performers breathing, the feeling of being “present” at a live performance are amazing. Looks like I will be re-ripping all my CD’s to FLAC’s and listening via USB from now on.
I want to thank Scott Hinson for his generosity in publishing such a detailed write-up of his design process for the DIYRM-A. Without this document I could never have dreamed of taking on a project like this. I am very glad I did and am sure I will enjoy these speakers for many, many years to come.
About the Designer:
Long time car audio enthusiast. Long time home theater enthusiast. First time to DIY a pair of speakers and first time to experience “high end” home audio, stereo sound.

I’m a high-fidelity retailer since the ’70s and an Acoustic Engineer who has studied the art of creating high-fidelity audio reproduction systems. I’ve studied virtually every DIY speaker system sent to me by PE. This one could be one of the best because the basic considerations are excellent – just leave that grill off and expand that front baffle covering.