The Summer Winds
Designer:
TomZ
Project Category:
Tower Speakers
Project Level:
Expert
Project Time:
20+ Hours
Project Cost:
$100 – $500
Project Description:
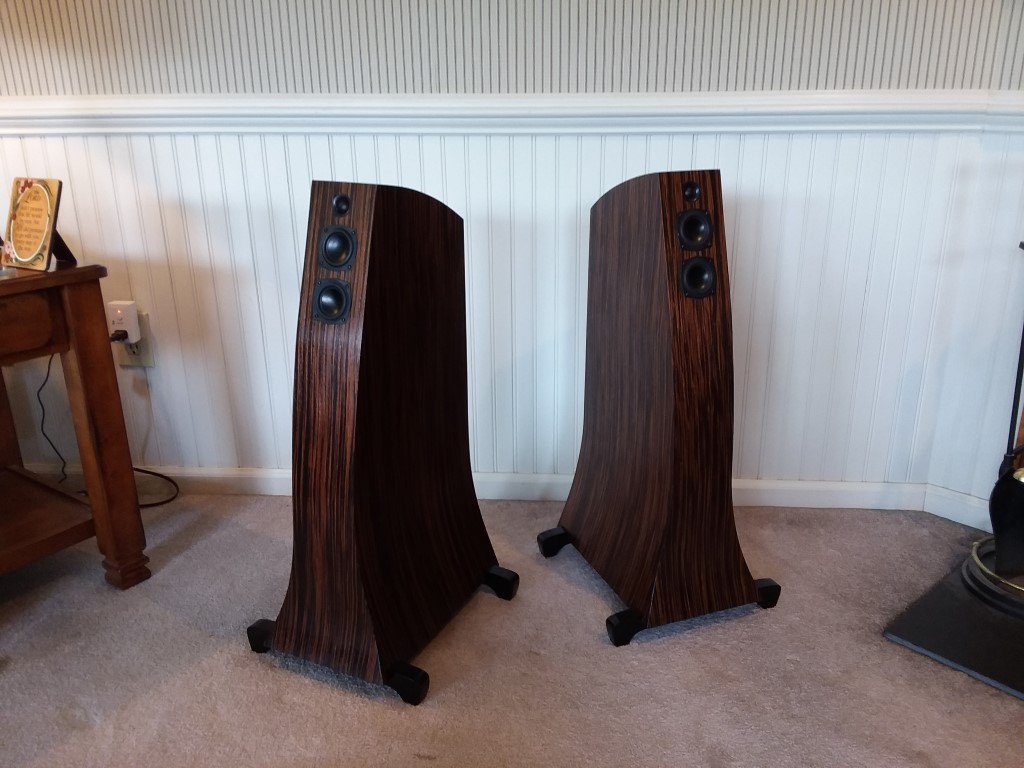
This speaker set is a “Micro-Tower” design… full range sound in a very small size.
Design Goals:
Like many longtime speaker builders, not all of the speakers I build have an immediate purpose for their existence. Since my house is literally full of speaker pairs, I often just build them because I love to do so. These speakers, however, have a specific reason for their creation, they were designed for my niece, who’s name is Summer Lace. College life is behind her, and she is living on her own in an apartment in New York State. Upon visiting her last year, my wife and I noticed that she did not have a real sound system. She indicated that she would like a set of speakers from her uncle, and the result of some thinking and pondering yielded these… the ‘Summer Winds’.
Driver Selection:
These speakers would need to be very small due to space constraints in her apartment. This limited my driver choices to those around 3” and under in order to keep the total cabinet width reasonably narrow, as well as for better off-axis sound dispersion.
Having used the Dayton ND65 drivers in several previous projects, I chose them once again for their small size and fairly clean output. They have a long throw and copper in the motor which allows them to reproduce full-range sound at decent volume levels. The tweeter needed to be small enough to be placed very near the top of the enclosure, so the ND16 press-fit tweeter was one of few that would work, plus it sounds very nice, having a wonderful ‘sparkle’ to it. These drivers would have made a decent sounding speaker on their own, but would have needed a boost in the bass department for sure in order to yield decent output levels.
Enclosure Design:
I really like the narrow tower format because when designed small enough, they are not much more intrusive than a set of small speakers on a traditional stand. I also like speakers with curves, it’s just my preference… but sometimes it’s also the only way to get a certain driver to fit.
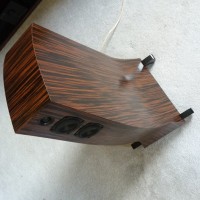
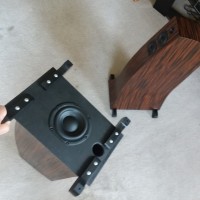
I originally considered using the ND105 driver as a woofer in this design, but when I realized that I could get deeper, louder bass from the Peerless 5.25” woofer in about the same space, I decided to try and see if I could implement it somehow. The result ended up being facing the driver in a down-firing configuration, and flaring the sides of the cabinet larger towards the bottom in order to fit the width of the driver. The volume for the Peerless sub is about 13.6 liters, and is vented with a 1.59” (1.5” black ABS at a home improvement store) by 7” port. The upper volume for the two ND65 drivers is 3.1 liters.
This cabinet is only 29.5” tall on it’s brass spikes, which places the tweeter terribly low. I didn’t think my niece would necessarily feel like sitting on the floor just to hear her music, so I decided to curve the front of the speaker up to aid in distributing the sound into the room a bit better.
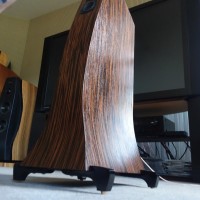
The veneer is striped ebony and the cabinet is finished with several coats of rub-on polyurethane. The outrigger legs are solid redwood and painted with black and clear lacquer; combined with the brass spikes, they give the bottom-mounted woofer a bit of room to breathe.
Enclosure Assembly:
Curvy speakers have an advantage over standard flat panel speakers, in that the curves can often allow for less material thickness per a given square footage. 3/4” MDF is the standard thickness for most speakers, but these speakers have panels that are much thinner… 1/2” thick on the top, 3/8” thick on the sides, 1/2” on the back, and 1/4” on the front baffle. For everything but the back and bottom panels, I use multiple layers of 1/8” HDF (high density fiberboard.) In fact, the only 3/4” material in the entire speaker is the bottom panel… mostly because I needed something substantive and ‘square’ to attach the ‘bones’ of this speaker to. The knuckle test tells no lies — rap on any panel of this speaker and it’s solid all around. Consider a barrel made with thin sheet metal… it’s very strong because of the curve of the sides… and resists bending and flexing because curved material can resist those forces much better than a flat panel of the same thickness. Imagine a square box made of the same thickness of sheet metal as a metal barrel of the same cubic volume… it would flex far too much to be of much use. The curves on the front and sides of the ‘Summer Winds’ allow for thinner material used in multiples to make up for the lack of thickness, and it also looks cool!
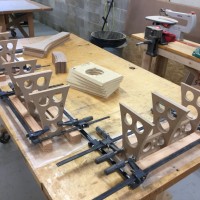
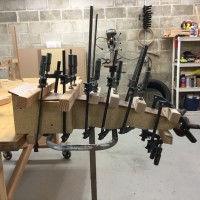
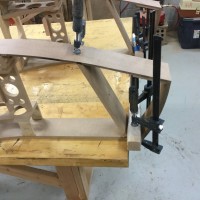
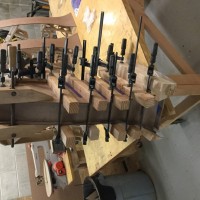
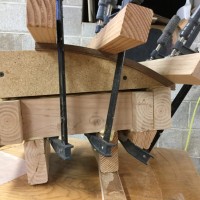
I needed to construct several jigs to pre-bend and glue up the multiple layers of 1/8” HDF that comprise this cabinet. There are several inside braces that help ‘hold’ the thinner layers of material in place until the glue dried. Once the entire cabinet is glued up, it is a rigid — but light — unit.
I used Tightbond II wood glue to adhere the thin 1/8” panels to each other, and Gorilla glue or PL Premium construction adhesive to glue the panels to the speaker framework.
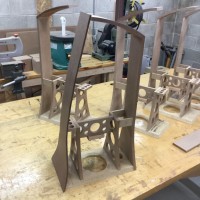
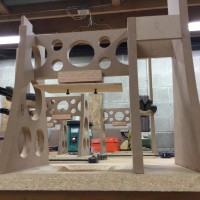
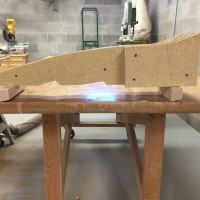
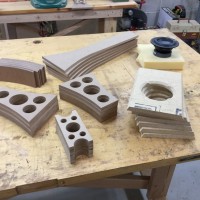
Speaking of framework, this speaker has several internal braces that aid in rigidity, as well as create the curve which the side panels would eventually glue to. I drilled as many holes into those braces as I could to make things lighter, and allow for open airflow within the cabinet. Those braces are mostly made of 1/2” MDF with a few pieces of 1/4” MDF as well.
Since I had to spend so much time making custom jigs to build these speakers, I decided to get a little more return on my time investment and build 3 pairs at the same time, which is why there are multiple speaker carcasses in several of the pictures.
Crossover Design:
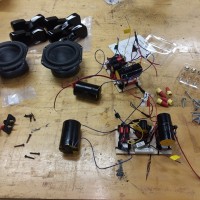
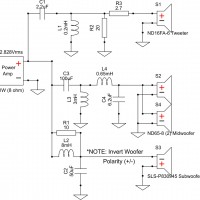
I went for a minimalist design for this speaker. Being a three-way speaker it needed a fair number of crosser bits already… add to that the low crossover point of 150 Hz. from the woofer to mid drivers, and you already have a few fairly costly, and decent sized components to deal with in a very small internal volume. With a good amount of fiddling, I was able to get a fairly flat response with only 11 components in the crossover. The crossover point between the midwoofers and tweeter is 5,000 Hz, and all slopes are second order LR electrical. I have the tweeter just a bit hotter than I normally would use in most of my own speakers; this is because I believe these will not really be used as “sit down and listen” speakers, but will rather be listened to while moving about the apartment, often not right in front of the speakers themselves.
I’m glad I made lots of holes in the framework of these speakers… I had to use one of them to stick a particularly large 100uF cap as it didn’t fit on the crossover board.
Tips & Tricks:
In order to maintain consistency, I made one ‘perfect’ master template of the front and back pieces, which I reproduced with a router and trim bit for nearly perfect copies.
The top and front panels were pre-bent as individual glue-ups before attaching them to the frame of the speaker.
Being so small means that everything must be thought of beforehand. There is really no room in this cabinet to do anything but install drivers, and a minimal crossover board in the bottom woofer opening.
Since I used hardwood for the bottom outriggers, I was able to drill and tap them with a standard metal tap and die set to attach the speaker spikes right into the hardwood with no metal insert. Since the spikes are screwed fully into the outriggers, there is no concern with the threads giving out.
The particular binding post I used was chosen for it’s shallow mounting characteristics. The vent tube for the port is very close to the rear of the enclosure, and would have created interference issues with a standard terminal cup.
I thought about how I would mount the crossover in the early stages of the cabinet design. I glued a small piece of maple to the inner framework of the speaker which would be assessable from the bottom subwoofer opening. I used thin plywood as crossover mounting boards and pre-drilled holes to mount those boards. That way, when I finished the crossover, I knew it would mount right to the inner crossover mounting point with no issues as long as the components were not much bigger than the outer dimensions of the crossover board.
Conclusion:
This design is now honestly one of my favorites. I love all the curves, and I get a real kick out of hearing full-range sound out of a speaker cabinet that is so tiny at 4.5” wide and only 29.5” tall. I didn’t anticipate that this design would play very loudly, but I’ve actually tested this system out on a few movies and they can keep up with the audio of an action movie in a medium sized room just fine. The vented Peerless subwoofer drivers really produce ample bass; they model very closely to the venerable Tang Band W5-1138 subwoofer which I considered using as well. The bass output of the Peerless sub is augmented by their downward firing configuration and close proximity to the floor (less than 2”.)
These speakers measure reasonably flat down to 37 Hz, a surprising frequency range for something so tiny. For normal listening levels, a subwoofer would not be required.
About the Designer:
I’ve been tinkering with and building speakers since I was a teenager, though I admit… most of those early speakers didn’t sound very nice. After I found Parts Express, and the Tech Talk website, I was able to get answers to many of my questions from the many generous folks on the forum. That help, combined with a lot of reading, practice, and some tenacity to follow my speaker building aspirations have helped me to finally be able to create speakers that look and sound like I’ve always wanted them to.
Project Parts List:

Wow if these sound as good as they look you hit the mark.
Not a “beginner project”. Lovely outcome.
Be my uncle too.
Very beautiful design!
Wow, Those are not just speakers but pieces of art. Beautiful design and craftsmanship. What a fantastic present for your niece.
Did I you create a drawing / plan? Love the design.
Awesome Tom! Now I want to build these. 🙂
Thanks for the positive comments, guys.
I didn’t do a full-on drawing for these since I really doubted anyone would try to recreate these. There were several templates/jigs that needed to be made in order to build these and I didn’t see anyone really trying to give it a go. I did one full-size drawing that I used to make the actual speakers from but that was it really.
Beautiful cabinet work
could you give me the frd and zma files for the sls woofer you used i cant find them anywher online….
Jeremy,
I do have the files, they were taken in-box, so they are really only valid for this particular enclosure. Note: the frd is nearfield (1 cm.)
Here are links to the files:
https://drive.google.com/open?id=120GwZTx5II4w6WA-ThDvzeXel9isP8JD
https://drive.google.com/open?id=1pb40jZe62m9mX-GuIQbiO3uOyZ0f9u2M
Hope this helps,
TomZ
Jeremy, I do have the files, they were taken in-box, so they are really only valid for this particular enclosure. Note: the frd is nearfield (1 cm.)
Here are links to the files:
https://drive.google.com/open?id=120GwZTx5II4w6WA-ThDvzeXel9isP8JD
https://drive.google.com/open?id=1pb40jZe62m9mX-GuIQbiO3uOyZ0f9u2M
Hope this helps,
They look great Tom. Howard