Bluetooth Speaker Bench


Designer:
Bryan J
Project Category:
Furniture
Project Level:
Advanced
Project Time:
20+ Hours
Project Cost:
$100 – $500
Project Description:
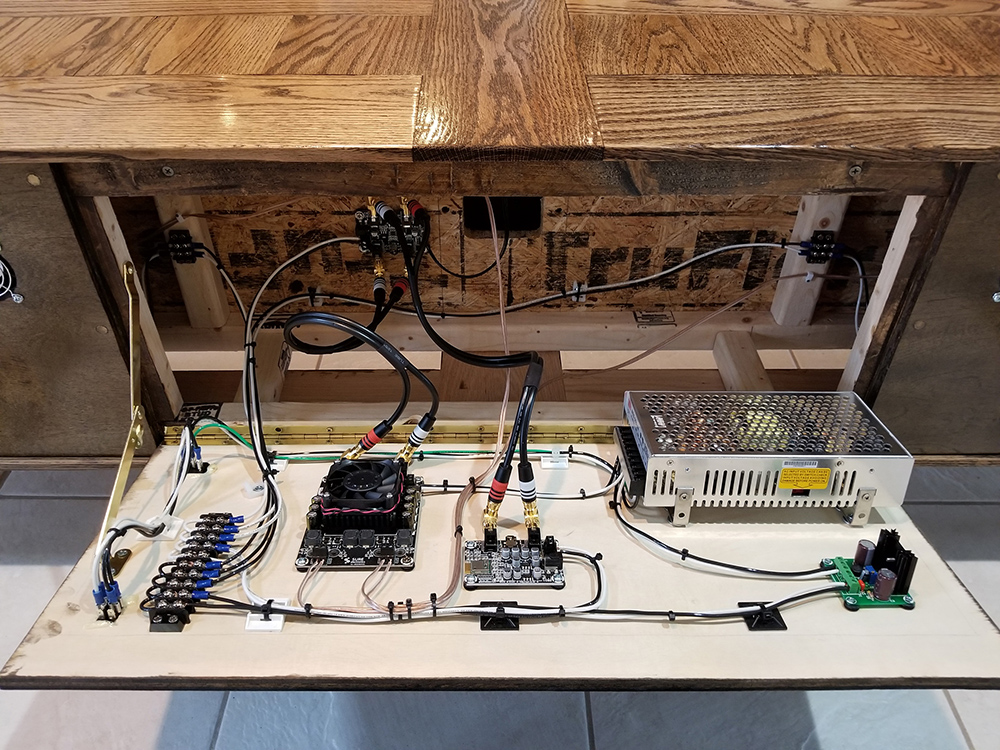
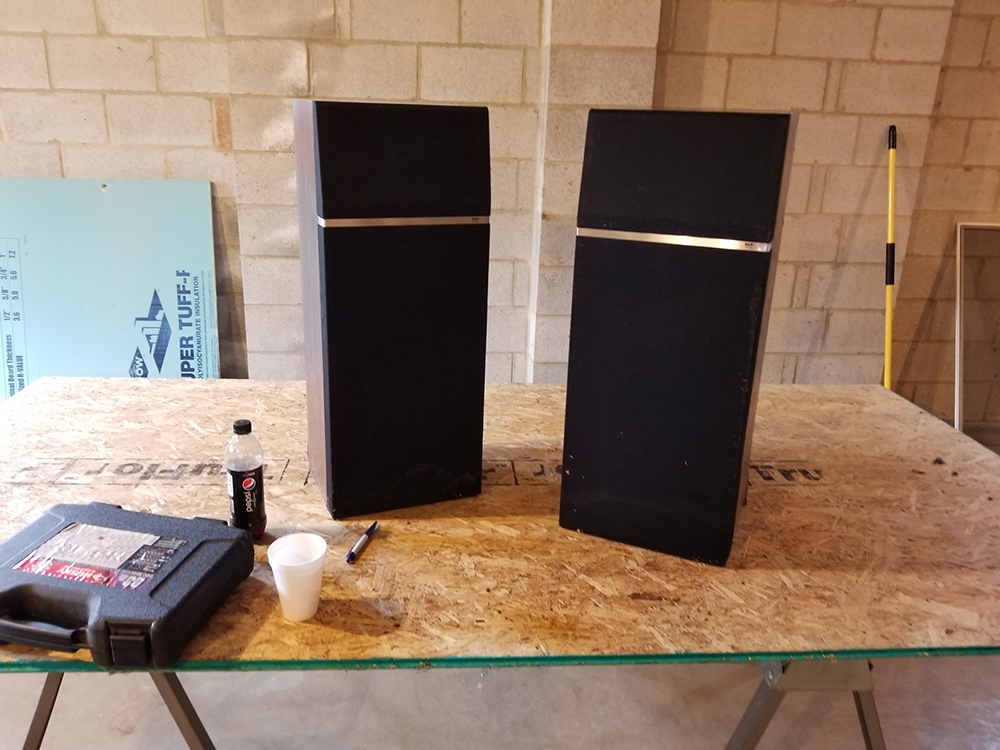
After cleaning my basement and finding an old, water damaged pair of JC Penney Speakers, (and watching some Kirby Meets Audio on YouTube) I thought I would try my hand at making them into something else. I had always wanted to build my own Frankenstein speaker enclosure and thought, why not up the stakes and learn how to build an amp to power the drivers? And then I found Parts Express and stumbled across the Sure Electronics class D line of products. I went a bit crazy and decided on a 2x100W amp and Bluetooth adapter with a Mean Well 200W power supply to make it all run!
Design Goals:
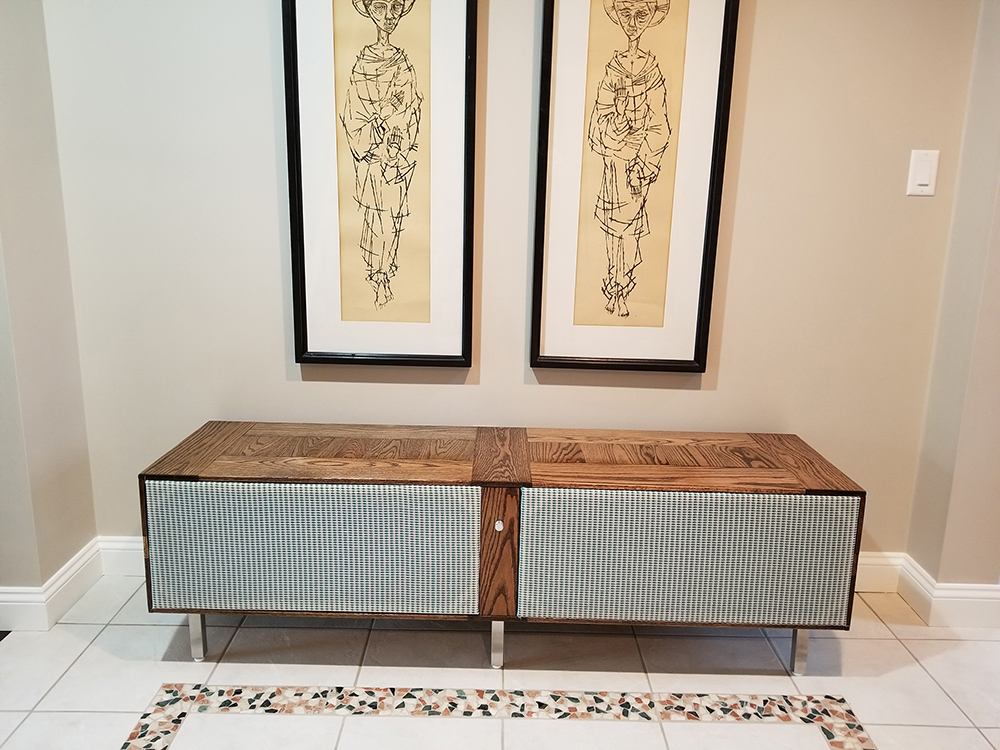
I decided that I wanted to make the speakers into a bench that I could eventually use for a space to listen to my growing collection of vinyl. I wanted to make something that had a vintage look but hid all the latest technology inside.
Driver Selection:
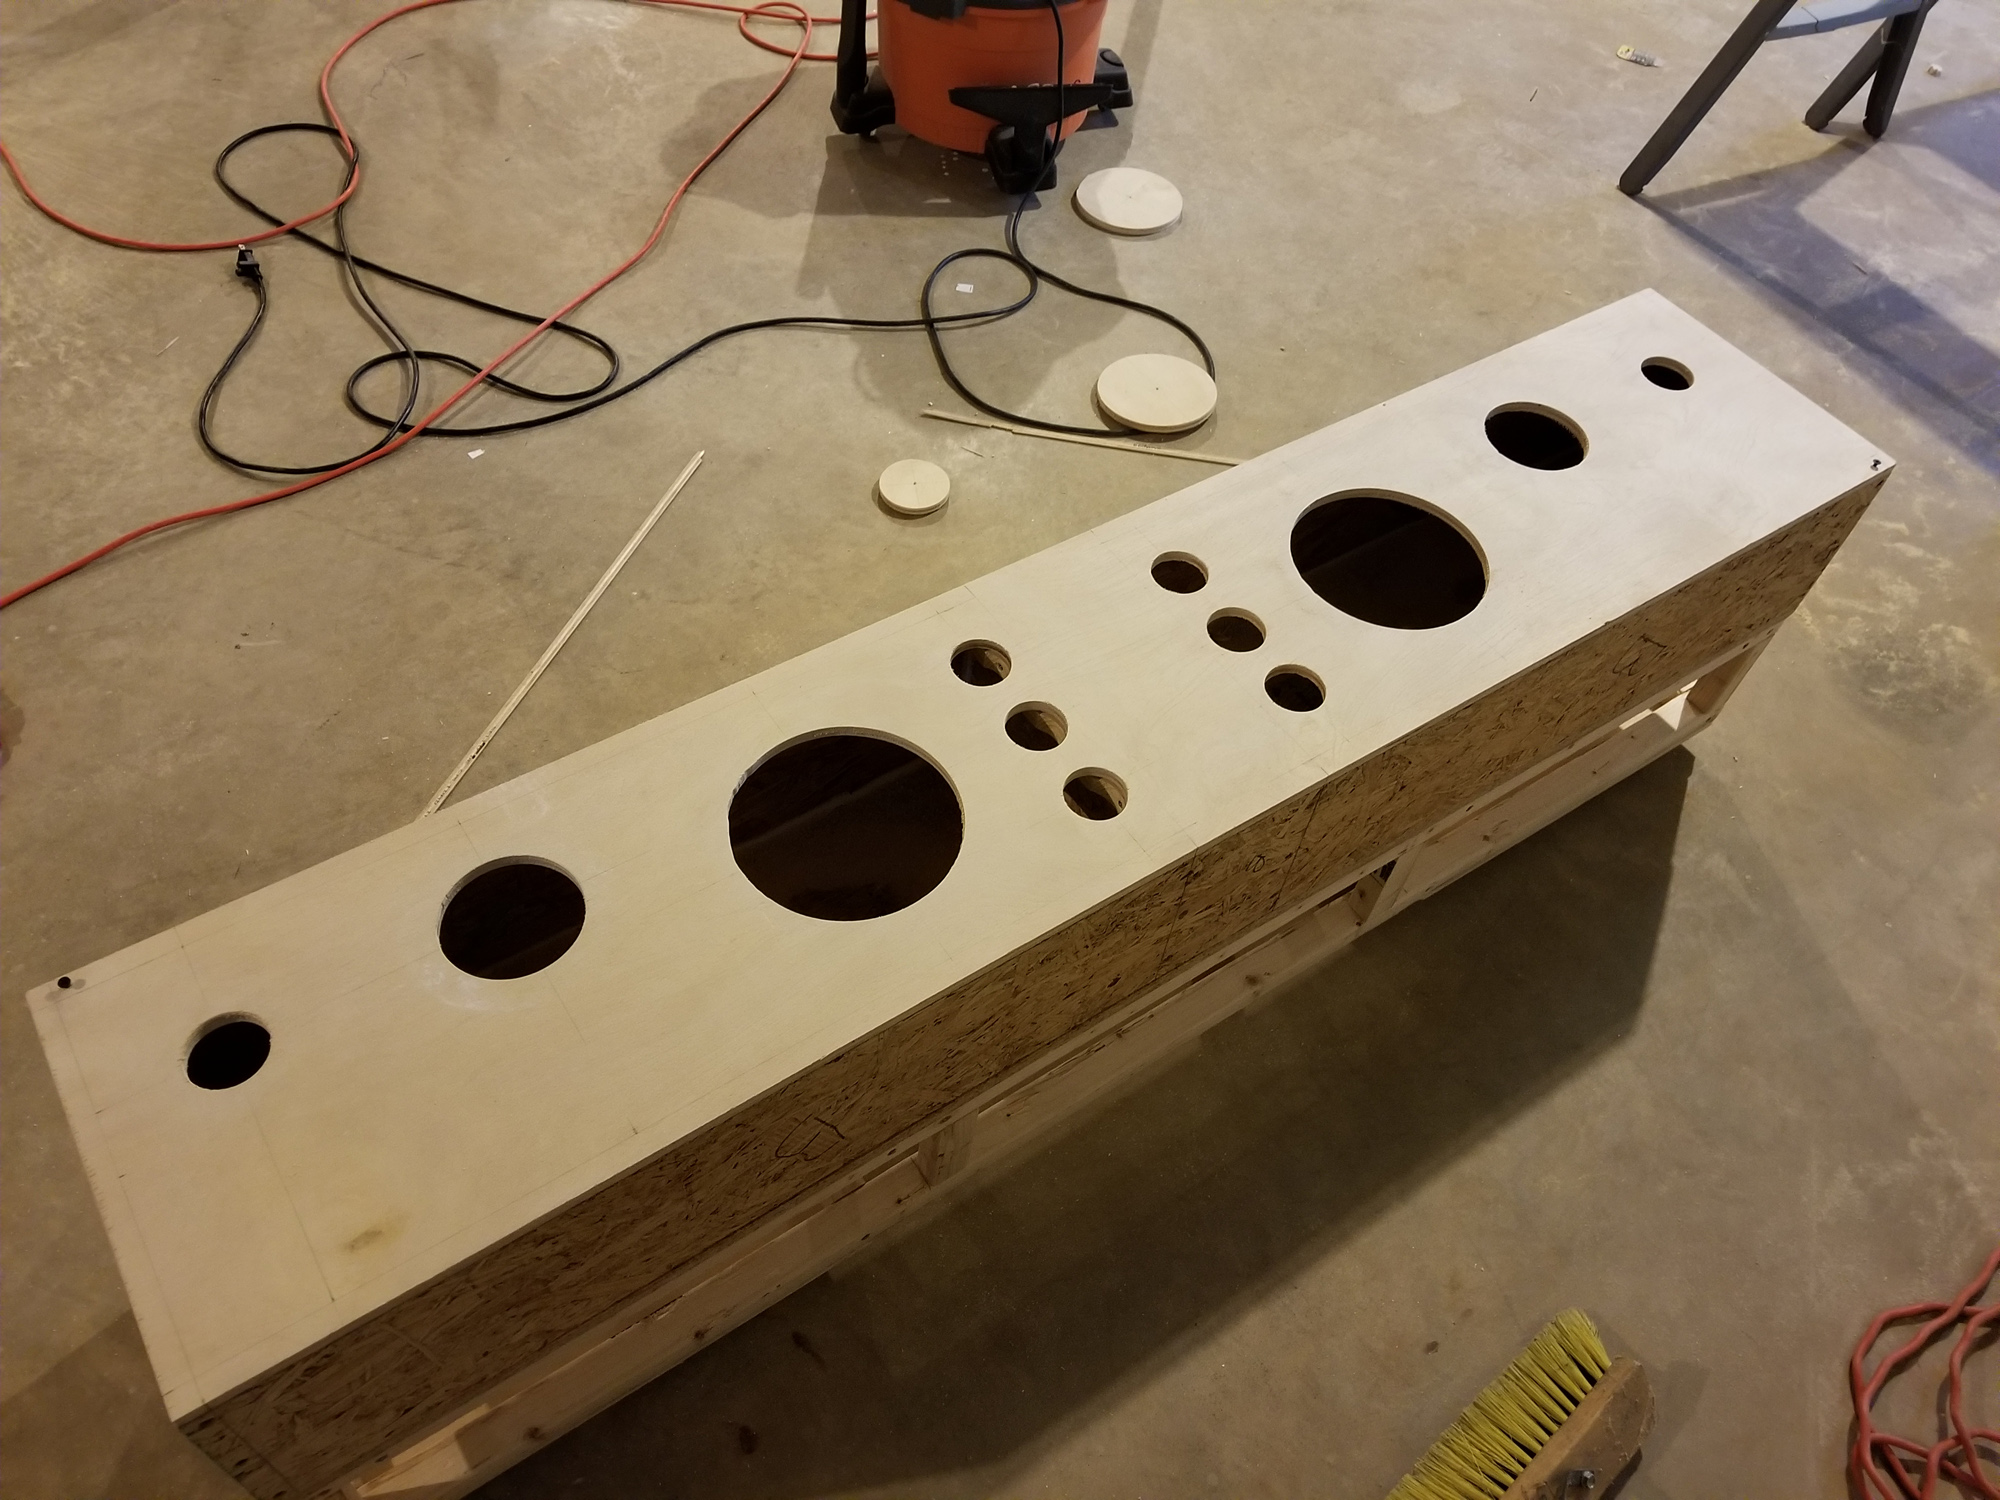
For starters I used a pair of JC Penney MCS Series linear phase speakers. I have been collecting speakers since I was a kid and had a few extra pairs lying around. The enclosure had been damaged in a basement flood and they were the only 3-way pair I had on hand, so I went with them. As I went through the build, I discovered that one of the tweeters wasn’t working so I purchased a pair of Tang Band (264-822) tweeters to replace them. I picked them solely on size (already had the holes cut) and they sound great!
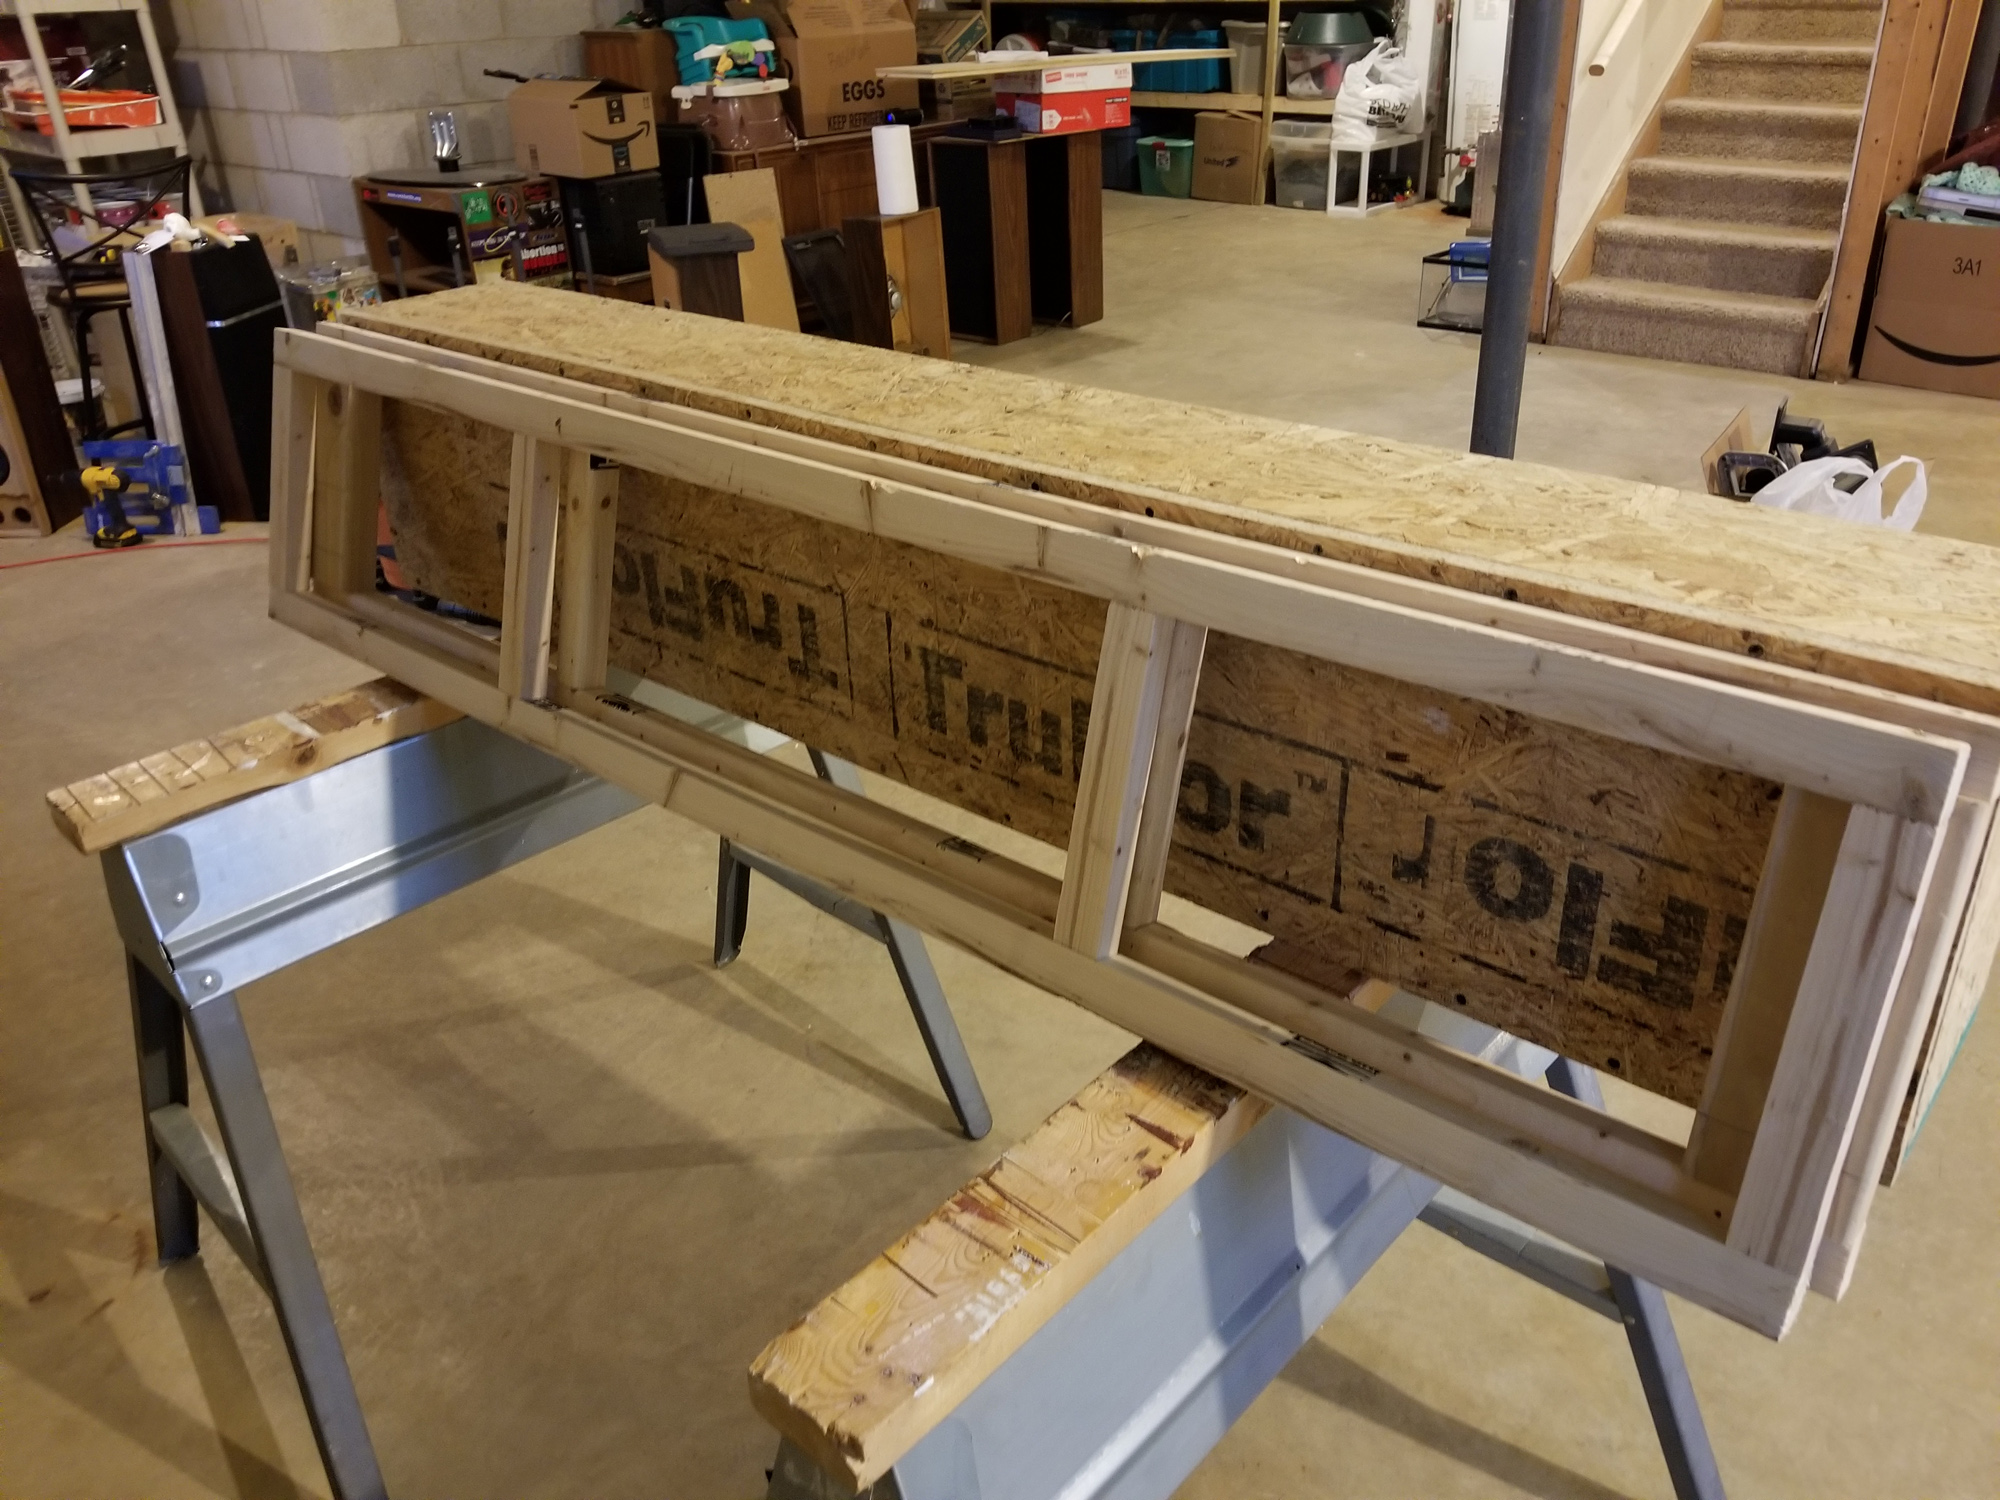
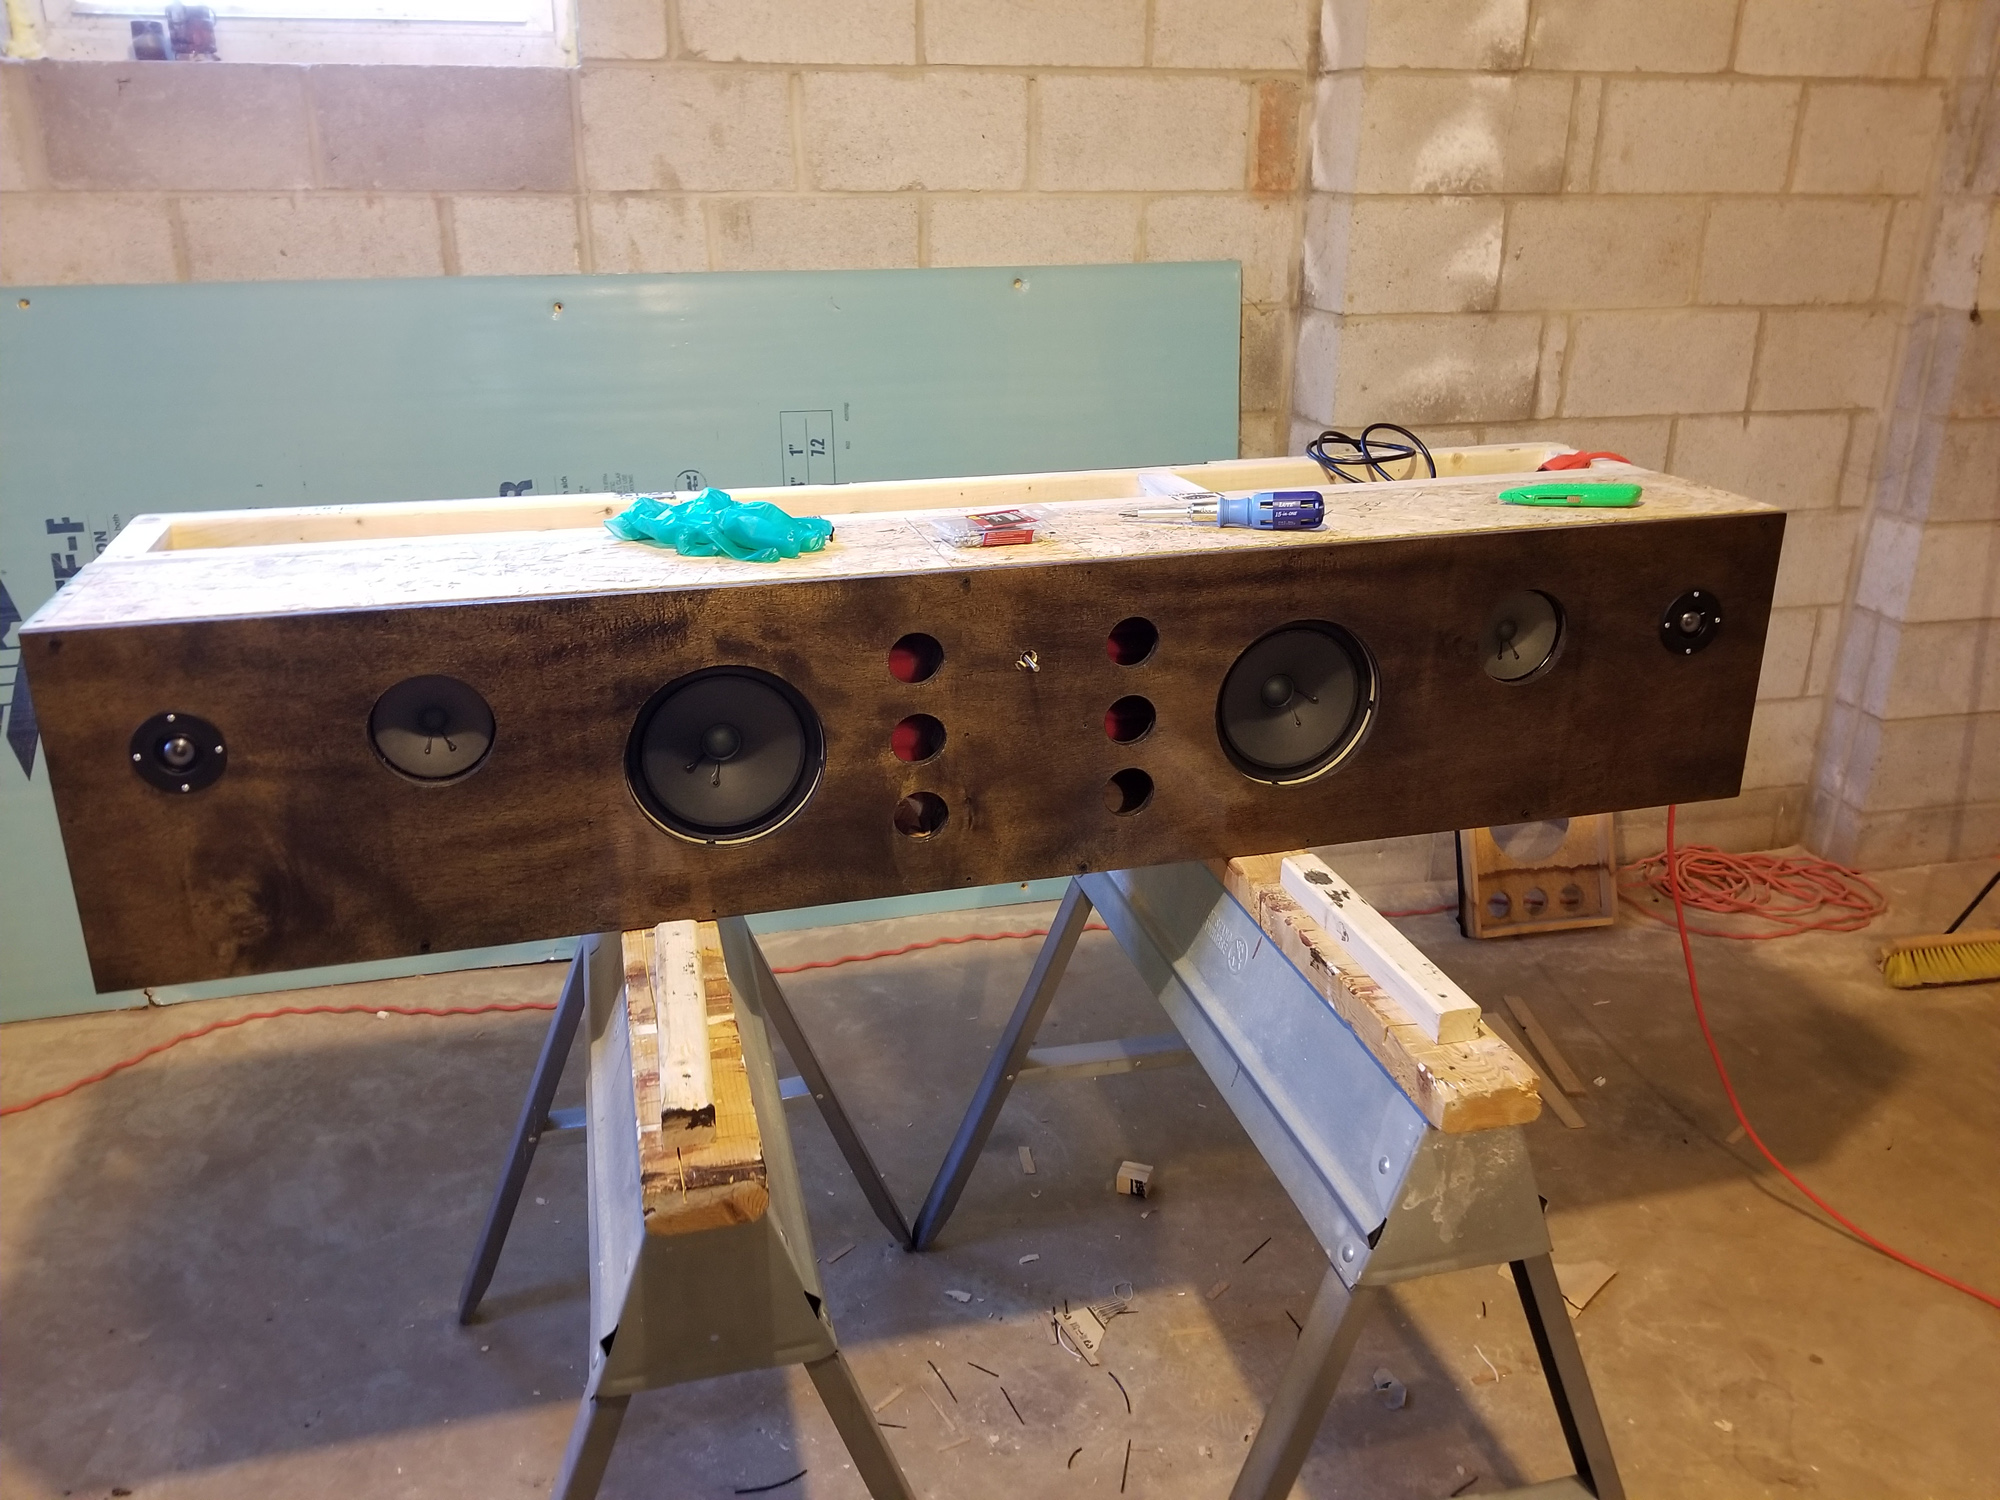
Enclosure Design:
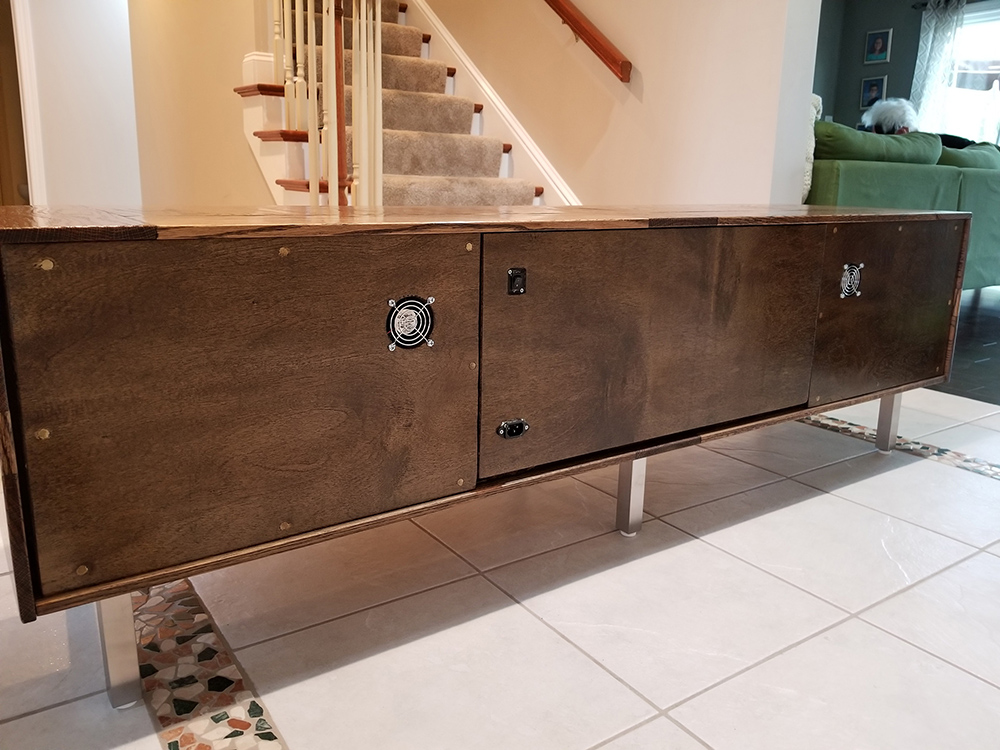
I decided to make the speakers into a bench. I am new to speaker building I didn’t want to take a chance at messing up the math when designing the interior of the cabinets, so I measured the old enclosures and turn them on their sides, leaving a space in the middle to run the volume control knob. The speaker enclosures were very narrow and would not make for a great seating area, so I built a frame off the back of the new enclosure to make the bench deeper. I used this space to hide all the electronics. I wanted the bench to feel like it was built in the 70s, so I went with a dark oak stain and turquoise grill cloth (261-825)
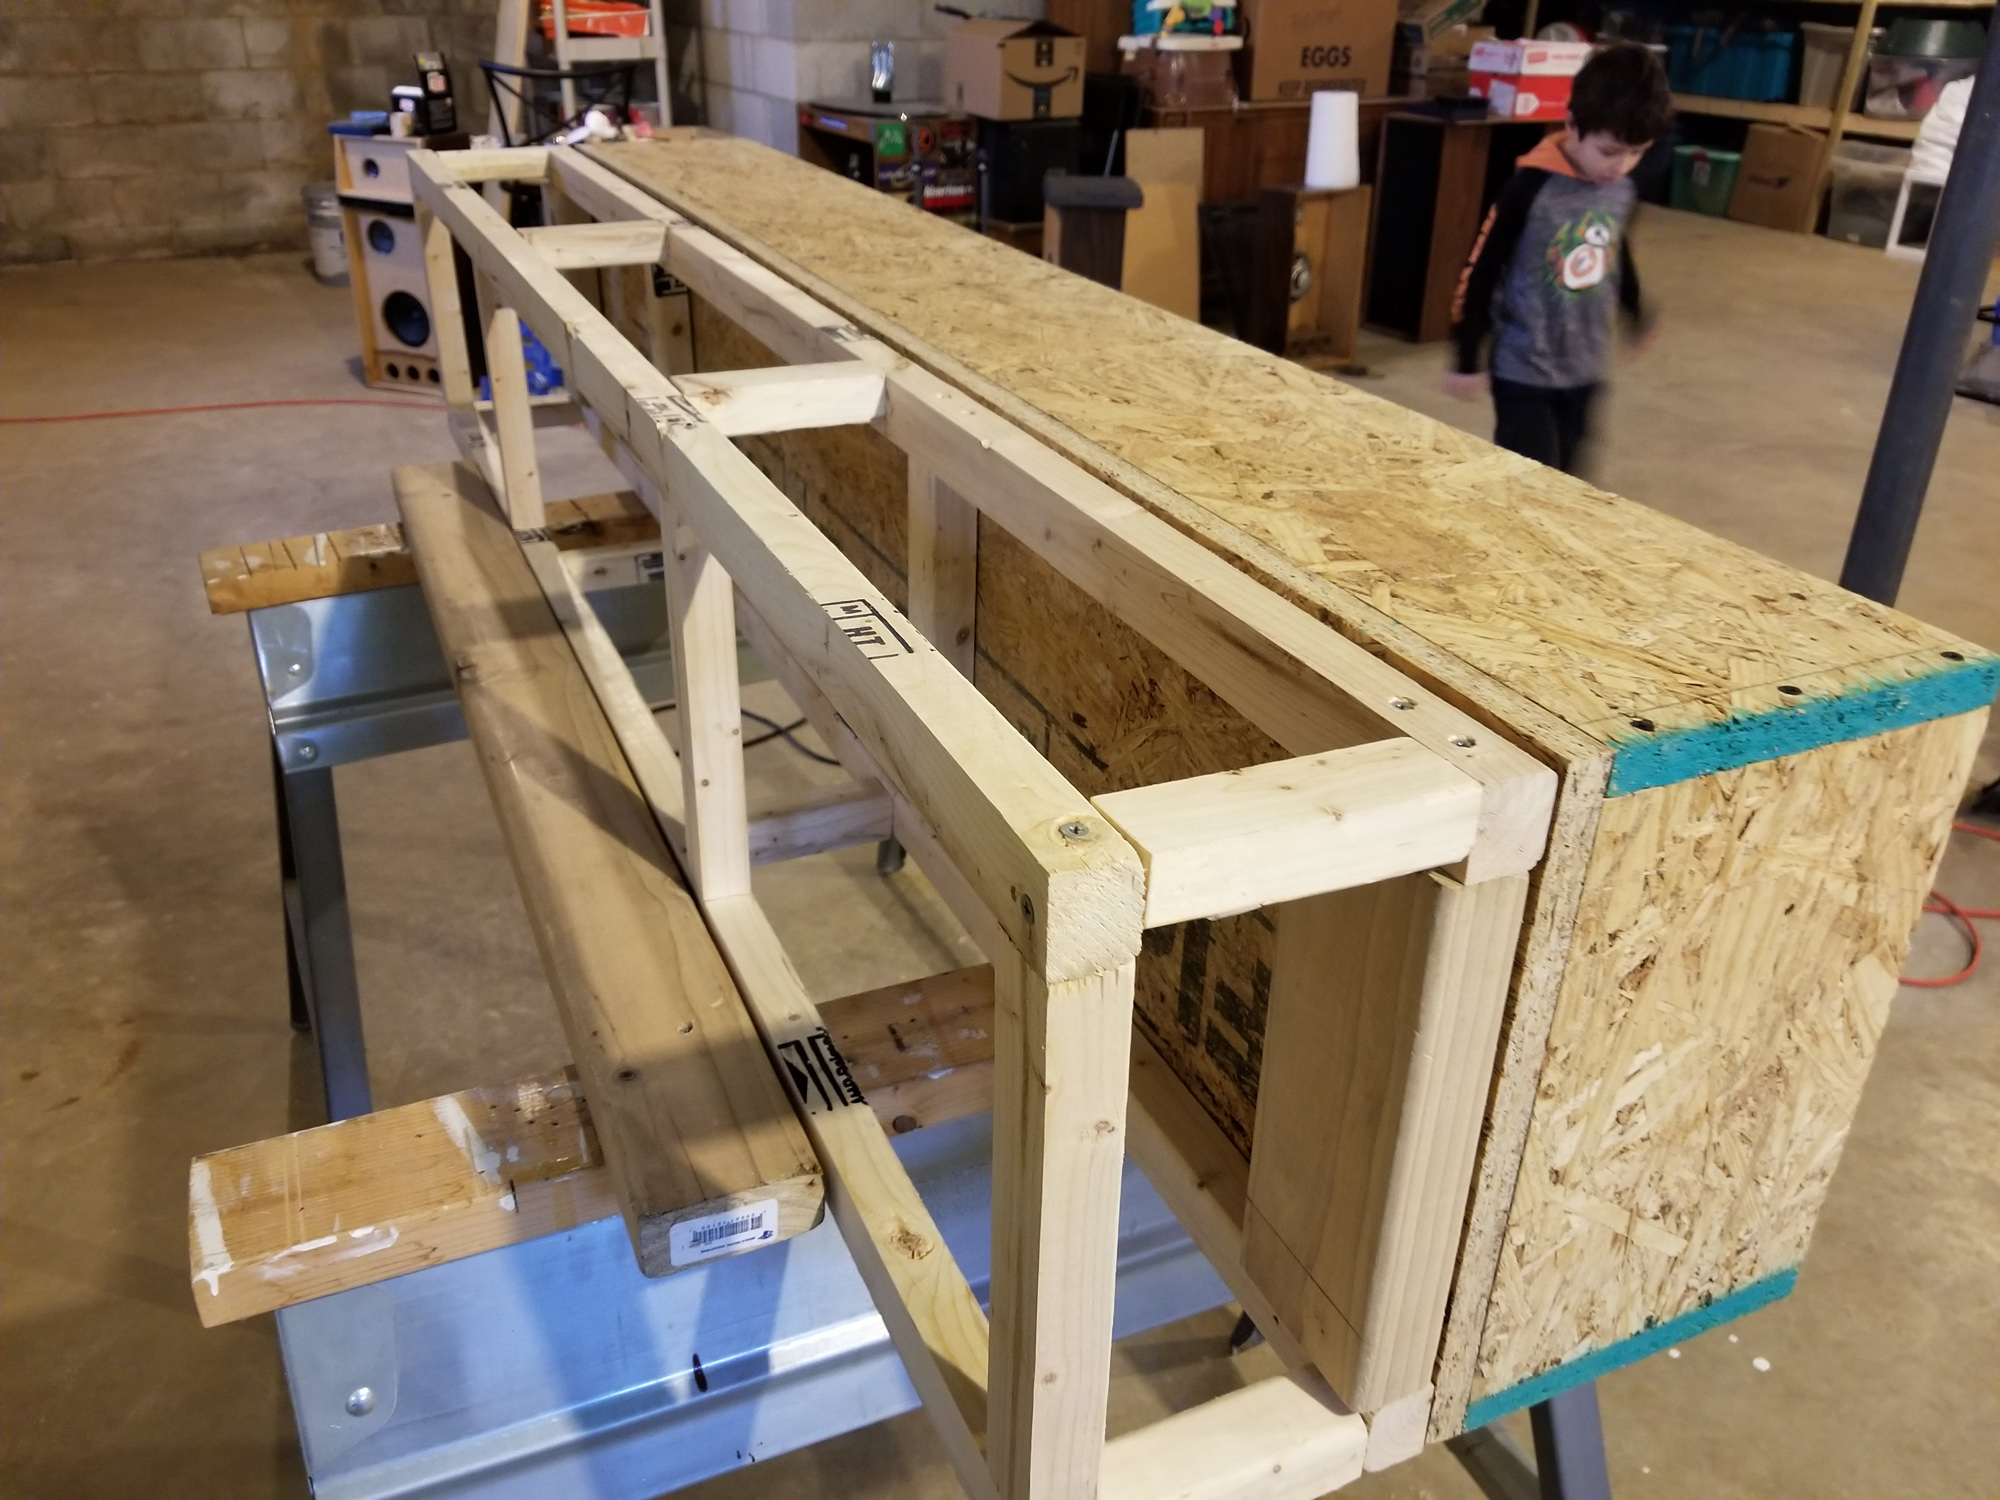
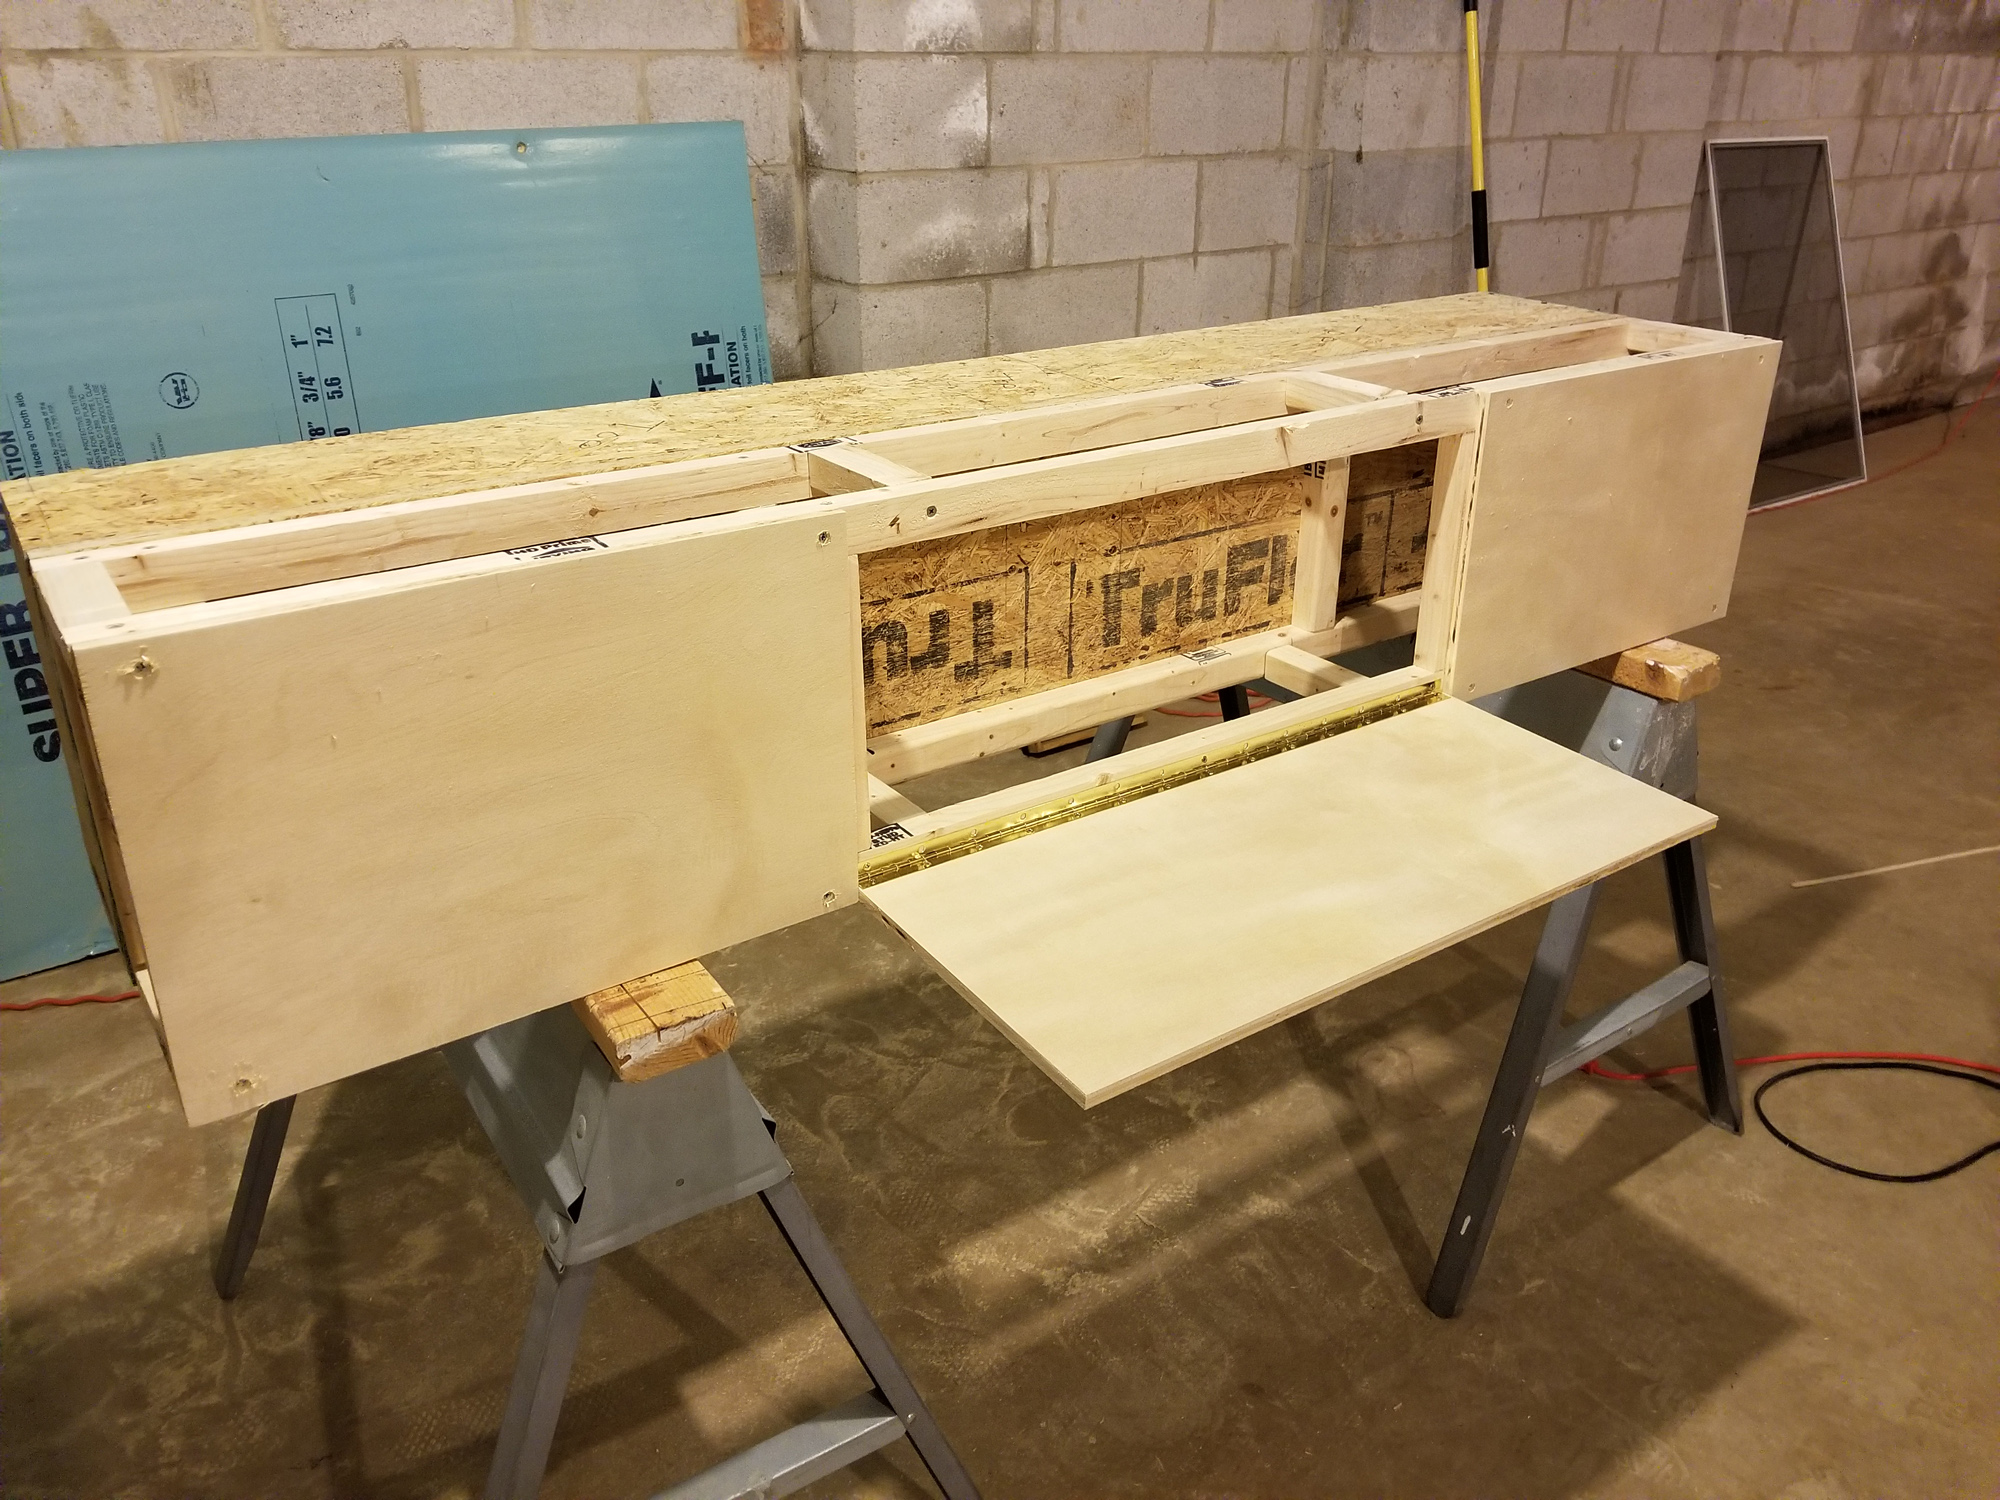
Enclosure Assembly:
The main speaker enclosure is built out of 3/4in flakeboard. This is a bit overkill (and added a lot to the weight), but I wanted this to function as a bench so I needed it to be extra strong. The back of the bench is made from three 2x3s ripped in half and built into a frame to extend the size of the bench. The whole enclosure is then wrapped in 1/2in oak hobby boards from Home Depot. The face and back of the bench were made from a sheet of 1/2in finished grade plywood.
Crossover Design:
As I am new to speaker building, I thought I would reuse the crossovers from the old enclosures. Once I started building, I realized that they had none. So, I purchased a pair of pre-built 100W crossovers from Parts Express (260-210)
Tips & Tricks:
Wood is very expensive, so to cut down on cost I got creative with hobby boards. Laying out the electronics was probably the most time-consuming portion of the build. Layout and wire management were key I keeping the back of the bench nice and clean. I learned a lot about soldering on this build. Spend the money on a good soldering iron and a good solder wick is your friend.
Conclusion:
The project turned out great. The speaker sounds amazing and is very loud (and I haven’t turned it up the whole way yet). The drivers sound much better than they ever have, thanks to the new crossovers and a bit of insulation. I like the look of the bench and even my wife was impressed with how nice the finish turned out. It was I fun project and I learned a lot along the way. Thanks to the folks at Parts Express for steering me in the right direction when I had questions.
About the Designer:
I’m a computer programmer and graphics producer for local TV station. In my free time I like to build computers and I have been collecting speakers since I was old enough to ride my bike to the record store. I grew up working with my father, who owns his own remodeling business. I was always encouraged to take things apart and rebuild them. Don’t tell my wife, but I think I found a new hobby!
Project Parts List:
very nice. I will be doing something very similar. How do you find the 3 ways rotated like that?