The Tenacious Bass 6 and 8 Subwoofers


Designer:
Tom Zarbo
Project Category:
Subwoofers
Project Level:
Intermediate
Project Time:
8-20 Hours
Project Cost:
$100 – $500
Project Description:
This subwoofer project is really two projects in one. Since many folks tend to gravitate towards building smaller 2-way speakers due to space considerations, using a subwoofer with speakers of that type really makes sense.
Design Goals:
I had the idea of designing two subwoofers with a similar design language in two sizes, or ‘strengths’ if you will. These two projects should meet the needs of most people with speakers ranging from tiny, single drivers to larger 5-7″ woofer two-way stand-mounted speakers.
Driver Selection:
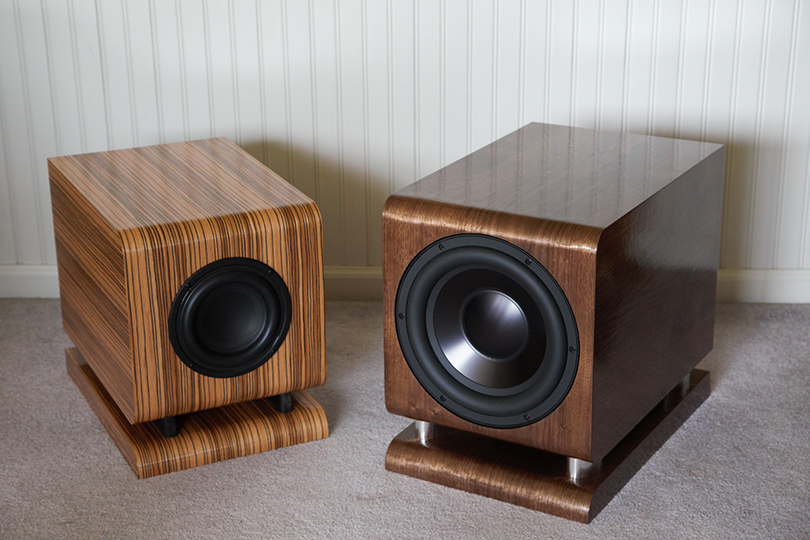
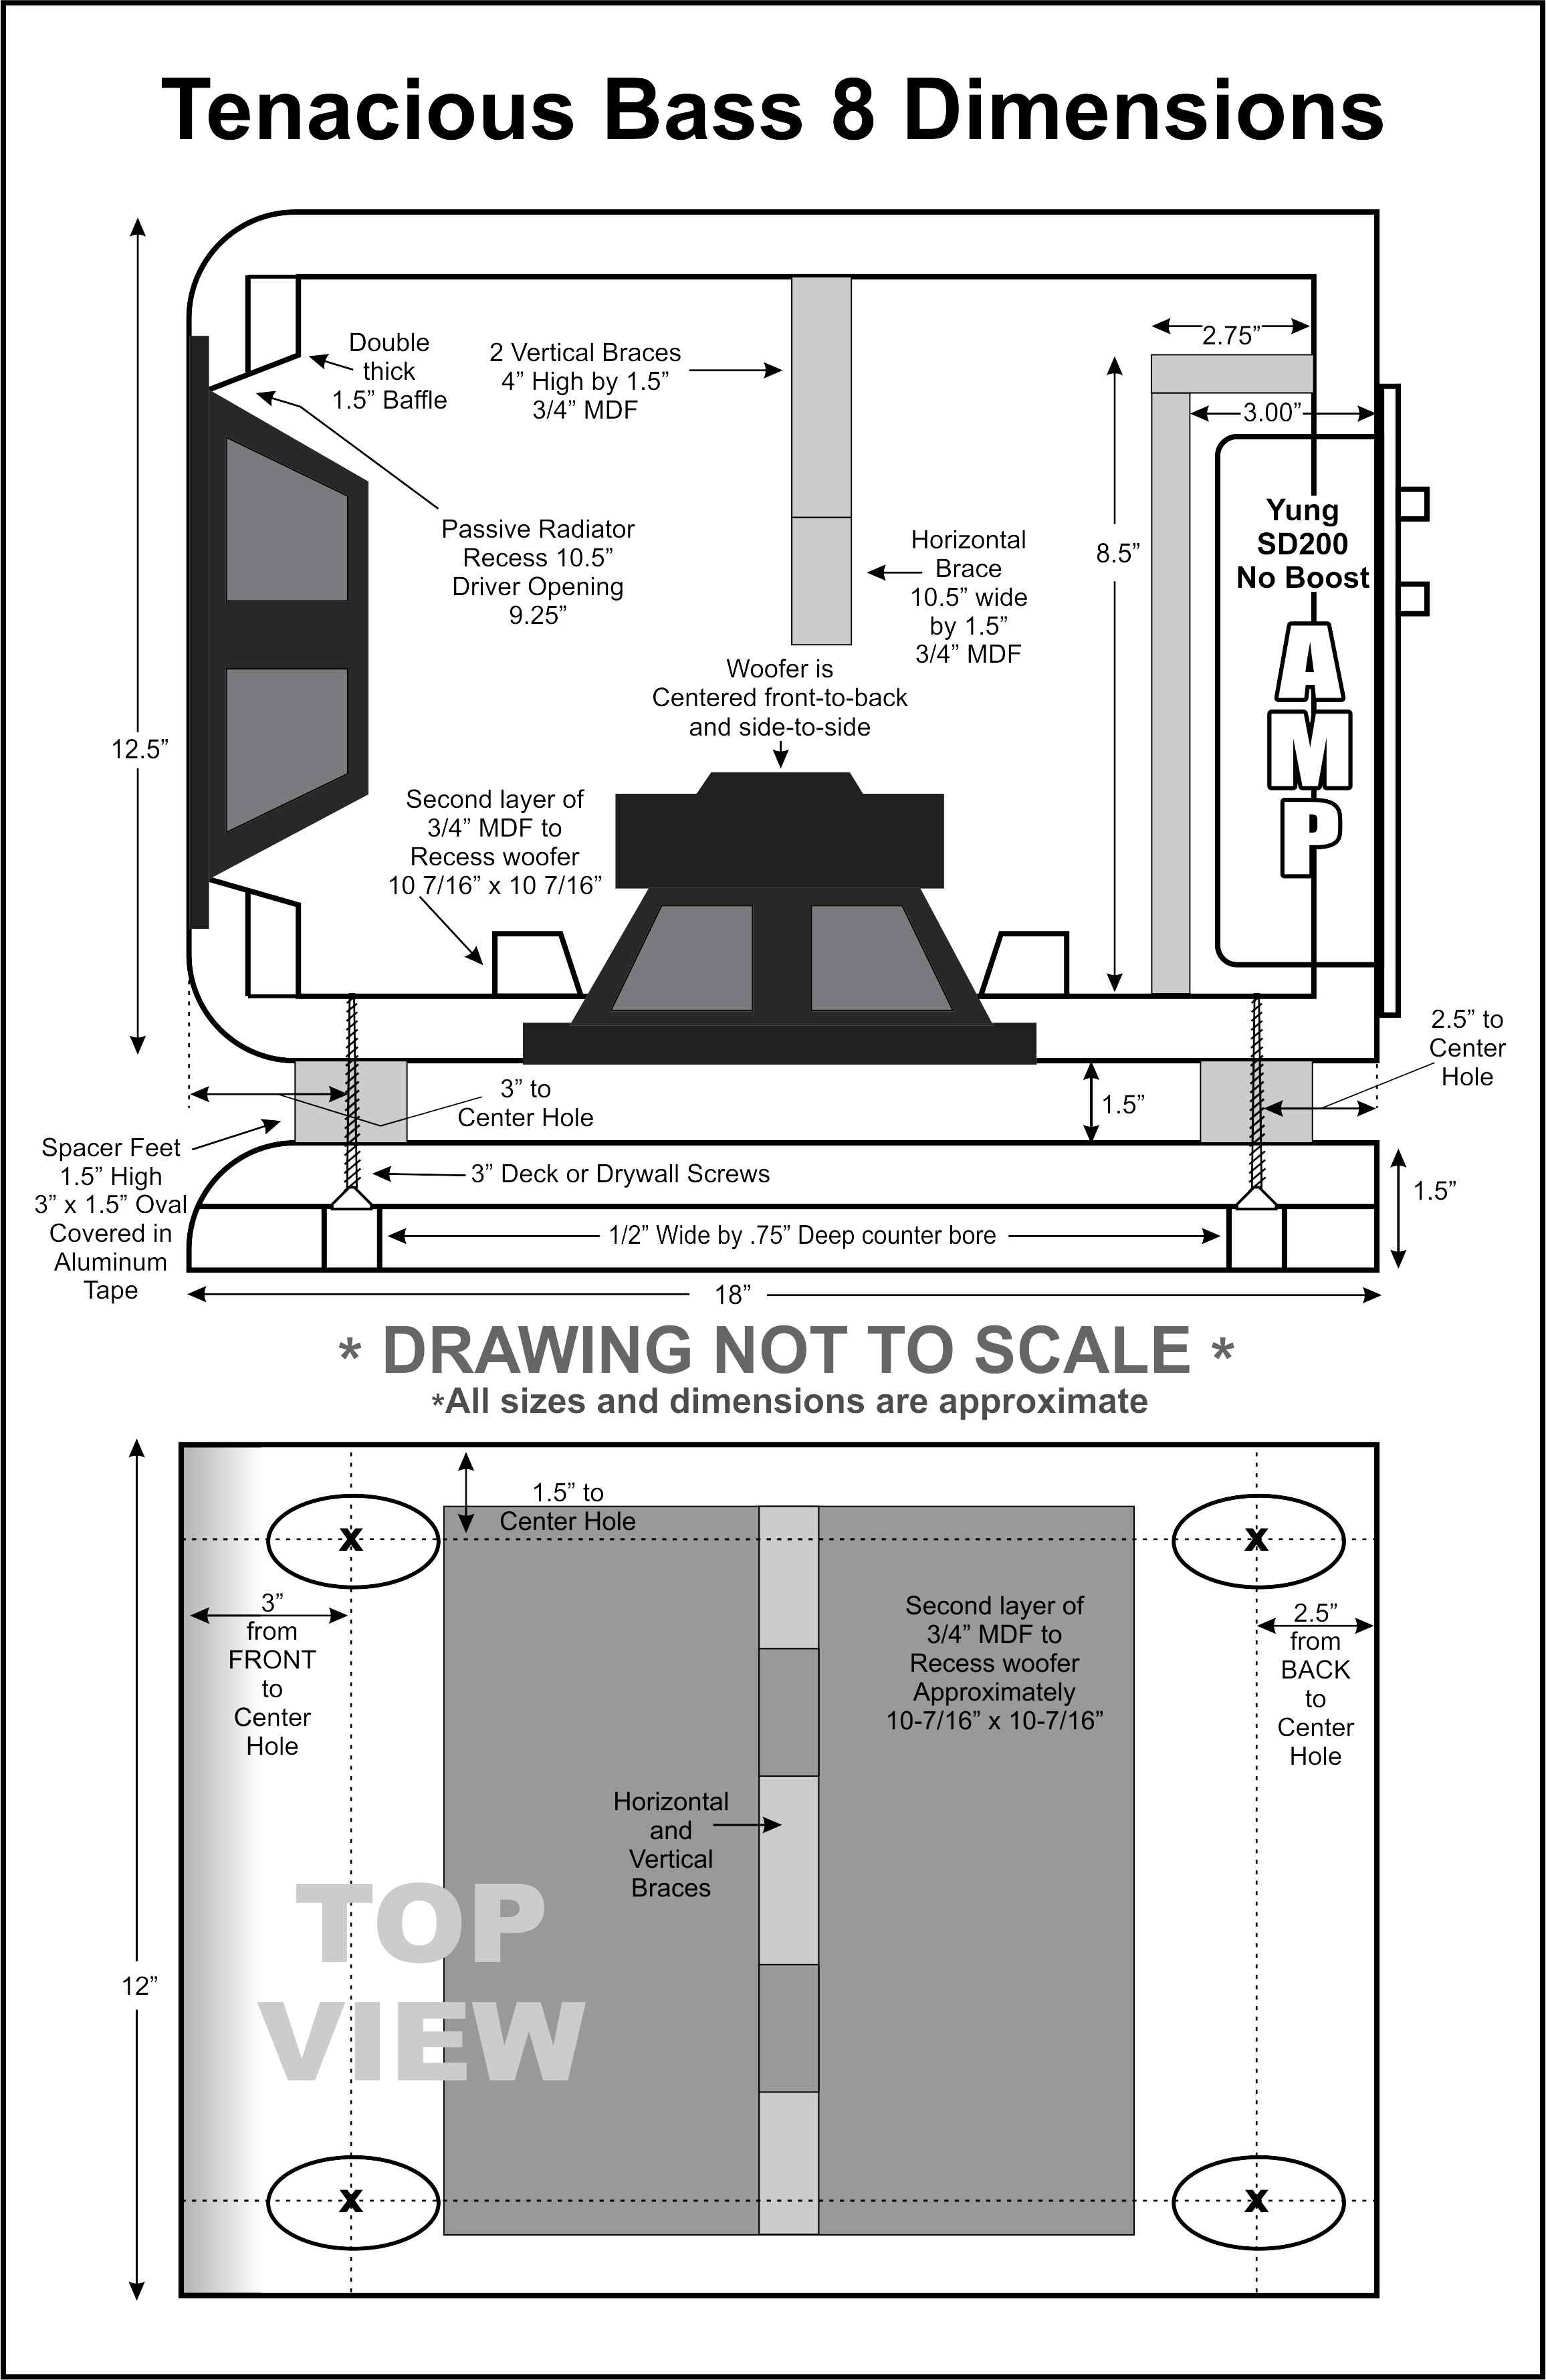
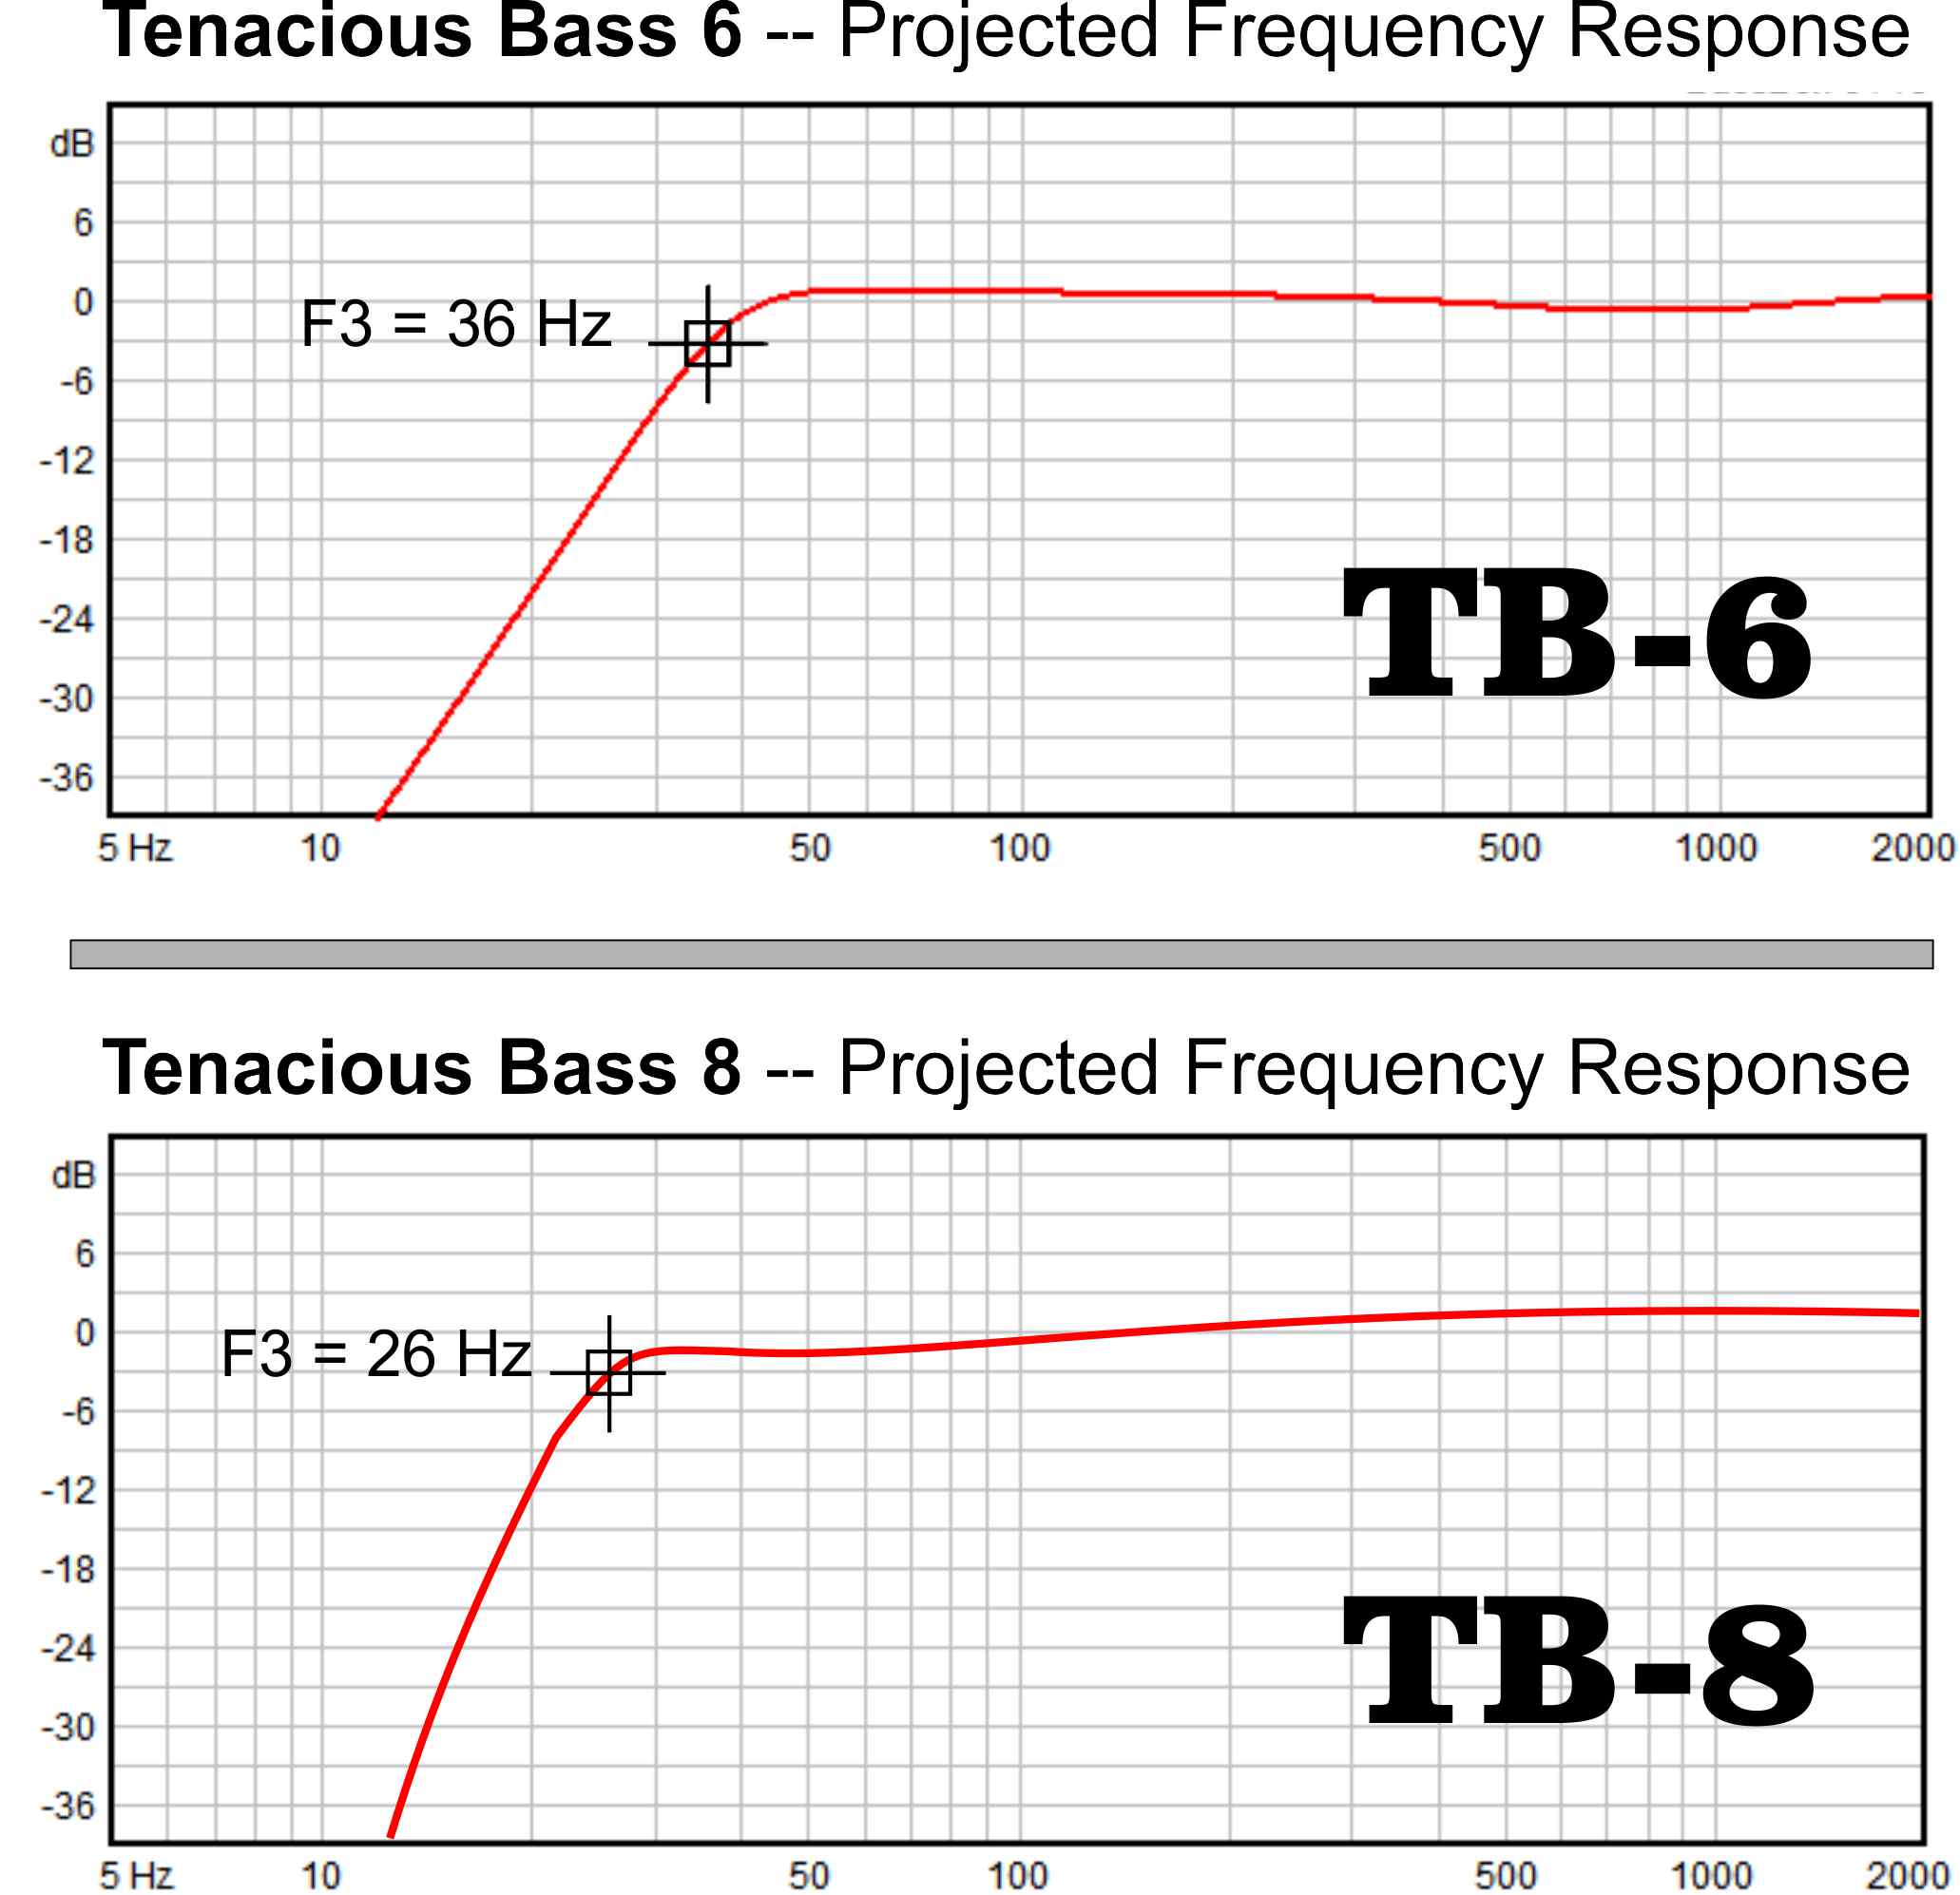
When thinking of subwoofer drivers, you almost have to consider the offerings from Tang Band, they are almost legendary at this point. The smaller ‘Tenacious Bass 6’ (TB-6) subwoofer uses the Tang Band W6-1139SIF 6.5″ driver, while the larger ‘Tenacious Bass 8’ (TB-8) sub goes with the Tang Band W8740P 8″ driver. The name ‘Tenacious Bass’ is an obvious play on the Tang Band name, but it certainly is descriptive of their bass producing abilities. Although not a ‘driver’ the sexy Dayton RSS 262-PR 10″ Passive Radiator is used instead of a vent in the TB-8 to tune this enclosure low and keep the enclosure size reasonably small.
Enclosure Design:
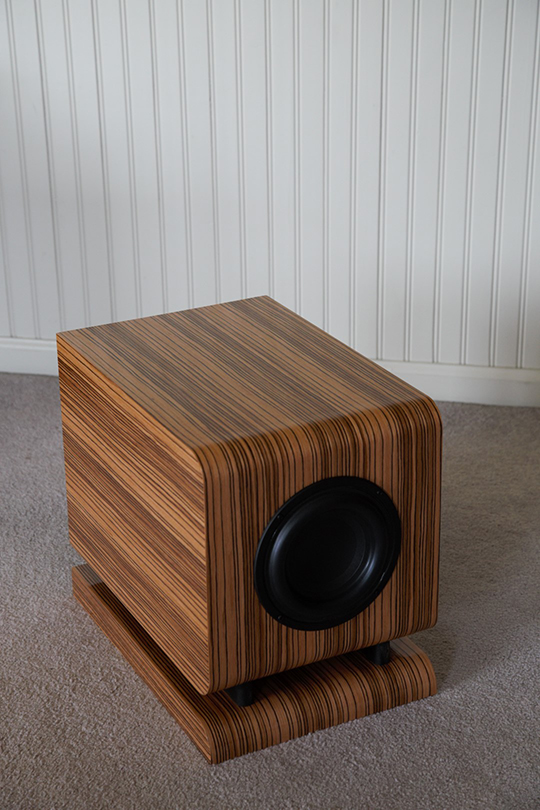
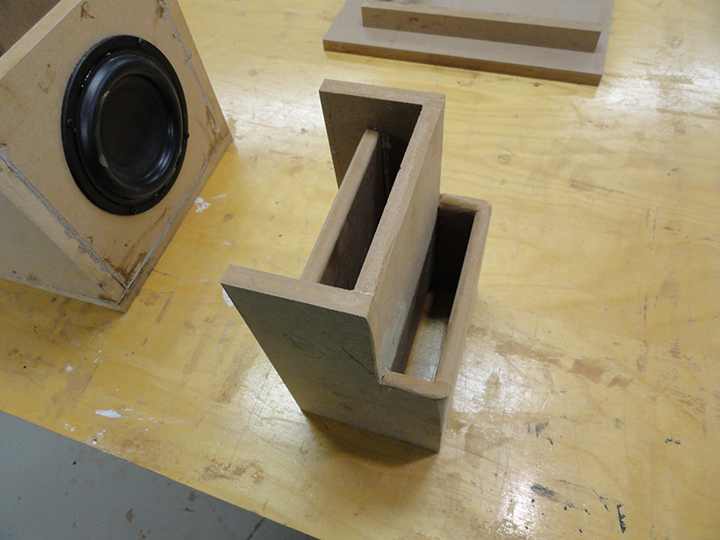
I wanted the enclosures to be unique looking, as well as functional. Both have a fairly beefy bottom plate that adds interest and serves a purpose. In the smaller TB-6 sub, the bottom plate serves as part of the slot vent, and in the larger TB-8 sub, the space between the enclosure and the bottom plate allow ample airspace for the bottom-mounted subwoofer driver to breathe. Additionally, the large round-overs on the smaller ‘Tenacious Bass 6’ aid in reducing port turbulence at the slot vent exit, as well as give it a bit of ‘pizzazz.’ Both versions of this project produce bass with a nice ‘visceral’ feel to them as the drivers, vents, or passive radiators as the case may be are mere inches from the ground.
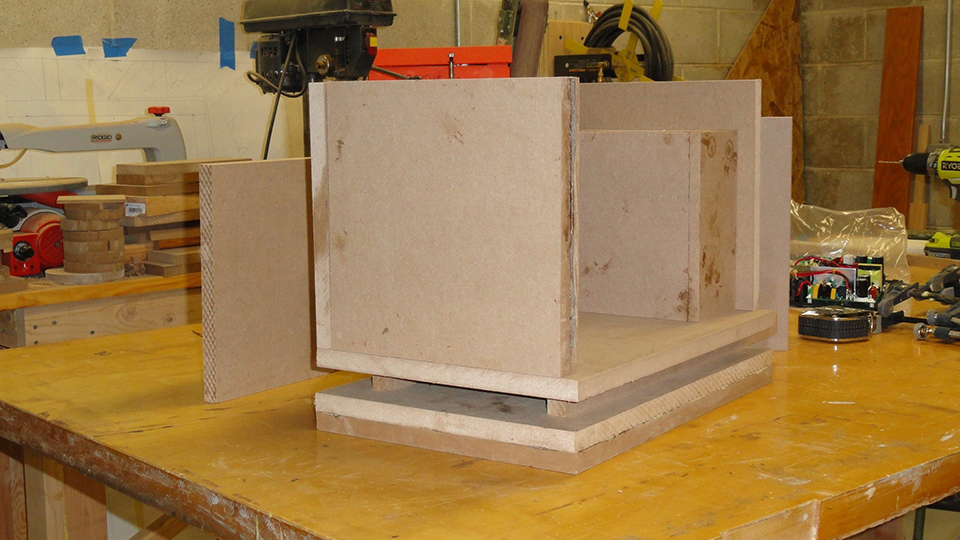
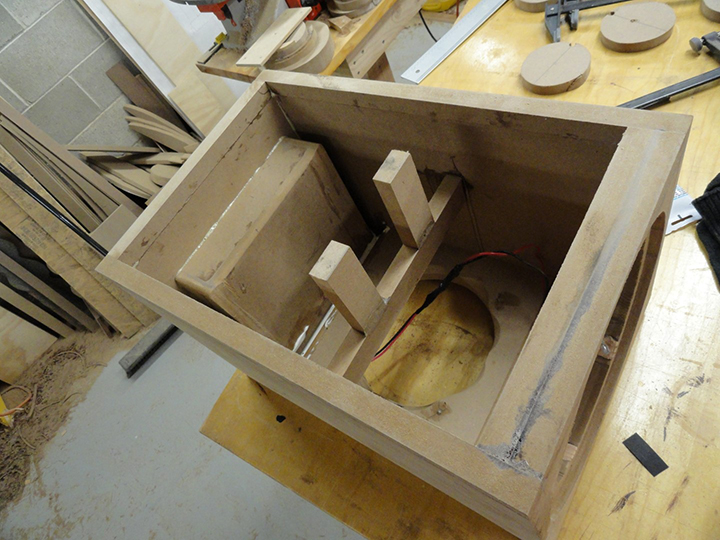
Enclosure Assembly:
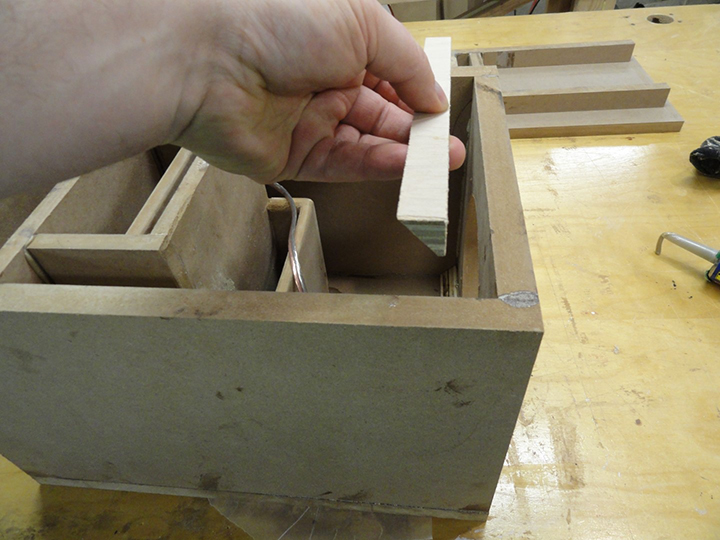
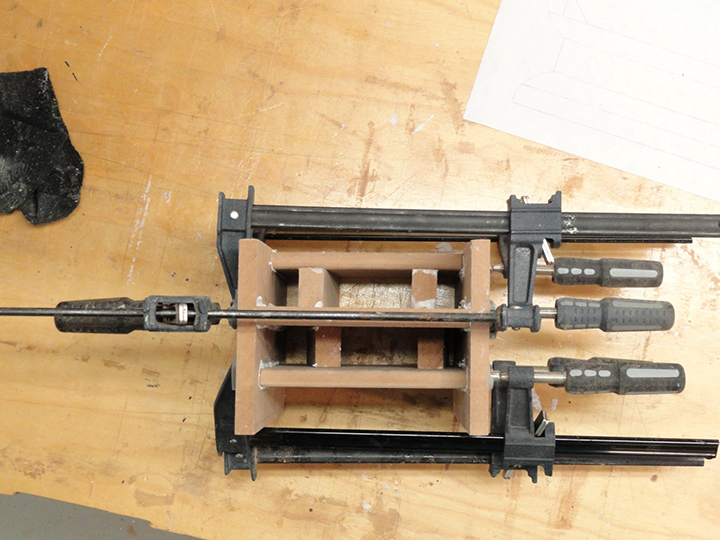
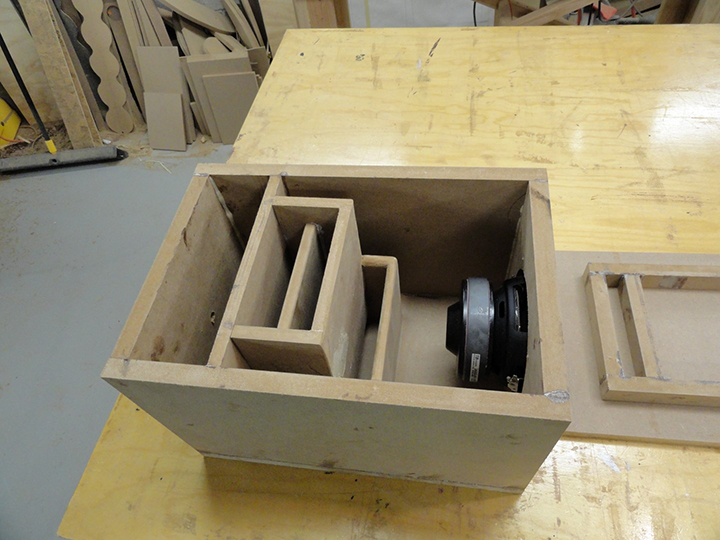
Both cabinet designs are constructed using simple 3/4″ MDF butt joints, with 1/2″ MDF amplifier sub-enclosures. The vent assembly on the smaller TB-6 enclosure is constructed entirely of 1/2″ MDF with roundovers on the inside exits. The folded slot vent on the TB-6 is 6″ wide and 1.25″ high, approximately 37.5″ long. I added small ‘triangles’ to the front horizontal corners to provide adequate strength since I used a large 1.25″ roundover on the front horizontal corners. I also assembled the vent assembly as one unit with temporary spacer blocks to ensure that the vent area remained constant throughout. This assembly was glued in after the box was glued up except for the top. I used Gorilla glue to assemble both projects except for the vent assembly and top of the TB-6 enclosure — which used PL Premium construction adhesive. I chose the PL over wood glue or Gorilla glue because I wanted the thicker consis tency to ensure the vent structure was airtight, but I didn’t want the ‘foam-out’ that comes with using Gorilla glue. Before installing the driver, I added a 26″ x 26″ piece of polyfill batting folded in half, then in thirds to the top of the woofer compartment. This helps calm down vent noise a bit and is specified in the design.
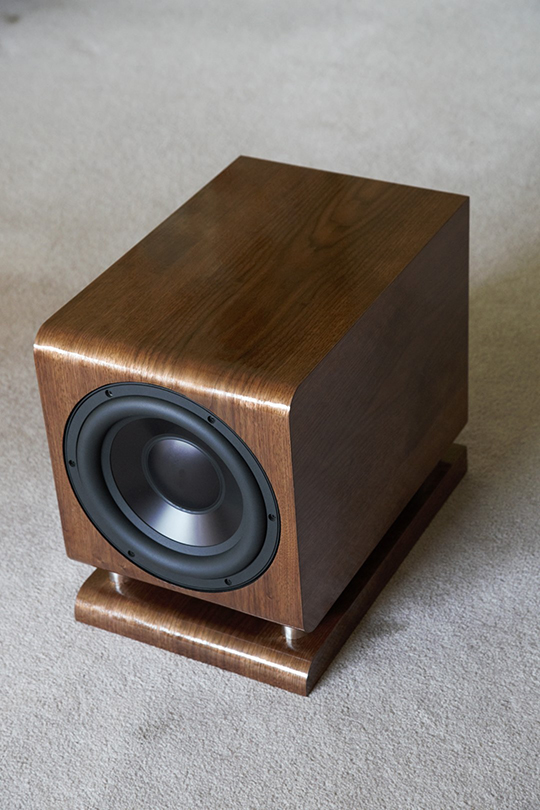
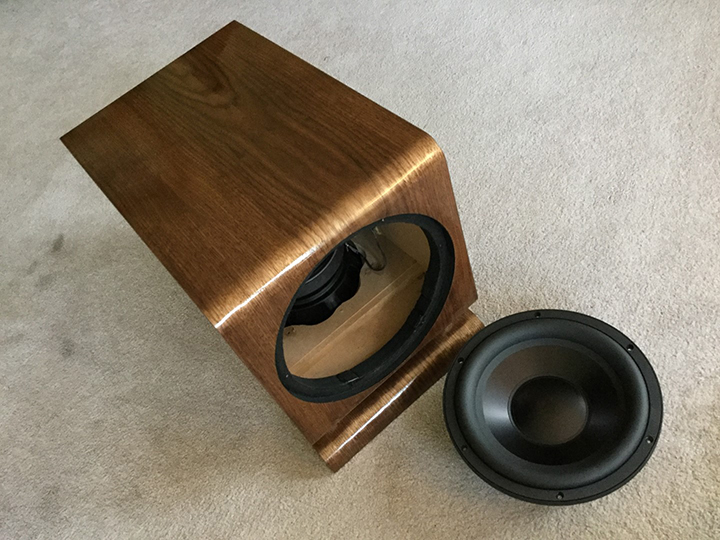
The TB-8 has a double-thick front baffle to accommodate the thicker driver recess of the Dayton passive radiator. It also has a double thick baffle on the bottom of the enclosure where the 8′ driver is mounted as it has a thick driver flange and needs to be flush with the bottom of the enclosure. The pictures of the cabinet drawings have much more detail as well as exact sizes and dimensions.
Crossover Design:
Being powered subwoofers, the crossover is built into the plate amplifiers used. The TB-6 uses the 70 watt Dayton SA70 plate amp, where the TB-8 employs the 200 watt Yung SD200 plate amp. These amps were chosen as they allow for a bit of ‘headroom’ where the amp produces more power than the driver would normally see.
Tips & Tricks:
As I mentioned, the vent structure on the smaller TB-6 should be glued up as a unit before assembly is complete. Also, use a square to ensure the amp sub-enclosure plate is perpendicular to the enclosure as any gaps between it and the vent assembly may result in air leaks. If I were to build these again, I would apply the veneer to the enclosure before making the driver openings; veneer application would be much easier that way.
Conclusion:
During the construction of this project I encountered several obstacles which you can read about on the Tech Talk ‘Speaker Project Gallery’ sub-forum. Part of the challenge in DIY speaker building is working through problems, and in this case, the end results more than met my expectations for bass output as well as style and attractiveness.
About the Designer:
I’ve been dabbling in speakers since I was a teenager when I built my first set of speakers. Even as a kid I thought they sounded kind of awful… but I had been bit by the bug — and have been striving for better sound and more creative cabinet designs ever since.
Project Parts List:
|
Part # |
Description |
Qty |
|
*** |
“Tenacious Bass 6 Subwoofer” | |
|
264-919 |
Tang Band W6-1139SIF 6-1/2″ Paper Cone Subwoofer Speaker |
1 |
|
300-784 |
Dayton Audio SA70 70W Subwoofer Plate Amplifier |
1 |
|
*** |
“Tenacious Bass 8 Subwoofer” | |
|
264-854 |
Tang Band W8-740P 8″ Subwoofer |
1 |
|
301-504 |
Yung SD200 200W Class D Subwoofer Plate Amplifier Module No Boost |
1 |
|
295-500 |
Dayton Audio RSS265-PR 10″ Aluminum Cone Passive Radiator |
1 |
gorgeous! awesome build. bet they sound fantastic.
Great Design! love the finishes too!
More great designs! The score goes to TomZ!
On the TB6 is that just bracing on the inner top or is it part of the vent structure?
Love the look of this! I am thinking about doing a 2 sub set-up using the same 8″ sub and amp combo and had a question for you. I was reading about the 8″ Tang Band sub and someone had commented that the 10″ passive radiator they used wasn’t enough and they suggested the 12″. Have you had any troubles with that being the case where the PR is moving too much and maxing out? I love the 26HZ tune you have! Beautiful Enclosures!
So sorry I didn’t see this sooner Cory.
Thanks for the comments. The 10″ PR has no trouble whatsoever keeping up with the driver. With a lower tune, it may, but tuned where it is, no issues at all. The driver will bottom out before the PR hits max excursion.
I’ve lived with this sub paired with a tiny set of two-ways (The Bantams) for months, and it really performs well in that configuration.
Tom, 26hz from an 8” sub from such a small closure is fantastic! Looking for a 10” (or a 12”) that gets down to 20hz or lower in a larger, though not a lot bigger, closure. Plan to build two – maybe more if just a bit bigger than your TB8. Suggestions?
I forgot to check the “notify me” box.
Hey Tom have ever thought of an 18 inch sub with this box design. Id so what would the deminsions be.
Gran diseño, servira con controladores de 18″ ?
Well done! Nice speakes.