
Tang Band 6.5 ported @ 35hz


Designer:
GregM
Project Category:
Subwoofers
Project Level:
Beginner
Project Time:
8-20 Hours
Project Cost:
Under $100
Project Description:
I will list a full description here, sorry if it is redundant with other fields below:
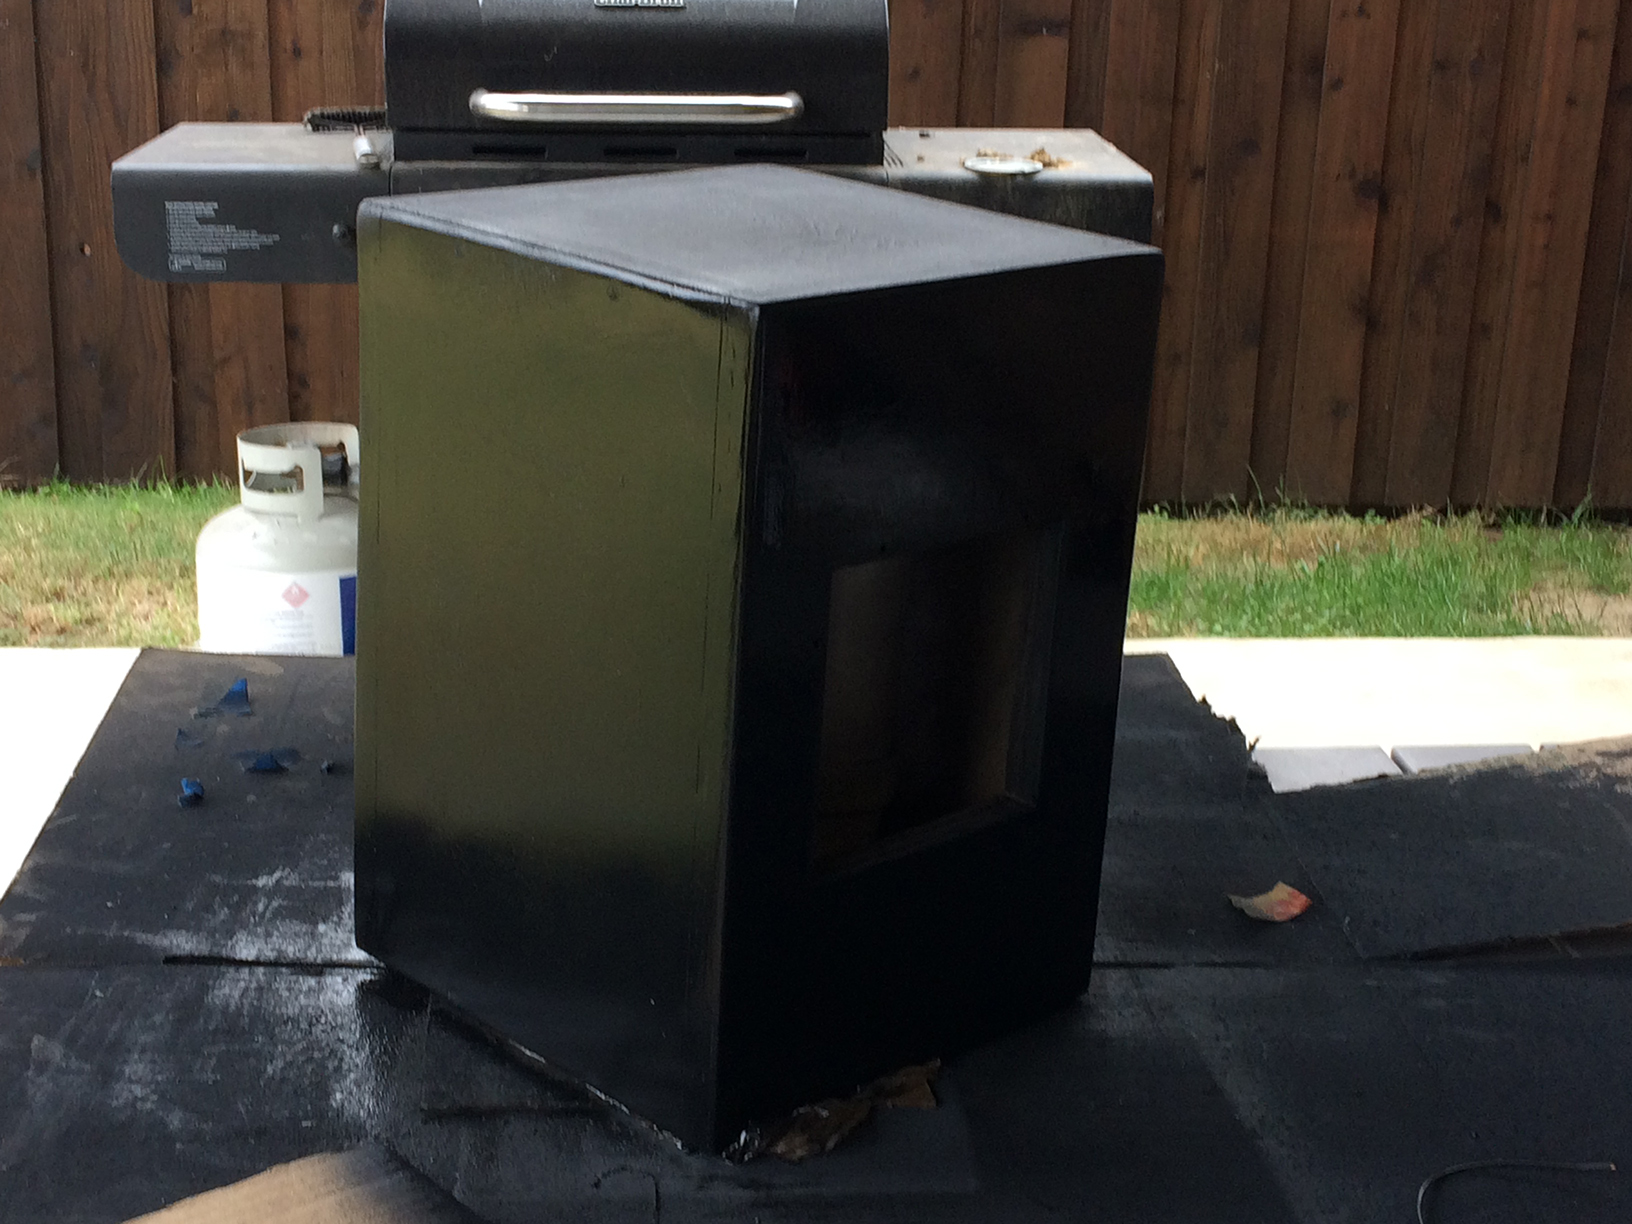
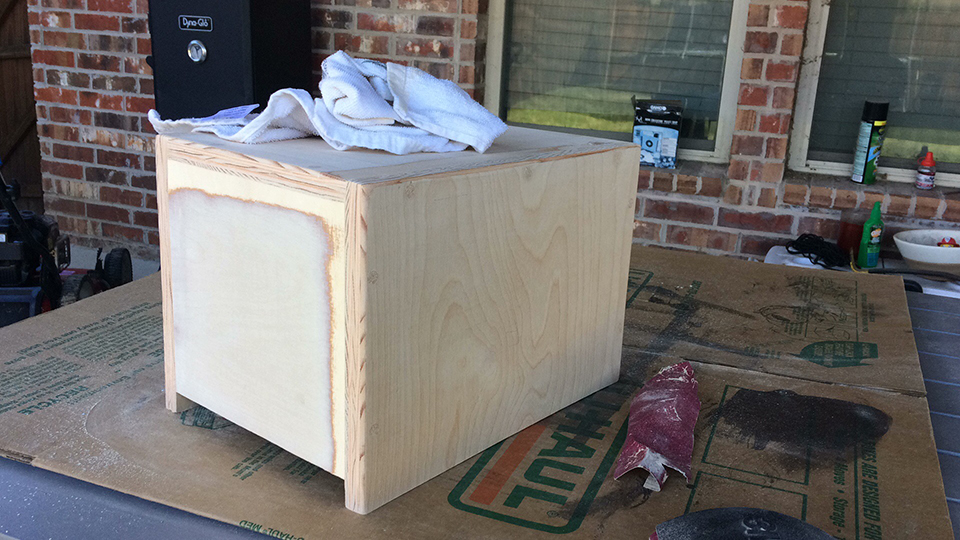
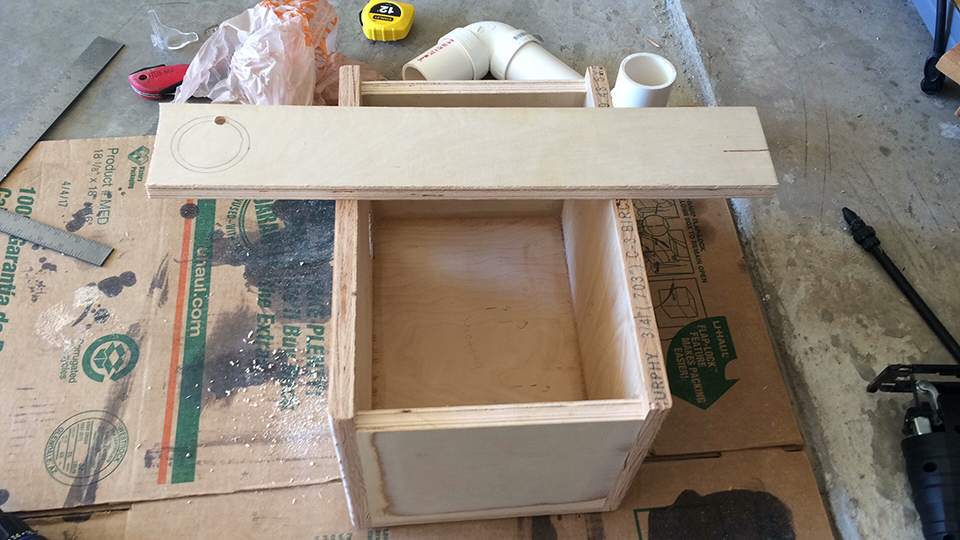
I had some ¾ Baltic birch left over from another speaker project, so decided to make a small sub to compliment my small room/computer musical setup. I have the Audioengine A2s. I used the Tang Band W6-1139SIF 6-1/2″ Paper Cone Subwoofer Speaker with the Dayton Audio SA25 25W Subwoofer Plate Amplifier. I built a ported box tuned to 35hz, with dimensions of 9.375 x 14 x 9.75 (in). The port diameter was 2ID x 17.9. The PVC made 2 90 degree bends to allow for ~2.5 inch clearance where the air enters the port, and for the PVC to not hit anything (subwoofer, amp, walls, etc). I stuff some polyfill along the walls between the PVC for dampening but didn’t add too much. Originally the PVC called for about 14.5 inches to be tuned to 35hz, but after considering the displacement of the amp, and subwoofer and the small piece of wood to attach the PVC to, it became slightly longer.
I was inspired by the Cerberus that is all over the DIY forums but I felt I could do better as far as eliminating the chuffing (he used 1.5 diameter vs my 2). I also used a homemade method of flaring the baffle end of the port by basically sanding the opening for what seemed like forever (but I had a lot of time for this project). I used a less powerful amp than for the Cerberus, so perhaps it isn’t pushed as well or as loud, but the results are impressive. I might buy the 70w Dayton plate amp, but I got the 25w one I’m using refurbished for 20 dollars. It isn’t working correctly (cutting on an off randomly) but it allowed me to hear pretty well that this was a good idea to build. I hear chuffing on the loudest volume before distortion on the lowest music/movie content I have. If I back off a bit it is fine.
I finished the outside of the box by counter sinking the 2.5 inch screws, then filling the holes with a mixture of sawdust from my cuts and wood glue. I then sanded these down flush. Then I by sanded the entire box extensively first with an 80, then 150, then 200 grit sandpaper. I then used two cans of primer, with sandings of 200 then 400 grit sandpaper. My last coat of primer was then sanded with 400 grit. I then emptied half a can of flat black on it, then sanded with 800 grit. After that I used an entire can of 2X rustoleum semi gloss on the box. I used 800 grit for the first coat, then none after that. It came out well, not perfect but good. Perhaps for a paint job like that I should’ve used MDF, but I used left over Baltic birch, so it felt free.
I hope this can be an inspiration for others. Perhaps I could’ve flared the port opening more to eliminate chuffing at high volume, but also perhaps the weak amp is making the woofer move too rapidly, maybe subsonic content is causing it, or maybe the 6.5 tang is almost impossible to port without chuffing because a 3 inch diameter port would never work in a box that small. I feel that the tradeoffs for this build are worth it. The 25 watt amp would’ve worked fine, but as I said it’s defective, cutting on an off often. Parts express gave me a refund, so I’m going to likely buy the 70 watt Dayton plate amp soon.
Design Goals:
To make a musical sub with medium output potential for a small 2.1 system used in my bedroom with my laptop, and mp3 players.
Driver Selection:
6.5 inch sub (see parts list)
Crossover Design:
Set in plate amp
Conclusion:
I am very happy with the build, and the results (visually and musically). I think I will put in the dayton 70 watt plate amp soon, and will update afterwards. But the 25w one (when it was working decently) worked well.
About the Designer:
I started making boxes a few years ago for my car and home with 6.5 up to 12 inch subs. Most boxes have been sealed but lately I’ve built ones ported.
Project Parts List:
|
Part # |
Description |
Qty |
|
264-919 |
Tang Band W6-1139SIF 6-1/2″ Paper Cone Subwoofer Speaker |
1 |
|
300-782 |
Dayton Audio SA25 25W Subwoofer Plate Amplifier |
1 |
2X4 foot 3/4 inch Baltic Birch from Home Depot.
2 foot long, 2 inch diameter PVC
2 90 degree bend connector PVC
2.5 inch wood screws.
Wood glue
Caulk
Primer+semi gloss spray paint.
80, 150, 200, 400, and 800 grit sandpaper
I love the idea of this project. So much that I think I am going to try something similar. Something to note as I am a cabinet maker’s son, the plywood you used in those pictures is not Baltic birch plywood (which only comes from Russia). It looks to me like birch ply with poplar core. The only piece that looks like BB is the spacer block used on the port tube via the inside of the cabinet. I’m not criticizing you, but wanted to make you aware. Baltic birch is very nice to work with if you get the chance. The only negative is the formaldehyde glue they use and density of the wood really takes a tole on your cutters and carbide tooth saw blades.
Cheers! I can’t wait to see your next project.
Sorry, just seeing this now. Yeah it was a fun project, and sounds really nice. I ended up swapping out the 25 watt amp for the dayton 70 (fit with no mods other than the hole to mount). Home Depot, where I bought the wood, were claiming it was baltic birch, so I got the name from that. Either way, it was kind of fun to work with whatever wood I used, and it seems solid/rigid enough for this design. Did you end up making something similar? The 6.5 Tang, ported, with the 25 or 70 watt dayton amp is quite an impressive little powerhouse. I have a sealed tang 8 with a yung 200 watt amp, I imagine ported it would be thunderous, but sealed is nice too, and the tang 6.5 and tang 8 both seem to compliment each other well in my smallish bedroom. I’d like to see some pics or even a text description of whatever you make. I’m glad this project inspired you, it was a lot of fun.
This sounds just like what I need. You posted dimensions. Are those interior or exterior dimensions? Thanks.
Sorry just seeing this now. Those were external dimensions I listed. I probably have more detailed instructions on my computer I can send you if you are going to build this. Maybe I can email them to you over a private message?
0.356 ft^3 was the final net volume as well. Perhaps you can model it in winisd to see if this design will work for you.