Texas Flood


Designer: Kerry Armes
Project Time: 1-8 hours
Project Complexity: Intermediate
Project Cost: $500-$1000
Project Description
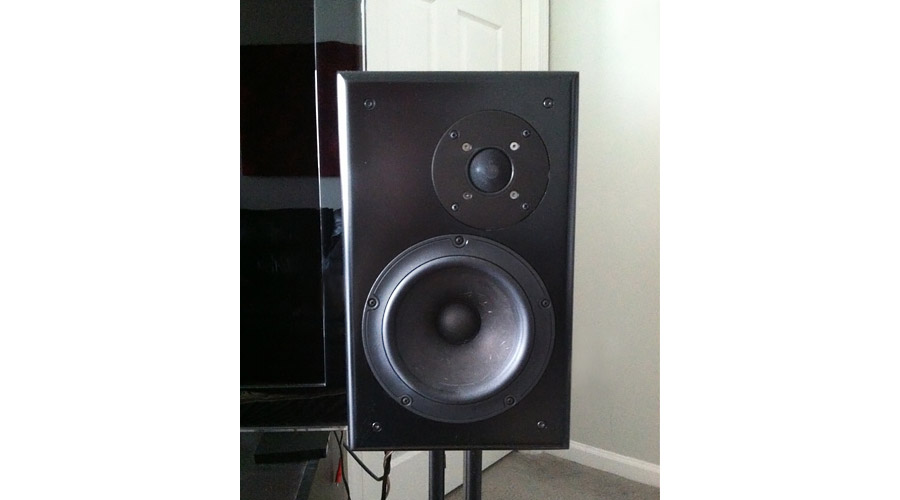
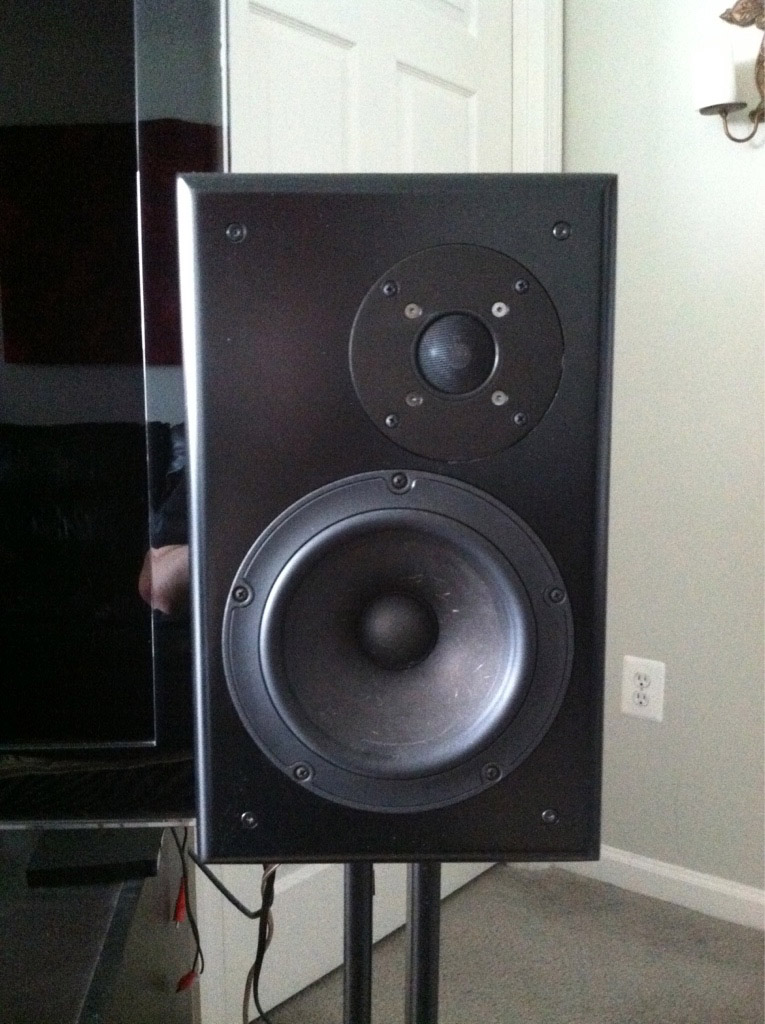
A medium sized, high performance 2-way design
Design Goals
I was asked by a friend to design him the best pair of speakers I could with $500 with the cabinets included. My goal was to design him something with high performing, low distortion drivers that he would be happy with for years to come. We eventually upped the budget slightly to $550 with the cabinets.
Driver Selection
I chose to go with a higher end 2-way as opposed to 3-way so I could put more money into higher tech drivers. He still lives in an apartment, so he also wanted something that wasn’t enormous. We elected to go with pre-built cabinets from Parts Express (which I believe were on sale at the time) which left about $350 for drivers and crossovers.
At the time I built this, the Vifa NE180W-08 was on sale for $90. Having seen the measured performance of this woofer, it looked like a great candidate. Using a 6.5″ woofer meant I was looking for a tweeter that would cross at or below 2khz to maximize power response and off-axis response. To make sure I still had money left for the crossover, I went with a reliable and reasonably priced RS28a, which definitely performs above its price point and can easily cross in the region I intended.
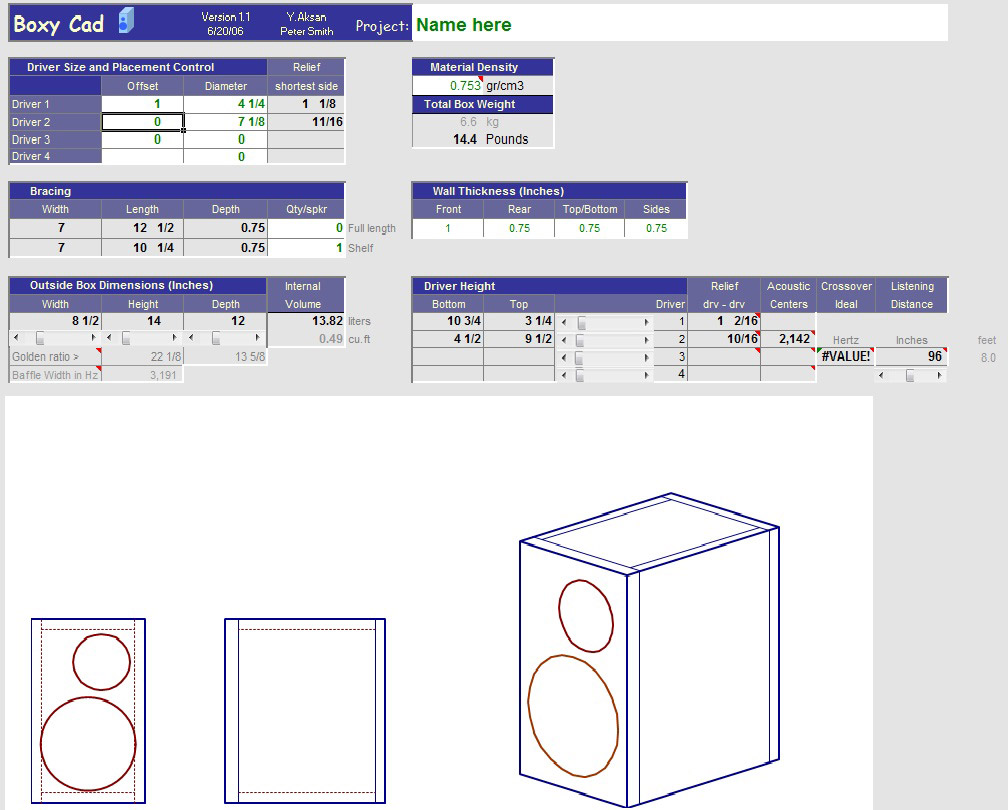
Enclosure Design
Since I didn’t have access to a table saw at the time, we chose to go with the Parts Express pre-fab 0.5 cu. ft. cabinets in gloss black. These allowed for a quick build with minimal effort.
The tweeter was offset to reduce baffle diffraction. The tuning was done using a 2″ adjustable port (PN 260-387) without the extension section attached (about 6.25″ long) which tunes the enclosure to 48hz. This provides a small 1-2db bump centered around 70hz and results in a fuller overall sound. The design f3/6/10 were 50/44/37hz.
Enclosure Assembly
The assembly was pretty straight forward with the pre-fab cabinets. I cut the holes and recesses with a Jasper Jig and chamfered the backside of the woofer cutout for better airflow. I then lined the interior of the cabinet with Fat Mat vinyl damping material and Ultratouch denim insulation.
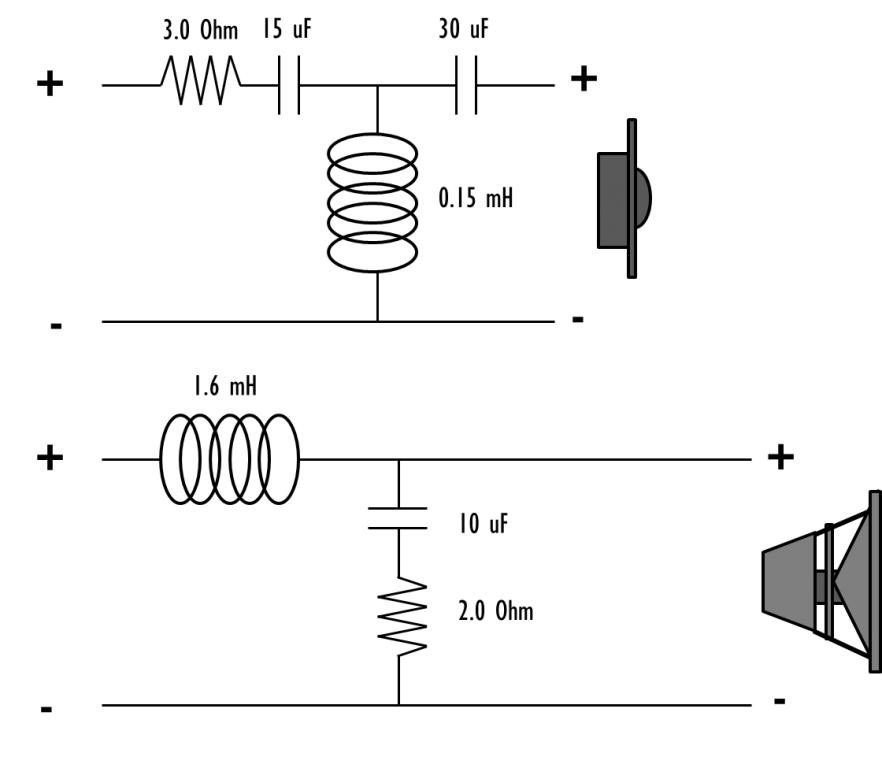
Crossover Design
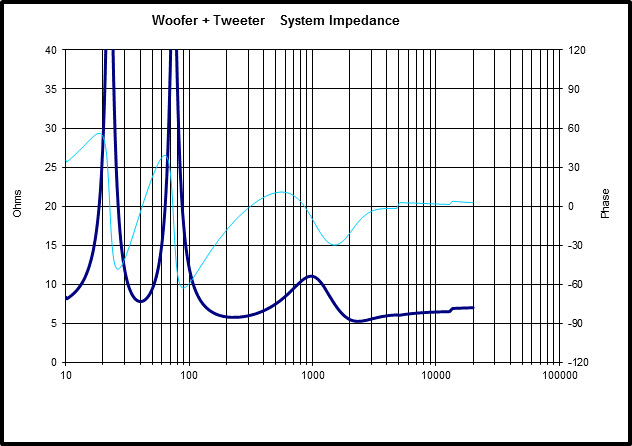
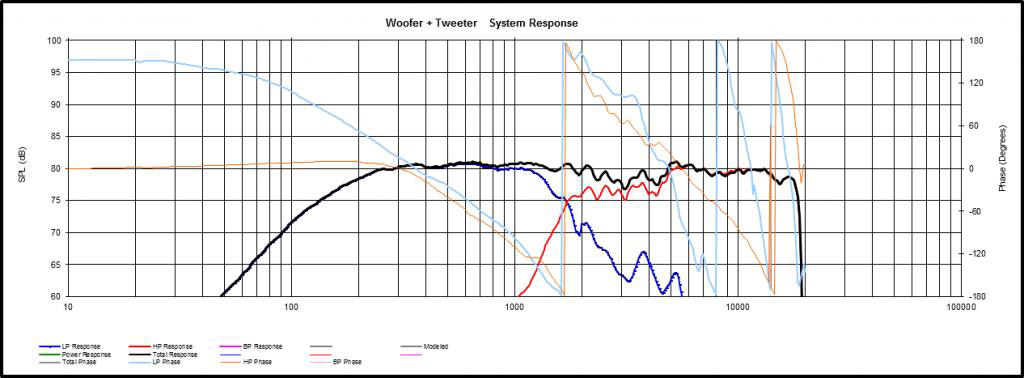
Measurements were taken using a Behringer ECM8000 measurement microphone in HolmImpulse (I’ve now upgraded to an Omnimic system) for frequency and Dayton Audio DATS for impedance. The crossover were designed using Jeff Bagby’s Passive Crossover Designer. The final crossover point was around 1.8khz. My friend intended to use these near wall, so I did not perform full baffle step compensation on them. A larger inductor in the woofer circuit can be used to lower the midrange level if you find it to be too high.
Conclusion
So the goal was high performance on a $500 budget, which we eventually had to stretch to $550. Excluding that, I think all goals were met exceptionally well. The Vifa NE series of woofer have incredibly low distortion midrange performance and the RS28a really can’t be beat for the money.
These speakers really perform well over the entire spectrum. Bass was some of the most articulate I’ve heard and had a lot more impact than I expected based on the f3/6/10 numbers. The midrange was super clean and the drivers integrated really well. The RS28a has a nice bite to it that most of the other tweeters I’ve used thus far don’t. The imaging is really great and the soundstage was large. When I finally had to turn these over to him, I was disappointed I had to go back to my lesser pair of speakers.
My friend couldn’t be happier with them. He gets compliments on them anytime anyone listens to them and he even had a family member ask how he could get a pair!
Tips & Tricks
Make sure you chamfer the backside of the woofer cutout for airflow. The baffles on the PE cabs are thick an it will need the extra space.
You can play with the tweeter padding to adjust the level to taste in your room. Just add or subtract in 0.5 Ohm increments until you find what you like. 3 Ohms is what I preferred and would be a good starting point.
I also recommend these be used with the tweeters on the outside if you are listening with the drivers pointed straight forward. There is a diffraction dip at the lower range of the tweeter that will fill in about 10-15 off-axis in this configuration. However, I always recommend toed in if you can do it because you will maintain more of the top end response.
About the Designer
I’ve been serving in the U.S. Navy for the last 8 years as a Submarine Warfare Officer, studying nuclear power and underwater acoustics. I’ve been interested in audio since I put together my first car audio system back in high school. I had been wanting to build/design my own speakers for years, but it wasn’t until I found the Parts-Express Tech Talk forums that I truly gained the understanding I needed to build my own speakers. My Navy training proved to be valuable in shortening my learning curve!
Project Parts List
I would like to build these speakers. Can you provide a list of parts?
Alan,
Sorry for getting back to you so late on this. I don’t get notifications for comments posted here. There is no way for me to add a new image to this project. If you send me a message on the Tech-Talk message board (forum name: Navy Guy) I will email you a picture of a shopping cart with all the parts you need. You can change the brands on anything you want as long as the values remain consistent. You might also want to buy a few extra resistors to try different padding levels on the tweeter. Try 0.5 ohm increments in each direction on the tweeter to see what you like best.
Hi Kerry, could you send this to us as well? We would love to add this information to your post on the Speaker Project Gallery!
Just sent it to you, Rachael.
It looks like the parts list has the incorrect woofer listed. It should be the NE180W-08, NOT the NE149W-08. Can you please help me update the parts list?
done!