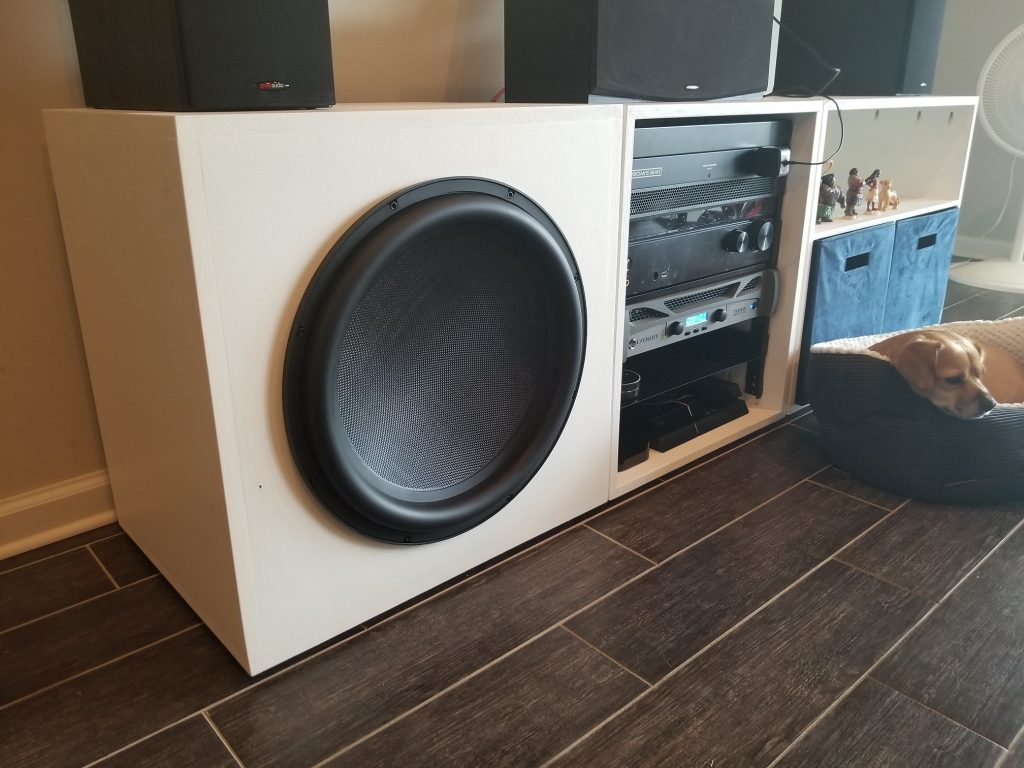
Ultimax 18″ w/Matching Entertainment Center


Designer:
Ryan Clark
Project Category:
Subwoofers
Project Level:
Intermediate
Project Time:
8-20 Hours
Project Cost:
$500 – $1,000
Project Description:
Entertainment Center w/18″ Ulitmax (sub, media rack, storage)
Design Goals:
Crushing bass, ascetically pleasing and functional
Driver Selection:
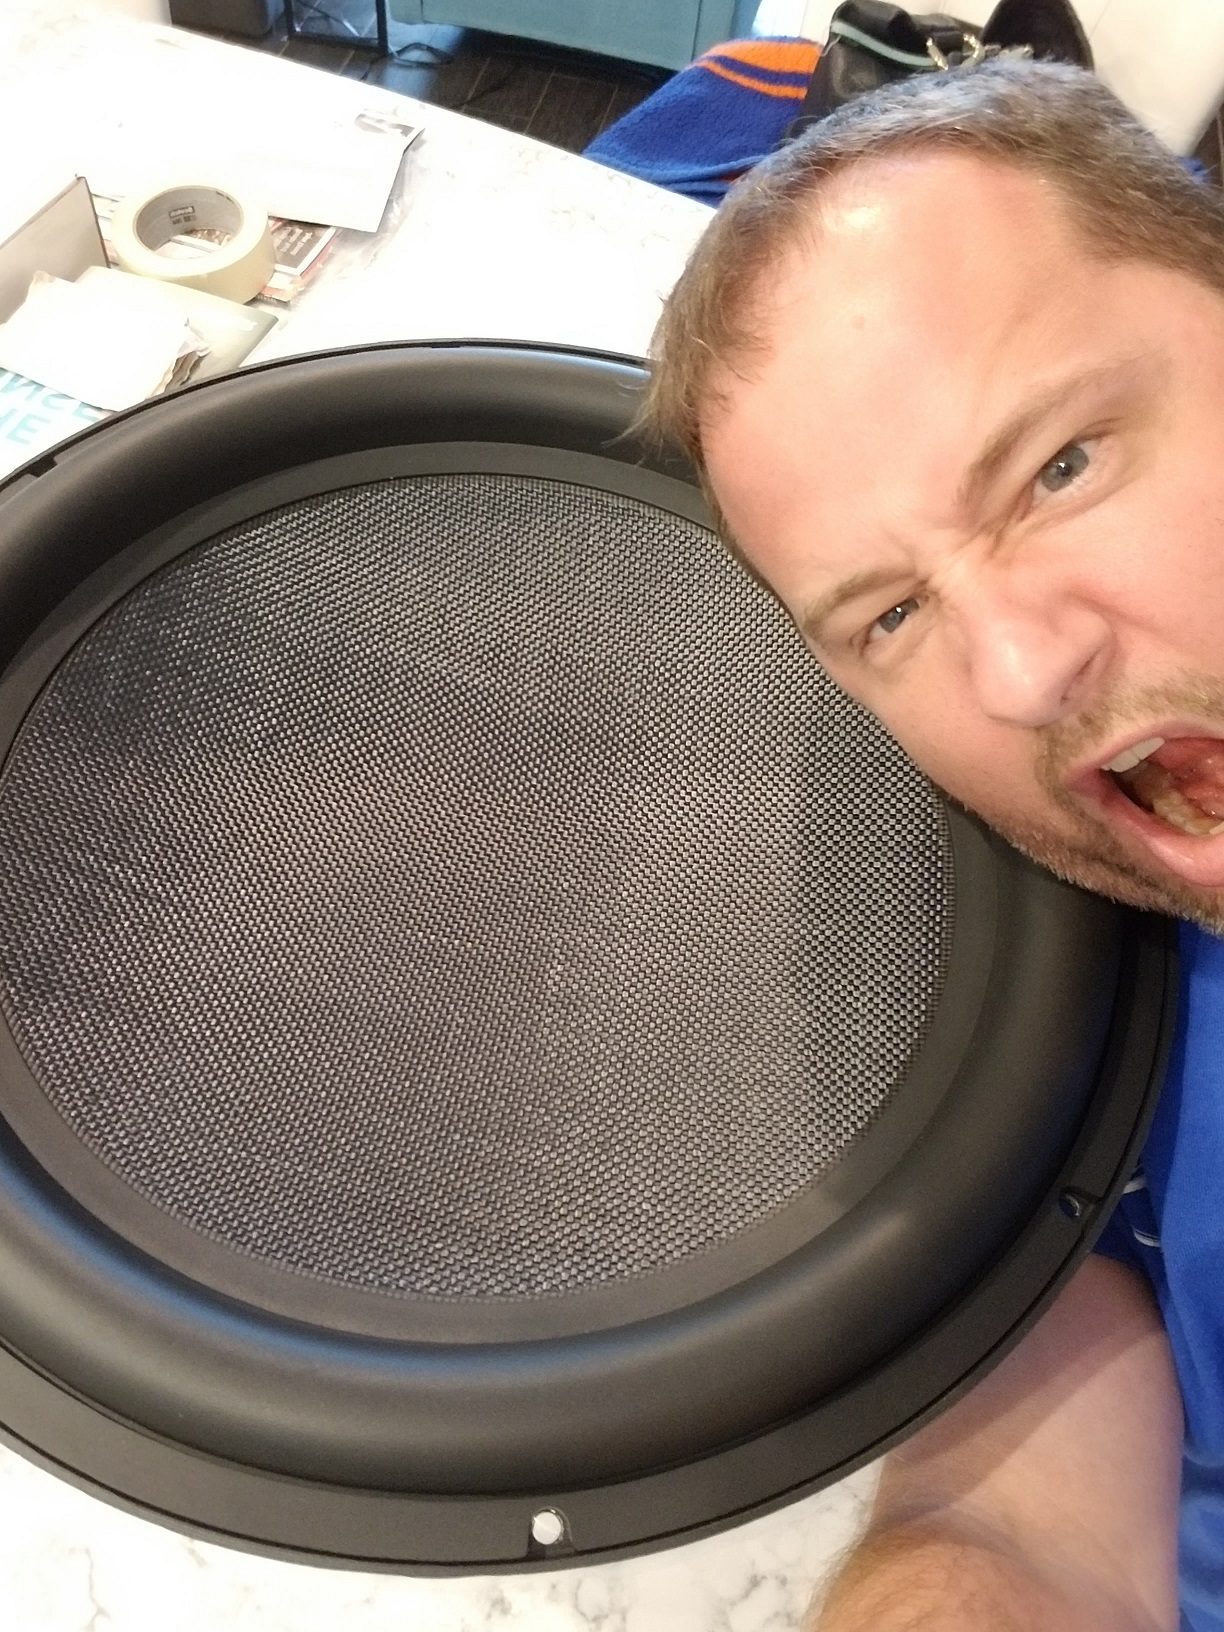
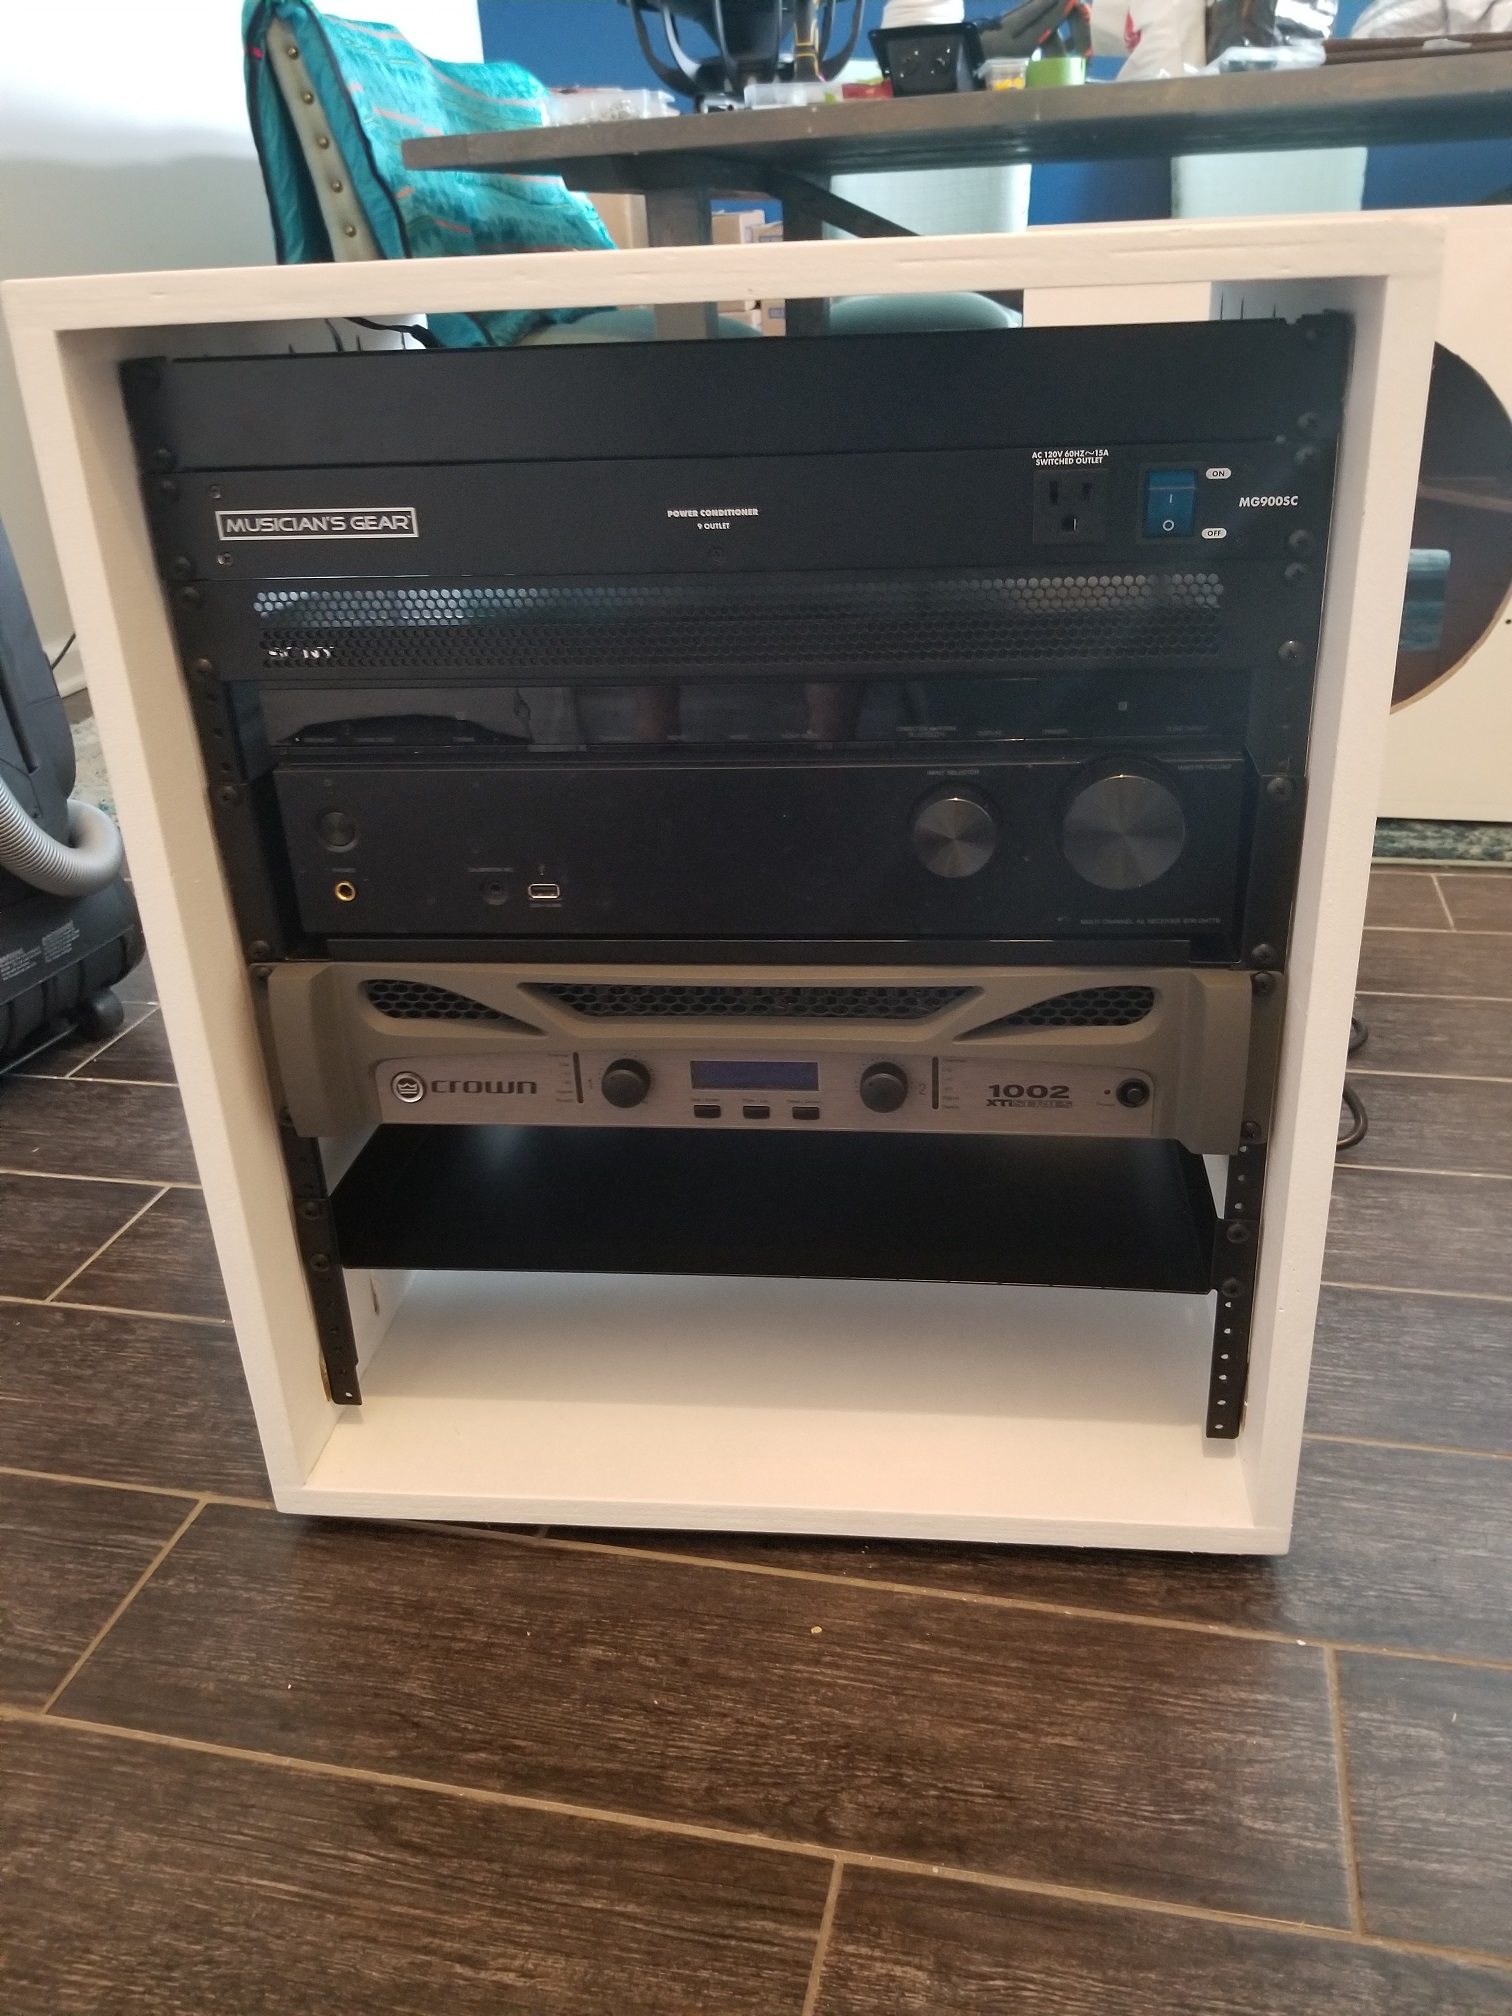
18″ Ultimax to replace my two 15″ Dayton Classic subwoofers which were each in a 3.6 cu foot cabinets. This design made my LCR entertainment center actually smaller with improved bass. The rack media section cleaned up all the gear so I don’t have rats nest of cables anymore. Love it!
Crown XTi 1002 – I wasn’t planning on using this amp but got a deal on it used and with its DSP functions decided to go with the smaller sealed enclosure with worked out fantastic. Now that I have this amp, I would buy it new for this project. It’s DSP functions with Band Manager application is amazing!
Enclosure Design:
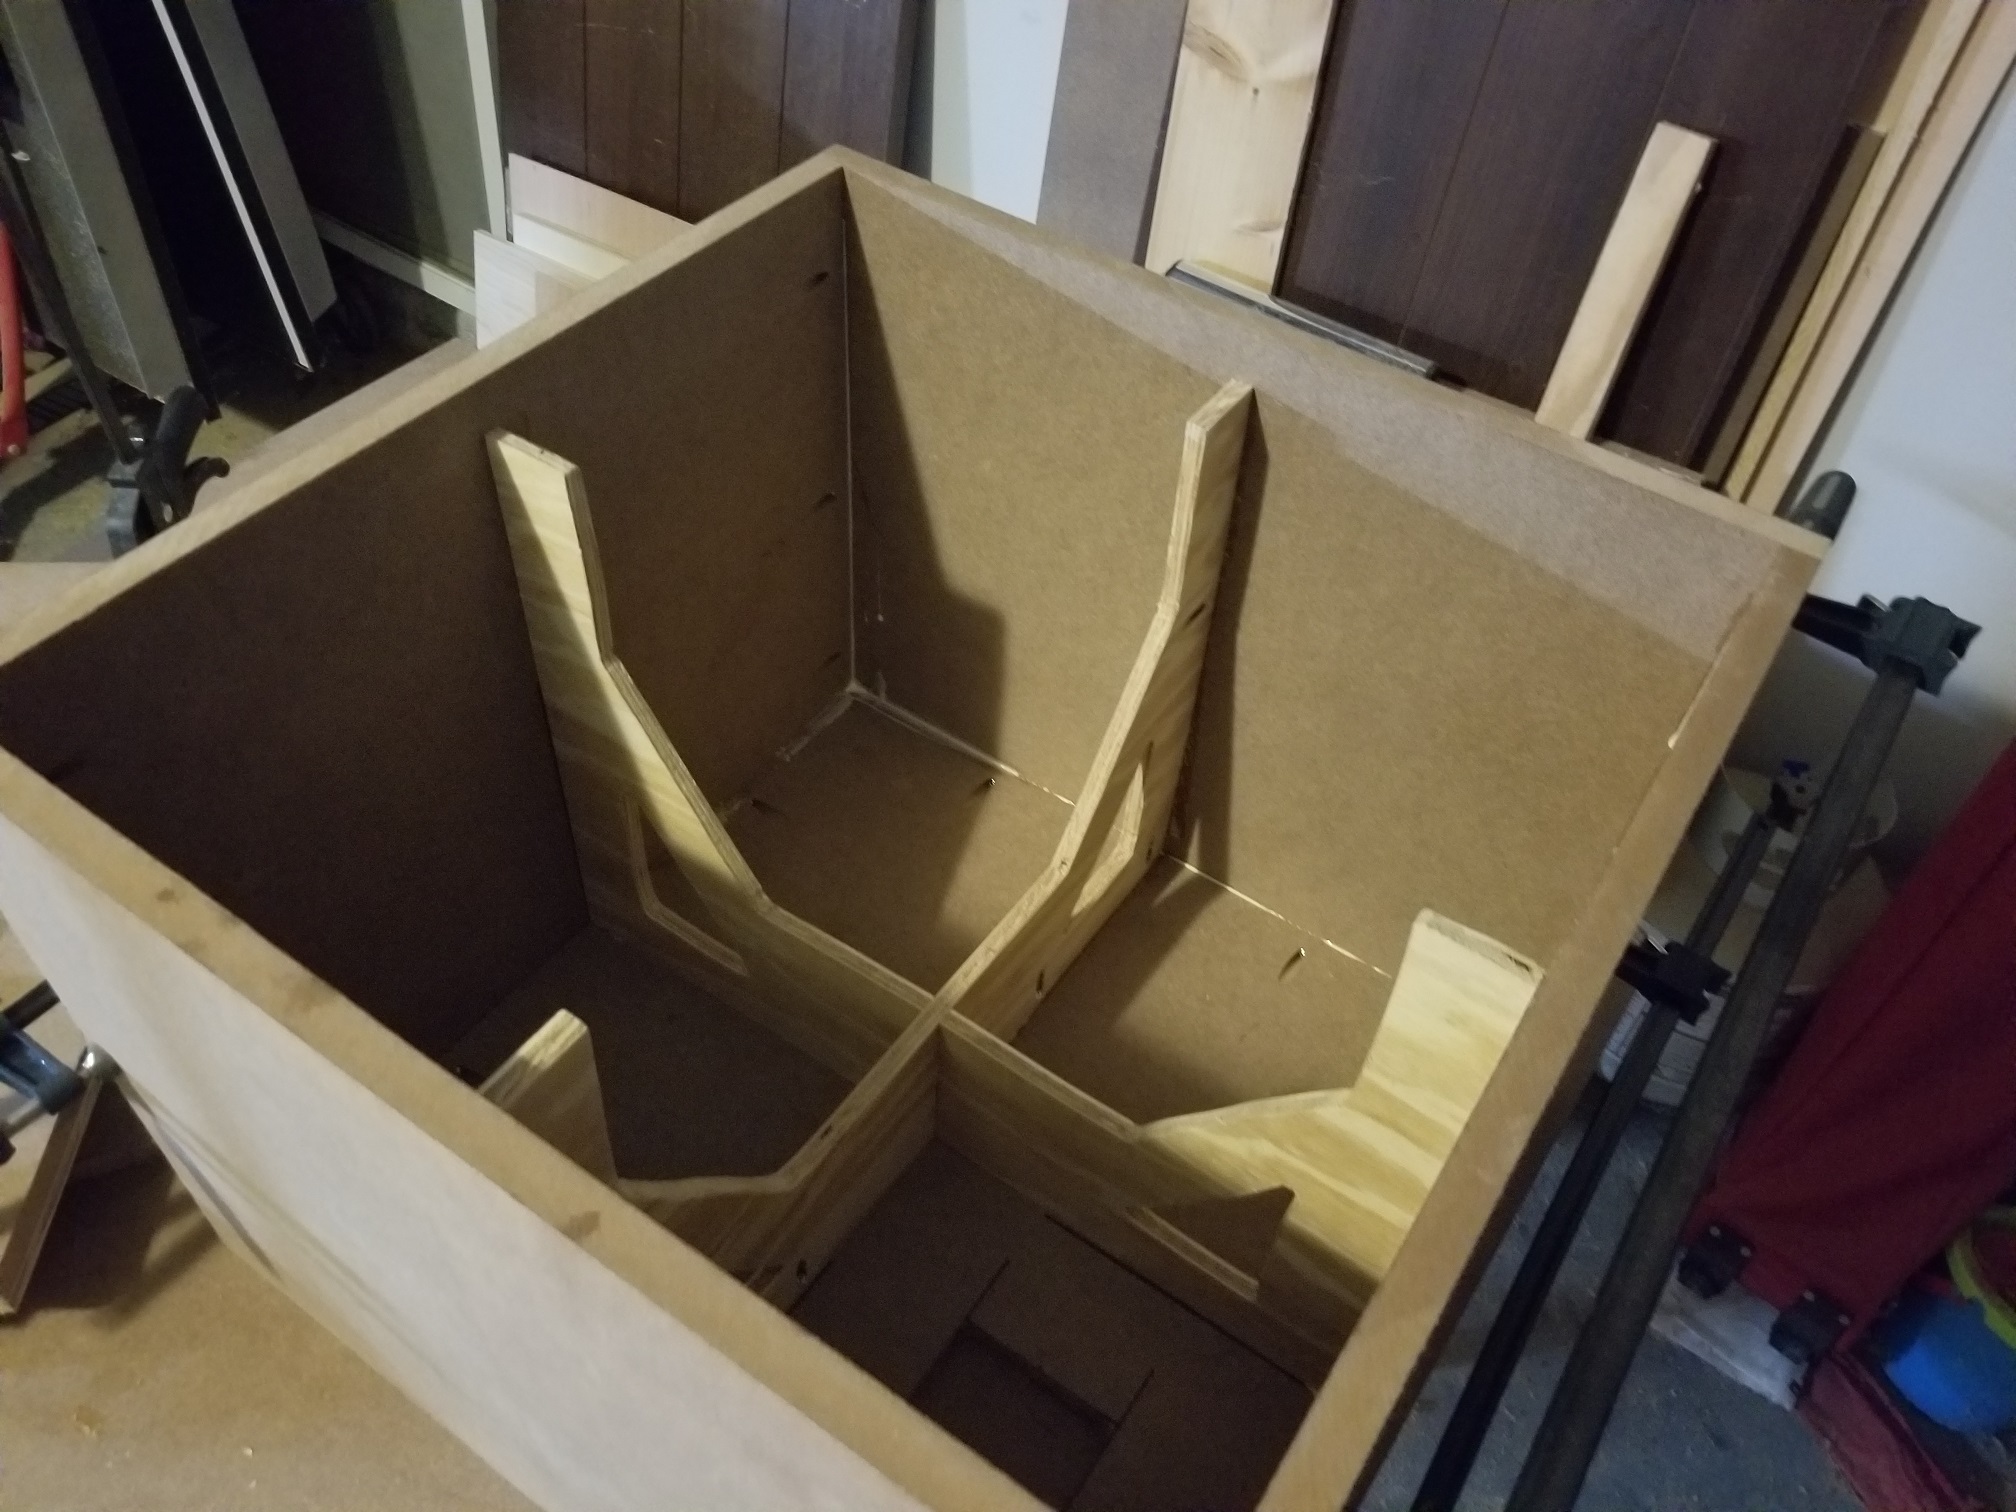
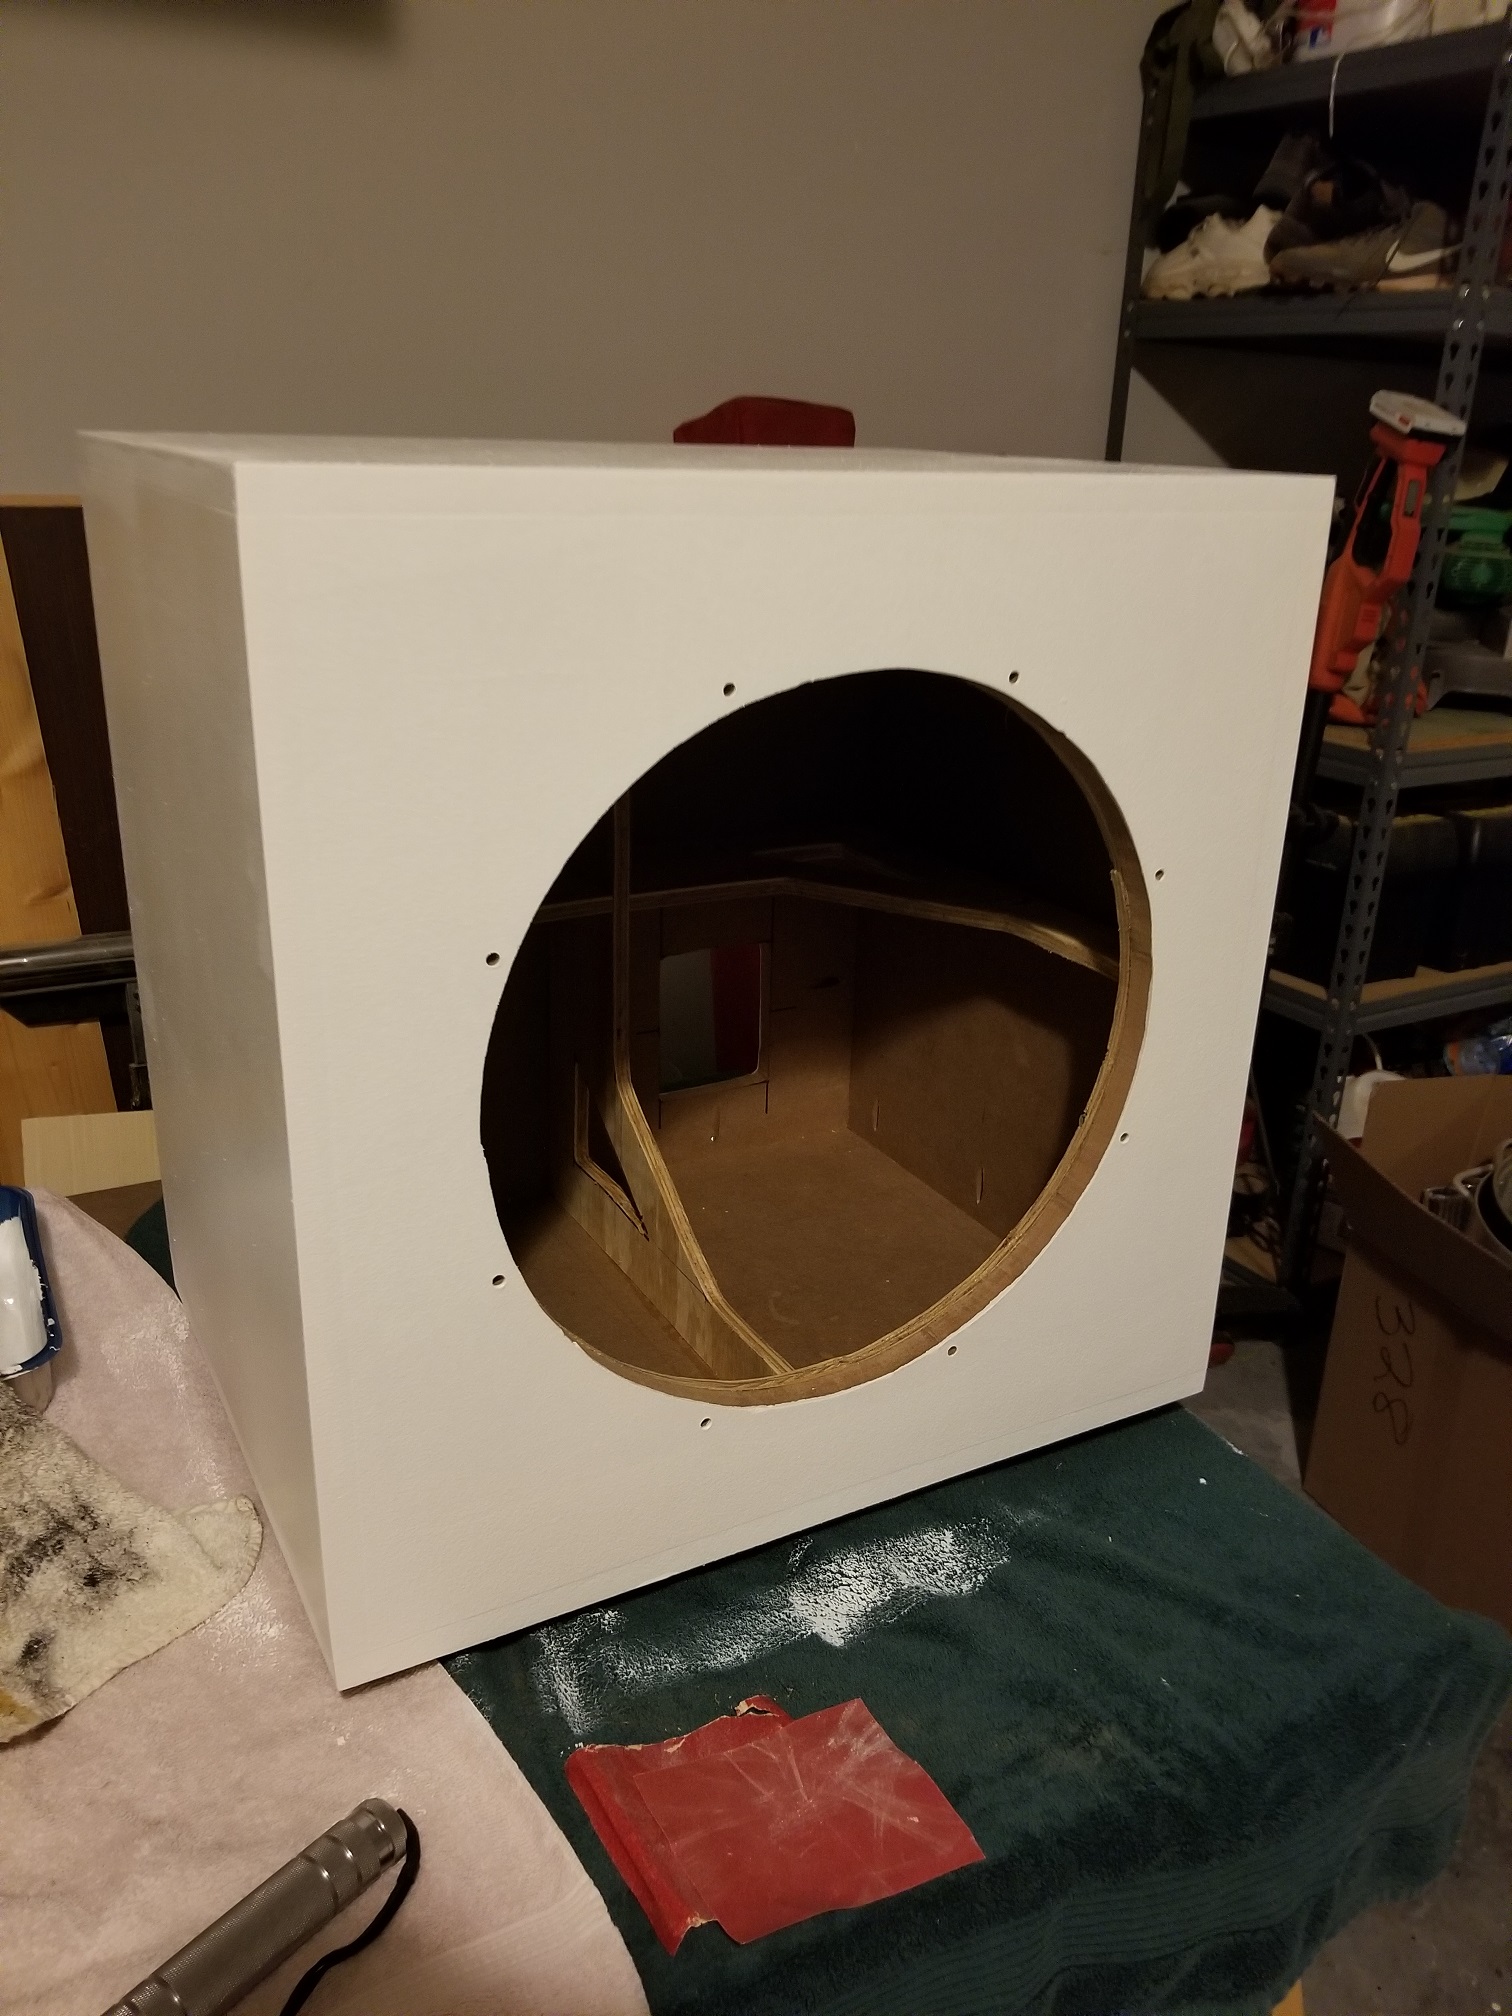
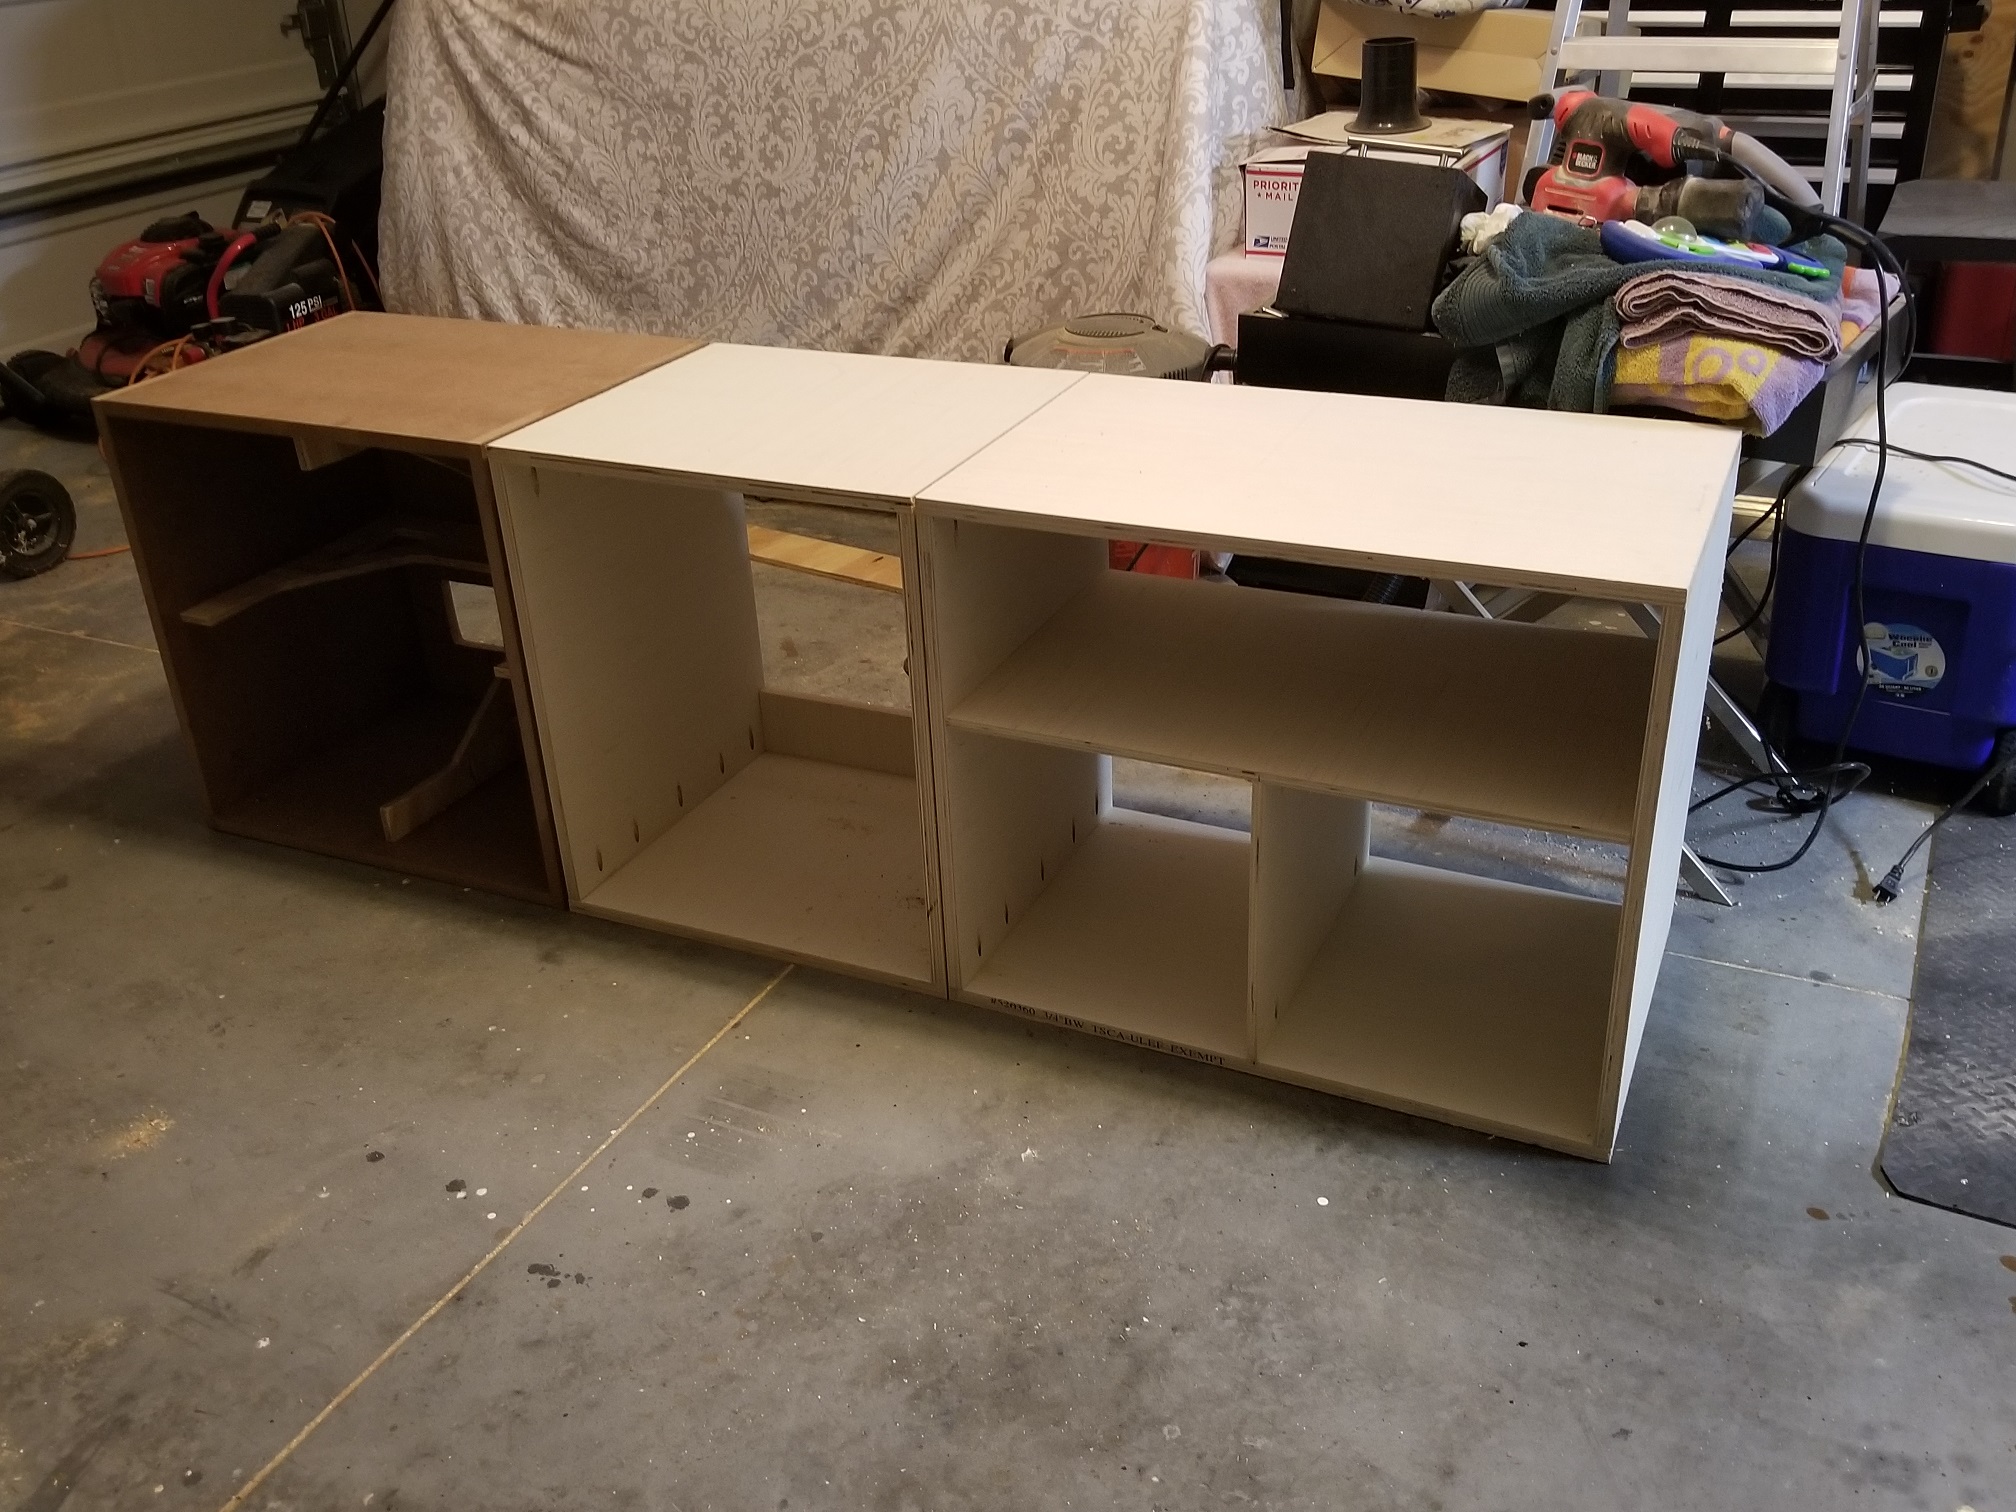
Essentially replicated the Denovo Ultimax cabinet. Pretty straightforward ~4 cu foot sealed cabinet. I did design all 3 components to match in height.
Enclosure Assembly:
Used 3/4″ MDF with a double front baffle, although I used 1/2″ plywood for the inside part. I did this for two reasons; wanted to make sure it wasn’t too thick for the mounting kit I bought and the T-nuts set so much better in plywood than MDF (bad past experience).
The media section and storage section are made of 3/4″ and 1/2″ cabinet grade plywood.
Painted it all white
Crossover Design:
N/A
Tips & Tricks:
Plan every cut! I don’t have a big table saw or a truck so I have them cut down the full sheet in store so I can easily transport and handle.
Use plywood for internal baffle, recess using a spade bit to ensure the T-nuts set in well.
Before securing your baffle to the cabinet, measure, drill mounting holes. Set the T-nuts in place and then make sure they all line up, before you attach to cabinet.
If you build a rack rail cabinet make sure to space it out with actual components. Rack gear is 19″ but you will probably want to shoot for 19.125″ so you have a little wiggle room. I went a little too wide and had to add spacers between the rail and cabinet.
Files:
um1822_entertainment_center_with_subs um1822_project
Conclusion:
Very pleased!
About the Designer:
I have been an aspiring audiophile since I was a teenager. I still have my first speakers – Infinity SM-62’s I love building with wood – perfectly matched hobbies.
Project Parts List:
|
Part # |
Description |
Qty |
|
260-778 |
Parts Express Cast Frame 1/4″-20 Speaker Mounting Kit |
1 |
|
262-801 |
Rack Shelf 2U |
1 |
|
262-800 |
Rack Shelf 1U |
1 |
|
262-390 |
Penn-Elcom R0828/12 12 Space Full-Hole Rack Rail Pair 12U 21″ |
1 |
|
262-846 |
Heavy Duty 0.065″ Steel Blank Rack Panel 1U with Flanges |
1 |
|
262-590 |
Middle Atlantic HPS #10-32 x 3/4″ Rack Screws 25 Pcs. |
1 |
|
262-291 |
Penn-Elcom R1385/1UVK Flat Perforated Rack Panel |
1 |
|
260-770 |
Penn-Elcom F1686 Rubber Cabinet Foot 1.57″ Dia. x 0.61″ H |
1 |
|
262-838 |
Angled Metal Speaker Cabinet Input Dish |
1 |
|
092-059 |
Neutrik NL2MP Speakon Connector 2 Pole Panel Mount |
1 |
|
092-2283 |
Neutrik NL4FX-4 Speakon SPX 4-Pole Cable Connector with Yellow Bushing |
1 |
|
295-518 |
Dayton Audio UM18-22 18″ Ultimax DVC Subwoofer 2 ohms Per Coil |
1 |
|
245-405 |
Crown XTi 1002 Power Amplifier 2 x 500W at 4 Ohms |
1 |
Nice build! Super clean. Like.
Wow! What a beast!
Badass! An 18” in my home theater would be pretty awesome. Jealous, haha.