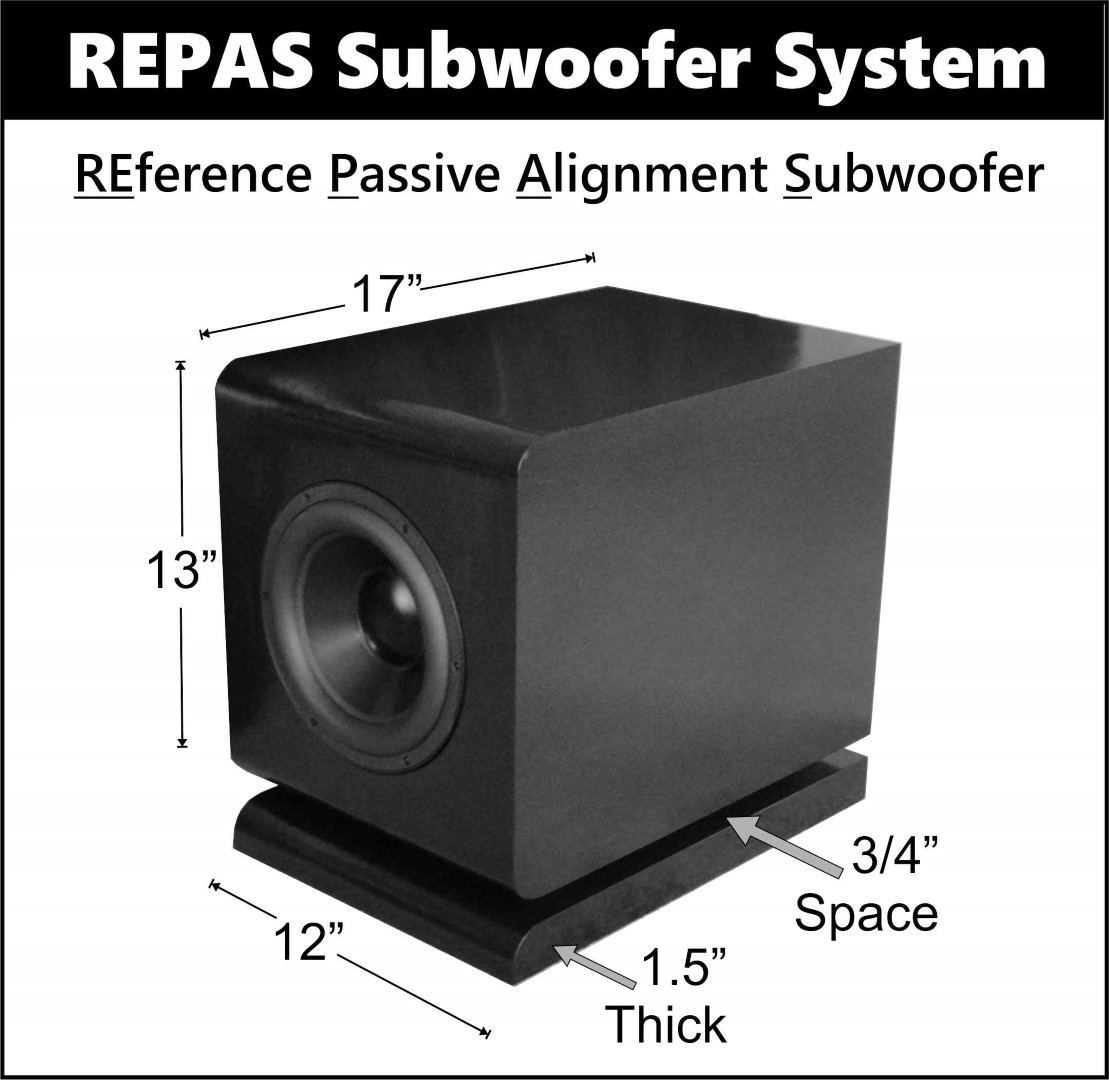
REPAS (REference Passive Alignment Subwoofer)


Designer:
Tom Zarbo
Project Category:
Subwoofers
Project Level:
Intermediate
Project Time:
8-20 Hours
Project Cost:
$500 – $1,000
Project Description:
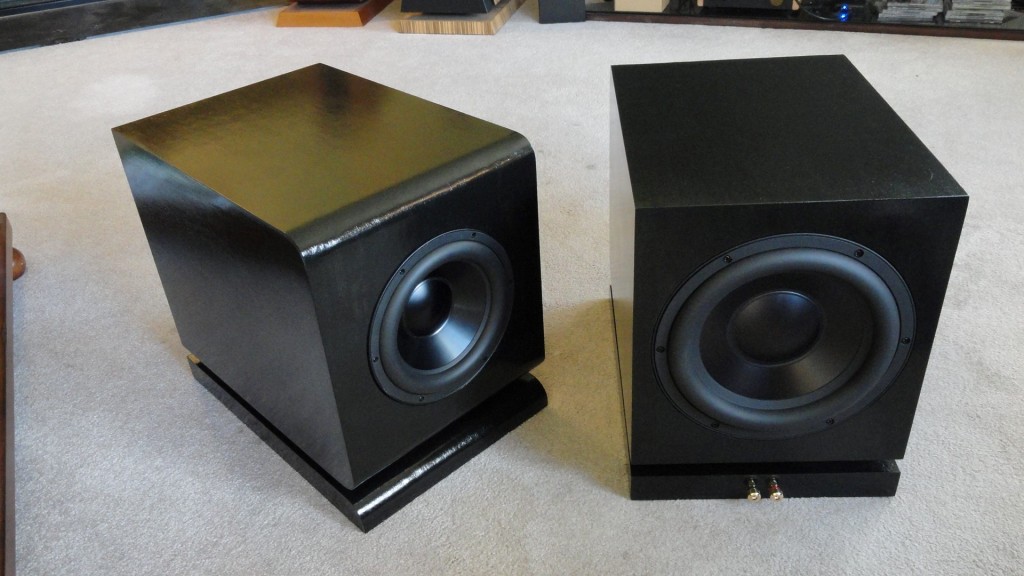
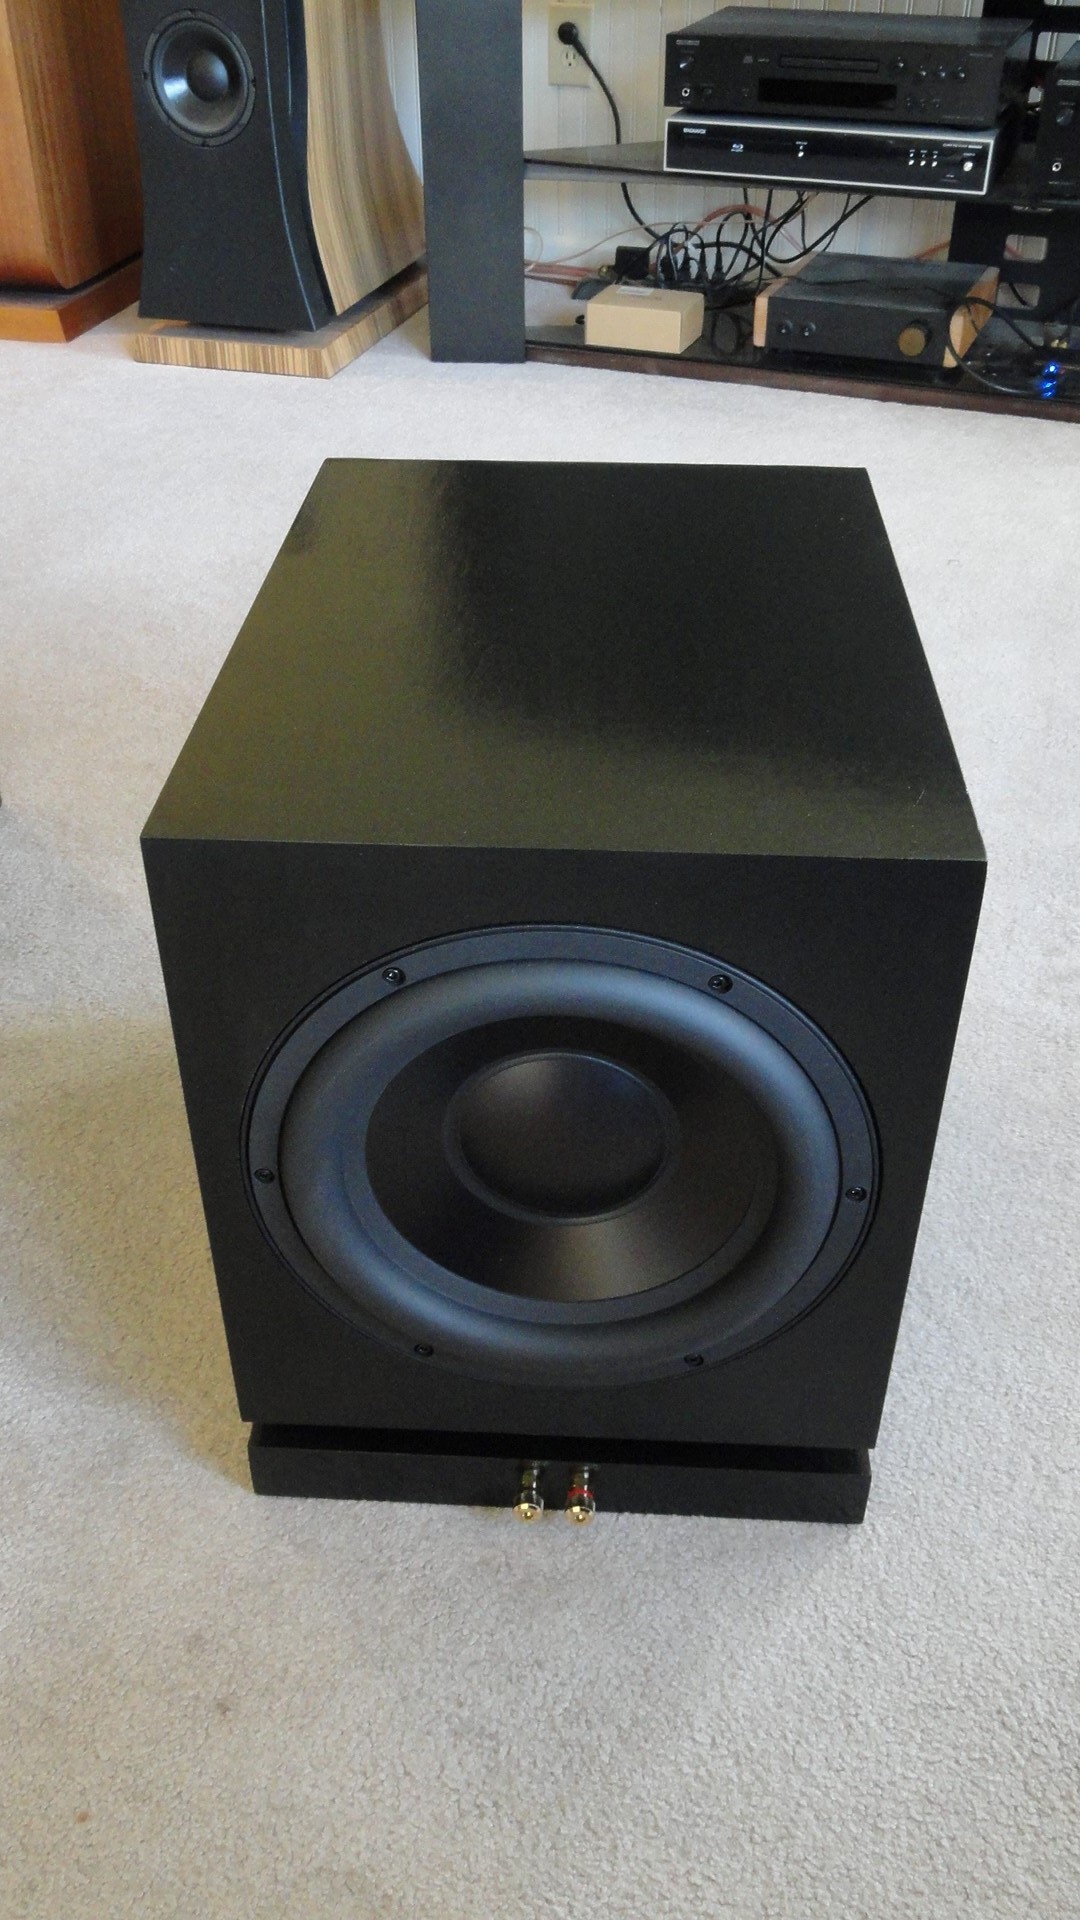
This project is a dual enclosure subwoofer system that pairs an 8″ High Fidelity Reference Series subwoofer with a 10″ Reference Series passive radiator in each enclosure.
Design Goals:
My wife and I are friends with a couple from church with a good, but slightly older home theater setup. I’ve offered to upgrade their subwoofer system several times over the past few years, and last year they mentioned that they might like to upgrade their subwoofer from an older 12″, low-wattage system to something more modern — rightly surmising that they could find some gains in performance in light of how far subwoofer technology has come in the past 15 years or so.
After some discussion, two things became apparent: First, 20 Hz bass was not necessary; and secondly, whatever I design needed to be on the small side. I suggested two smaller enclosures that could be tucked away… they liked the idea.
Driver Selection:
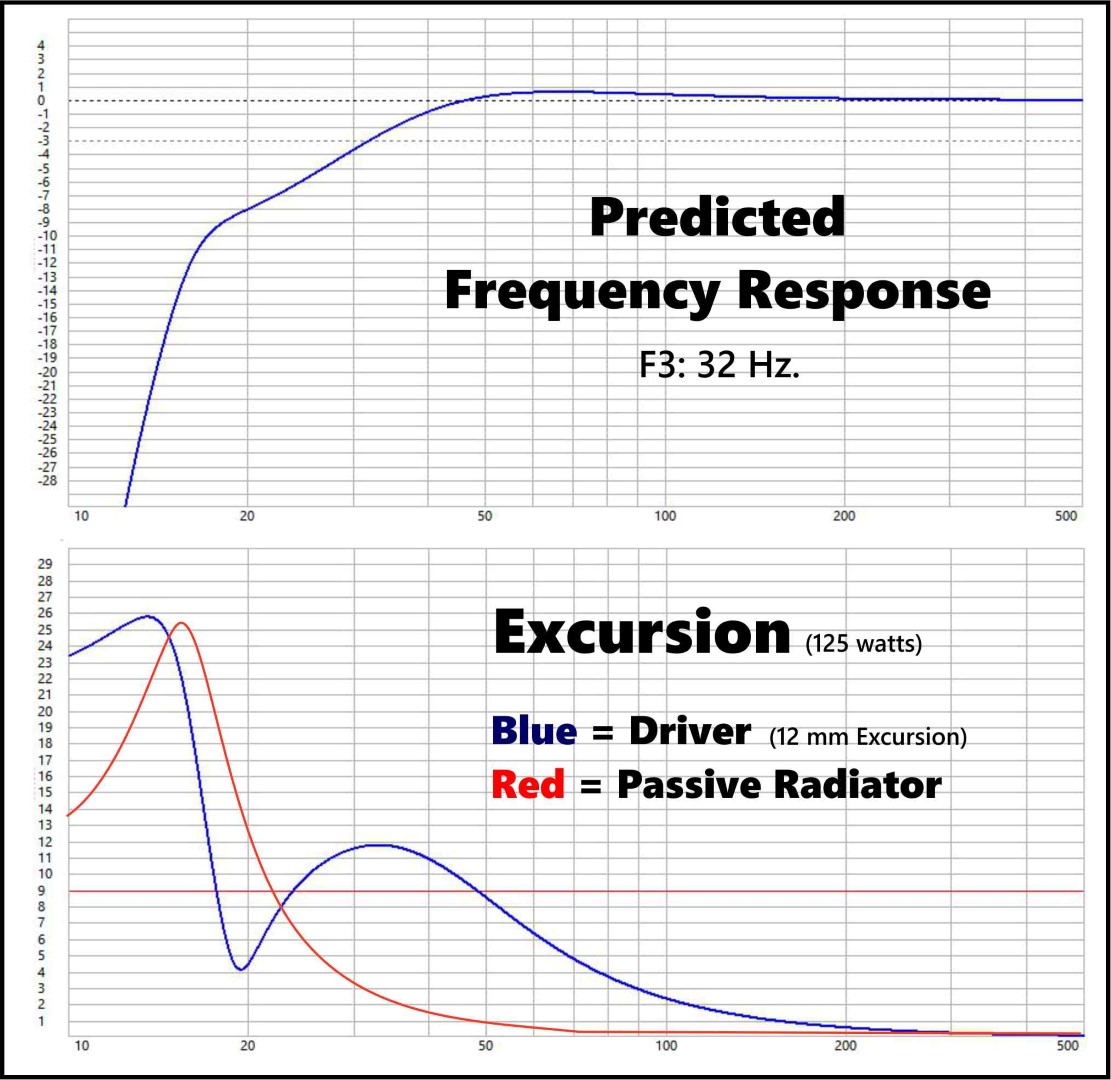
Since size was a major factor, the driver I ended up using was the Dayton Audio HF 8″ subwoofer along with Dayton Audio’s impressive new RS-based 10″ passive radiator, which is a perfect aesthetic match for the Reference Series line of subwoofers. I added one washer to the PR which yielded an F3 of around 32 Hz… This combo doesn’t need a very large cabinet to perform well.
Enclosure Design:
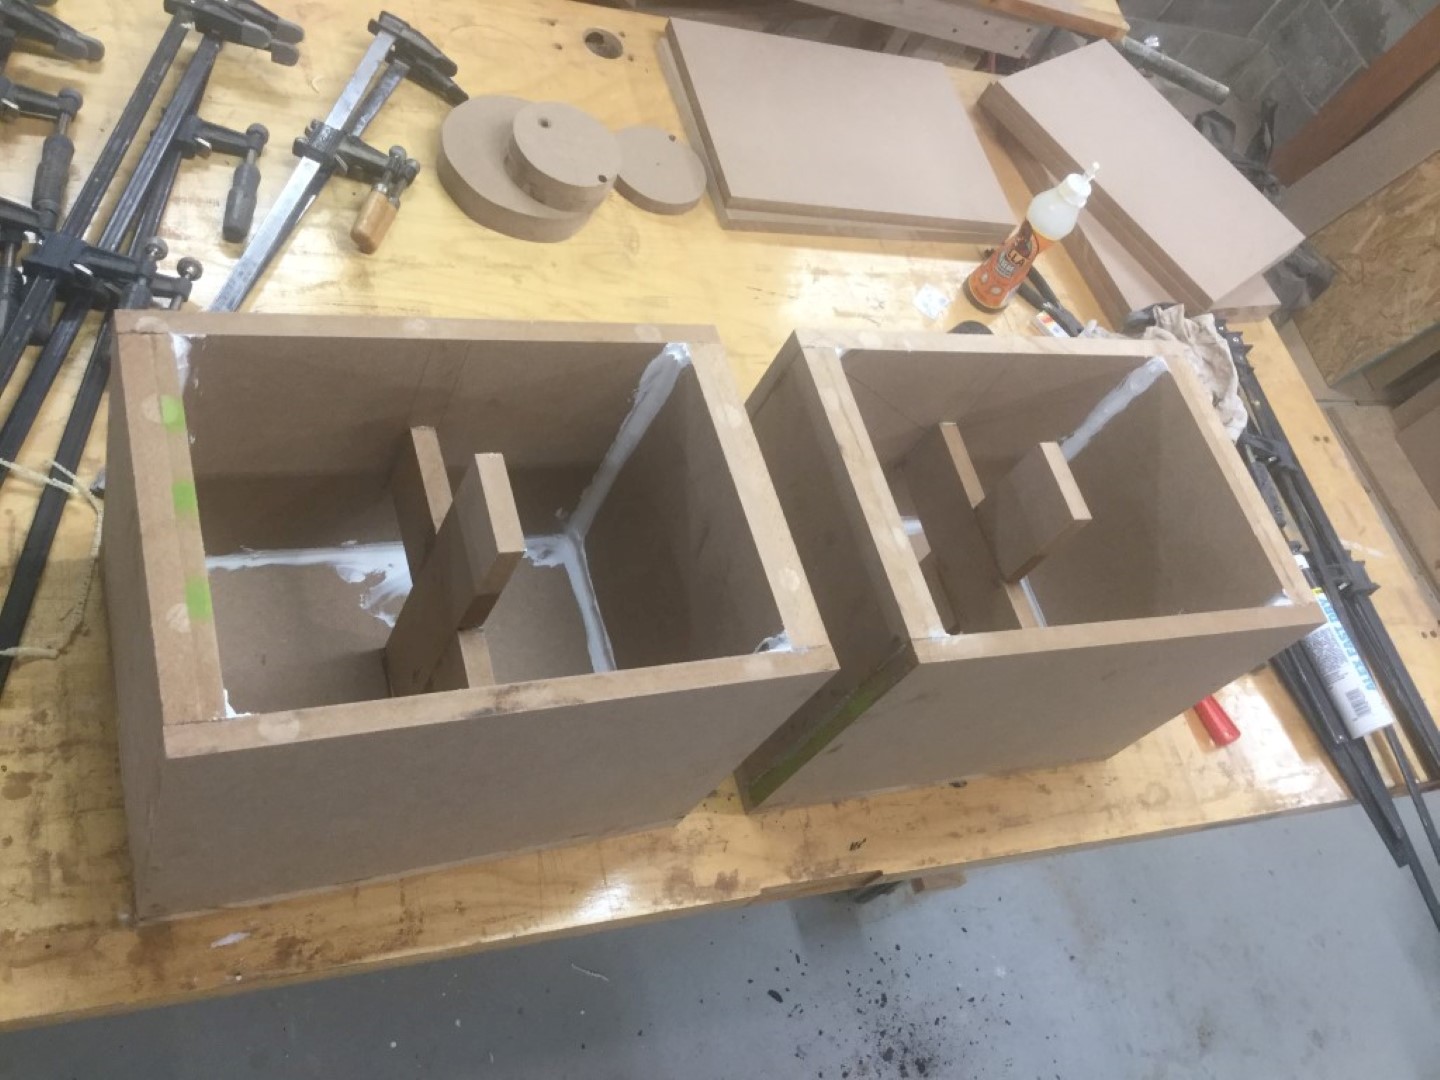
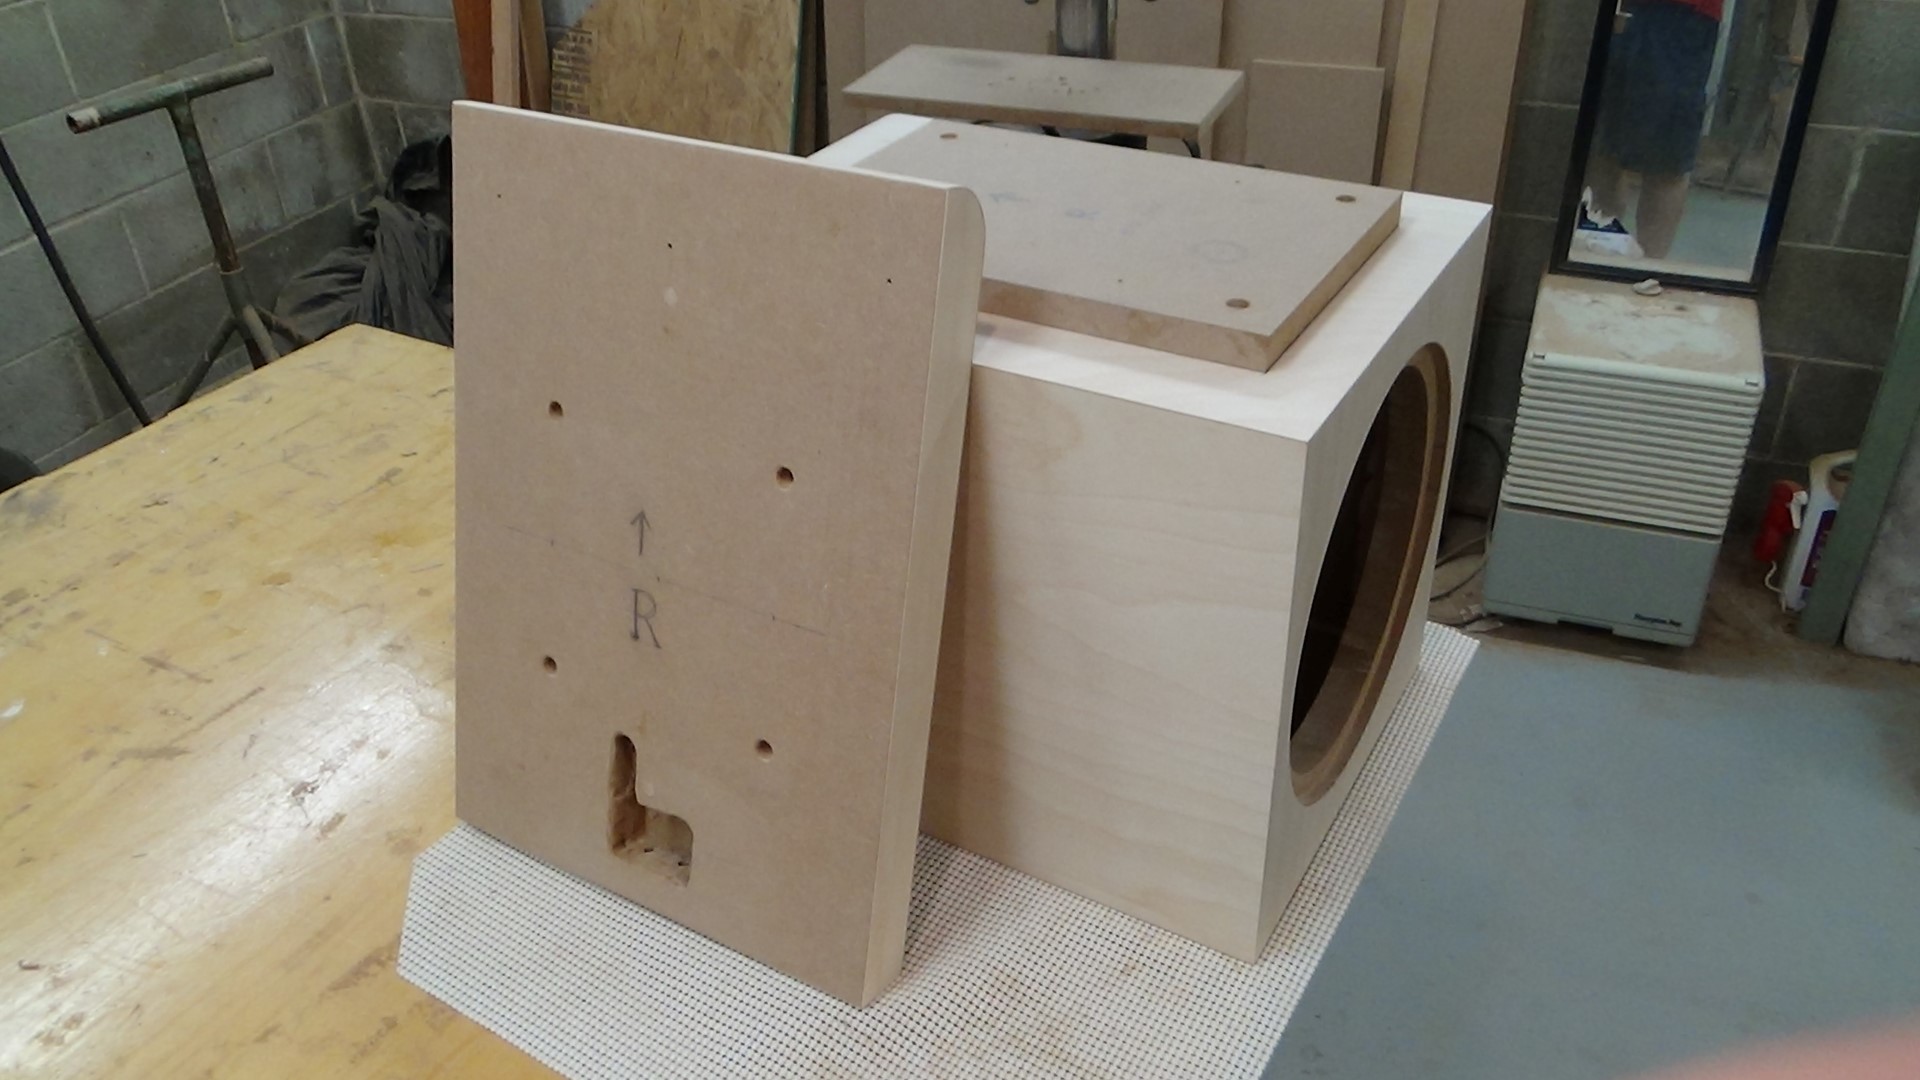
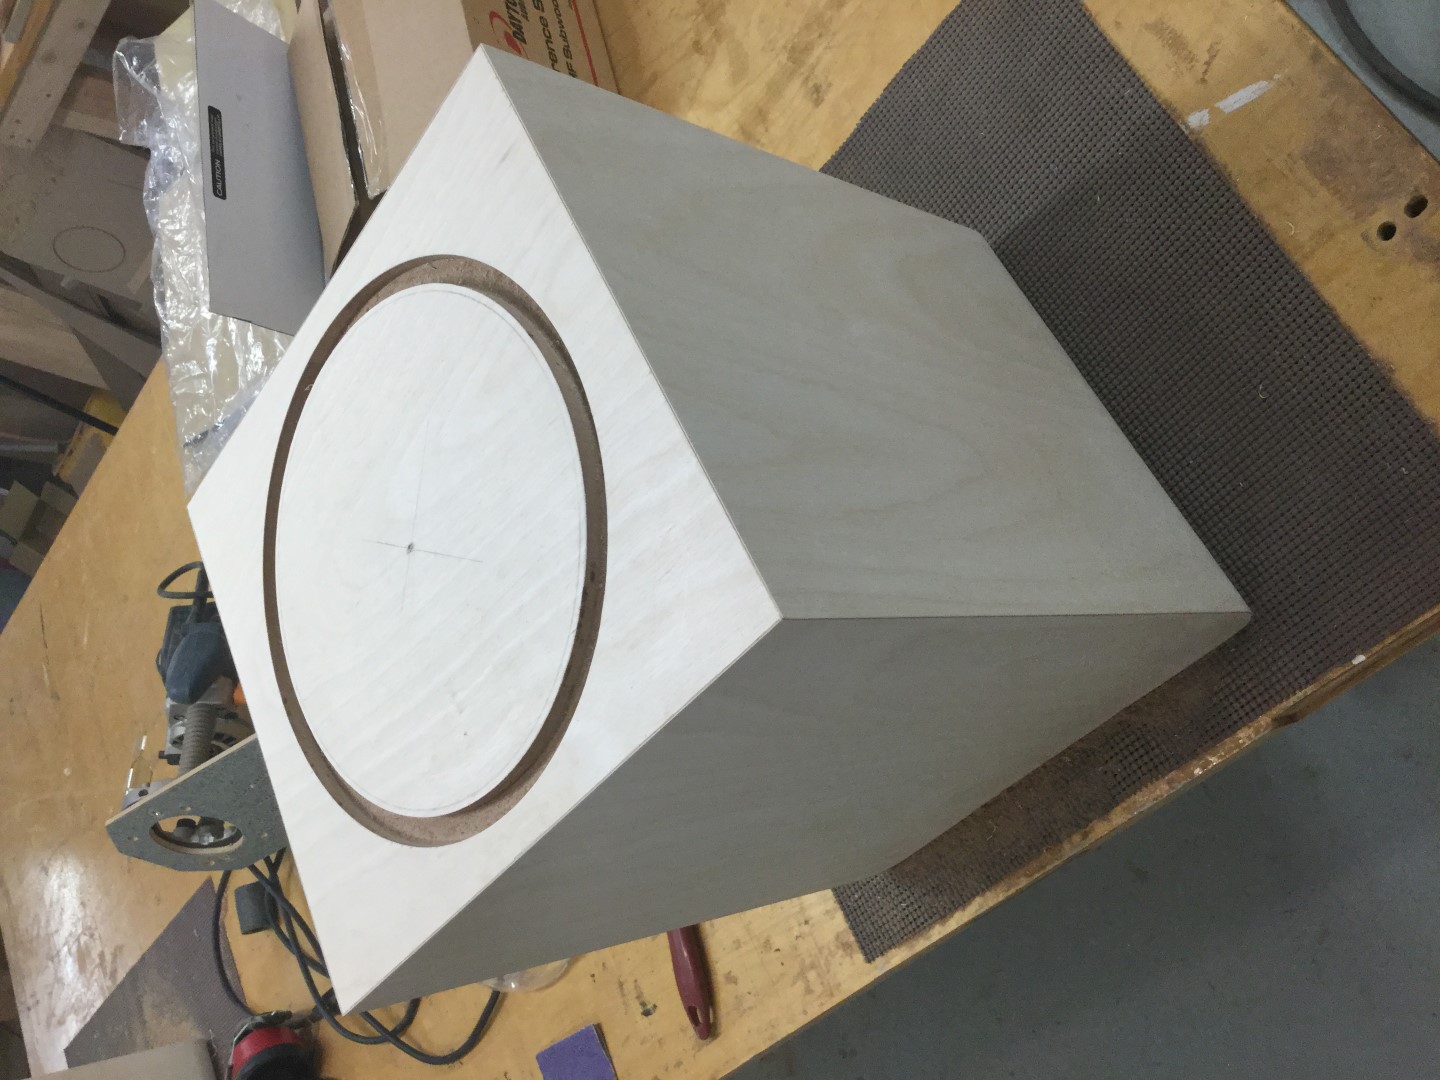
The enclosure is fairly straight forward. I used 3/4″ MDF for the enclosure, adding an additional layer of 1/2″ MDF to the front and rear baffles to allow the drivers to be recessed and still have enough material for the mounting screws to ‘bite’ into. The enclosure volume is around 28 liters.
Enclosure Assembly:
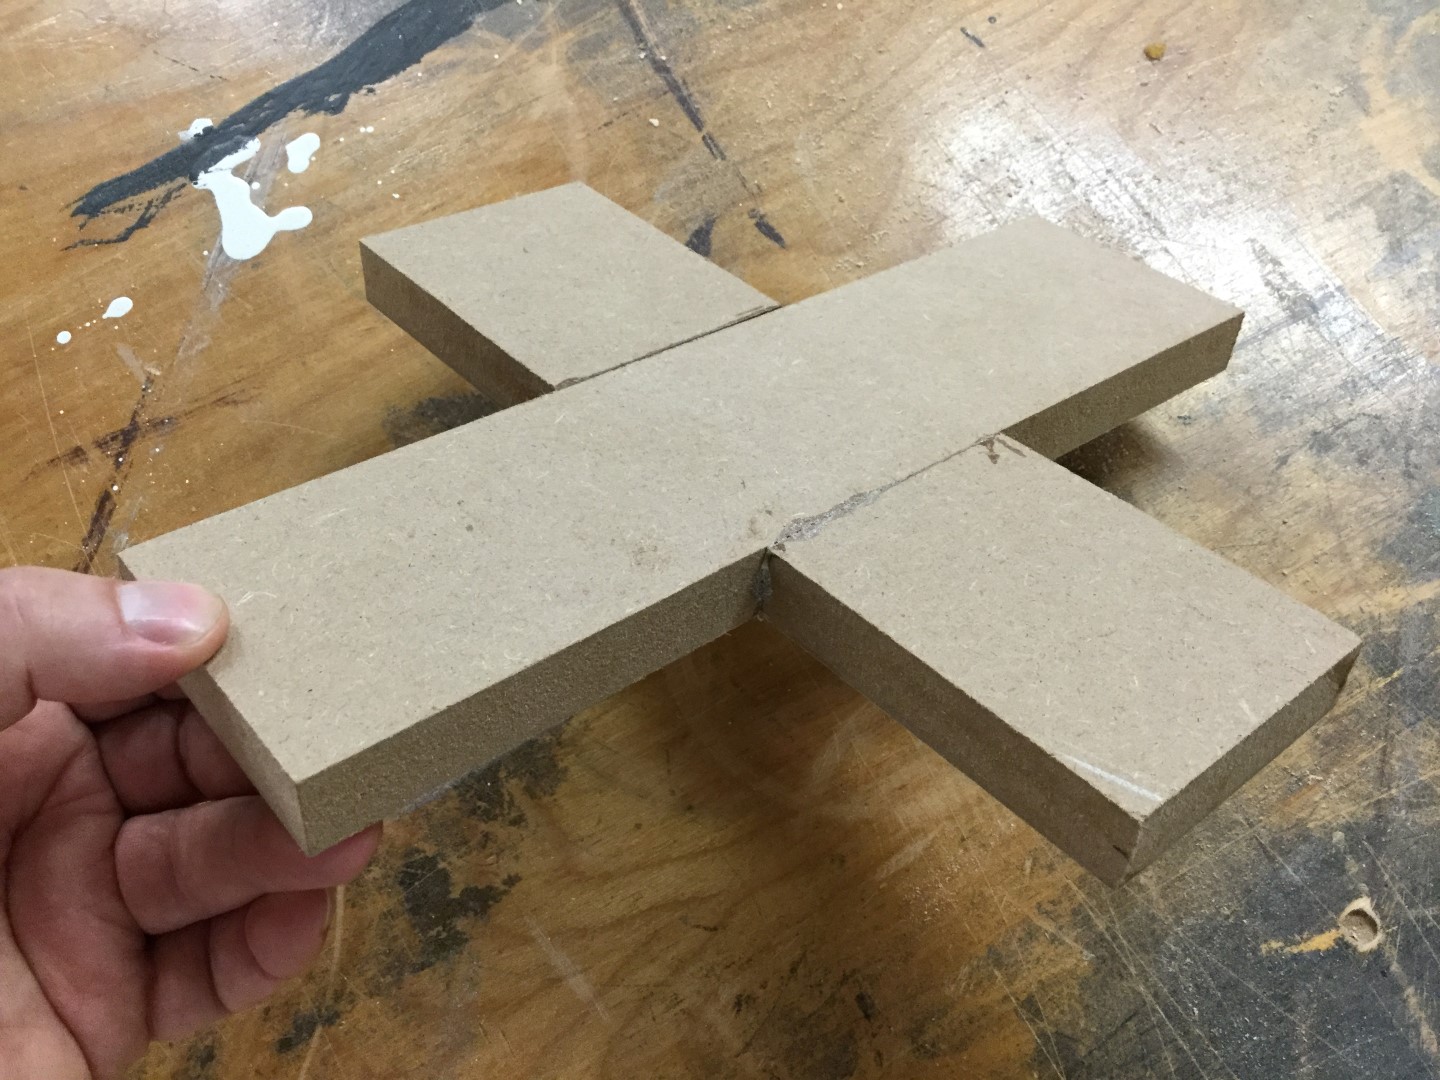
The enclosure was glued together with Gorilla Glue and is fairly easy to put together with clamps. I rounded over the front horizontal corners of the cabinet and the added bottom base-plate with a 1 1/4″ round-over to add a little extra flair to the design. I also added a single cross brace of 3″ wide 3/4″ MDF to the middle of the enclosure to provide resistance to any flexing.
Since my friend wanted a black finish and knowing how difficult it is to achieve a high gloss black paint finish, I decided to cover the cabinets with birch veneer, stain them ebony black, and apply clear polyurethane as a gloss finish for protection.
Crossover Design:
I intended from the start to use one of the new Crown Drivecore series pro-audio amplifiers to power this pair of subwoofers, as opposed to a more common plate-amp scenario. The crossover duties are handled by that device.
Tips & Tricks:
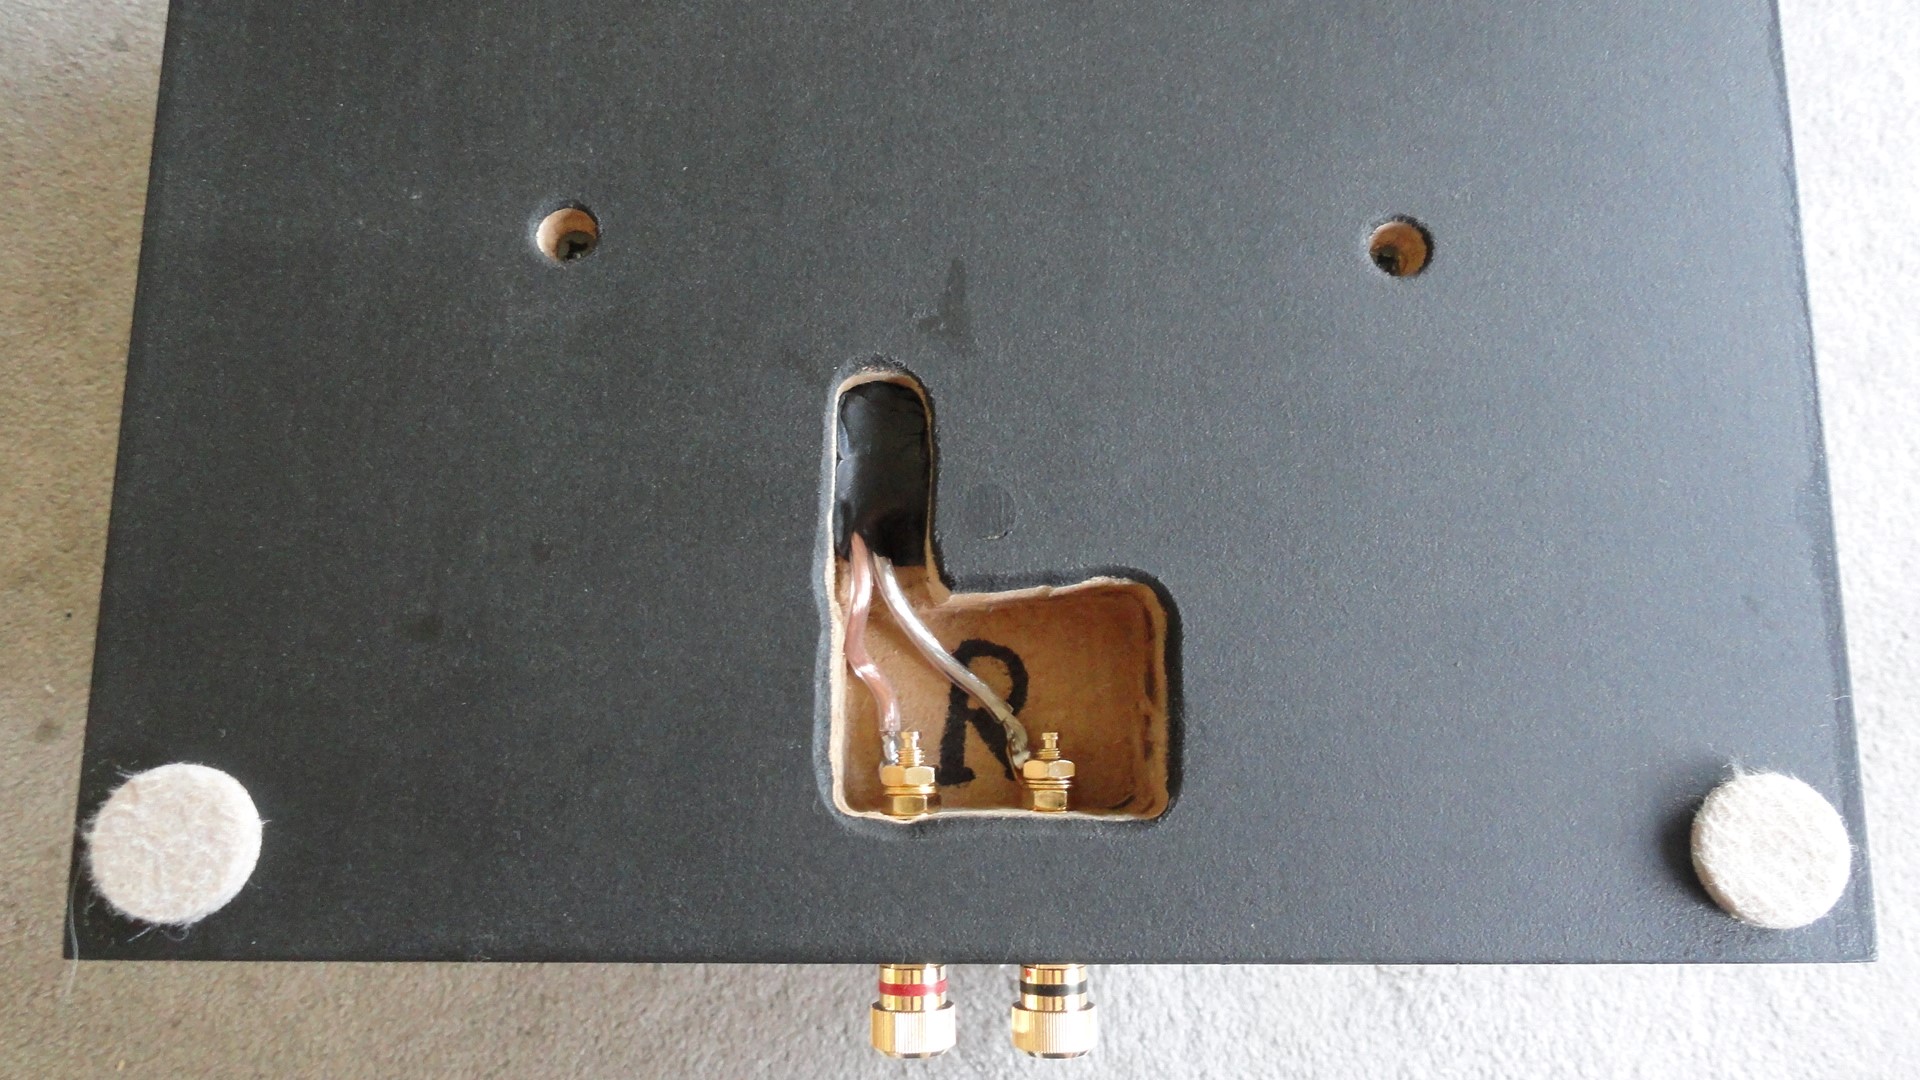
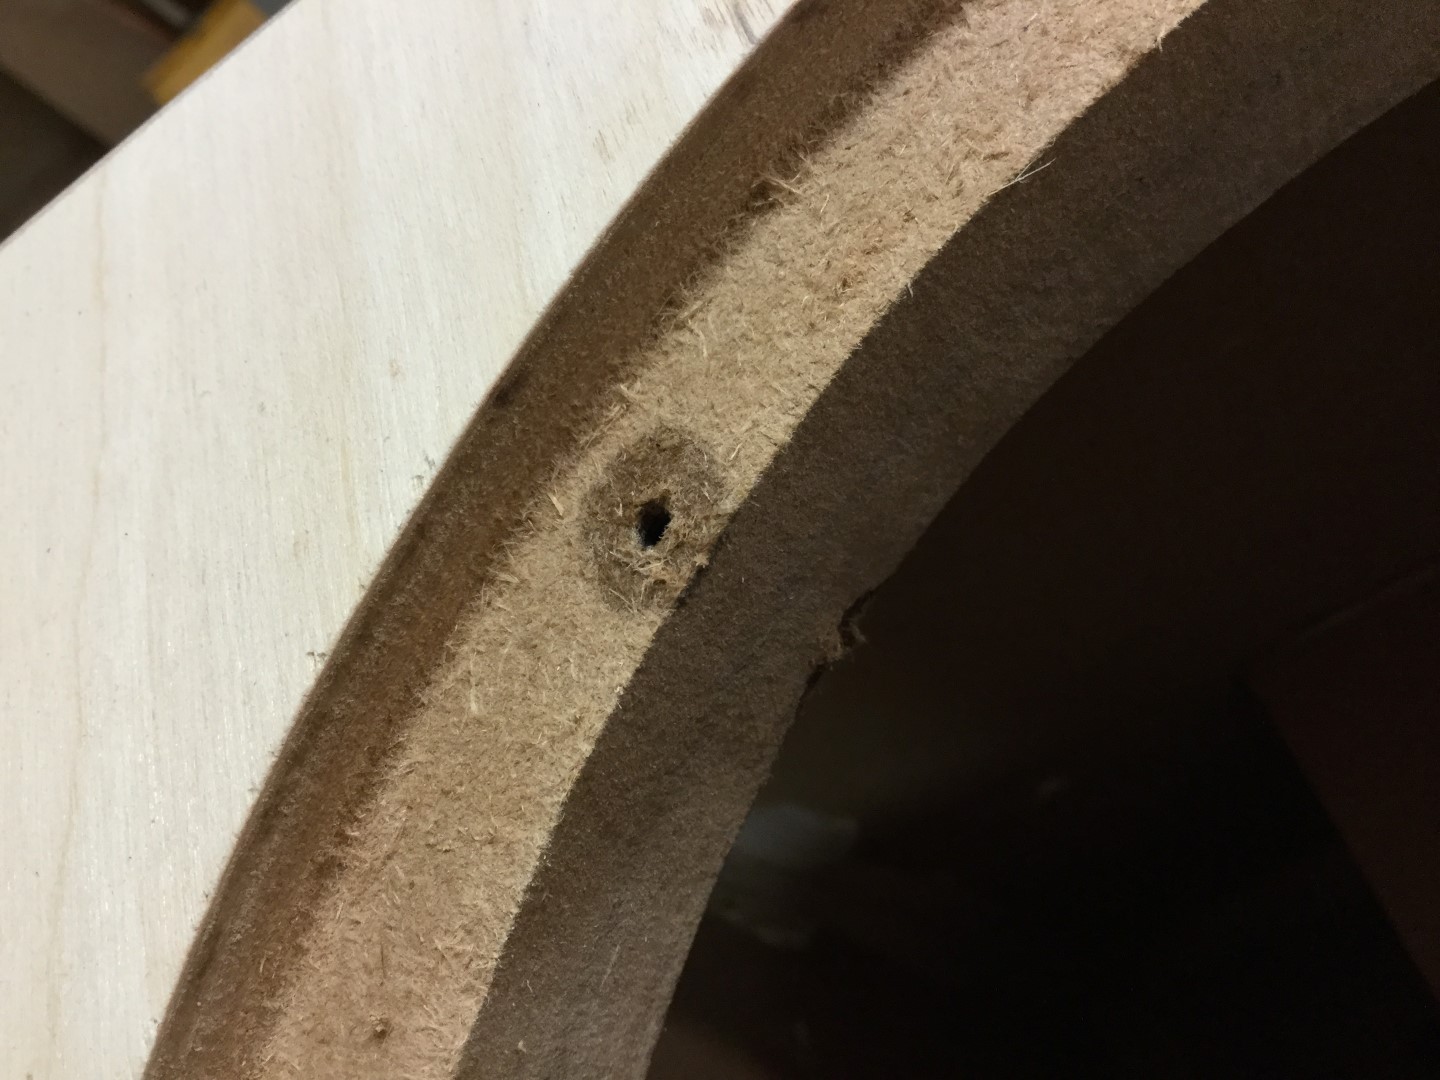
There are a few things I did that may not be obvious from the pictures. I used a rotary rasp in a drill to make some clearance in the cabinet for the active drivers to breathe. This was not necessary for the passive radiators as they are more ‘open’ since there is no magnet. Also, after drilling the driver mounting holes and driving in the intended mounting screws fully in each hole and removing, I saturated each mounting hole with super glue to help ‘harden’ it up to add strength. I also then applied some bees wax to each mounting screw to aid in insertion and prevent possible snapping of the fastener.
My goal is to construct each project to the level that it almost becomes a “kit” that just needs to be reassembled after the finish has been applied. You don’t want to be engineering things after you’ve applied your finish to your gorgeous cabinets! Do the engineering work before finishing, test fit each part, and you will keep your enclosure looking great after assembly.
Conclusion:
I was surprised at the ‘punchiness’ of the bass this project produced. It digs down low enough for home theater use, but it really excels at reproducing music, and will do so at fairly loud volumes. Having two separate subwoofer enclosures allows you to find the best locations for ‘even’ bass in your listening room, as well as giving you about 6 db more volume overall. The cabinets are small enough to tuck behind a piece of furniture if you want to hide them… or attractive enough to place them front-and-center in your listening room and show them off.
About the Designer:
I’ve been building subwoofers and speakers since I was a teenager and I’m still enjoying it at the age of 46. I keep learning thanks in part to the great folks on the Parts Express “Tech Talk” forum.
Project Parts List:
|
Part # |
Description |
Qty |
|
295-456 |
Dayton Audio RSS210HF-4 8″ Reference HF Subwoofer 4 Ohm |
2 |
|
295-500 |
Dayton Audio RSS265-PR 10″ Aluminum Cone Passive Radiator |
2 |
|
245-507 |
Crown XLS 1002 DriveCore 2 Power Amplifier 2 x 350W at 4 Ohms |
1 |
|
091-1245 |
Dayton Audio BPA-38G HD Binding Post Pair Gold |
2 |
|
260-330 |
Acousta-Stuf Polyfill Speaker Cabinet Damping Material 5 lb. Bag |
1 |
+ There are no comments
Add yours