SLS-85


Designer:
John H
Project Category:
Freestyle Speakers
Project Level:
Intermediate
Project Time:
8-20 Hours
Project Cost:
$100 – $500
Project Description:
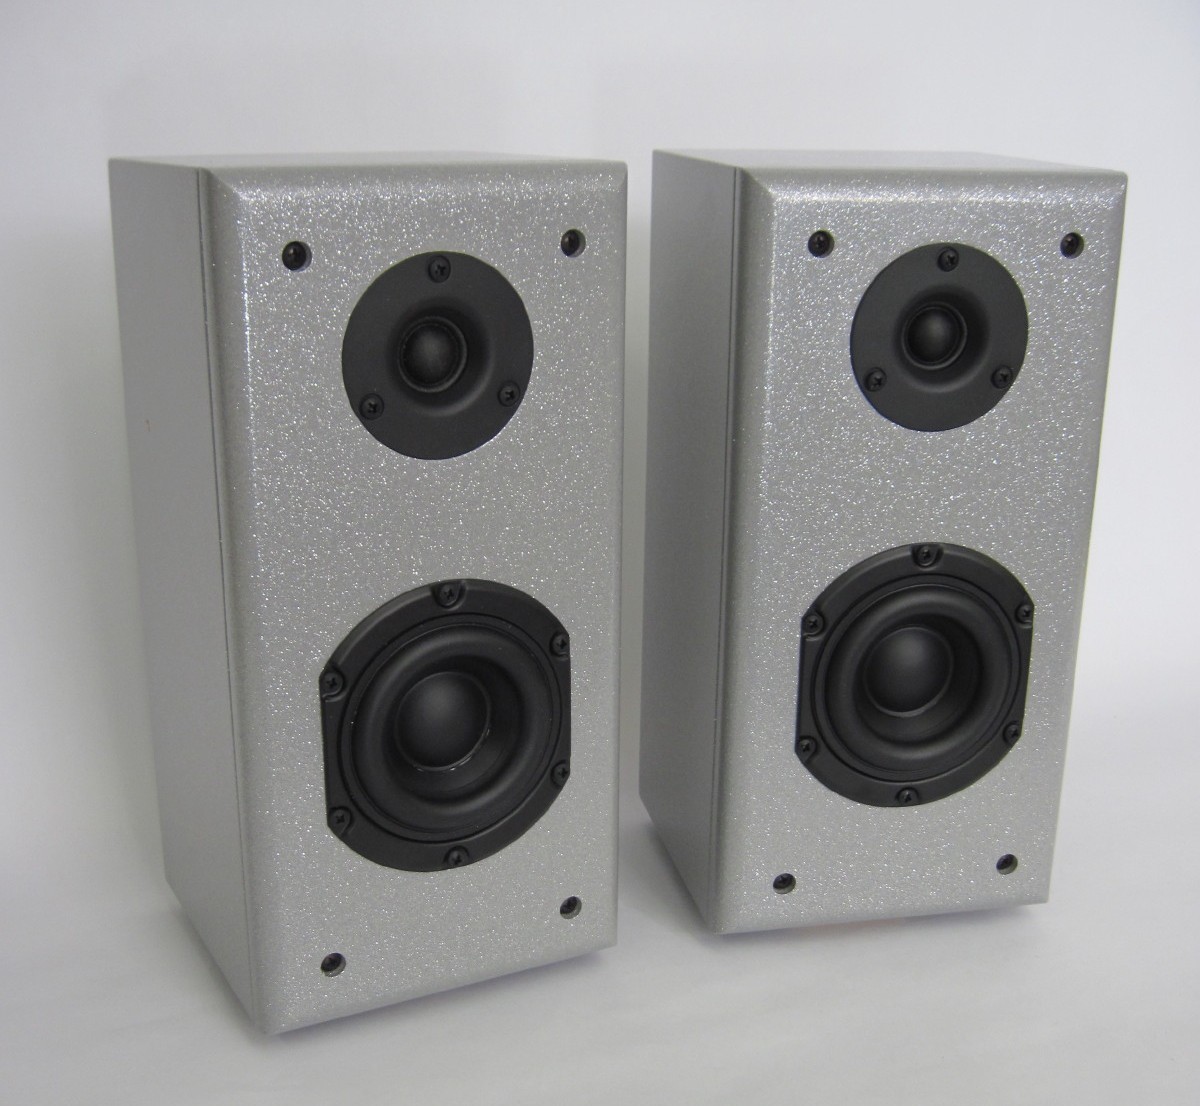
This project makes a small ported 2-way speaker suitable for a small room or desktop.
Design Goals:
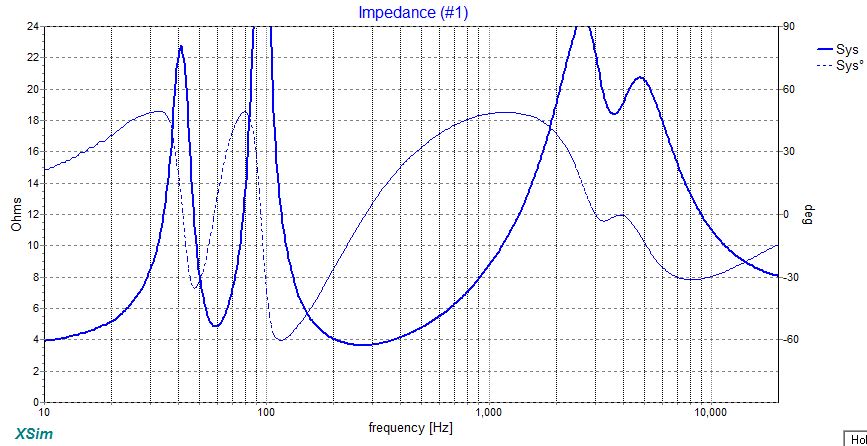
The design goal was to make a vented speaker with a port resonance trap. By extending the frequency response low in a ported speaker, the port resonances can become an issue. By installing a resonance trap the port resonance can be reduced.
Driver Selection:
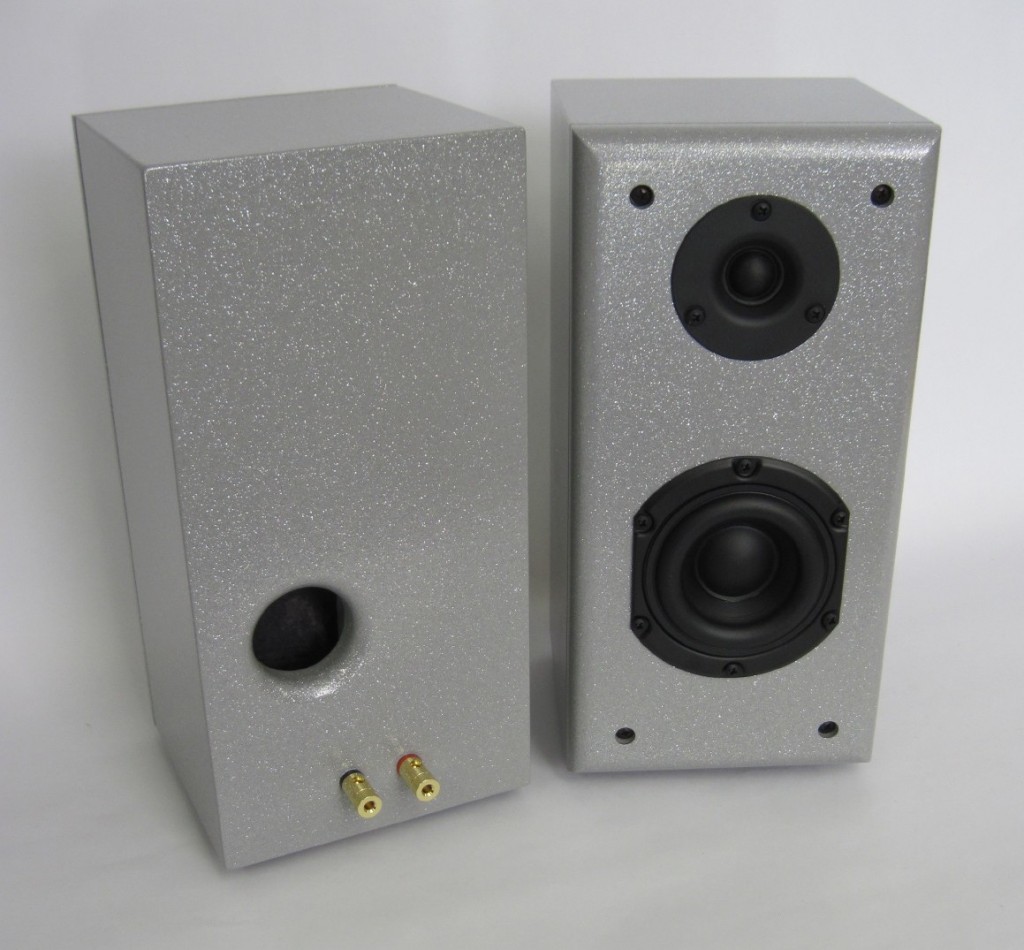
This is an all Peerless design with the DX20BF00-04, .75-inch tweeter and SLS-85S25CP04-04, 3.5-inch woofer.
Enclosure Design:
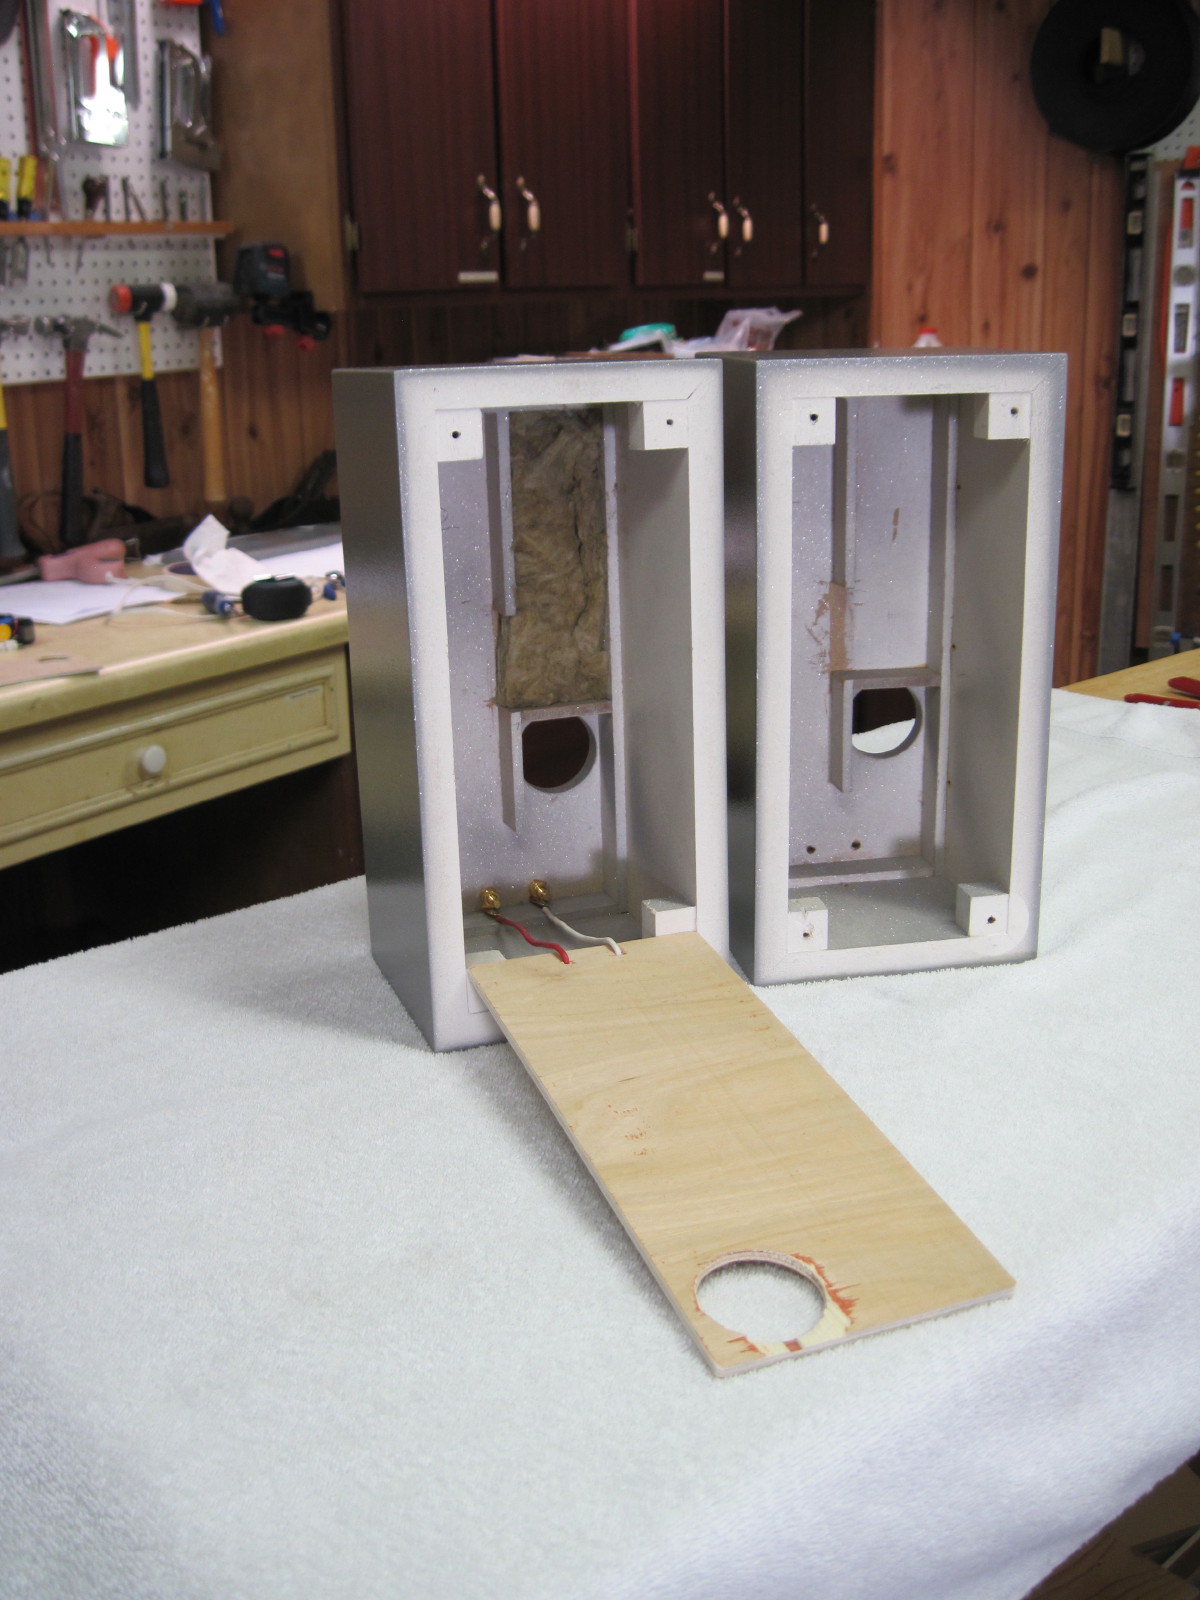
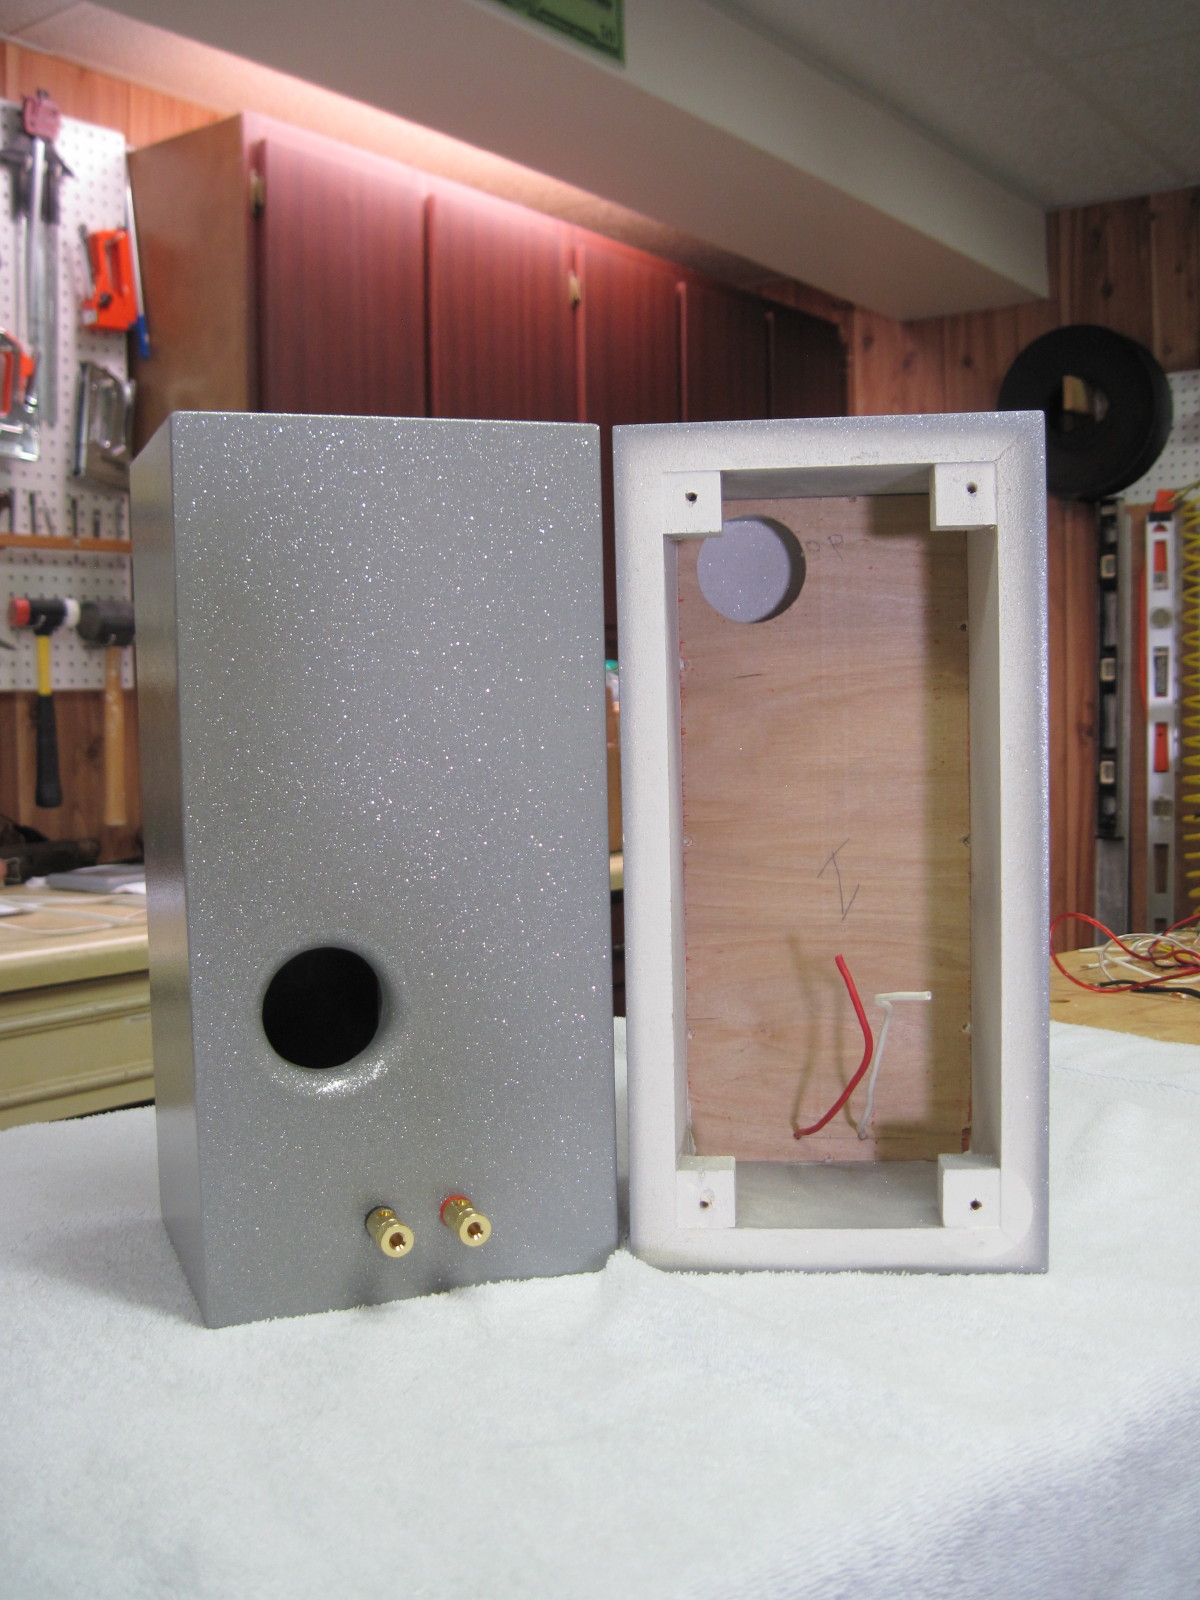
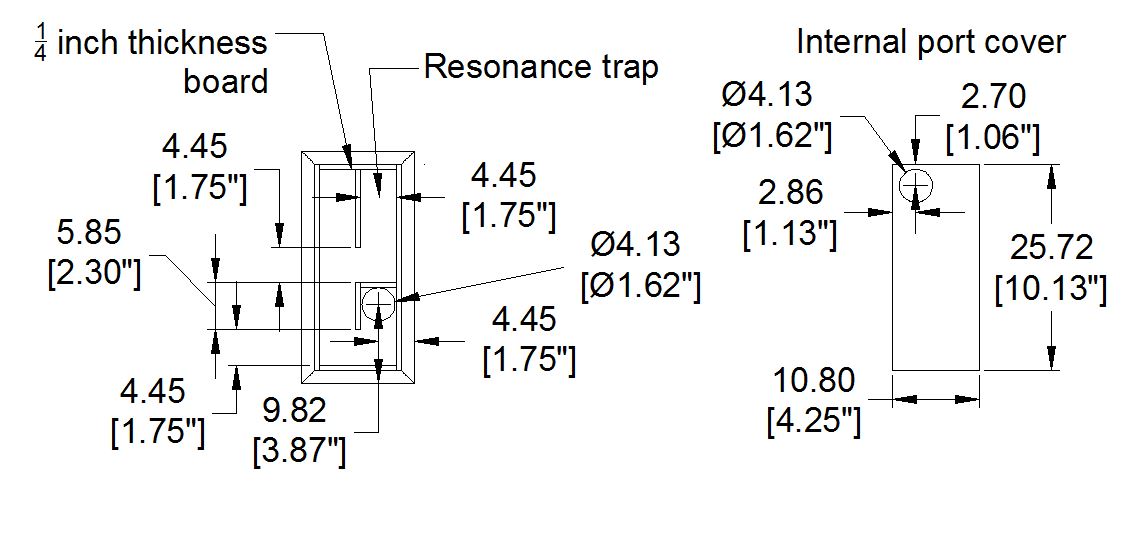
The box tuning was set to 60 Hz in a 2.1-liter box results in a F3 of 56 Hz. The cabinet internal volume is 3 liters without the port. The port is a slot design with 9.08 cm2, 1.41 in2 area and equivalent length of 35 cm, 13.75 inches. A port resonance trap is located near the middle of the trap with the same area and an equivalent length near ½ the total port length. To facilitate testing the front baffle was made to be removed.
Enclosure Assembly:
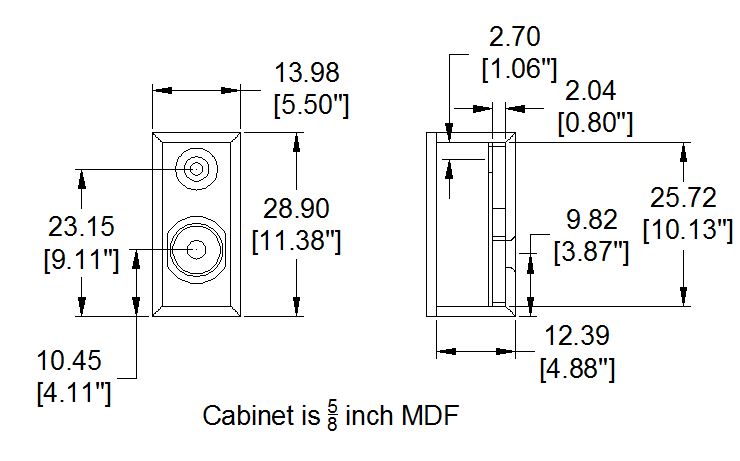
The cabinet thickness is 5/8 inch MDF. The box was cut with 45 degree angles to minimize the edges ghosting through the finish. The 45-degree cut panels are taped together then the joints are glued and folded together. Use a straightedge to make sure the panels are aligned straight while taping them together.
The front baffle is cut separately, attached to the box, then the sides routed flush to the box. The tweeter hole is cut with a 1-7/8-inch hole saw then the recess is cut with a 3/8-inch rabbet router bit. The Peerless driver hole is cut with a 3.125-inch hole saw. The front baffle has a ½ inch radius round-over on the front edges.
Cut and test the port cover so it fits in the box. Add the binding posts, wires, and resonance trap insulation before gluing the port cover in place. Paint or use black marker on the back of the port cover so wood does not show through the port opening on the back of the cabinet. Use a heavy caulk or panel adhesive to glue the port cover in place. Use a flat blade screw driver and damp rag to clean any of the glue squeeze out that is visible through the port opening on the back of the cabinet. Seal the wires coming through the port cover with glue.
About 2 oz. of insulation is added on the bottom part of the enclosure behind the driver. Make sure the insulation is away from the port and driver vent.
After finishing add gasket tape to the driver recess.
The crossover is mounted in the bottom of the cabinet.
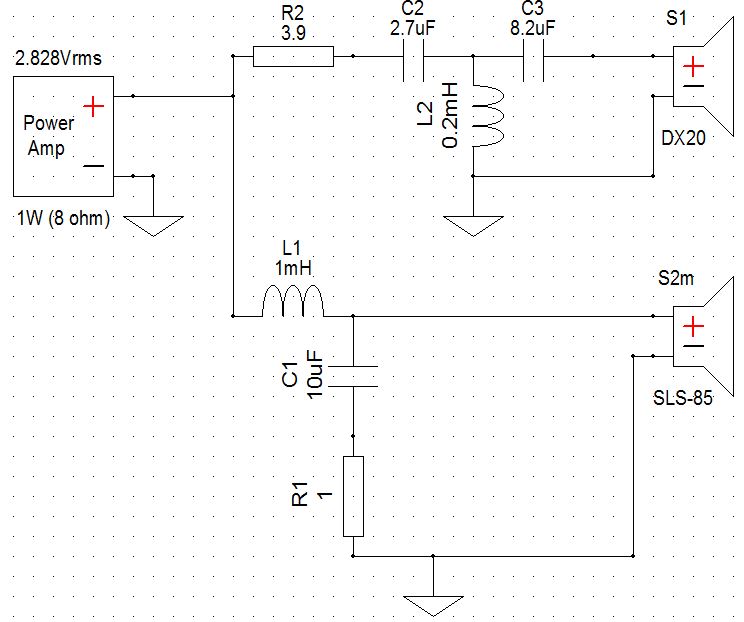
Crossover Design:
The crossover was designed for flat frequency response. The DX20 and SLS-85 were easy to work with. The crossover frequency is 3,000 Hz with LR4 slopes.
Tips & Tricks:
Apply the exterior finish before assembling the cabinet pieces. The SLS-85 woofer is deep with the extra magnet so test fit the woofer to make sure it misses the insulation and crossover.
Conclusion:
The use of a port resonance trap works to reduce port noise. The DX20 tweeter sounds much better than its price point. Overall the this was a very satisfying combination of drivers.
About the Designer:
John H is a member of the PE Speaker Building Design Team
Project Parts List:
Great peerless design, impressive.
What is the finish on these beautiful speakers?
The finish is Rustoleum rattle can sandable primer, then Rustoleum glitter spray paint, then topped with gloss lacquer
How did you calculate the resonance trap?
The resonance trap is determined by experimentally by measuring the port frequency response and adjusting to reduce the first resonance peak. The starting point is to locate the trap in the middle of the port length, the same port area, and at half the length of the port. The port stuffing and other factors make trail and error adjustments the best way to determine the trap size