Sounds Like Christmas


Designer: Joel Foust
Project Time: 20+ hours
Project Complexity: Hobbyist
Project Cost: $500-$1000
Driver Selection
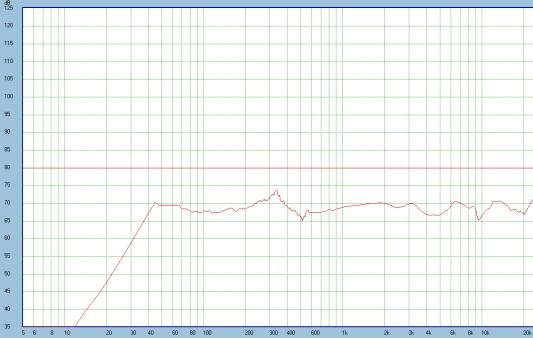
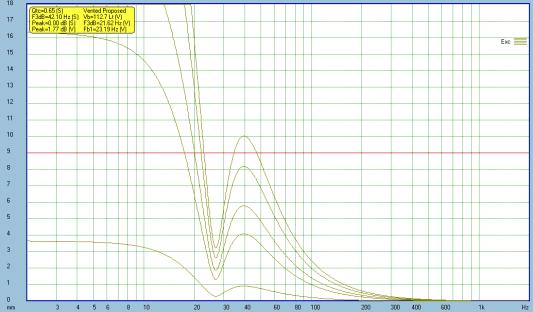
Given that I’ve had 4 Peerless XXLS 10” (830843) woofers in my closet for a couple of years, I decided to find a way to put 2 of them to use. These drivers are very linear, very low distortion and reasonably efficient. I started by determining an adequate enclosure in Sound Easy and found a ported 62L cabinet tuned to 27Hz provided relatively flat frequency response with excellent extension (See figure 1). Additionally, above 25Hz, the woofer should not reach xmax until the SPL was > 108dB (See figure 2). Group delay was sacrificed for increased output and extension. For the midrange driver, I had a pair of Dayton Audio RS150-8 6” reference woofers on hand. These drivers had a good efficiency match for the peerless woofer and are very low distortion and high performance for the cost! They are pretty easy to work with except for the frequency response above 3kHz. Since I was planning a high order crossover and have Sound Easy to help model the crossover, I felt confident that they would work very well. Since crossovers for a 3 way design can be costly, I decided to find a tweeter that had extremely linear response so that I didn’t have to add components to flatten out the response. After researching a few different options, I settled on the Seas 27TDF tweeter. The efficiency, distortion and power handling of this tweeter clearly met the design goals.
Enclosure Design
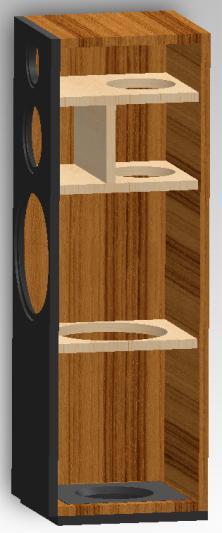
After determining 62L tuned to 27Hz for the Peerless Woofer and 4L sealed for the midrange, I went to work in 3D CAD to come up with a design that could easily be covered with album covers and met the volume requirements. Figure 3, shows a cutaway of the 3D design. The attached PDF outlines the enclosure design plans if you want to cut your own cabinet. The port is actually downward firing so the system must be placed on spikes or feet a minimum of 1” off of the ground. The bottom plate is removable to access the crossover and tweak things such as port length etc.
Amplifier/Crossover Configuration
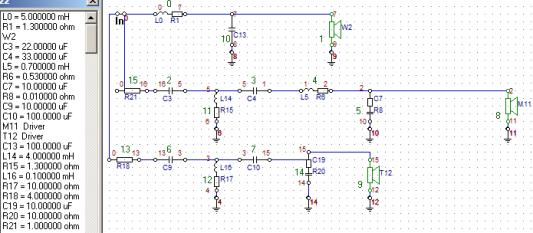
The crossover design started with mounting all of the drivers in the final cabinet assembly. From there, I took impedance measurements and SPL measurements w/ the Dayton EMM-6 calibrated measurement microphone using Sound Easy MLS feature. After several hours of measuring and manipulating data in Sound Easy, I started the crossover design process. Sound Easy really saves much time and money in the long run if you are into speaker design at all. A text book crossover will not have the acoustic response expected and good results are difficult without proper modeling. Doing this by hand is nearly impossible. The software allows you to set target crossover points and test the acoustic response of many electrical filter topologies before building. I was immensely surprised at how wrong my instincts were for a 3-way system. I settled on a modified 3rd order butterworth filter after a couple of very long nights modeling. I did not have a goal for time alignment in this design and worked hard to keep impedance and phase in check as the crossover evolved. After shopping for parts, I realized that a $600 crossover was outside of the budget of this project. So I continued modifying components until I arrived at a final crossover cost of less than $120. Final crossover points are 350Hz and 3800Hz with approximately 3rd order slopes. I say approximately because the response anomalies required some additional work that make the response not follow a true butterworth 3rd filter response. The system impedance does not dip too far below 6 ohms and should work with most amplifiers. Crossover network with component values is shown in figure 4.
Enclosure Assembly
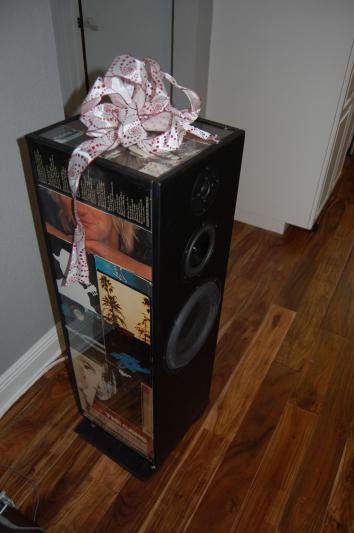
The final product consists of ¾” birch plywood for all sides except the baffle which uses ¾” MDF. The entire back of the cabinet is lined with insulation and acoustic stuffing was used to taste in the woofer area and midrange chamber. All drivers were countersunk using a route with a Jasper Jig and then the back of the driver coutouts were chamfered with ½” chamfer bit. All parts were glued together with a few screws where necessary. The baffle was simply painted flat black with 8 coats of spray paint. Between each coat of paint, I lightly sanded with progressively finer sand paper and used steel wool between the 7th and 8th coat. The baffles came out very nice and seem pretty durable. The bottom plate is sealed to the speaker using weather stripping and screws. We went to thrift stores and garage sales to find album covers for this project. My wife cut up the album covers and used Modge Podge to adhere them to the cabinet. We used Lexan over the album covers and trimmed with spray painted plastic corner protectors to dress up the Lexan junctions.
Conclusion
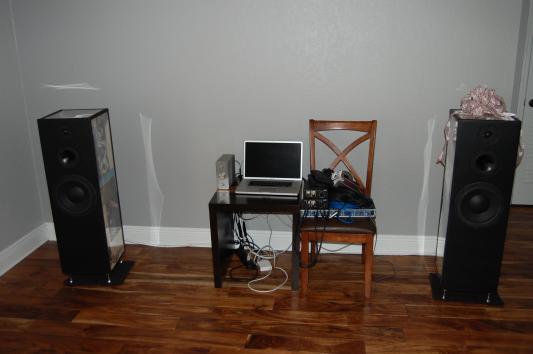
Everyone thought he got the coolest gift this year. My wife and I are glad because we poured many hours into this project. They came out looking really neat given our inexperience with carpentry. However, I did have access to a good workshop, which had much to do with the good results. Since sound quality is subjective, I’ll keep it brief and say everyone likes the way they sound. They measure good too so I’m very happy with the end result. These play very low and loud as should be expected from a full range loudspeaker of this size.
About The Designer
Joel Foust has been working as a quality control manager for a small telecommunications company for the past 5 years. He is interested in the field of psychoacoustics and hopes to professionally design loudspeakers by understanding how humans hear.
+ There are no comments
Add yours