The Summits


Designer: Chris Biese
Project Time: 8-20 hours
Project Complexity: Intermediate
Project Cost: $100-$500
Project Description
The Summits are a compact 3-way bookshelf/stand-mount speaker featuring all Dayton Audio Drivers. It is suitable for small to average living rooms and is suited for 2ch listening at normal to moderate levels. The design may certainly be accompanied by a subwoofer, however is enjoyable on it’s own. The design is lower efficiency and four ohms, so a four ohm stable receiver or amp of 50 watts or more is recommended.
Design Goals
The focus of the design was for a small enclosure three-way that had adequate low frequency response despite its smaller size. I wanted to use a dome midrange driver and non-traditional tweeter type just to change things up a bit in my builds. The overall sound goal was for a warm and balanced sound that did not cause listener fatigue, with it’s intent to be a music speaker for use in a larger office/study type room.
Driver Selection
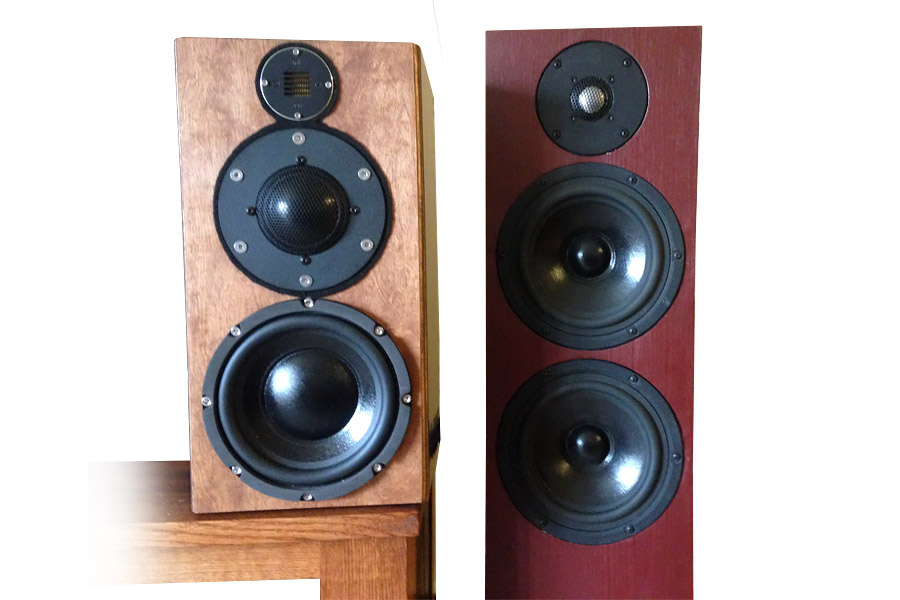
Based on the desire for a non-dome type tweeter, I decided on the Dayton AMT Mini-8. The price was certainly right and it’s small and proportionate element appeared it could offer good off-axis performance both horizontally and vertically.
The woofer (Dayton DCS165-4) was chosen for it’s small enclosure capability and apparent durability. The fact that it has a great and tough classic look was a bonus.
The midrange (RS52AN-8) was chosen to meet the dome requirement, to keep the all-Dayton driver theme, and for its respectable performance.
Enclosure Design
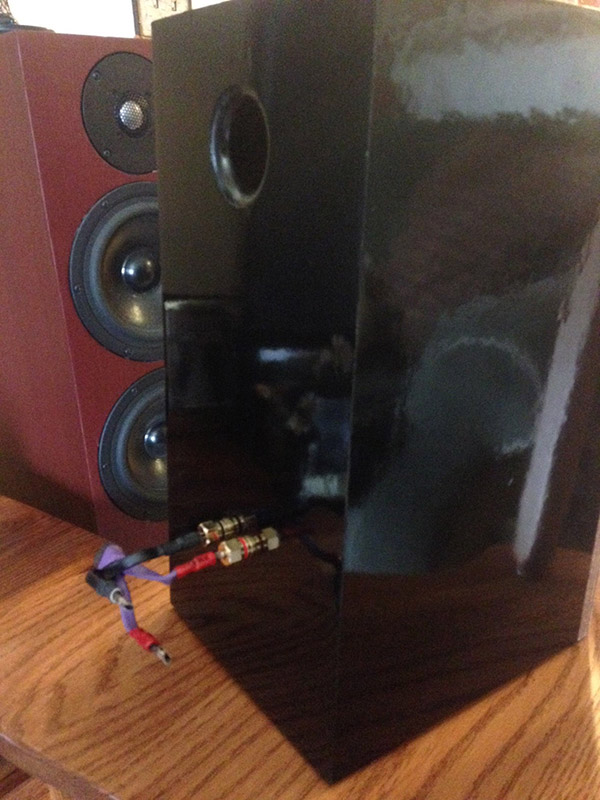
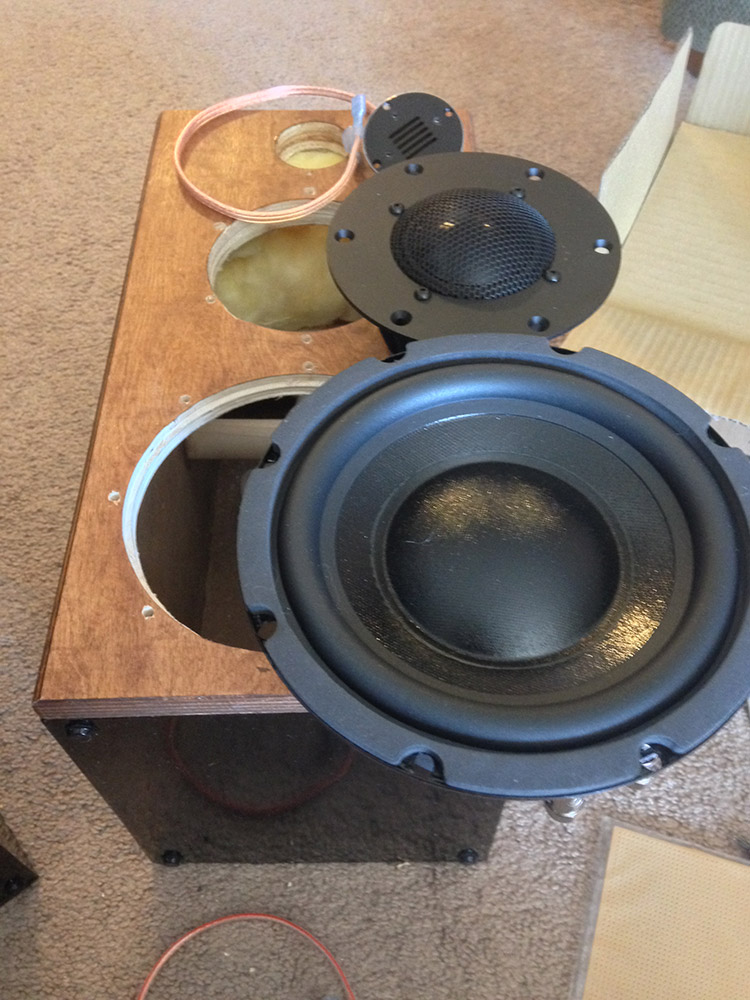
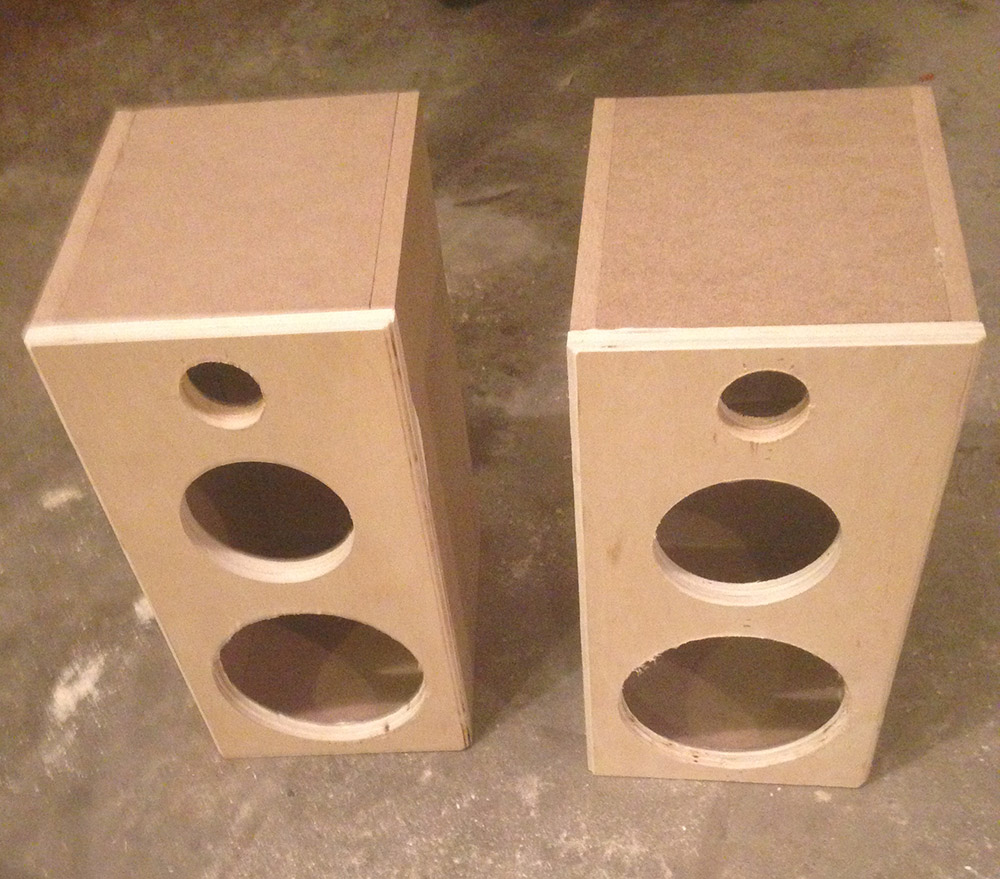
I chose a ported design to help extend the low frequency response of the smaller woofer. The woofer can perform well in a small vented box and appears to have adequate suspension to handle it. I was going for a classic monitor look, so a standard rectangular enclosure worked just fine. The sides and back are 1/2″ (would recommend 3/4″) MDF with two dowels from side to side for bracing, and a 3/4″ birch baffle. The drivers are all surface mounted, eliminating the need for a router. The baffle measures 7.5″ x 15″ and the gross internal volume is .42 ft3, with a 1.5″d x 7″L vent to the rear. The port may be plugged for use with a sub or for increased listening levels, both to help prevent over-excursion and boominess.
Enclosure Assembly
The enclosure is simple, able to be made with a circular or table and jig saw. Simply cut the panels to size, cut and cut out the driver holes, then glue and clamp. I used an air-nailer with 18ga x 1.25″ brads to ease assembly. I also put a slight chamfer on the baffle side edges, which I did with a router but could be done on a table saw (prior to assembly preferably). I stained the baffle to my liking and opted to cover the rest in black gloss vinyl, however it can be finished in any way desired. The inter walls should be lined entirely with an acoustic material, such as acoustic foam. I used a combination of foam and fiberglass insulation, peeled to be about an inch thick. The walls should be lined but the middle should be empty.
Crossover Design
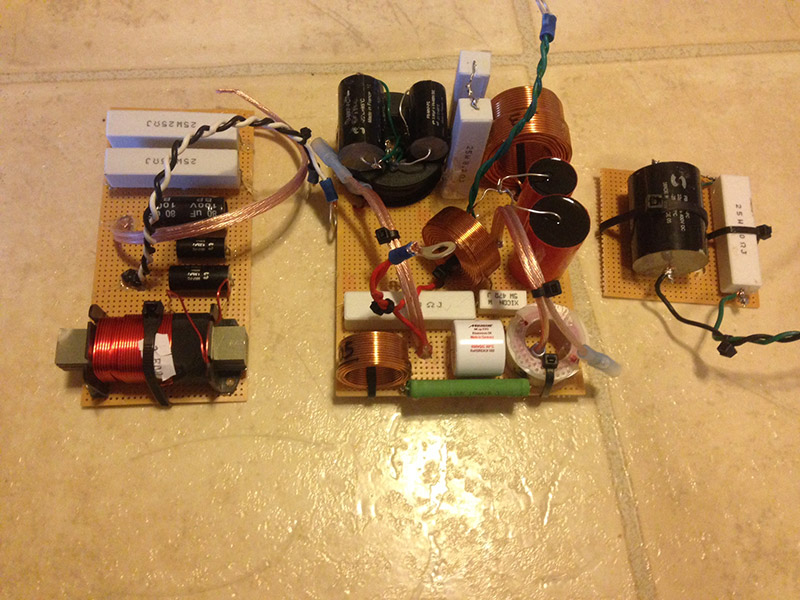
The crossover is relatively complex due to the responses of the drivers chosen. All caps are Audyn Q4 except the big cap on the woofer section. The RS52 has a large resonant peak that must be dealt with and is accounted for with a notch filter in the crossover. The crossover was redesigned since originally posted due to new measurements, so the photo of the crossover is not current, however it does represent a good way to orient the inductors.
Conclusion
I’m quite satisfied. My personal opinion is a pleasant, warmish sound. As dictated by their low efficiency, they are not designed for, nor will they facilitate, ear bleeding levels or parties. They are however great for normal listening levels, very non-fatiguing, and can, if desired/necessary, play notably louder cleanly by plugging the port. I would consider them ideal for a dorm, a study, a large home office, or anywhere where you just want to relax and enjoy your music.
Tips & Tricks
Build them as vented for good low frequency response on their own at low to average volumes. Simply plug the vent if using with a sub or at higher levels.
Build the crossover sections on separate boards to help fit the parts in the box easier and to help simplify wiring.
About the Designer
I have been an audio enthusiast since I was just a kid, starting out as I’m sure many of us do, building huge speakers with off the shelf and having more subs than you could imagine. I was big into car audio for a number of years, and eventually became more interested in home audio, spending a lot of time at the local hifi shop listening. More recently I joined Tech Talk, and learned (and always will be learning) so much from the forum members. I became able to use a number of the design softwares available and began to step away from textbook crossovers and develop my own designs from ground-up. With every design I do I learn new things and am very thankful to the forum for their help.
How do you feel about the mid. I tried using them and found them to be way overpowering. I had to seriously step them down with a variable L-Pad.
Some people love them and some don’t care for them (personal taste). I really like the mid, a lot; especially for heavier music. The biggest thing for this mid is the absolute need to notch out the resonant spike around 10-12k and use steep-ish slopes. The .05mh coil and 3.3uf in the above schematic make up the notch filter. A couple of respected guys on the forum helped me to pick the mid circuit I used, and it seems to work well for it. If you don’t have the ability to model the circuit you use to view impedance stability, and employ the above notch, I would add a 2-4 ohm resistor in series with the notch parts to avoid issues since the notch creates a dead short to ground at the particular frequency. I have some pretty good attenuation as well, since the woofer used runs 6db below spec due to baffle step, so it is a relatively low sensitivity design all around.
Hi Chris – Thank you for publishing the project. Exactly what I was looking for. Since a couple of weeks I am trying to build a small speaker around that midrange-dome. I am struggeling with the X-over since days. The small AMT is a project changer, but even simpler to handle/build-in than the planned Dayton PT2C-8. Am I allowed to rebuild it? If it shines against another project (with Visaton drivers), I am going to try a center speaker as well (starting with your X-over and positioning the AMT over the mid-dome follwed by fine-tuning of the X-over – I suppose there is probably the baffle in the mids/lows to compensate). Greetings from Switzerland – Stefan
Just an update. After running the design through xsim, I would suggest 20w resistors for all, except the 25R and 1R in the mid crossover – 10w appears sufficient for those two.
Hey Chris, nice build you have here! I am considering building a set but am wondering if you have any more information from your design. Specifically, if you have the frequency response plots as well as enclosure dimensions. Additionally, if you have any other information needed to build a set, would you be willing to email it to me? Thanks!