
zx82net 2.1 Tang Band System

3D Componenets
https://partsexpress.wufoo.com/cabinet/1f5375d2-4a1f-45b6-b82e-c0e6c26a2eaa
https://partsexpress.wufoo.com/cabinet/6ccdb196-6aaf-4196-afd4-e7c203325073
https://partsexpress.wufoo.com/cabinet/a1e60a12-f810-4998-89e4-186cf61c3360
https://partsexpress.wufoo.com/cabinet/7afa1f10-2a39-4159-a9b7-2acb67028949
https://partsexpress.wufoo.com/cabinet/c8d7e0ce-622f-482e-b903-eadd21598eb8
Designer:
zx82net
Project Category:
Freestyle Speakers
Project Level:
Beginner
Project Time:
1-8 Hours
Project Cost:
Under $100
Project Description:
These use sealed speaker modules from Tang Band. It’s a very user friendly build, no external circuitry or tuning is required and the quality of the 3D Print is not critical to the sound quality.
Design Goals:
I wanted to produce an attractive lifestyle sound system, accessible to anyone with moderate 3D Printing skills and basic audio knowledge.
Driver Selection:
I chose the Tang Band modules for their ease of integration and great sound quality to size ratio.
Enclosure Design:
I designed the 3D printed enclosures to give a modern minimalist look, with very simple assembly. Minimal supports are needed and post processing it not required to get a good finish.
Enclosure Assembly:
This 3D printed sub-sat system requires a print area of 200x200mm for the subwoofer, and slightly less for the satellites.
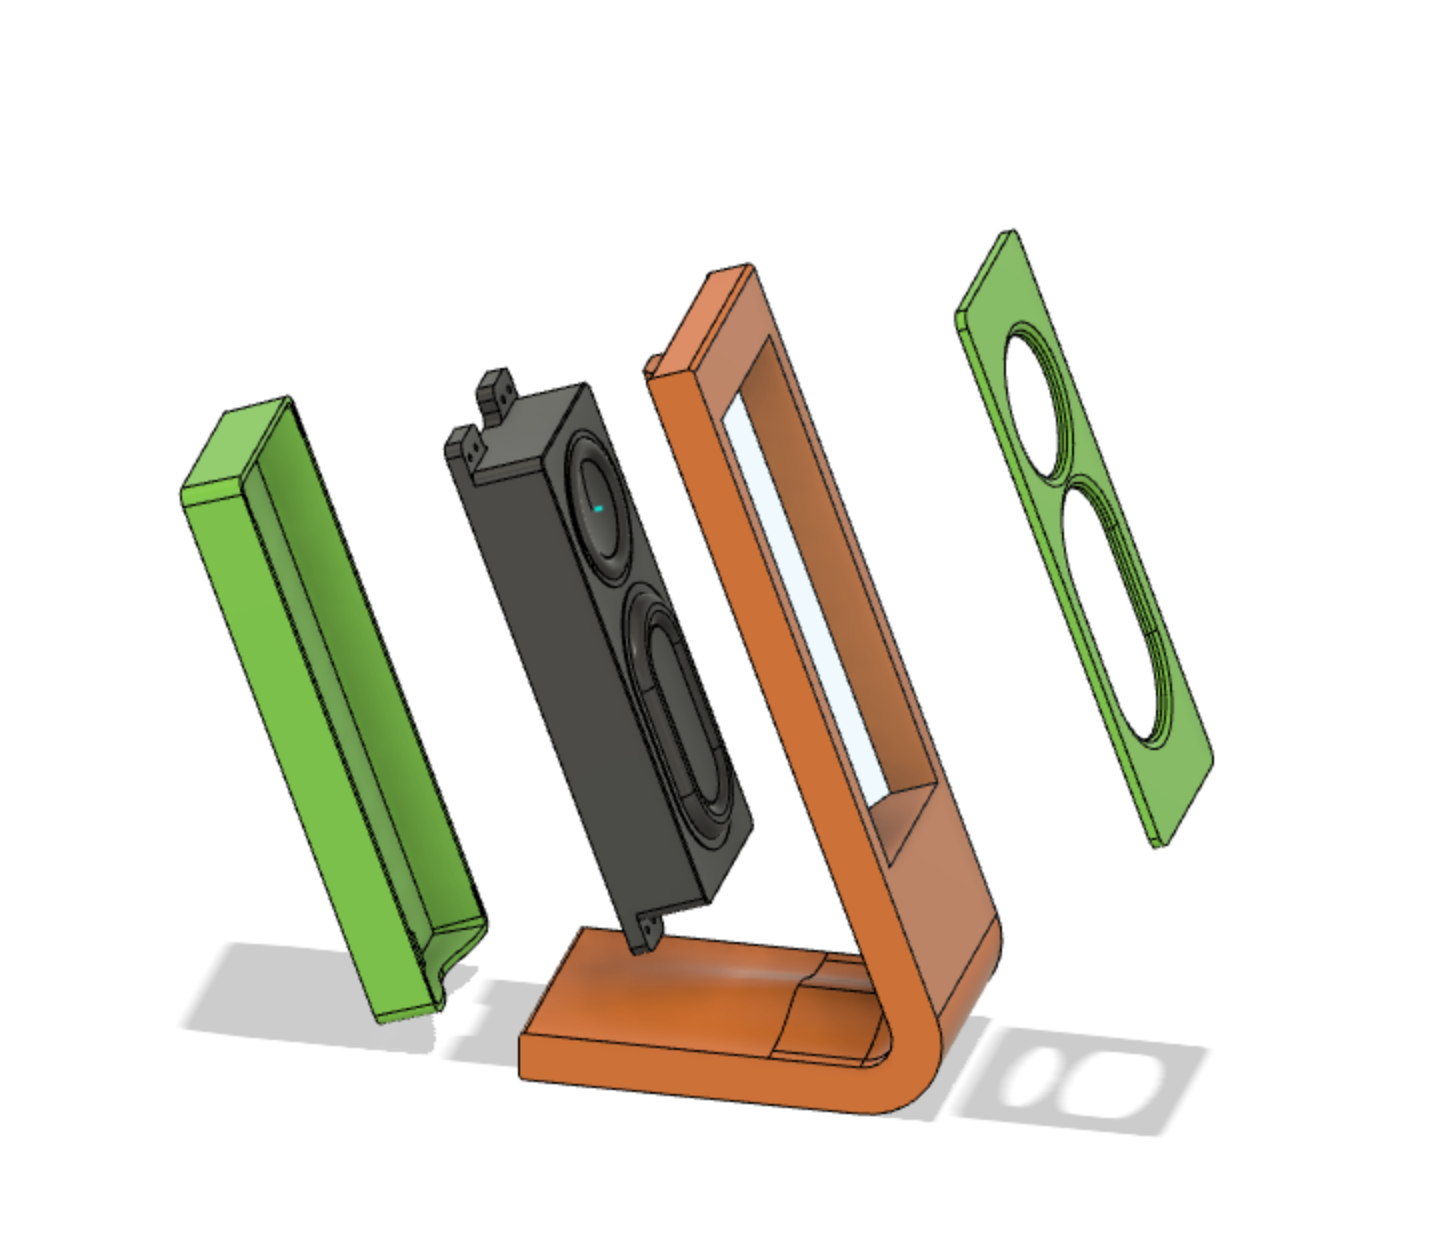
The satellites print in three parts; the stand, the back cover and the decorative trim. The back screws into the stand (2x M3 screws), clamping the module in place. The trim can be glued to the front, or held with bluetack, allowing you to swap out colors. The speaker cable feeds through a channel in the body and out of a hole at the back. To avoid any rattles, use a few blobs of bluetack between the speaker and the stand, and the speaker and the back cover. You need to solder the wires to the terminals on the module. Some support is needed for the “stand” component. Make sure your slicer does not put support in the cable channel!
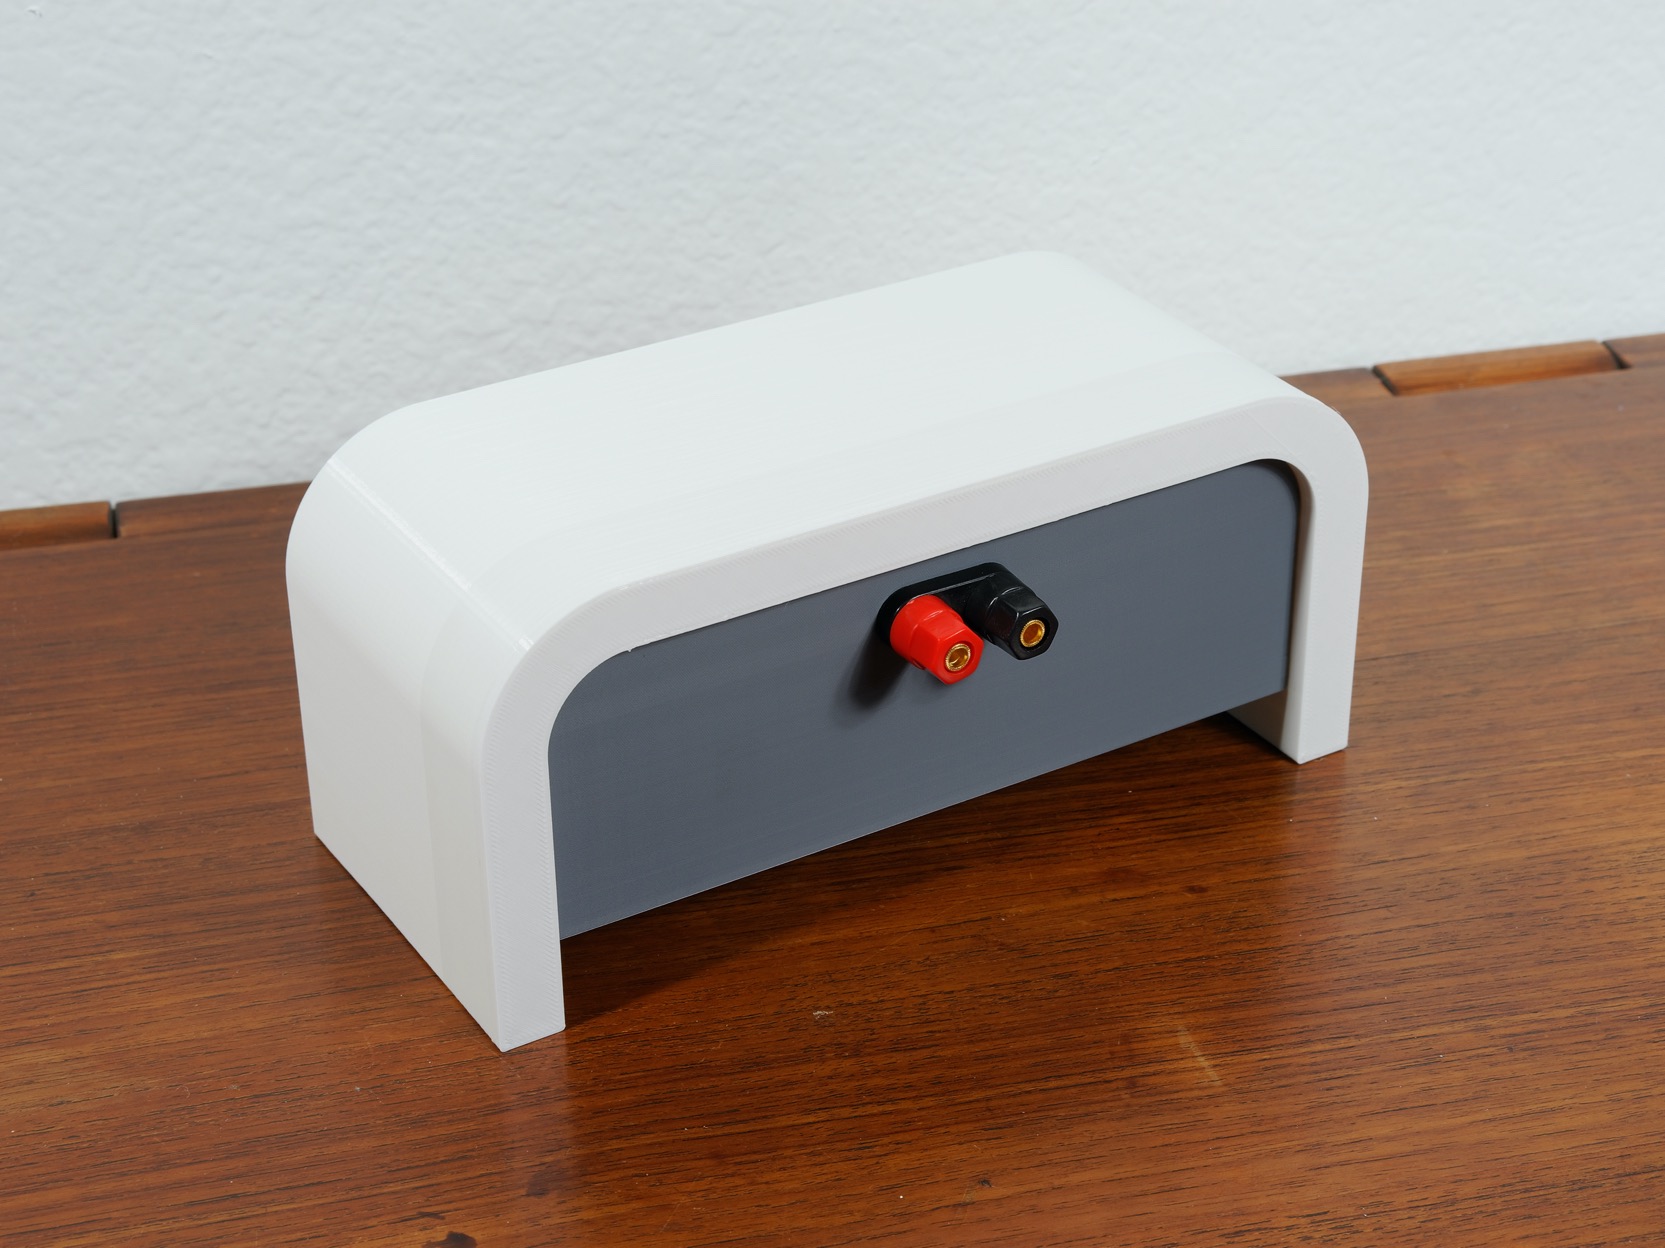
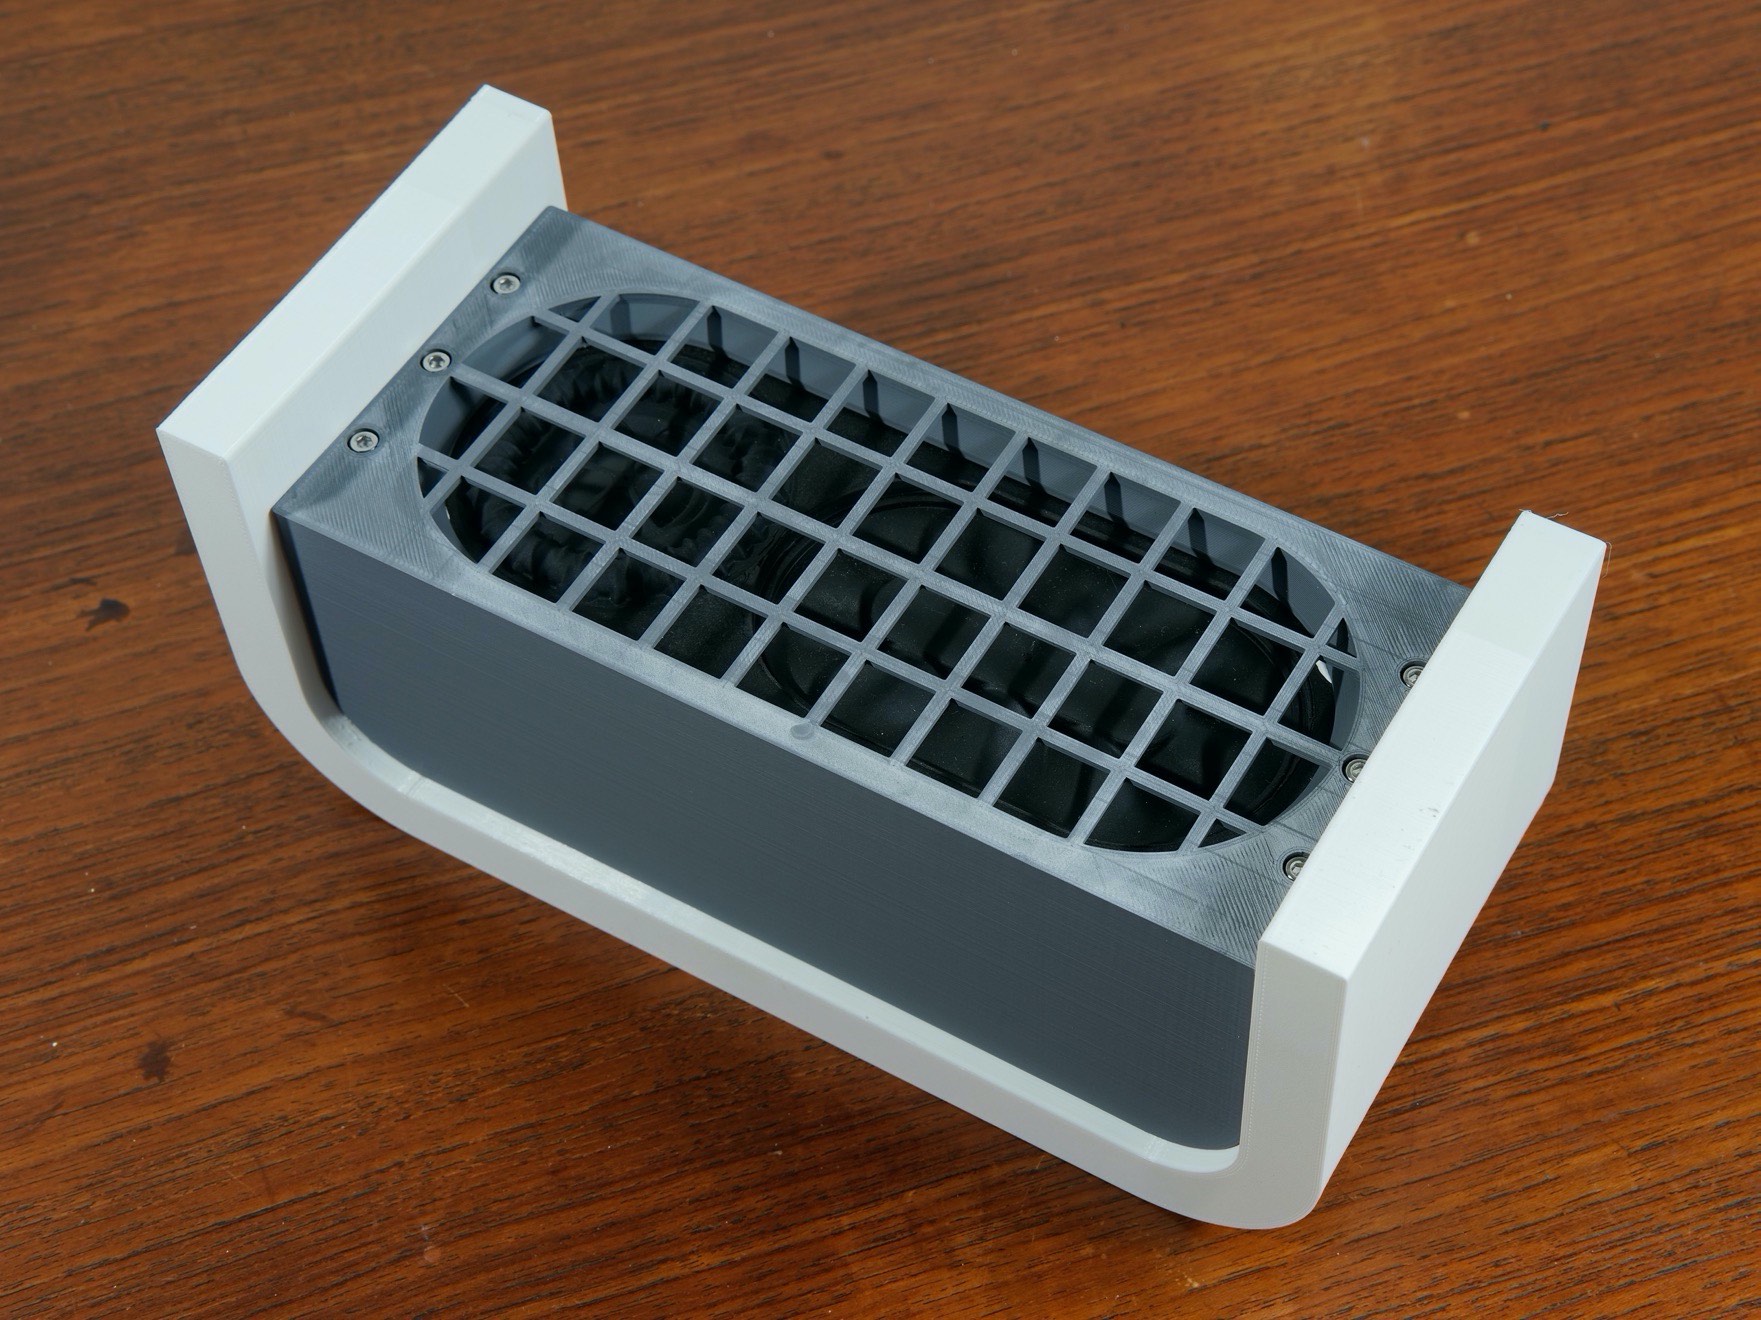
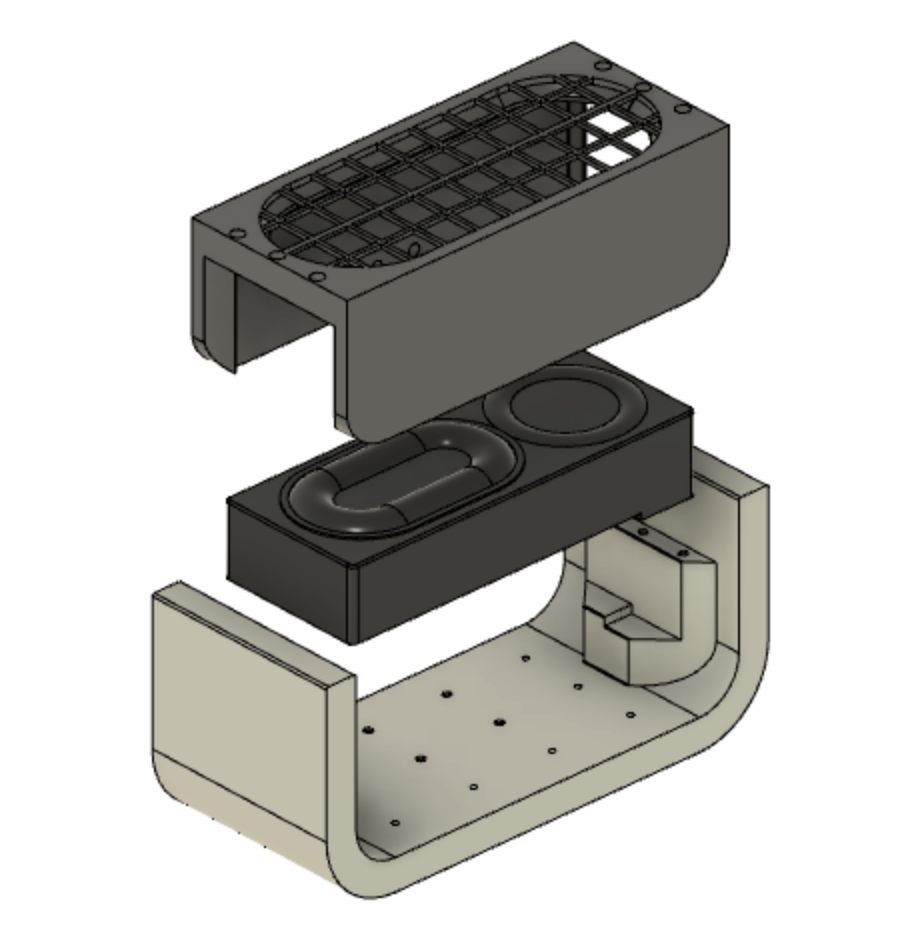
The subwoofer prints in two parts which screw together, clamping the module (6x M3 screws). You need to unscrew the existing mounting tabs from the module. Use bluetack between the module and the frame to prevent rattling, there is a clearance of 1mm for this purpose. Use enough bluetack to fill that gap. You will need to either put some additional weight inside the top of the subwoofer, or use bluetack to hold it down, otherwise it will dance about on the table. (There are some M3 holes inside the top surface to fix things there if needed.) You need to solder the wires to the terminals on the module.
Crossover Design:
The sub to sat should crossover anywhere in the 100~200Hz region.
A 50Hz high pass filter on the subwoofer will improve power handling.
Tips & Tricks:
The full range units have a peak in response around 14kHz, this may sound either crisp or a bit tinny, depending on your point of view. Use your equalizer to push the response down slightly above 10kHz, and you’ll find they can sound very natural.
Conclusion:
I’m very happy with the results of this project. I think it makes a great introduction to speaker building, for anyone interested in 3D Printing.
I’ve posted the 3D stl files here. They are also available on my Thingiverse page: https://www.thingiverse.com/thing:4545494
About the Designer:
I design cameras, but I like speakers too!
Project Parts List:
|
Part # |
Description |
Qty |
|
264-948 |
Tang Band T1-2121SD Speaker Module 5-7/16″ x 2-3/16″ |
1 |
I love everything about this! this is the true spirit of modern diy!
Thanks! It was great fun to design.