
Mini-TL


Designer:
John H
Project Category:
Freestyle Speakers
Project Level:
Intermediate
Project Time:
8-20 Hours
Project Cost:
$100 – $500
Project Description:
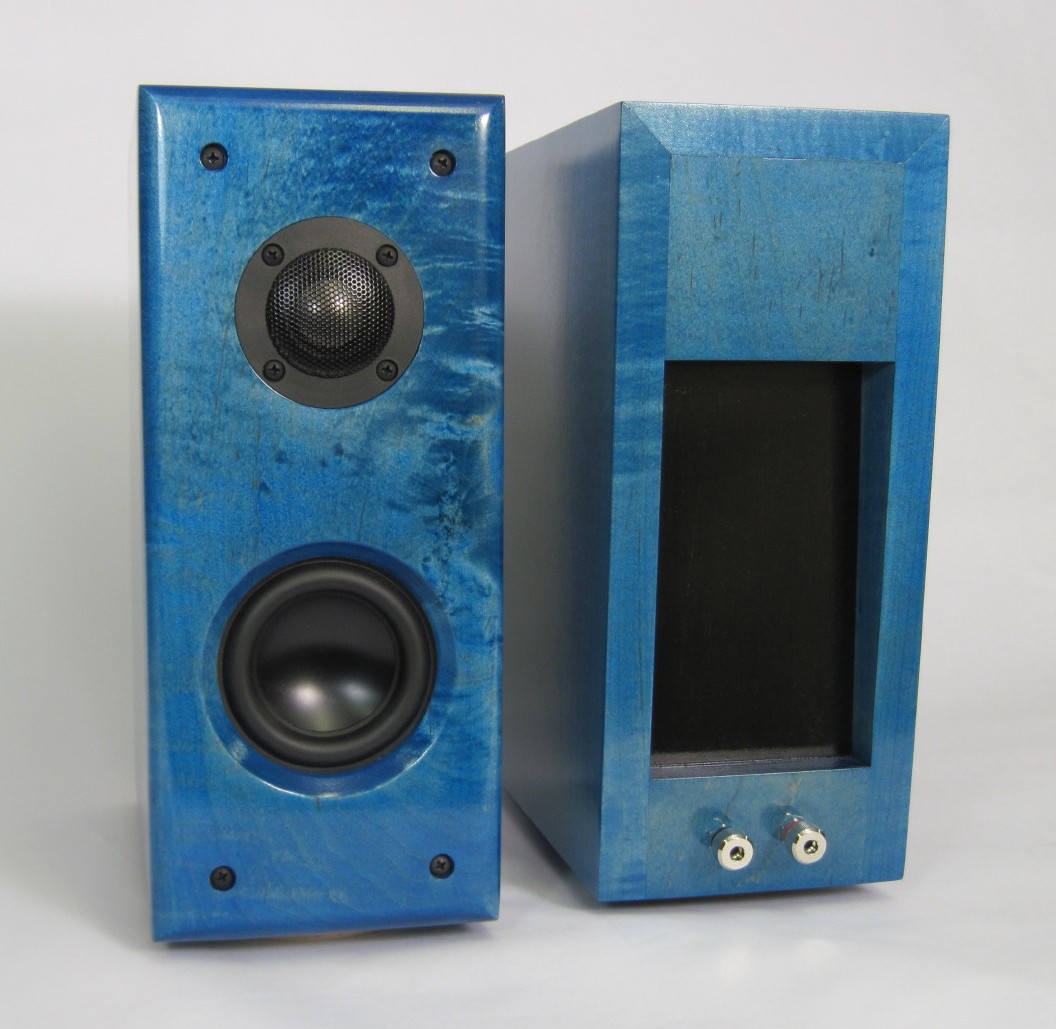
This project is a small tapered transmission line speaker design for use as desktop or small room speakers. Efficiency is about 80 dB at 2.83 V rms.
Design Goals:
The design goal was to get below 60 Hz response from a volume of 3 liters. After investigating ported designs and the port resonance issues, a tapered transmission line offered the best opportunity to damp down the line resonances and simplify the design.
Driver Selection:
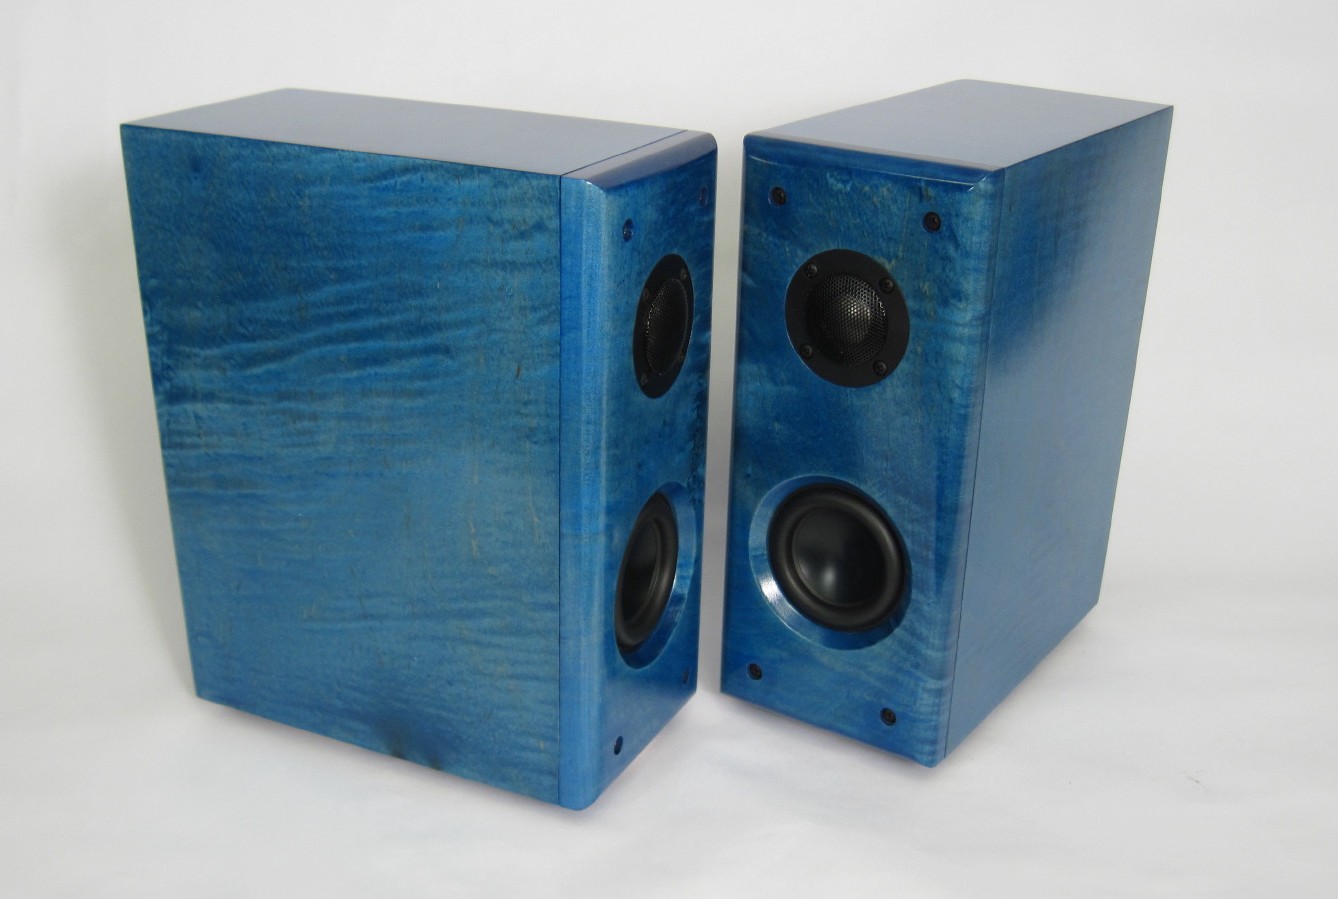
ND91-8 driver provided reasonable volume levels and bass extension from a small volume. Two ND91s would have provided more volume, but the tuning would have been above 60 Hz. The ND25Tn was chosen as I had always wanted to try the titanium tweeter.
Enclosure Design:
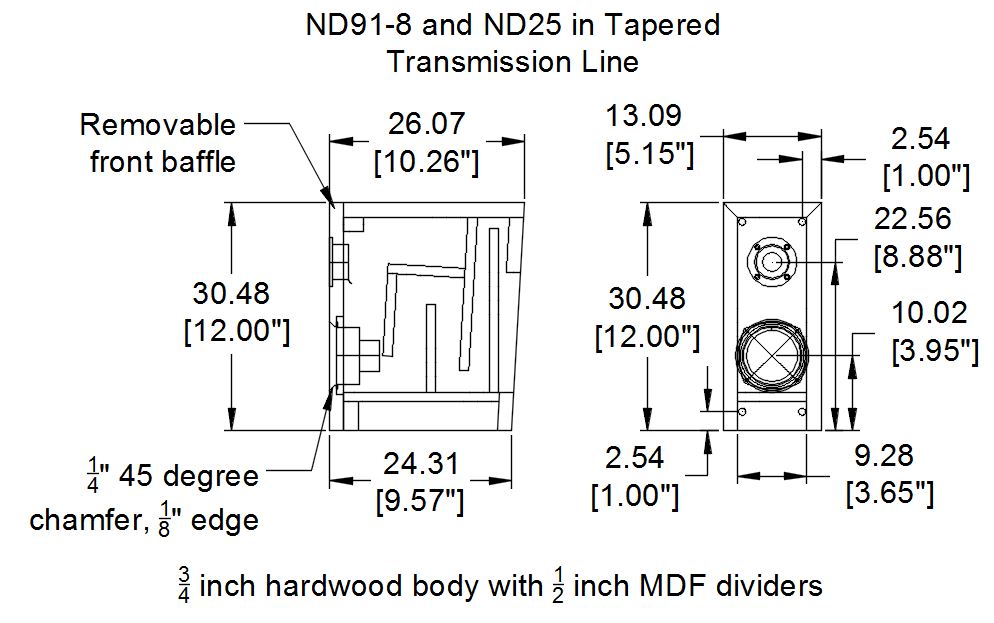
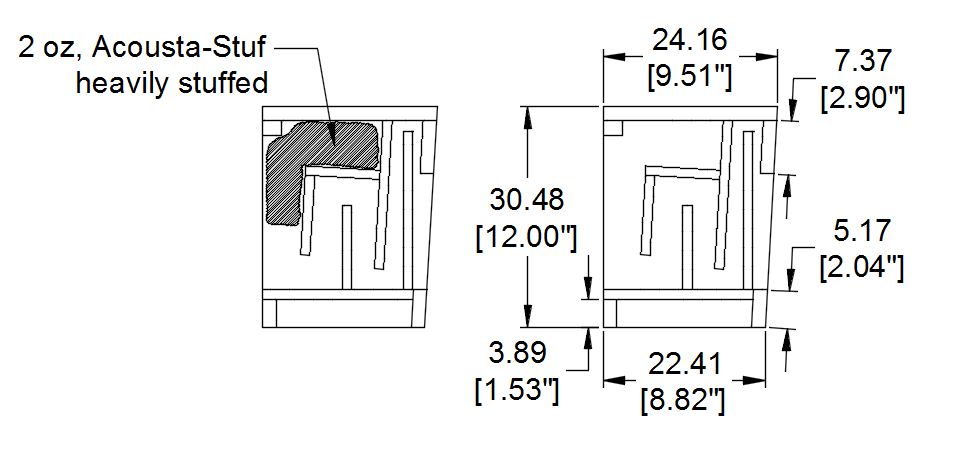
The enclosure design is a tapered transmission line with a 3-liter volume and a 96 centimeter length. The combined response of the terminus and driver provide an F3 of about 53 Hz. The actual measured terminus output shows an F3 below 50 Hz.
Enclosure Assembly:
The interior pieces are ½ inch MDF. The exterior is ¾ inch material but the entire speaker could be made from ½ MDF by adjusting a few dimensions. The side pieces have an optional tapered back. This speaker’s exterior utilized solid wood with 45-degree angle cuts but square cuts would be much easier.
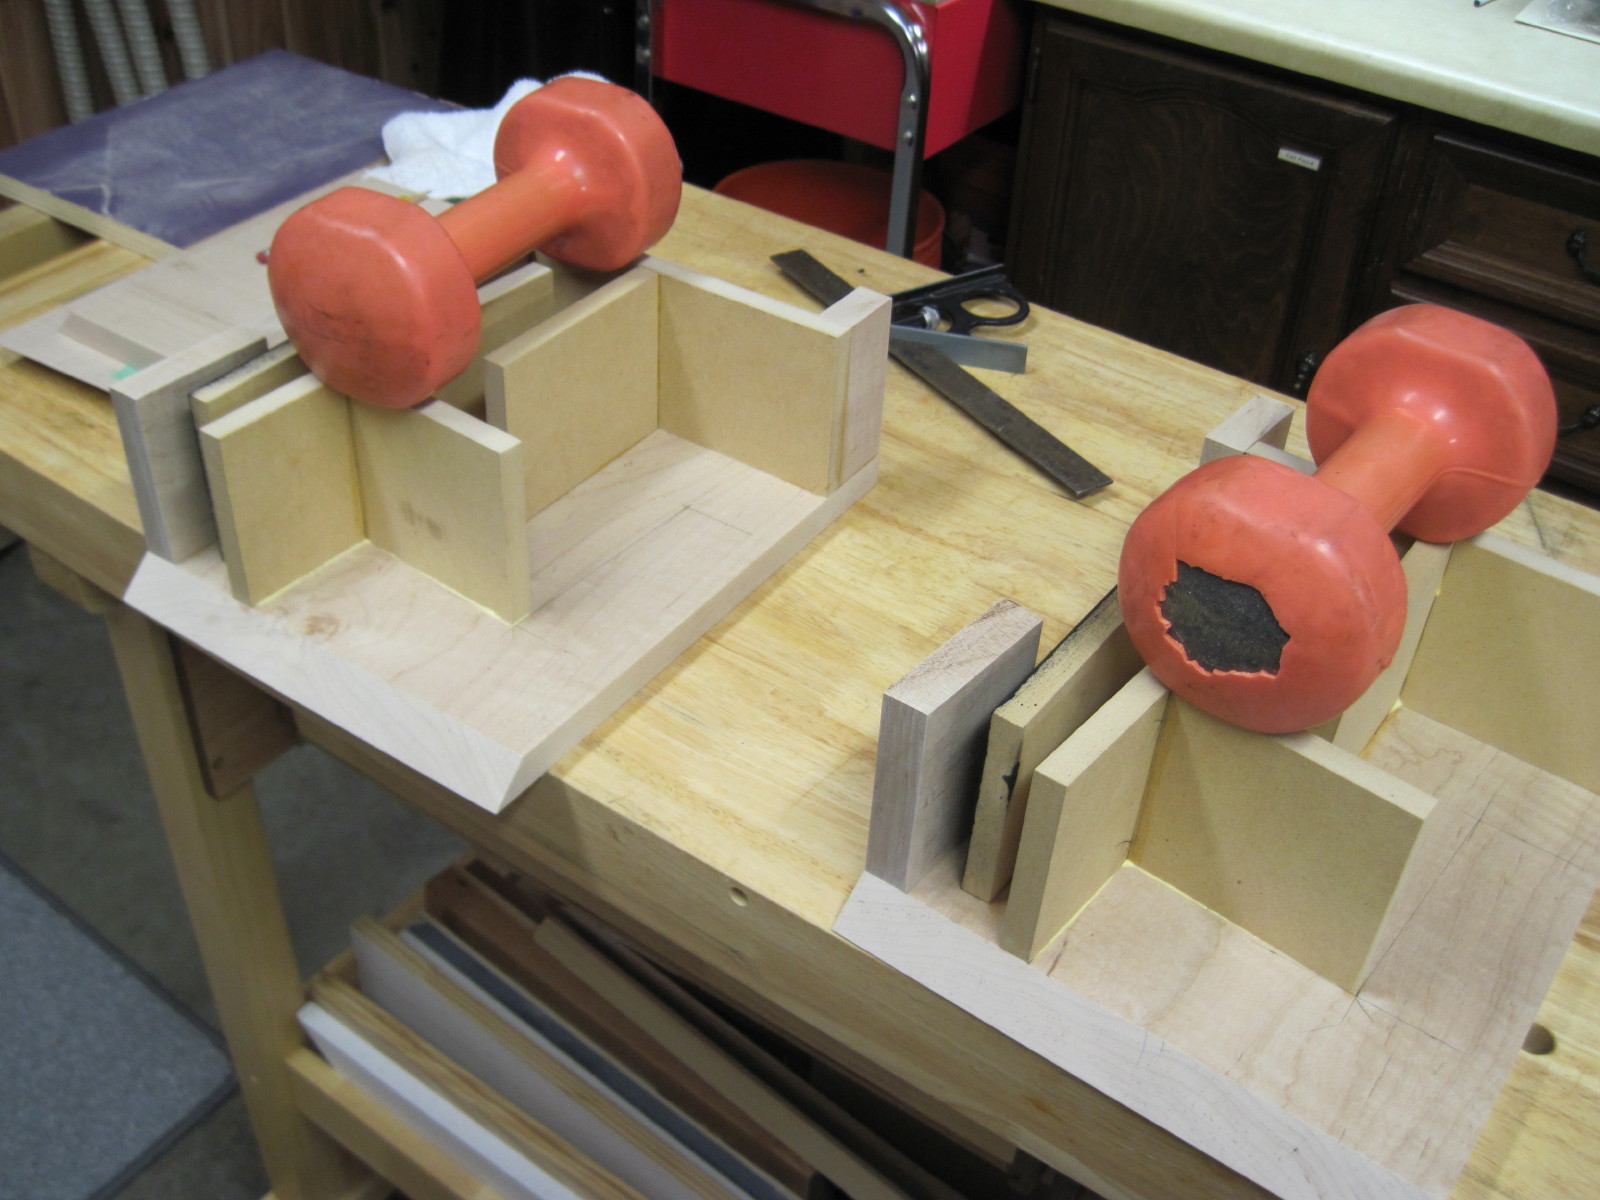
The tapered transmission line box assembly is straightforward with a bit of patience:
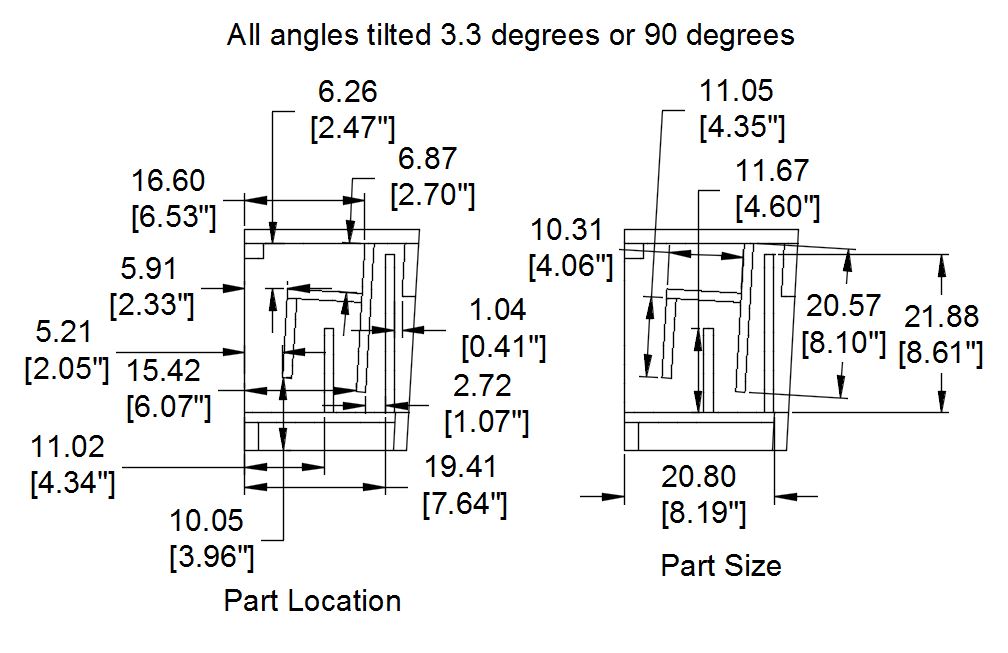
• Cut the pieces to size. There are only a few pieces that get a 3.3 (3.5) degree cut.
• Mark the dimensions for the location of the interior pieces on one side piece. Assemble all the pieces on that side.
• Pre assemble the base pieces then glue to the side.
• Glue only 2 pieces together at a time. That would mean only adding one piece to the side piece at a time. Use weights to hold pieces.
• Pre-fit each piece. As yellow glue was used to assemble, some pieces required sanding to fit without gaps.
• The back piece was prefinished black before gluing in place
• The side is the last piece to glue. After applying glue to the dividers and edges and placing the side piece, turned over the entire box so that any excess glue stays near the edges.
• The front baffle is screwed to the box with wood screws into hardwood blocks
• After finishing add gasket tape to the box edge to seal the baffle to the box. A thin gasket is also added behind the tweeter. The ND90 does not require a gasket as the rubber surround extends under the hole edge.
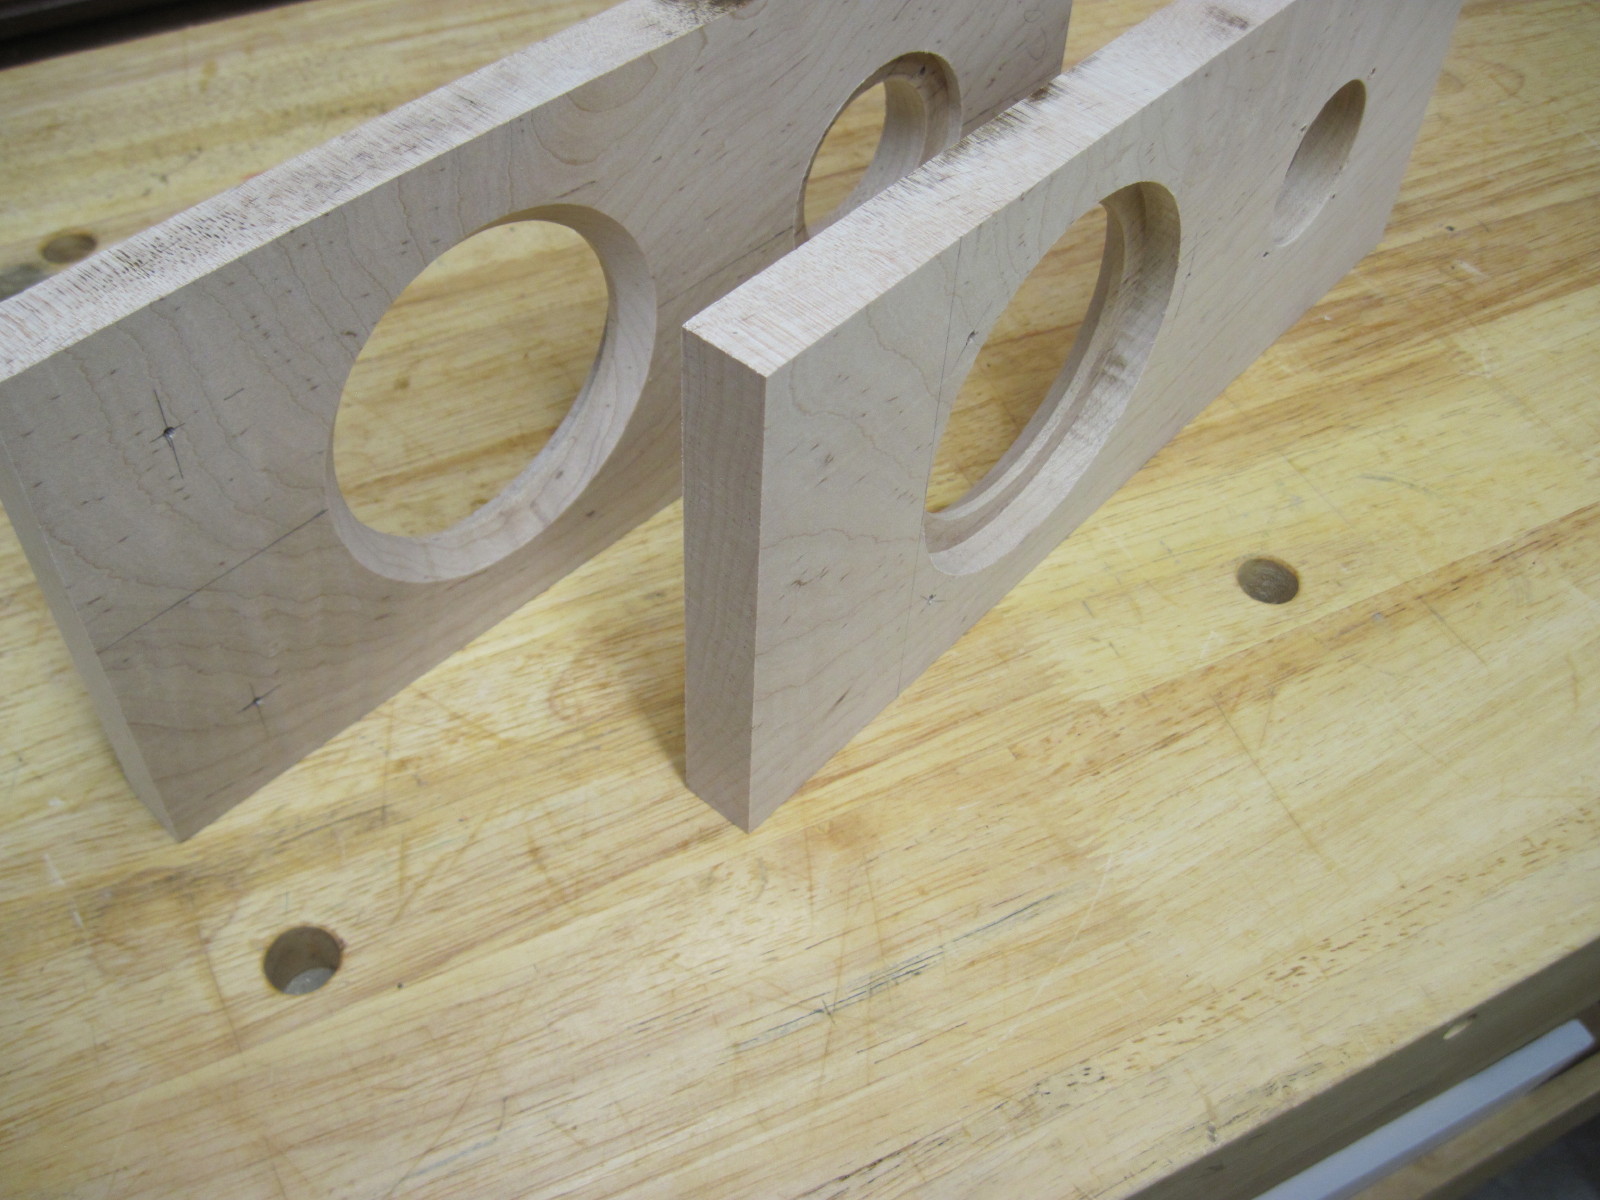
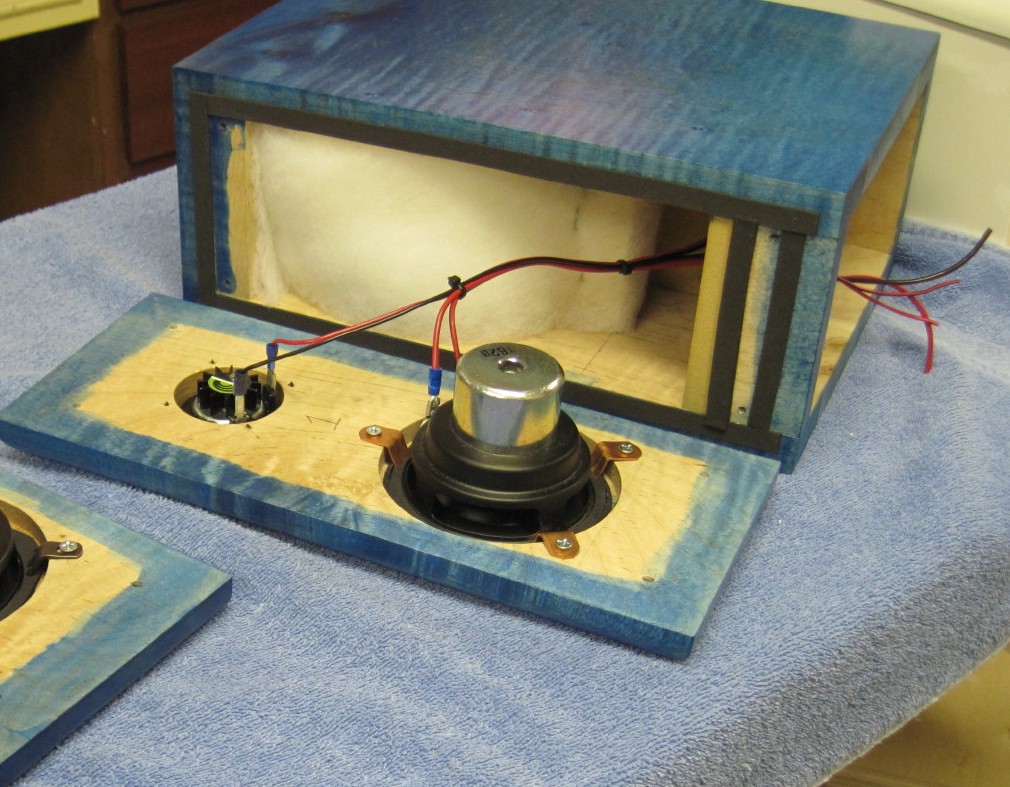
The front baffle is removable for access to the ND91 driver and for adding stuffing to the enclosure. The front baffle is mounted to the box then the baffle sides are routed flush to the box to ensure they match. The front baffle has a ½ inch radius round over on the front edges.
The tweeter hole is cut with a 1-7/8-inch hole saw then the recess is cut with a 3/8-inch rabbet. The ND91 driver hole is cut with a 3-1/8-inch hole saw. The back side of the hole receives a 3/8-inch by 3/8-inch rabbet. The front side receives a 45-degree chamfer ¼ inch deep.
The ND91 driver corners are snipped off so the driver fits in the 3/8-inch by 3/8-inch rabbet. The ND91 driver is held in place with 3 angle clips.
About 2 oz. of insulation is added in the large end of the enclosure up to the ND91 driver to damp the line resonances. If utilizing Acousta-Stuf consider using poly batting to hold the stuffing in place. There is no stuffing after the ND91 driver.
The crossover is mounted in an open space under the speaker. If mounting the crossover on a separate board, make sure no components are below the bottom of the speaker. Seal the wire holes between the enclosure and crossover area.
Crossover Design:
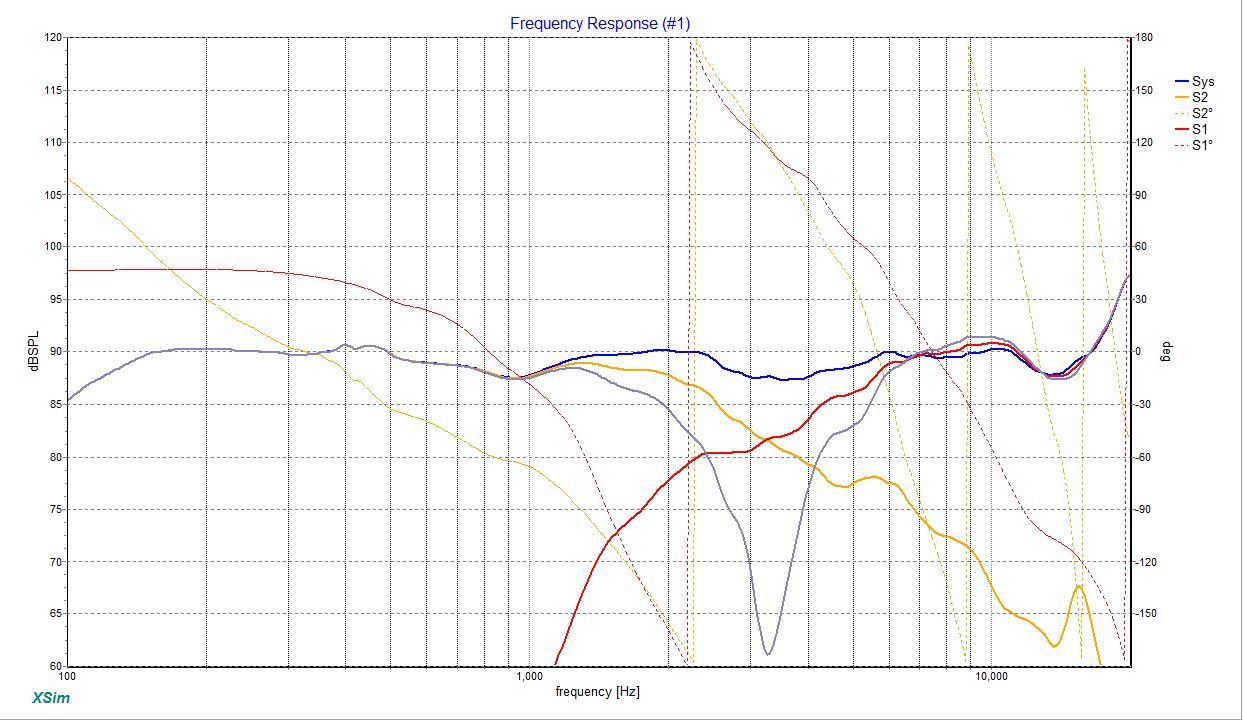
The crossover was designed for flat frequency response with a minimum number of components. Crossover is at 3,300 Hz with LR2 slopes. 2 parallel resistors are wired together for 4 ohms and increased power handling.
Tips & Tricks:
This project would be much easier with all ½ inch MDF and square cut joints. The baffle mounting blocks should be hardwood to hold the baffle mounting screws.
Conclusion:
This was a fun project to learn how to make a tapered transmission line speaker. The line resonances were able to be damped down which is an improvement over a ported speaker tuned to the same frequency.
About the Designer:
John is a member of the Parts Express Speaker Building Design Team
Project Parts List:
The finish looks great! how did you do that?
The finish is Keda Dye royal blue. There are two flood coats of dye on the quilted maple. The water based dye raises the grain so the wood is sanded flat with 400 then the second coat of dye is applied. After the dye has dried a damp cloth is wiped over the surface to remove any excess dye. The finish is 2-3 coats of spray gloss lacquer. A 3M finish pad is used between the coats. Although I used a spray gun, the speaker is small enough where a rattle can spray lacquer would work.
Super mini/micro TL.
I would like to build these but have a question: What is the purpose of making the terminus much larger than normal in the back?
Thanks
The terminus is the small opening. The sides and bottom were extended only for aesthetics
Thanks for your answer – by the way, what is the ratio of closed top volume to the volume at the terminus?
thanks
Correct me if I’m wrong, but a transmission line has the same area throughout the line. This looks to be an inverted folded horn instead.
Hi John – this is so cool! I thought that I was the only one interested in folded tapered TLs – I tried to build mine (not finished yet) by using dowels for alignment – sheesh, lots of problems! But now I’m going to use a CNC router to cut dadoes for the line. did you do the “special” corner calculations, or just get the width close to the model?