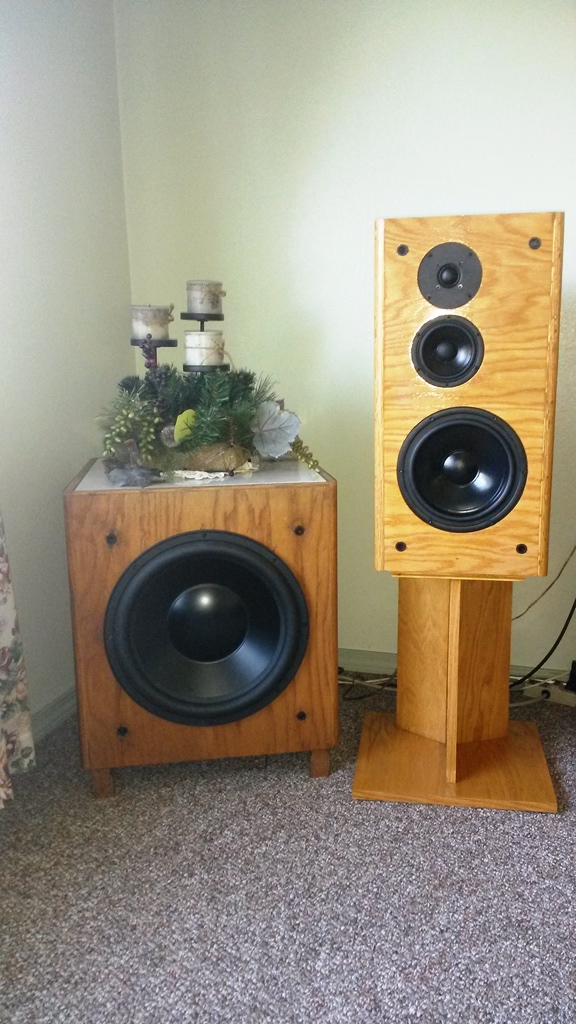
3-Way Classic
- ?????????????
- ?????????????
- ?????????????
- ?????????????
- ?????????????
Designer:
Rick Helman
Project Category:
Bookshelf Speakers
Project Level:
Intermediate
Project Time:
20+ Hours
Project Cost:
$500 – $1,000
Project Description:
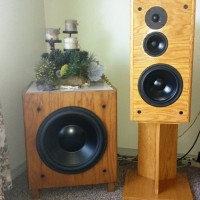
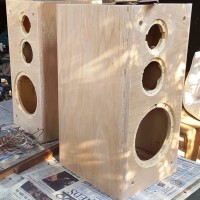
The speaker is a three-way ported classic 1970s to 1980s bookshelf design containing an 8” woofer, 4” midrange, and 1” fabric dome tweeter in a 1.31 cubic foot enclosure with crossover points at about 550 and 3600 hertz. The speaker was designed by Troels Gravensen from Denmark. Design details of the 3WC can be found at www.troelsgravesen.dk/3WClassic.htm.
Design Goals:
Transparent smooth sound with a wide and deep sound stage, fast midrange transient attack, 6 to 8 ohm system for compatibility with my Pioneer Elite SC-5 140 watt per channel 7.1 receiver, a maximum sound output level of at least 105 decibels (db) before exceeding xmax, an F3 less than the 50 to 80 hertz range for compatibility with my sealed Dayton RSS390HF-4 subwoofer and SPA1000 plate amp, efficiency of at least 90 db @2.83V/1 meter, and gentle crossover slopes of 12 db/octave for smoothness where possible.
Driver Selection:
Seas CA22RNX 8” woofer, Seas MCA12RC 4” midrange, and Seas 27TFFC 1” tweeter. Both the woofer and midrange have cast frames, treated paper cones, and rubber surrounds. The woofer is rated at 80 watts continuous power handling with an xmax of 6mm. Other speakers were considered such as the Dayton RS225-8 8” woofer, RS-125P-8 4” paper mid woofer, and RS28F-4 1-1/8” dome tweeter, which would have cost less than my driver selection, but I did not have access to a tested crossover design and am just starting to learn Passive Crossover Design software.
Enclosure Design:
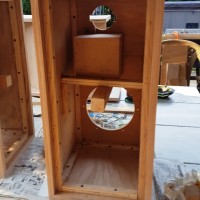
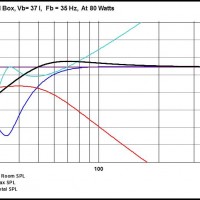
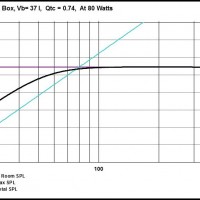
The speaker is a three-way ported design with a net volume of 37 liters (1.31 cu. ft.) in size and external dimensions of 23-3/4 x12x13 inches. The midrange is housed in a separate sealed ½” MDF 1.5 liter sub-enclosure. A 2-1/2” ID port cut to about 6-3/4” long with an outside flair was installed on the rear baffle, which should yield a FB of 35 hertz and F3 of about 44 hertz with a slight 1-1/2 db rise. If one wishes, the port can be plugged with foam or old socks for an acoustic suspension enclosure variation, which will have a QTC of .74 and an F3 of about 52 hertz. The acoustic suspension version will have a slightly smoother response but with reduced power handling capacity below 80 hertz.
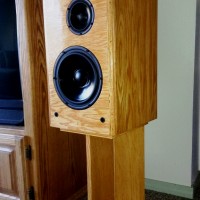
Speaker stands were also constructed and placed under each speaker enclosure to avoid the need for crossover baffle step compensation circuitry and allow the tweeter height to be at ear level about 38”. The stand is 15” wide by 13-7/16” deep by 18” high.
Enclosure Assembly:
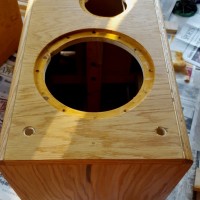
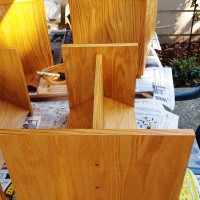
The enclosure is constructed of ¾”oak plywood that was stored from a La Scala and Tapped Horn project that I did not build (don’t have space) and ¾” oak ply battens for support of the butt-jointed assembly. The enclosure pieces take less than one 4’ X 8’ sheet of oak plywood for the pair. The front edges contain ¼ round ¾” thick oak corners to help smooth out dispersion. Oak edge banding was ironed on to all exposed corners. Front-to-rear and side-to-side bracing was utilized using scrap wood to minimize undesired enclosure side wall and baffle movement. The enclosure pieces were glued with Elmers wood glue, clamped, screwed with 1-1/4” dry wall screws and later internally sealed as needed with painters acrylic caulk. All speaker holes were cut and recessed with a router and Jasper jig, all screw holes were pre-drilled, and T-Nuts were installed for woofer mounting. The back of eac h midrange hole was chamfered using a belt sander to allow free air flow and reduced compression of the midrange before the sub-enclosure was glued and clamped to the front baffle. The front speaker baffle is permanently affixed to the enclosure, while the rear baffle is removable via dry wall screws.
A roll of 3-1/2” thick fiberglass wall insulation was purchased. A portion of the insulation was cut to size and pulled apart into two pieces 1-3/4” thick for the top, back, and one side of each enclosure, as well as for the back of each midrange sub-enclosure. The left-over insulation will be used in another future speaker project. The cut insulation was stapled through small cardboard squares onto the walls of each enclosure. A wad of polyester fill was added behind each woofer and midrange hole.
Wood filler was used on the enclosure and stands to seal any holes and flaws in the wood. Thereafter, the assemblies were sanded with 220 grit paper. Then Watco Golden Oak oil was applied with a foam brush, sanded with 330 grit paper, and wiped off. After waiting several days for the oil to completely dry, two thin coats of satin finish Polyurethane was brushed on to complete the finish.
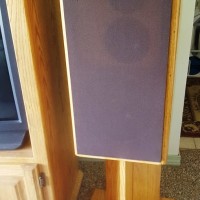
The speaker grilles were cut to size from ½” MDF. A 9”+ hole was cut out with a router around each woofer area and additional cutting around the midrange and tweeter area was done with a jig saw. The MDF was then spray painted with cheap brown paint and the grille male fasteners pounded into the holes with a socket and hammer. Brown grille cloth was cut to size and was glued to the grille frame with spray contact cement and reinforced with a staple gun. Excess grill cloth was trimmed off with an X-Acto knife.
Crossover Design:
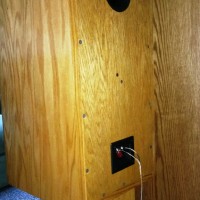
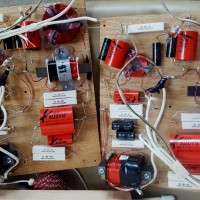
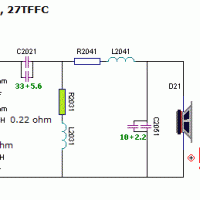
Although the crossover is Troel’s design, I had to make some minor modifications due to parts obtainability and cost considerations. I could not locate the 3.9 ohm resistors used in tweeter circuit and, therefore, replaced them with Dayton Precision Audio Grade 10 watt, 2 percent resistors that included 2-8 ohm resistors connected in parallel on the series connection for increased power handling and a 4 ohm connected on the parallel connection. Additionally, instead of the 1.8 ohm resistor called for in the midrange circuit, a 10 watt, 2 percent 1.0 ohm and 0.82 ohm resistors connected in series were used for increased power handling. Finally, instead of the almost $22, 56 mfd polypropylene capacitors used in the parallel connection with woofer circuits, 33 mfd and 22 mfd non-polarized capacitors ($1.84) connected in parallel were used. All other capacitors used were Audyn 400 volt as available and Dayton 250 volt polypropylene.
Crossover coils had similar gauge size and resistance as in Troel’s design, but due to the unique mH rating, they were specially wound to size and special ordered.
All parts were placed on a ¼ “ thick oak ply board cut to fit on the bottom inside of the enclosure using hot melt glue after all soldering occurred. Larger coils were also bolted, or strapped and screwed to the board. Input, woofer, midrange, and tweeter wires were cut to length and soldered directly to the crossover with the designated “+” and ” –“ clearly marked. Holes were pre-drilled on each corner and in the middle of each board and into the enclosure inside bottom. Once the crossovers were assembled, they were screwed into the bottom with 1” screws through the ¼” finished boards and ¼” thick rubber washers (from plumbing section of hardware store).
Tips & Tricks:
This may be my last enclosure building project as it is extremely difficult to achieve precision to 1/16” using an old table saw, and electric hand jig saw, circular saw, drill, router, belt sander, and orbital sander.
¼ round ¾” thick oak round was less than ¾” thick, which required me to glue popsicle sticks and add wood filler in the gap between the front baffle and ¼ round corner. The oil staining left the sticks a light color and the filler a dark color, neither was golden oak. It would be wise to widen the baffle to eliminate the gap.
Do not use a belt sander on the oak veneer surface of the plywood, especially near corners as it easily sands off.
When constructing speaker grille assemblies, drill holes for the male and female fasteners through both the assembly and front speaker baffle at the same time with both temporarily clamped together to insure proper alignment of the grille fasteners when later attached.
When constructing the crossovers, use terminal or barrier strips to avoid having to splice and solder together up to 7 connections. I did not do this and some of my solder joints look like welds, which add new meaning to the phrase, “heavy metal”.
Conclusion:
The speakers were placed on the stands, connected to the Pioneer receiver, and tested for low frequency response using a Test CD without the subwoofer connected. Low frequency began to roll off below about 45 hertz as predicted by the Woofer Box and WIN ISD modeling programs. The subwoofer was then connected and all speakers were ran through the Pioneer automatic MCACC program with a setup microphone to measure the acoustic characteristics of the listening area, taking into account ambient noise, speaker size, distance, delay and channel level. The program then optimized the speaker settings and equalization for the room. Evidently, the Seas 3WC speakers had minor 500 and 1,000 hertz spike issues in my 13’ X 15’ X 8’ living room that were reduced through the program. The subwoofer output level had to remain at about ¼ volume to match the 3WCs. A variety of music was then played through the system only running on stereo with s ubwoofer crossed over at 50 hertz.
These speakers are not perfect, but are by far the best sounding speaker system I have built. A Telarc Michael Murray recording of Saint-Saens and Loius Couperin pipe organ music was exceptional where one could feel the bass and perception of cathedral ambience down to what appeared to be in the mid to high 20 hertz range. Other Telarc classical music recordings from the Signature Monster Music CD that included voice, strings, and brass renderings also sounded extremely smooth, yet dynamic with outstanding soundstage and 3-D depth. More conventional highly mixed, closed mic’ed Fleetwood Mac, Alan Parsons, Steely Dan and Eric Clapton Blues music recordings sounded clear with lightning fast midrange transients, depth and resolve that was not realized on my previous 6-1/2” MTM speaker. George Winston’s piano music was extremely well-balanced as one could hear and feel the bite of the hammers strike. Overall, I am quite pleased and will probably keep these speakers a long time.
About the Designer:
Rick Helman has been a DIY speaker builder for over 42 years. He grew up with and later inherited his father’s Electrovoice Georgian corner horn speakers. Over the years, he has built JBL style rear loaded horn speakers, Kef B-139 transmission line systems, Bose 901 clones with factory equalizer and Pioneer 4-1/2” inch drivers, Seas 13 inch 3-way with Peerless K040MRF midrange and K010DT tweeter, mass loaded 42 hertz F3 Audax 5-1/4” mini speaker, 4-1/2” Pioneer MTM speakers (from Bose clone) in a push-pull isobaric configuration with a 1” Titanium dome tweeters, Eclipse 12” downward firing ported subwoofers with Dayton 250 watt plate amplifiers, Dayton III 6-1/2” with 1-1/8” “Silkie” MTM speakers, Cornscalas (Cornwall and LaScala mix) with 15” woofers and Selenium horn midranges and tweeters in a 6.79 cu.ft. cabinet, a sealed subwoofer with a Dayton RSS390HF-4 woofer and SPA-1000 plate amplifier, and Dayton Classic 2-way speakers using the woofers from the Dayton III.
Parts Used:
Part # Qty. Description
027-121 2 Audyn Cap 33 uF 400V Met. Poly
027-118 4 Audyn Cap 10 uF 400V Met. Poly
027-115 2 Audyn Cap 5.6 uF 400V Met. Poly
027-113 2 Audyn Cap 3.9 uF 400V Met. Poly
027-415 4 Dayton Audio Cap 2.2 uF 250V Poly
027-412 2 Dayton Audio Cap 1.5 uF 250V Poly
027-350 2 33uF 100V Electrolytic Non-Pol. Cap
027-348 2 22uF 100V Electrolytic Non-Pol. Cap
004-8 4 Dayton Audio 10W 2% AG Res. 8.0 Ohm
004-4 2 Dayton Audio 10W 2% AG Res. 4.0 Ohm
004-1.2 2 Dayton Audio 10W 2% AG Res. 1.2 Ohm
004-1.0 6 Dayton Audio 10W 2% AG Res. 1.0 Ohm
004-.82 2 Dayton Audio 10W 2% AG Res. 0.82 Ohm
260-478 2 Port Tube 2-1/2” ID X 8-1/2”L Flared
095-272 1 ¼”(22-18) Fml. Discon. Crimp Term., 50
095-280 1 ¼”(16-14) Fml. Discon. Crimp Term., 50
269-2114 2 3-5/8” X 3-1/8” Banana Jack Term. Cup
260-779 2 PE Cast Frame #8-32 Speaker Mount. Kit
081-435 1 PE #6 X ¾” Deep Thread Pan Screws, 100
260-367 1 Speaker Grill Guides, Heavy Duty, 12 Pair
260-339 1 Brown Grille Cloth, 1 Yard 70” wide

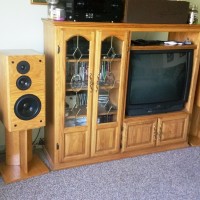
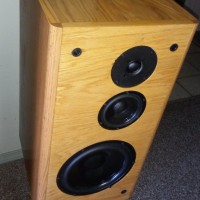
Beautiful build. Your efforts really paid off on those cabinets and I dig the speaker stands too. A similar build with Dayton drivers may be in my future.
Great set of speakers, I love the look. On my “to do” list is try to make a Harbeth Super HL5Plus clone (using a 2″ dome mid-range + 3/4″ tweeter as opposed to two tweeters).
Looks nice