6L6 – KT88 PP Tube Amplifier


Designer: Nanook
Project Time: 20+ hours
Project Complexity: Hobbyist
Project Cost: $500-$1000
Overview
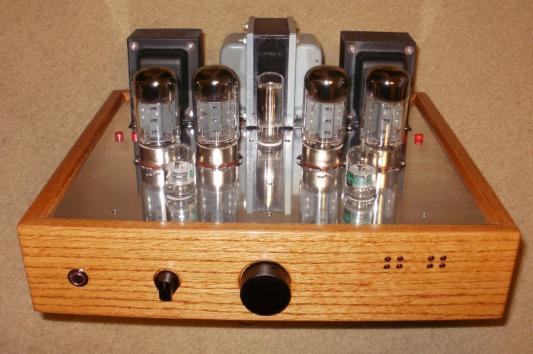
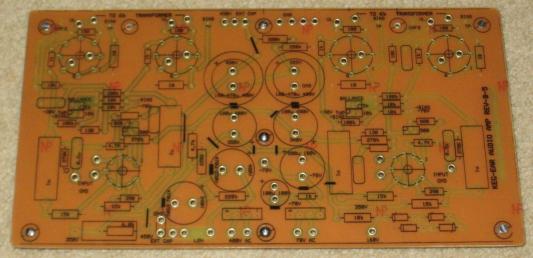
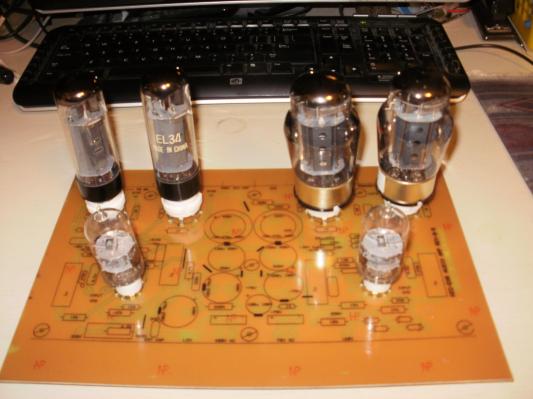
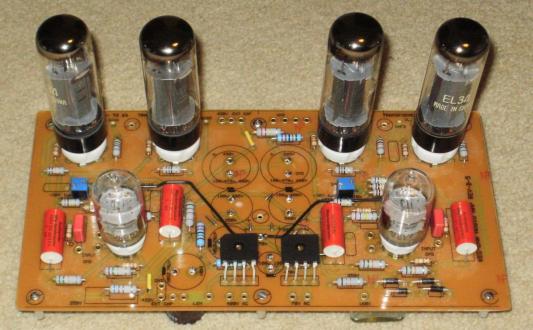
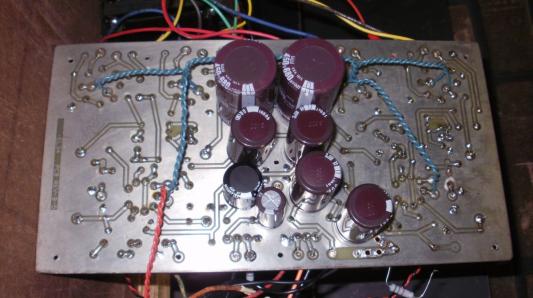
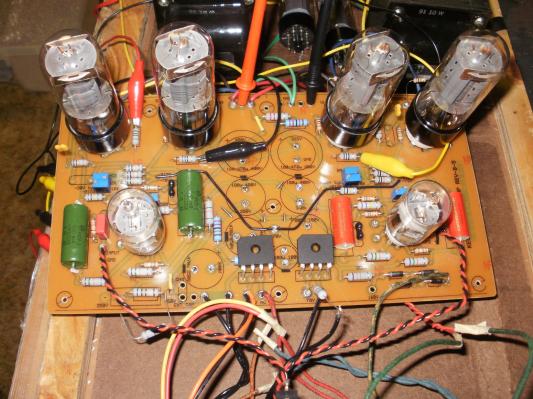
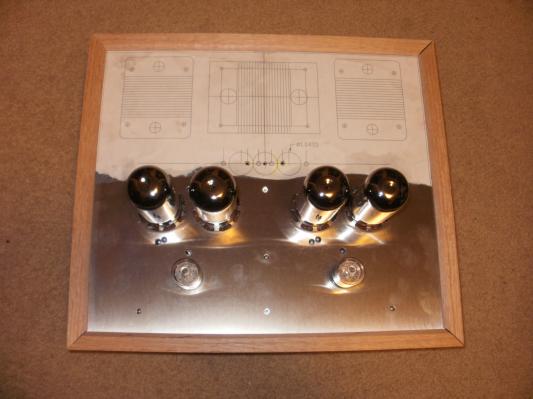
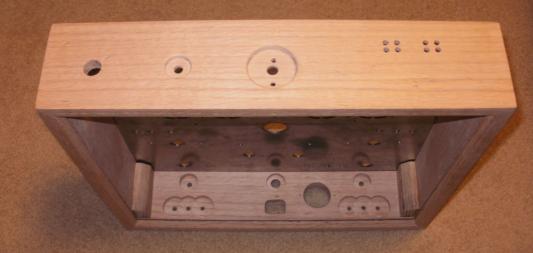
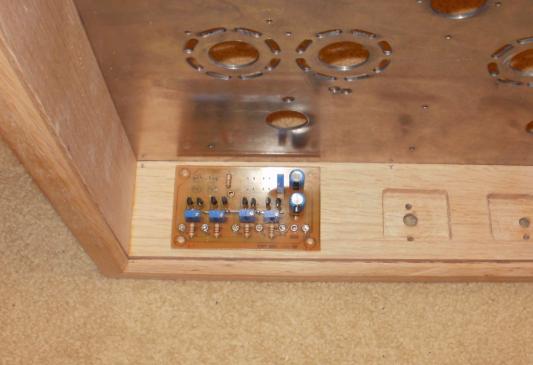
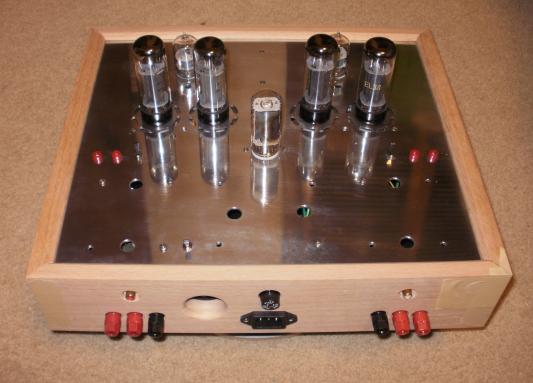
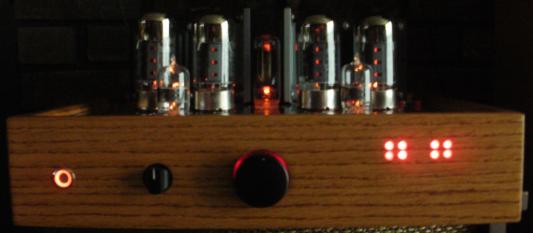
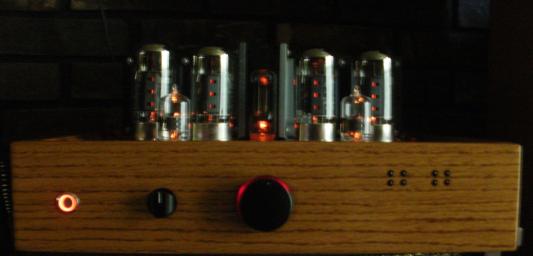
The most recognized amp with this topology is the Dynaco ST70 amp. Over 300,000 were produced and they are still being sought to upgrade and enjoy. I spent a year on this project with different output tubes, output iron, coupling caps, feedback and B+ levels. The PCB was based on a low cost triode-pentode driver tube and 6L6 family of output tubes that are available around the world. The power supply capacitors were 450V stacked to allow for 600+ B+ voltages. The output tubes tried were 6L6GC, 6P3S, 6P3S-E, EL34, 6550 and KT88. The output transformers tried were 40 watt Hammond 6.6K and 60 watt Hammonds 6.6K and 4.3K with UL taps. I also had a pair of 8K-8 25watt iron from a previous sweep tube project. Ultra linear and triode connected modes were evaluated. The object of the PCB was to be user friendly to allow for a simple trouble free platform for the novice or experienced builder. The design was almost identical to the sweep tube PCB for tube and mounting hole spacing’s. The power supply is placed in the center of the PCB placing each amplifier on the sides. The PCB toner transfer fabrication method is identical to the sweep tube. The chassis is designed after the PCB is finalized. I only had to change the trim pot through holes in the top metal plate for this design. The wooded chassis is the same but this time I decided to try a different bias monitor. This bias monitor is based on a NPN differential pair comparing the bias voltage against a reference voltage. The LEDs in the collectors of the diff pair display the intensity as a function of bias voltage. Mounted in a quad array per side, it is easy to adjust the bias by just watching the intensity of the LED’s. The LED’s are on a separate switch so they can be switched off. Probe test points were provided to use a DVM to tweak the offset to less than 1mA. I added red LED’s behind the volume knob so it could be seen in a dark room. I tried 1.0uF coupling caps and .22 Russian PIO caps and could not tell a difference when blind tested. The PIO caps are a little longer but the PCB can accept them. They are a good product for the price. For the lower cost version, the Russian 6P3S, 6P3S-E, 6L6GC tubes worked well at 45mA with the 6.6K output iron at 340V to 400V with minimal feedback. The 8K-8 iron can be used for the lowest cost version with a little power loss in triode mode with the 6P3S. 6P3S-E and 6L6GC liked a little higher B+ voltage. When hooked up to the 4.3K iron, they ran out of steam and I do not like to run a lot of feedback to compensate. The EL34, 6550 and KT88 could take a higher B+ so up to 480V. They all worked great with the 6.6K iron but the EL34’s ran out of steam without a lot of feedback with the 4.3K iron. The 6550 and KT88’s did not care and worked great with the 4.3K iron. My favorite combo was the Svetlana 6550=C= output tubes, triode connected at 480V. A flip of a switch to UL mode increases the output power available, but I prefer triode mode with my speakers. The B+ could be taken higher but I used a TRAID power transformer I had on hand. I also added a damper diode as a delayed B+ pass device to ramp the B+ as the heaters warmed up. The assembly process is simple, just follow the process in the sweep tube. DO NOT fire it up without a load on the outputs, high voltage inductive spikes could breakthrough the winding insulation and short out the transformers! Confirm hookup and fire it up. Watch the LED bias levels on the output tubes and after stabilization adjust them all too equal intensity = 50 ma, matching as close as possible to prevent core saturation due to current offsets. The dissipation of the 6550 output tubes is conservative .050A x 480V= 24 watts, under their rating. For more information and inspiration on tube amplifiers, check out the forums on the net. Check out Parts Express for their parts availability for your next amp project. If you take the time to audition a tube amp, you will wonder why you did not do it sooner, and you cannot go back to the dark side…. It is the clarity and soundstage…..
About The Designer
Schooled at DeVry, work experience includes linear design and characterization at National semiconductor, Digital at Intel, Hybrid circuit integration at Cermatek, Analog circuit designs at Honneywell, Space Flight Electronics at TRW/CE. There are a few more amps in design to make their way from paper to PCB’s……
VERY NICE WORK – IN THE TRADITION OF US OLD-SCHOOL ANALOG GUYS !
BRAVO ZULU
Any boards available for this amp?