A Poolside HiFi Speaker


Designer:
Craig J. Coley
Project Category:
Loudspeakers/Cabinets
Project Level:
Beginner
Project Time:
1-8 Hours
Project Cost:
$100 – $500
Project Description:
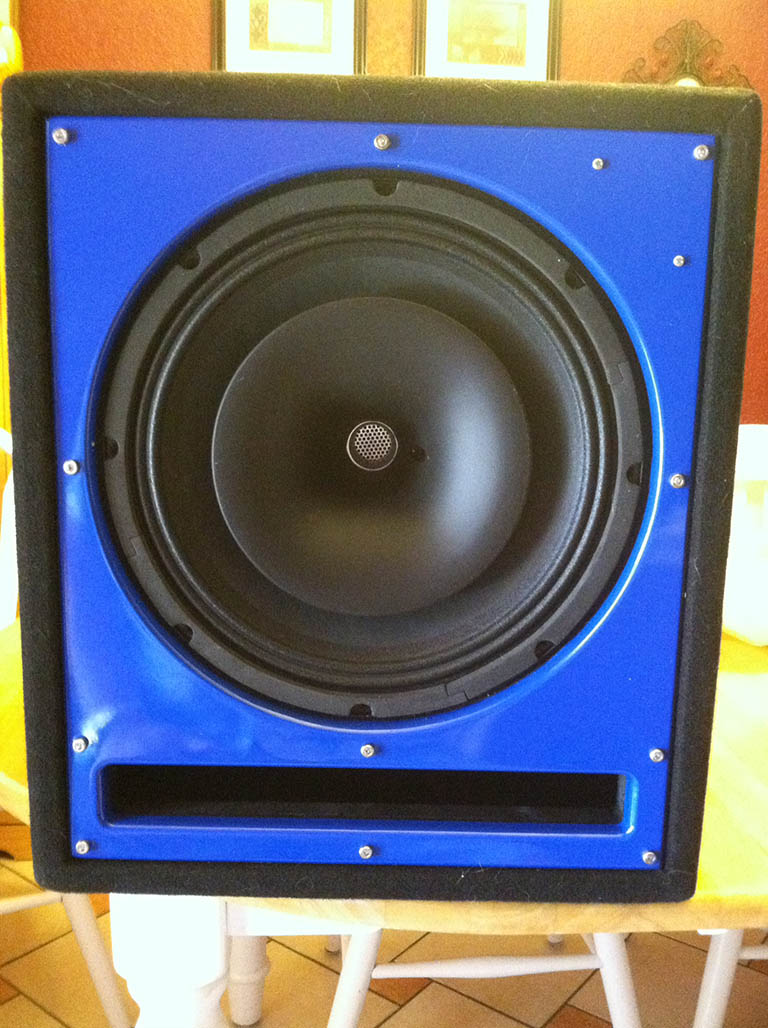
This project is the Coley CH12 speaker. It uses a Seismic Audio Coax-12 PA speaker in a stock 1.8 cubic foot Belva automotive enclosure. A somewhat unorthodox crossover was designed to level the low frequency response of the stiff-hung low frequency driver. The amplifier used for casual listening is a small 25W/channel Class D driven by my iPad. For parties, I usually bring out my Coley W225 tube amplifier, also driven by my iPad. Since this is a single speaker intended for outdoor use, monaural drive was used for the amplifier.
Design Goals:
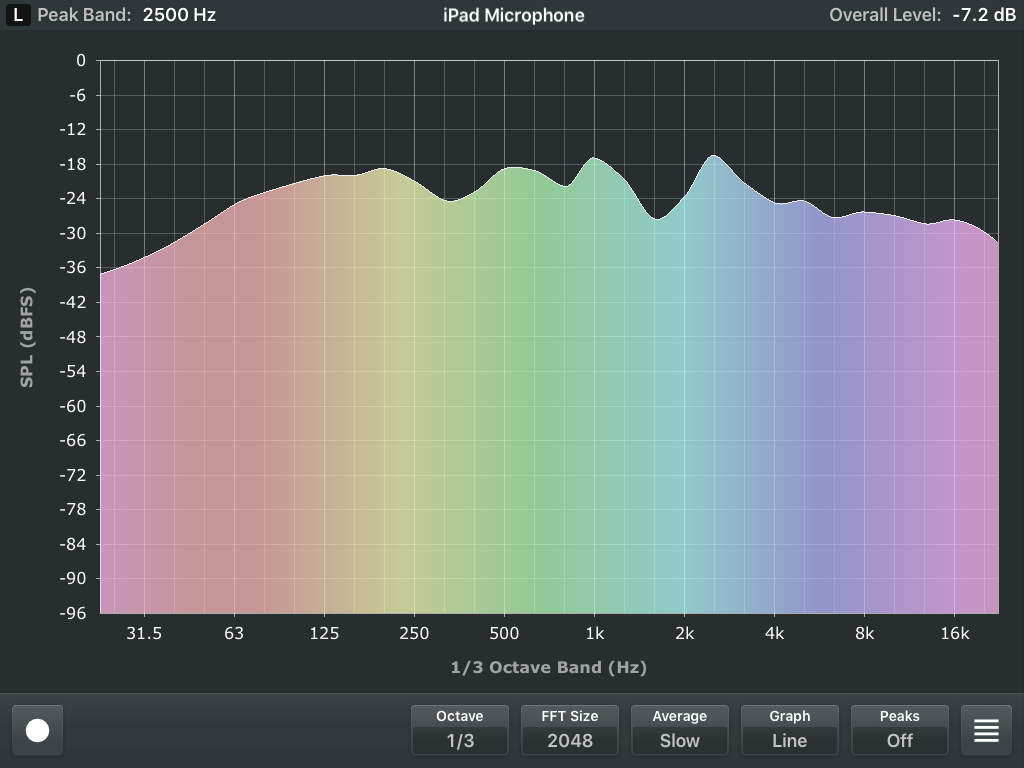
The origins of the Coley CH12 began with what may sound petty: I can’t stand crappy sounding jazz when I’m lounging around the pool. Not wanting to spend a lot of time or money, I chose a driver that was on sale for $120.00 and a 1.8 cubic foot cabinet, also on sale for $50.00; both came with free shipping. The crossover was my own design, incorporating bass boost, and modeled in SPICE to match the desired performance. The desire was to have a reasonably flat response from 42 Hz to at least 16 KHz and require no more than 25W drive.
Driver Selection:
Seismic Audio Coax-12
Enclosure Design:
The enclosure was a stock 1.8 cubic foot Belva BBX112BL subwoofer enclosure with a 42 Hz shelf type port. This enclosure was available for $50.00 with free shipping and made the construction fast and easy. Included was an internal absorber glued to the interior walls and rear speaker terminals. Any similar enclosure could be used; this one was chosen purely for economics. While this speaker does stay outside most of the time in the summer, it is protected from any direct contact with rain or pool water.
Enclosure Assembly:
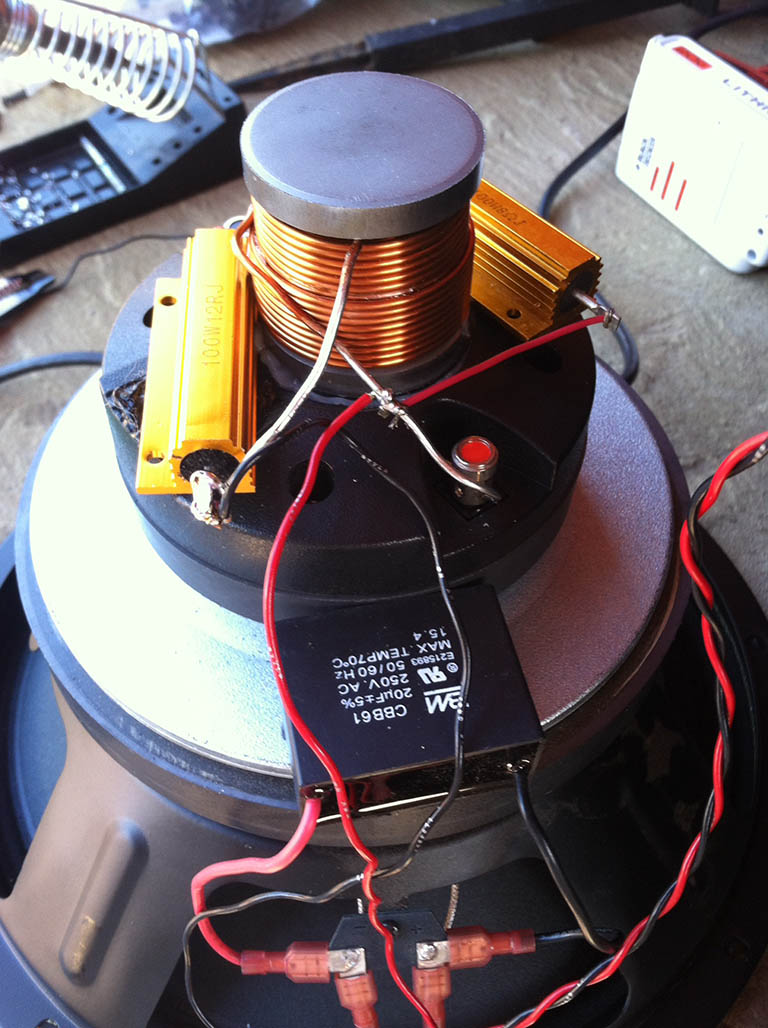
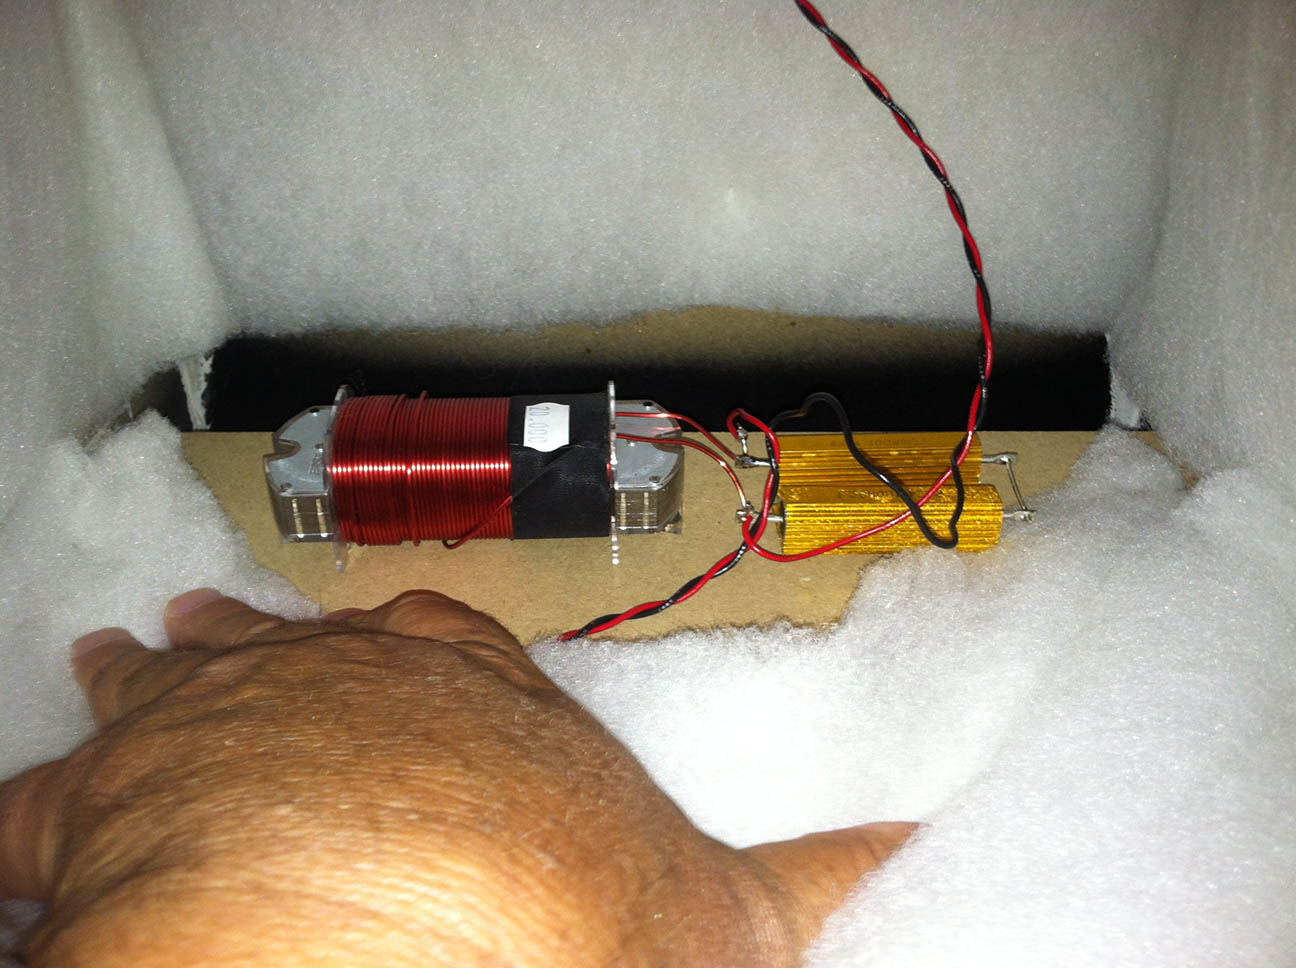
The enclosure was received preassembled. To simplify wiring, most of the crossover components were glued to the rear of the Coax-12 with silicone RTV but the large bass boost circuit was screwed to the bottom of the cabinet. I did load the rear section of the port with Polyfill, not so much for a performance advantage but to keep wasps from making nests inside the speaker cabinet.
Crossover Design:
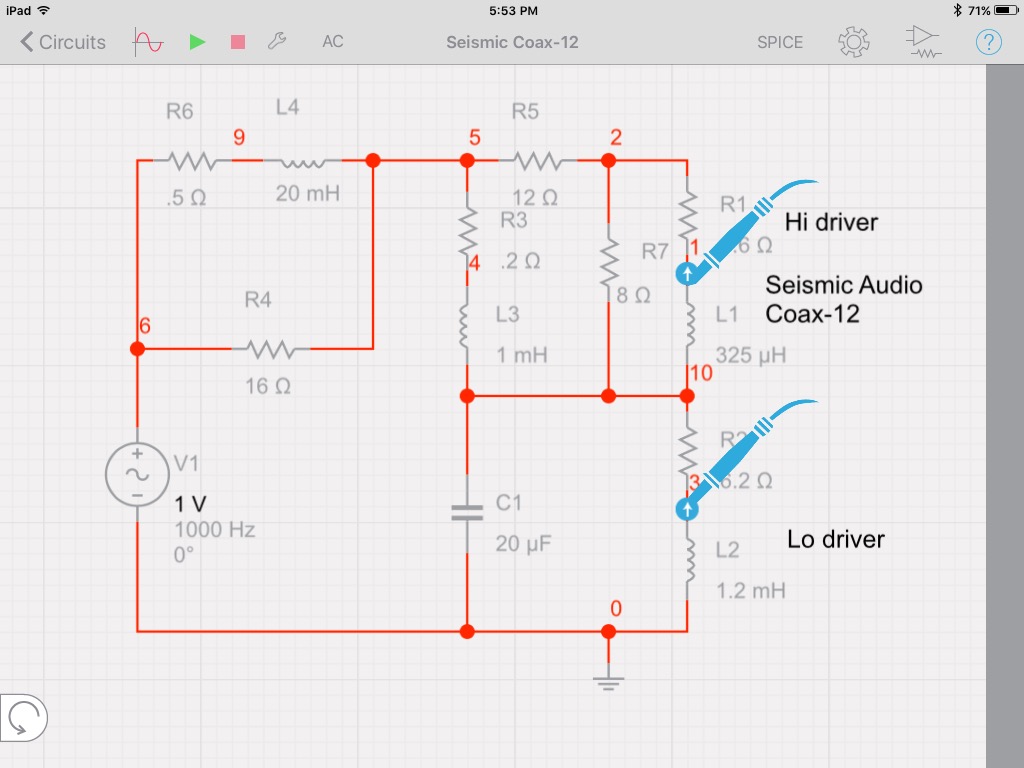
Since I personally like the sound and smooth transition of first order series crossovers, SPICE was used to model a series crossover design that takes into account the driver circuit characteristics. Balancing the very efficient horn loaded compression driver took several tries, both objectively with measurements and subjective by listening.
Since this was a PA speaker, the low frequency driver was very stiffly suspended and required compensation to extend the low frequency response. The low frequency network was an additional L+R circuit added to increase the available drive to the woofer below 100 Hz. The inductance of this circuit determines the transition frequency while the resistance value affects the depth. This L+R bass-boost circuit is fairly common with open-baffle designs and can be modified to tailor the enclosure used. Some driver efficiency is lost to boost the bass but even with a 25W amplifier, the performance is excellent.
Tips & Tricks:
This speaker is very easy to build. The L-Pad resistors specified in the design were chosen for use with a 25W amplifier; higher power systems will require higher wattage resistors. Also, bass-boost can be adjusted up or down by adjusting the 16 ohm resistor but higher values will reduce overall efficiency further.
Conclusion:
Even though my initial expectations were not high when using a PA speaker, the performance was excellent and far beyond the performance of a low cost store bought stereo. Even though some efficiency was sacrificed to flatten the driver response, the overall efficiency of the speaker was so high that little sacrifice was noticed.
About the Designer:
This project was designed and constructed by Craig J. Coley of Burleson, TX. I work as an electrical designer and am listed as inventor on 8 US patents in the field of electro-optics. I have been an electronics hobbyist since I built my first Heath radio at age 7 and a ham radio operator since age 11.
Project Parts List:
|
Part # |
Description |
Qty |
|
266-960 |
ERSE Super Q 20mH 16 AWG 500W Inductor Crossover Coil |
1 |
|
255-150 |
Jantzen 5806 1.0mH 13 AWG P-Core Inductor |
1 |
|
027-436 |
Dayton Audio DMPC-20 20uF 250V Polypropylene Capacitor |
1 |
|
004-16 |
Dayton Audio DNR-16 16 Ohm 10W Precision Audio Grade Resistor |
1 |
|
004-12.5 |
Dayton Audio DNR-12.5 12.5 Ohm 10W Precision Audio Grade Resistor |
1 |
|
004-8 |
Dayton Audio DNR-8.0 8 Ohm 10W Precision Audio Grade Resistor |
1 |
|
081-435 |
Parts Express #6 x 3/4″ Deep Thread Pan Head Screws Black 100 Pcs. |
1 |
|
260-317 |
Acousta-Stuf Polyfill Speaker Cabinet Sound Damping Material 1 lb. Bag |
1 |
|
N/A |
Coaxial PA Speaker |
1 |
|
N/A |
1.8 Cubic Ft. Enclosure |
1 |
If you don’t want to hear Crappy Sounding Jazz; don’t listen to Jazz… Just playing, to each his/her own! Looks great man! Building a speaker for similar reason currently, but with a different design.