B452 Remake


Designer:
John H
Project Category:
Bookshelf Speakers
Project Level:
Beginner
Project Time:
8-20 Hours
Project Cost:
$100 – $500
Project Description:
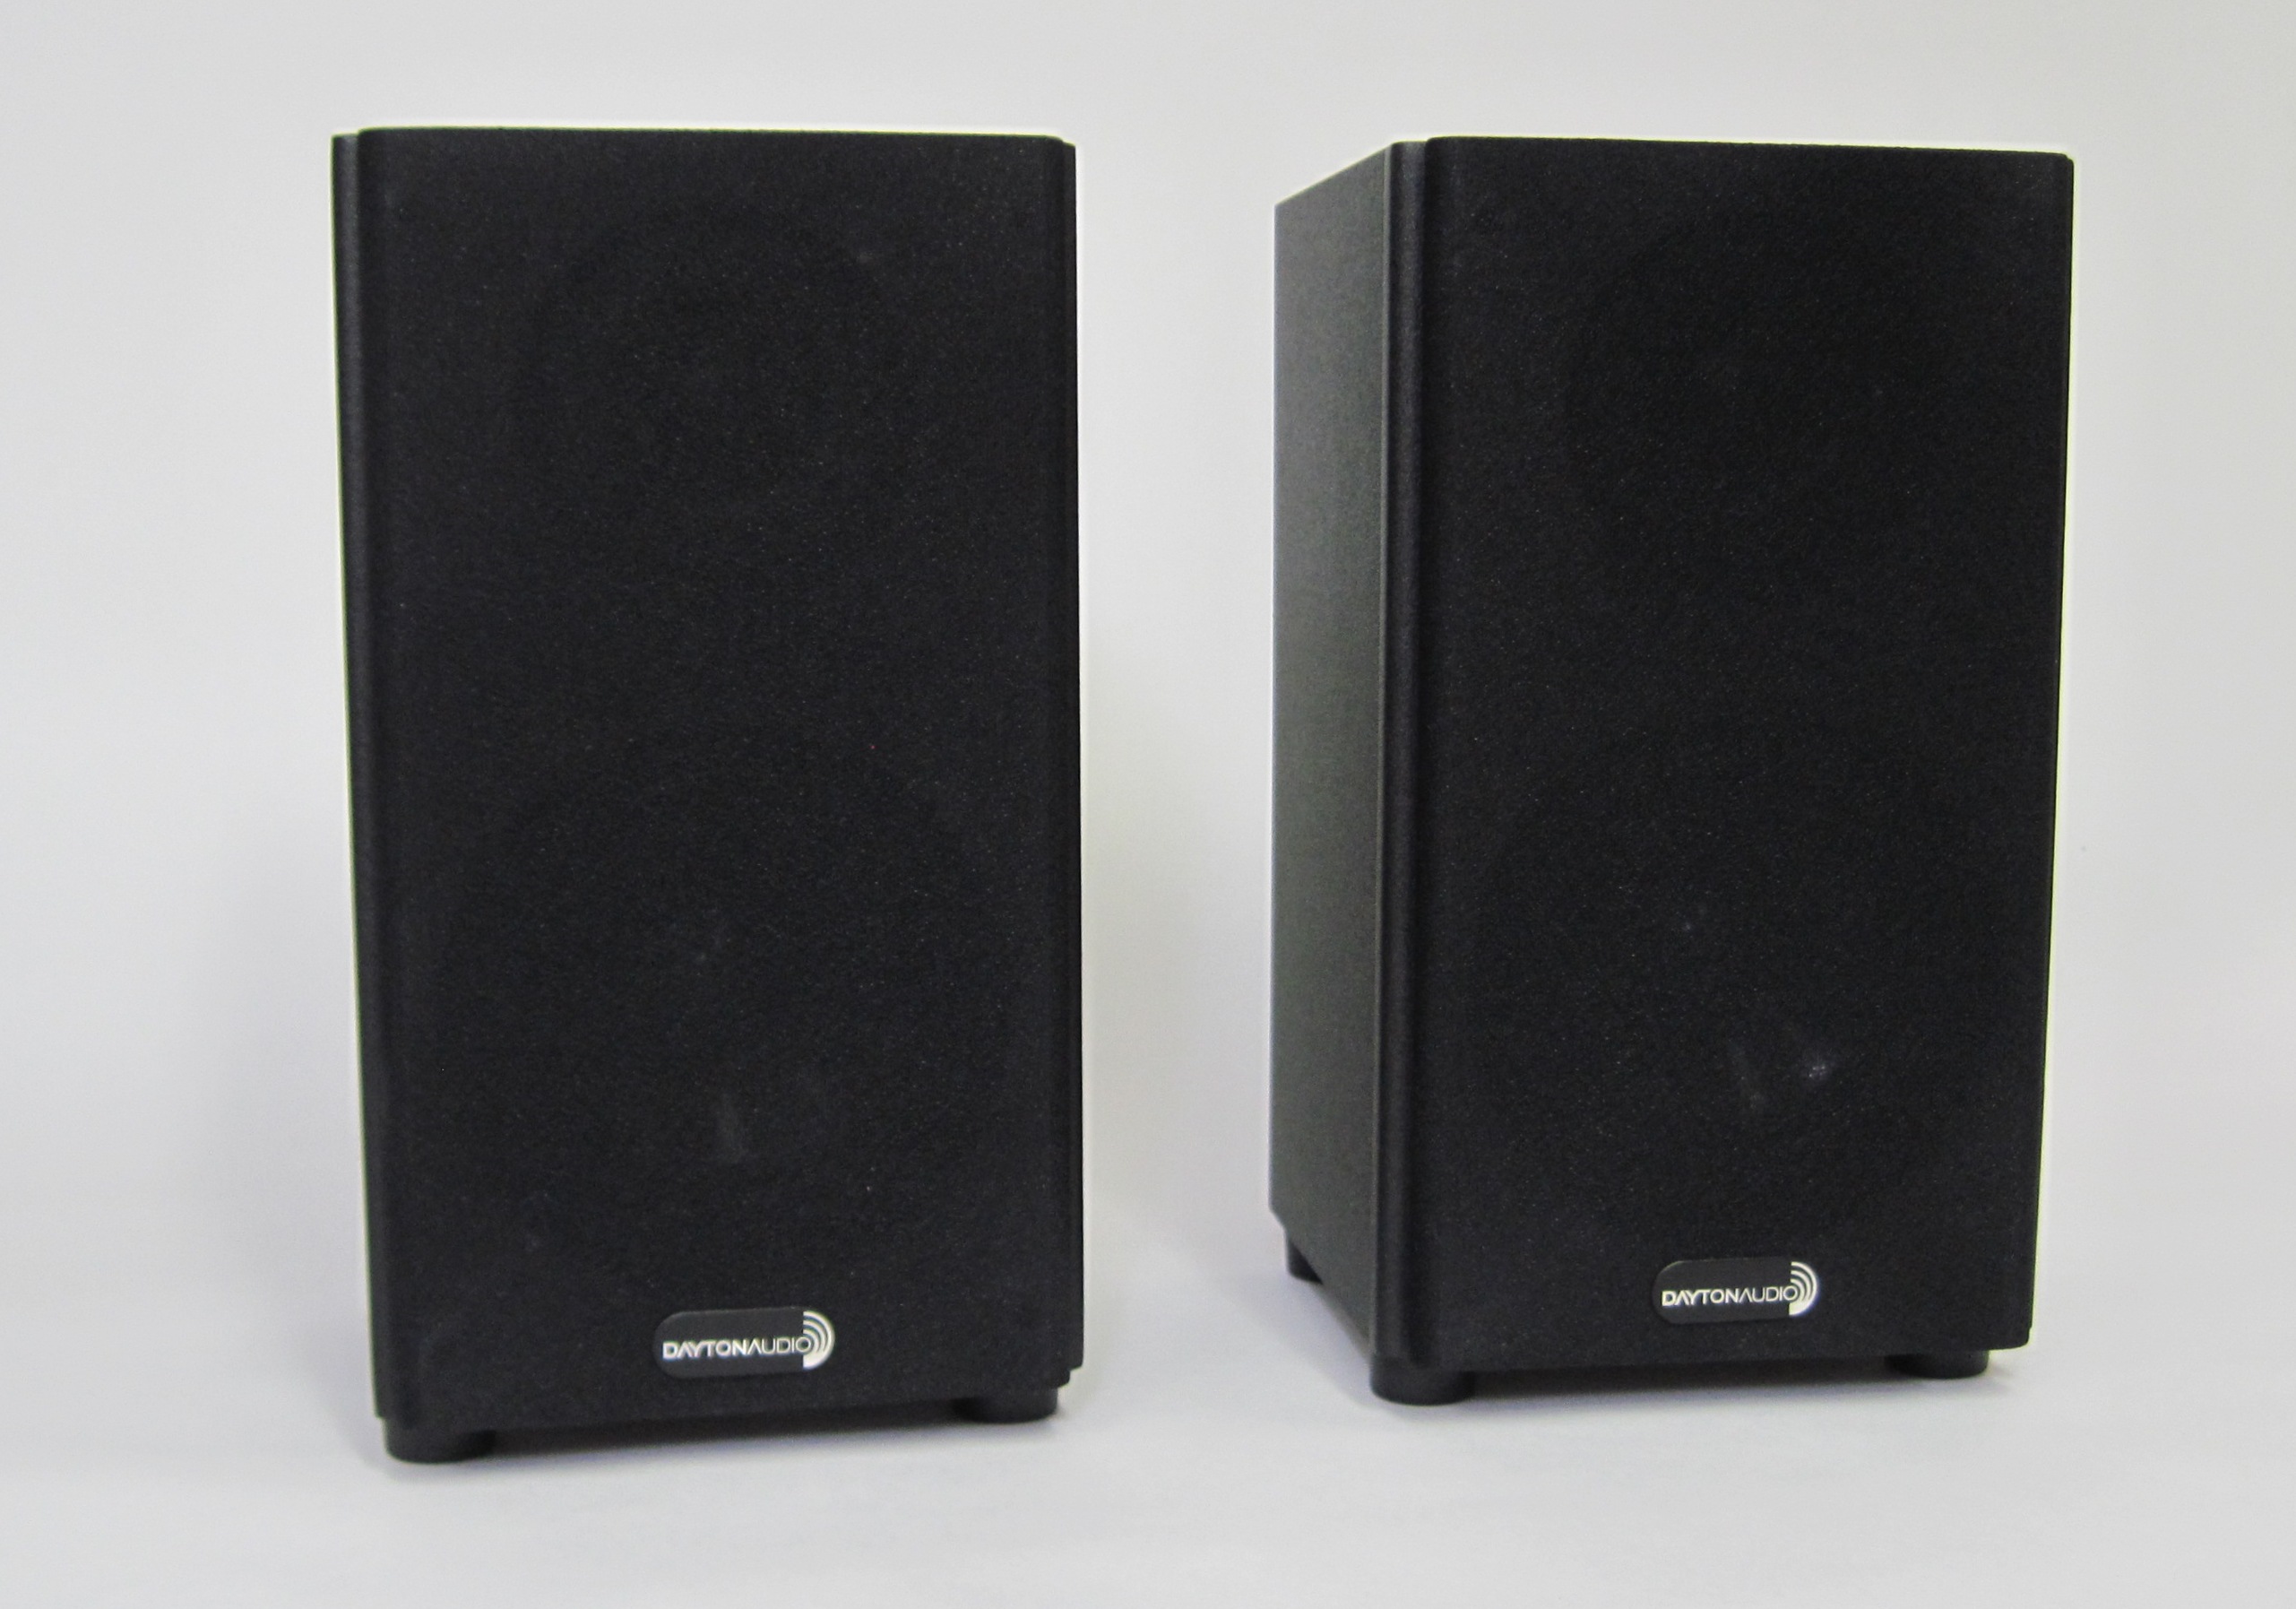
This project remakes the B452 speaker. They look nice for being so inexpensive. The front baffle looks to be 3/8 inch thick with black vinyl that was thermal formed into the cut outs. The rest of the cabinet is black vinyl.
At my first listening session I was impressed with the highs. With more detailed listening you could hear some flaws. Of note, the bass needed some help when stand mounted. The stock speaker would best against the wall or in a corner.
Design Goals:
The first phase of the project was to see what could be done with a crossover addition to the stock B452 speakers.
The second phase is a complete speaker (driver) transplant into the B452 cabinets. After modeling the new CF120 woofer it seemed like a perfect fit for the B452 cabinet. The ultimate goal was to create a surround and HT speaker that could reach to 80 Hz where a subwoofer would pick up.
Driver Selection:
The project started in reverse as I had a pair of the CF120 drivers and started looking for a cabinet that would fit the CF120 woofer. The B452 cabinets looked about the right size and the CF120 frame seemed to be close in size to the stock woofer.
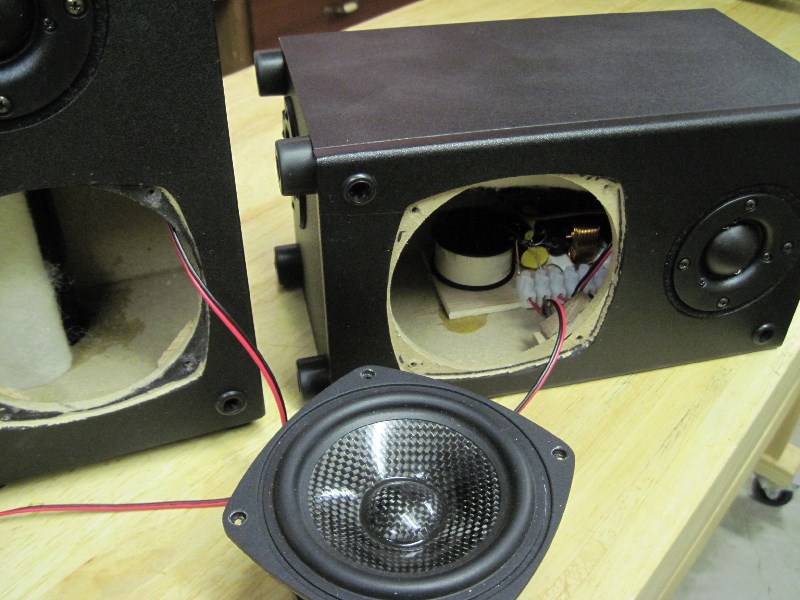
After some modeling and testing the stock B452 tweeter did not match well with the CF120. The ND28F-6 was chosen for its small flange size and the ability to provide a lowish x-o point to help with CF120 break up.
Enclosure Design:
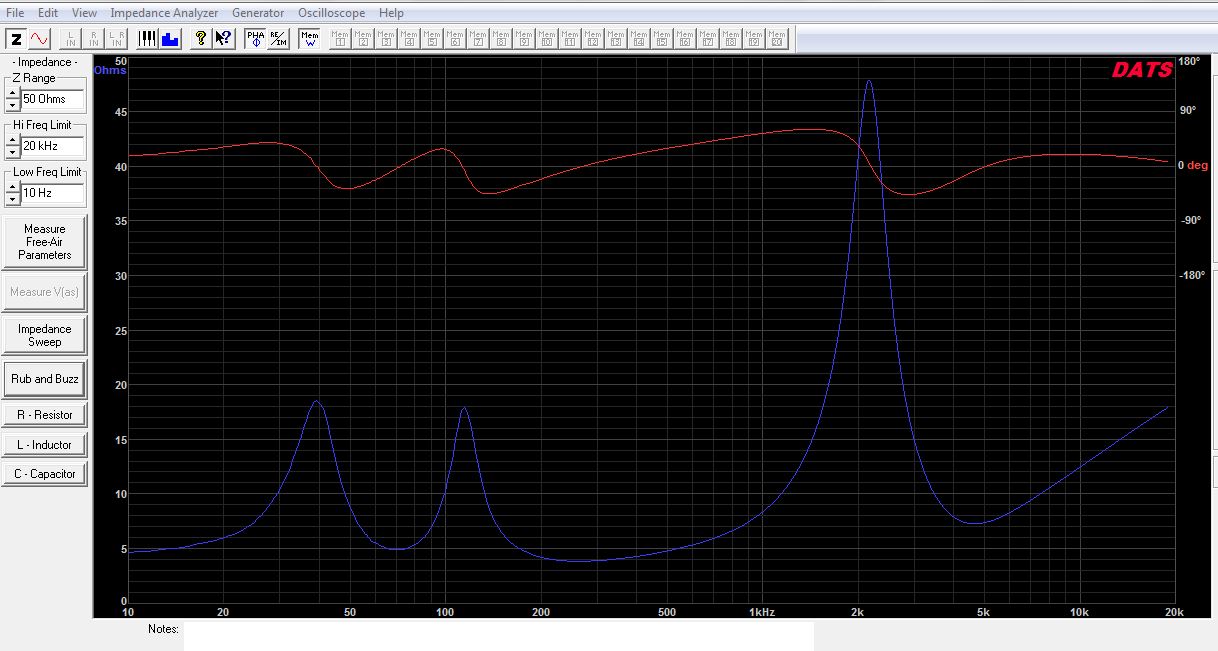
The B452 cabinet was estimate to be 3 liters. After subtracting the driver and port the volume for the CF120 woofer should be 2.5 liters. This is enough volume for a low response F3 of 67 Hz with the CF120.
Enclosure Assembly:
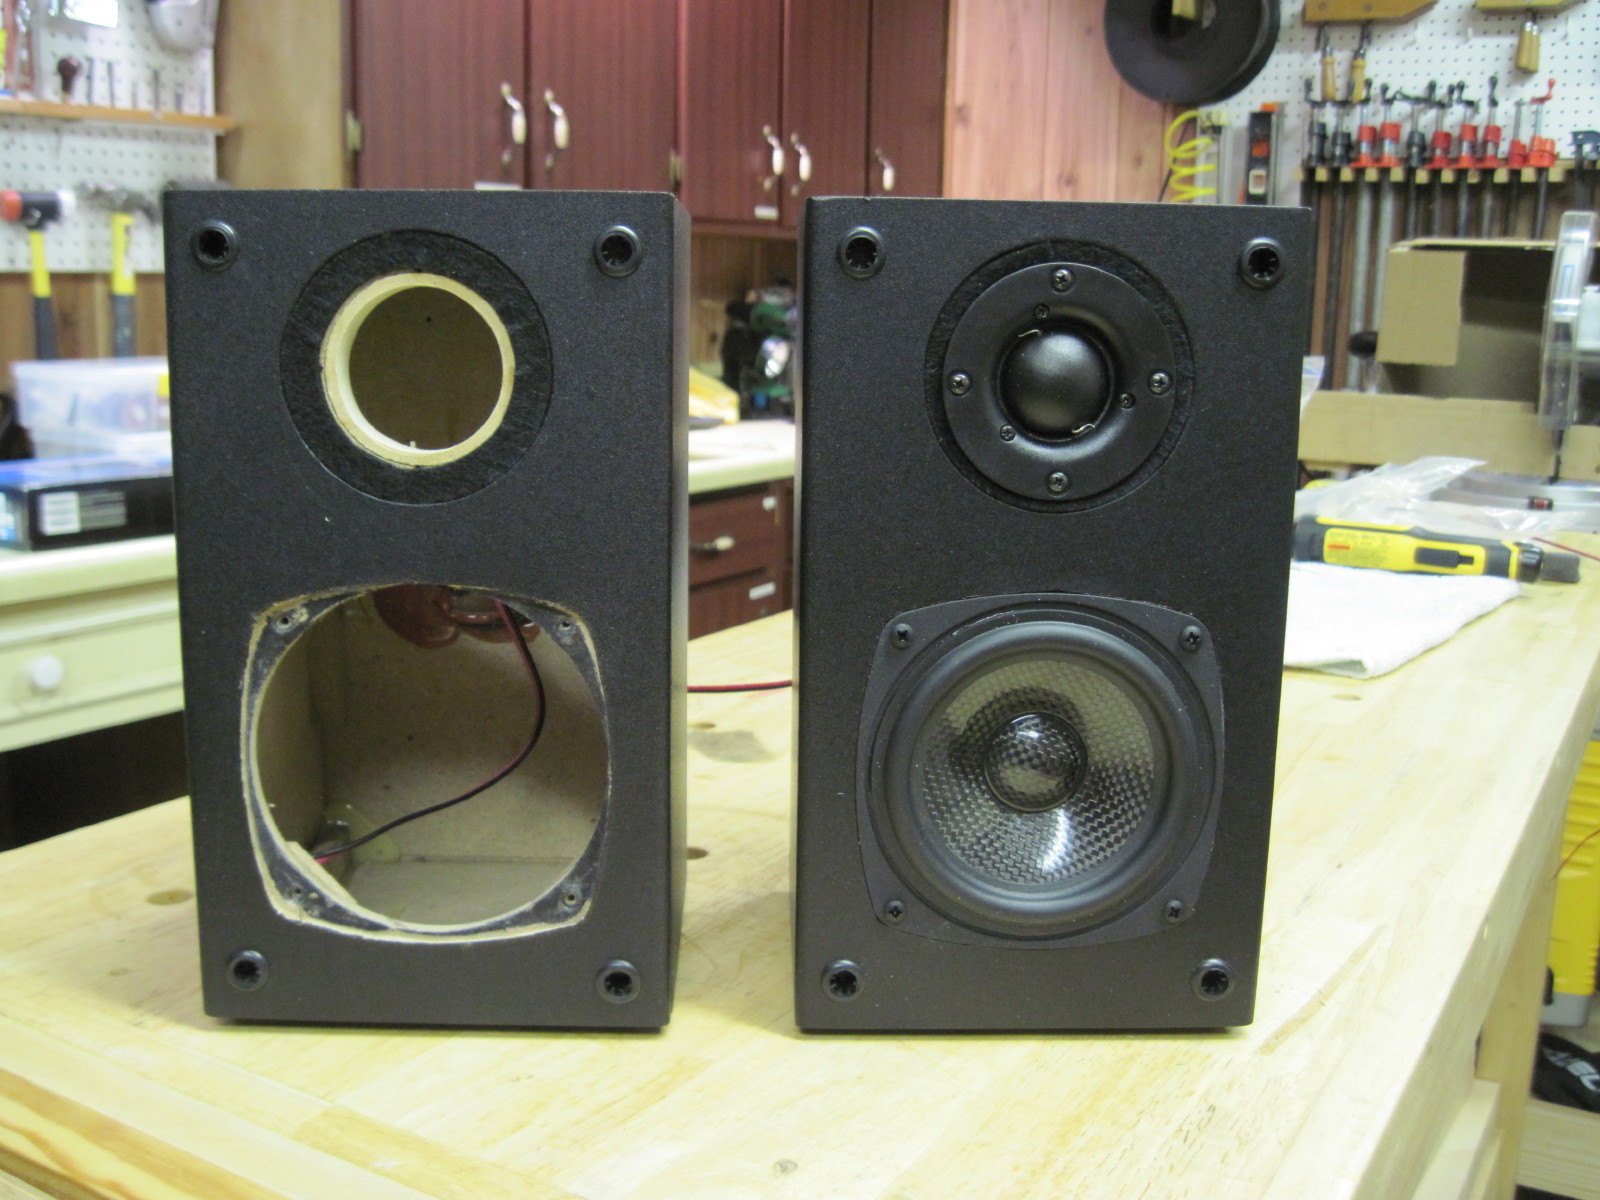
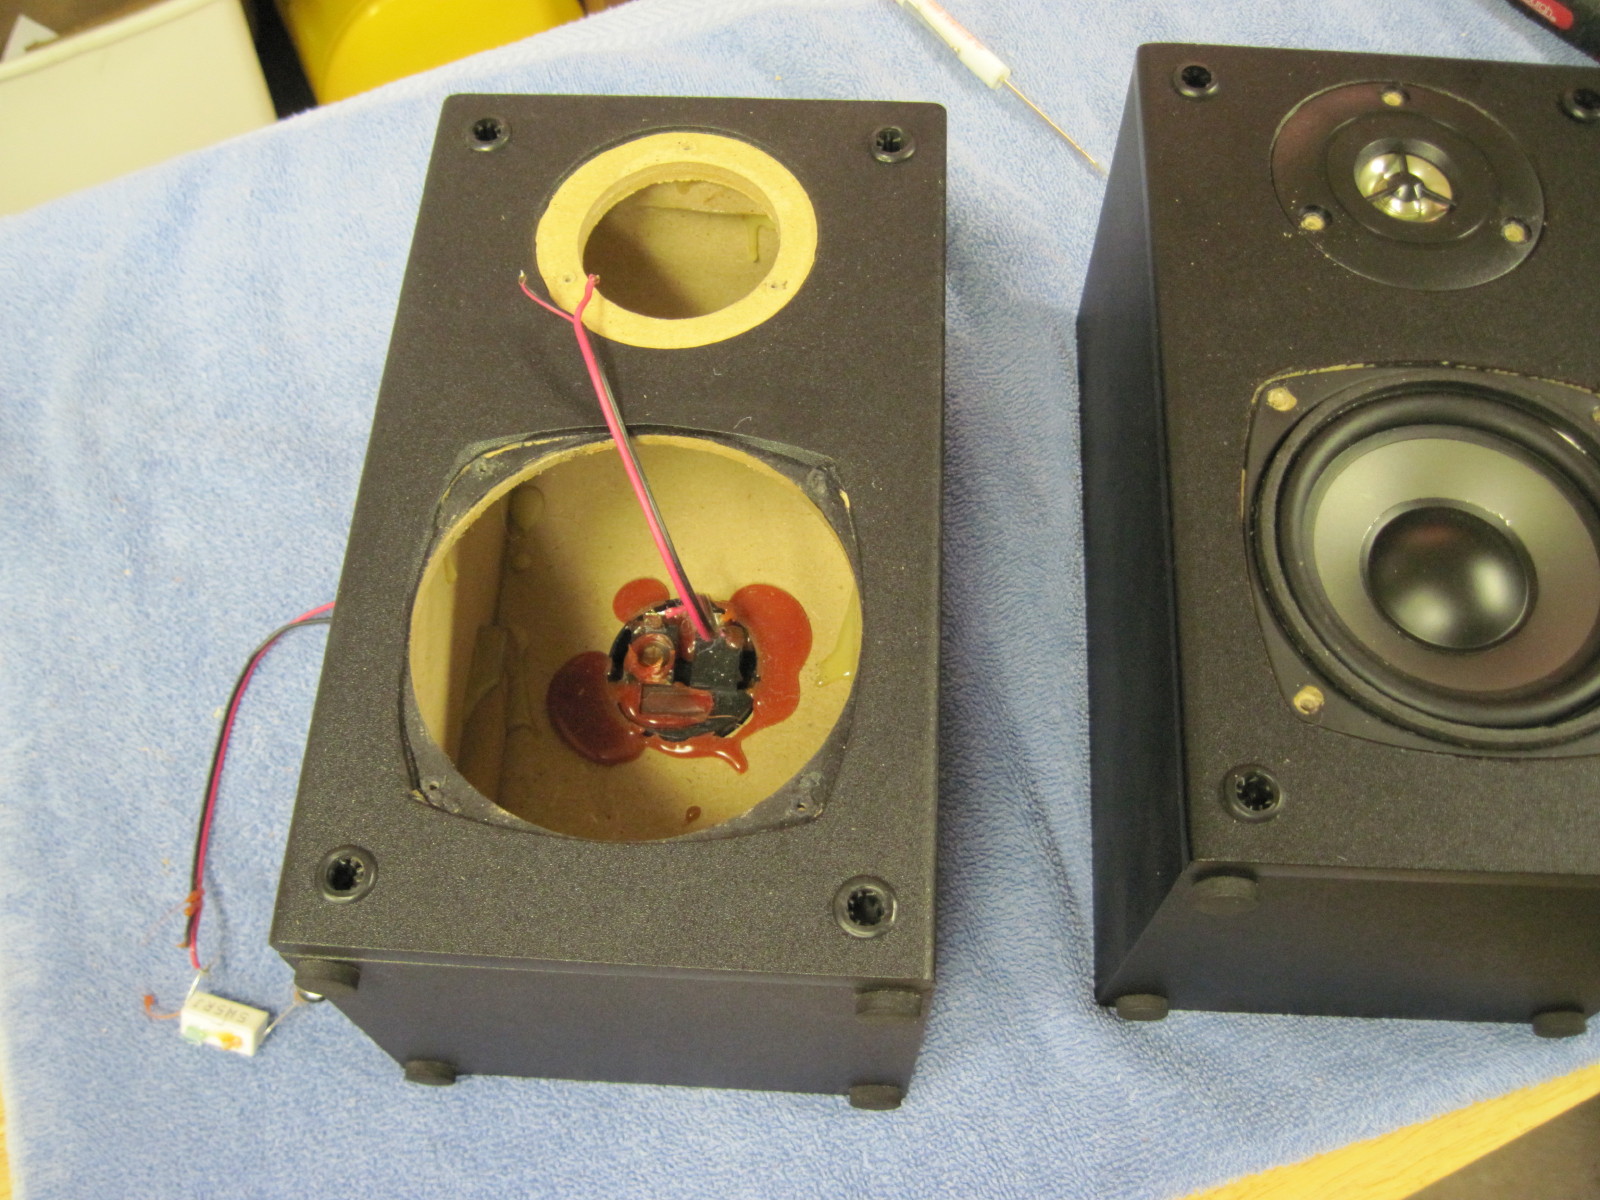
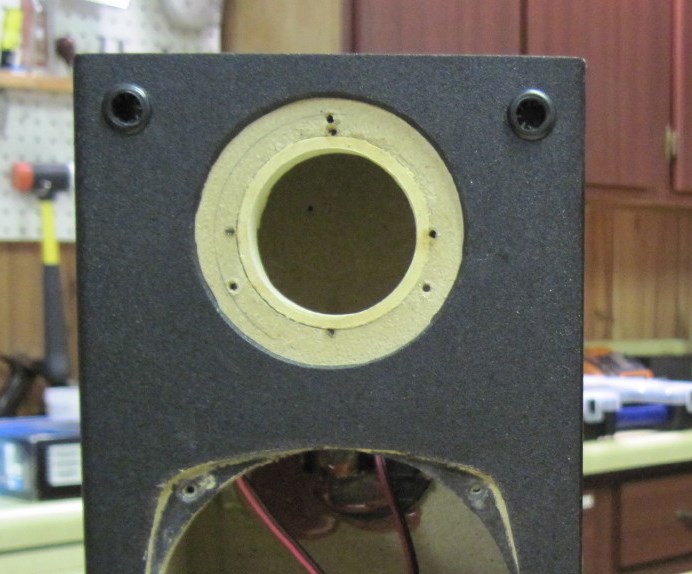
Disassembly of the B452 starts with removing the woofer. Clip the wires close to the woofer so they can be reused. Clip the tweeter wires next to the terminal cup, they cannot be reused, with a pliers pry out the resistor and capacitor.
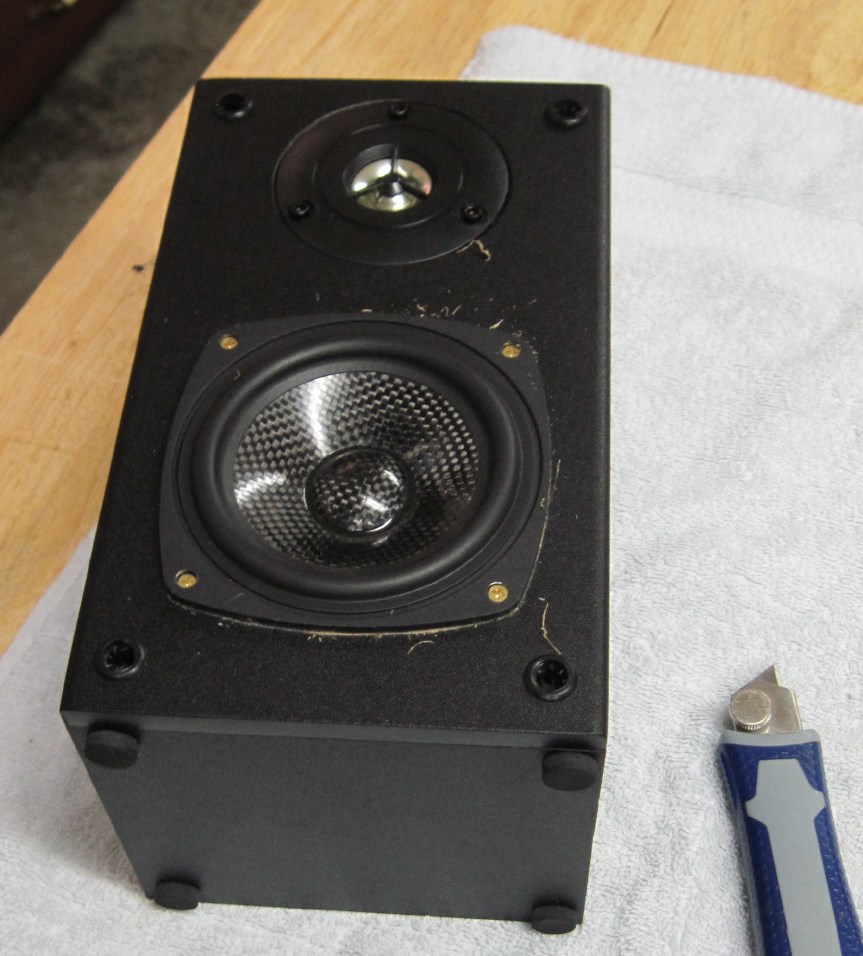
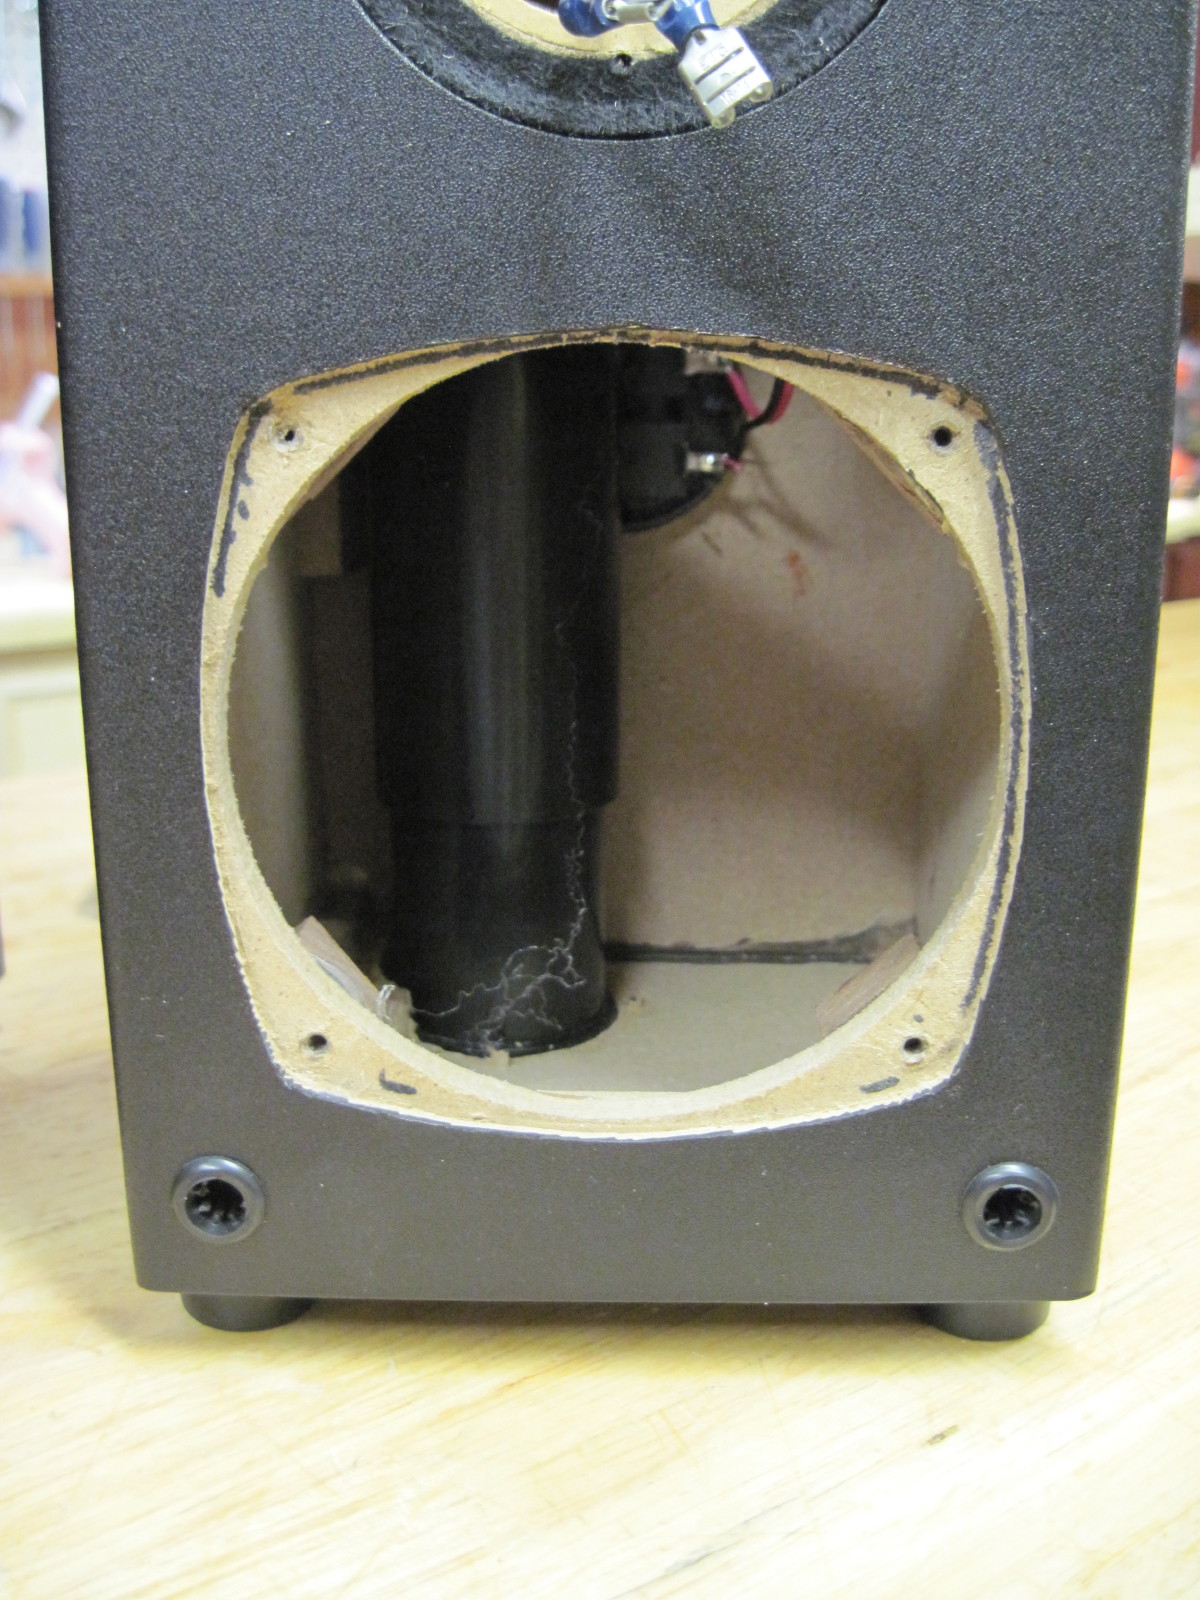
There’s not much assembly but the CF120 woofer is not a drop in. The woofer hole needs to be enlarged so the driver can be recessed to fit the grill.
My technique for recessing the woofer is to mount the woofer on the surface though the existing screw holes. You will need longer screws for this. With the driver mounted score/ cut around the outside of the woofer with a sharp utility knife. Cut enough to go through the black plastic. Take your time and make sure you know where the knife is going if you slip.
Remove the CF120 driver. Remove the vinyl. Use a utility knife to cut horizontally at the bottom of the existing recess in the MDF. Using a sharp chisel, with one corner at the bottom of the recess tilt the chisel and bite off a piece of the MDF. Walk the chisel around the cut out. Finish the cut edge with sandpaper. Use a black marker to hide imperfections.
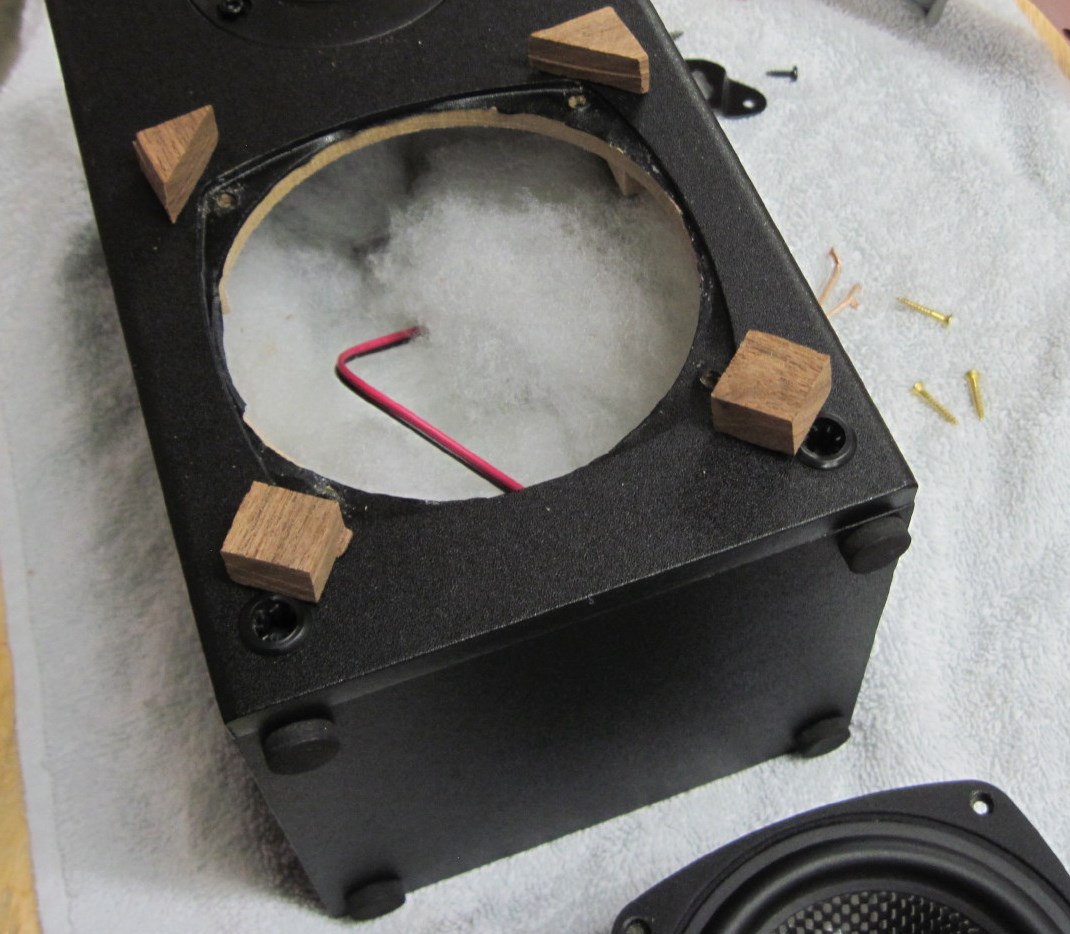
There’s not much MDF thickness for the driver mounting screws so glue blocks of wood under the driver mounting holes. The screw holes should be predrilled and the screws run in to make sure the blocks don’t get pushed out.
Use gasket tape on the CF120 driver to ensure an airtight seal.
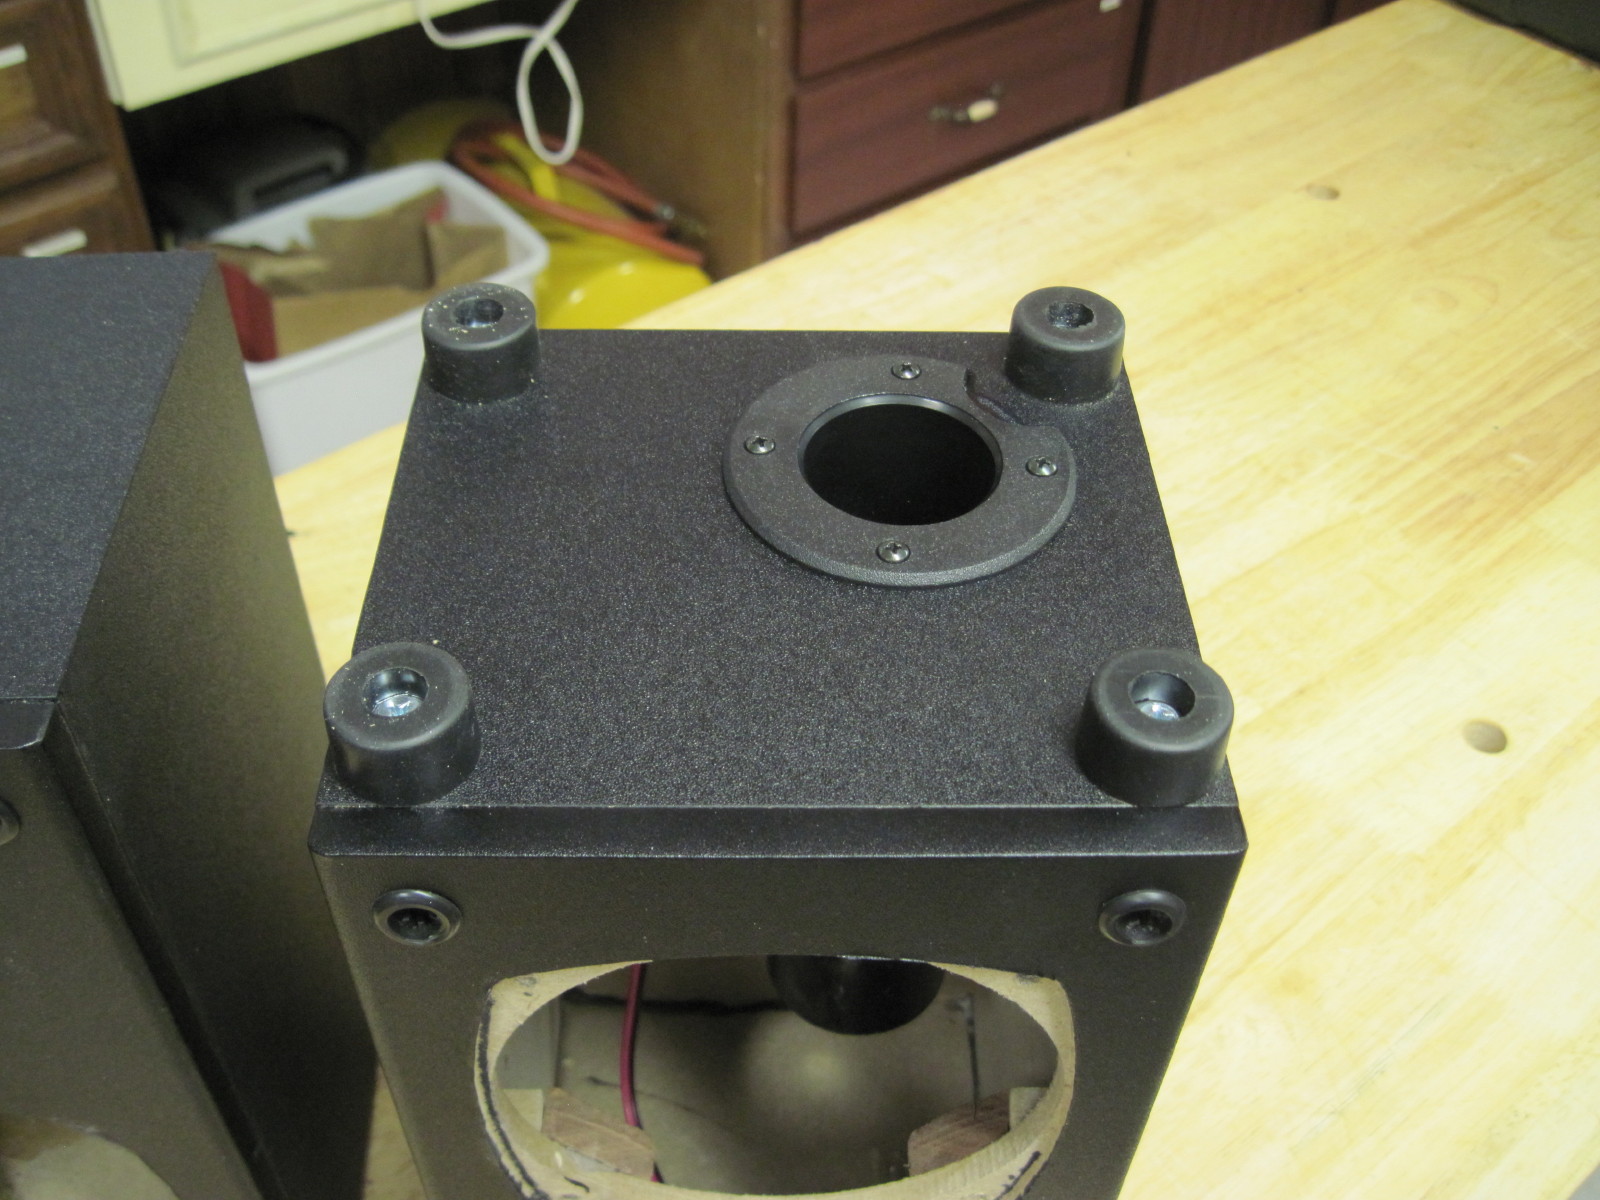
For the tweeter, the through hole is too large to mount the ND28. There are several ways to fill the hole. I chose to cut a disc with a hole saw and glue it in the hole then drill it out the next day with a smaller hole saw. Note that the tweeter through hole is not centered in the recessed hole.
The tweeter recessed hole is larger than the flange of the ND28, It’s optional but I filled the gap with some peal and stick craft felt.
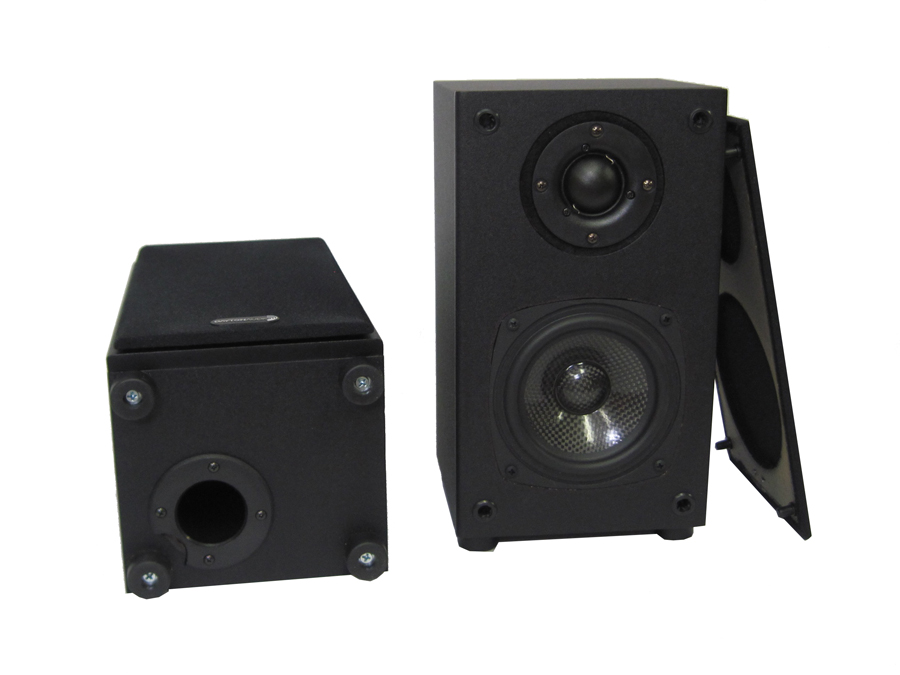
After a couple of experiments, it looks like the best location for the port is in the bottom of the cabinet. The center is 4.4 cm, 1.75 inches from the back and 4.8 cm, 1.875 inches from the side. The port length was designed for the proximity of the port to the surface. The port length is 16.5 cm, 6.5 inches from end to end. New .53 inch high feet were installed.
Although the picture shows a notch in the port flange it’s not required to accommodate the feet.
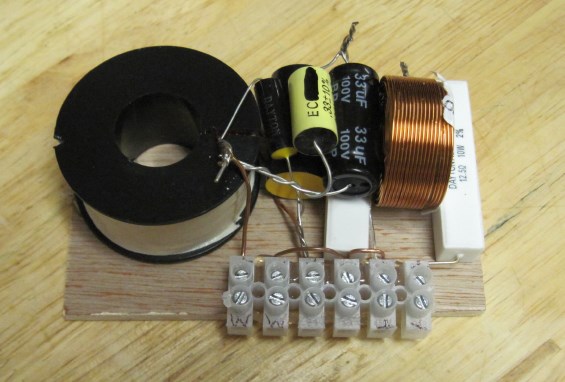
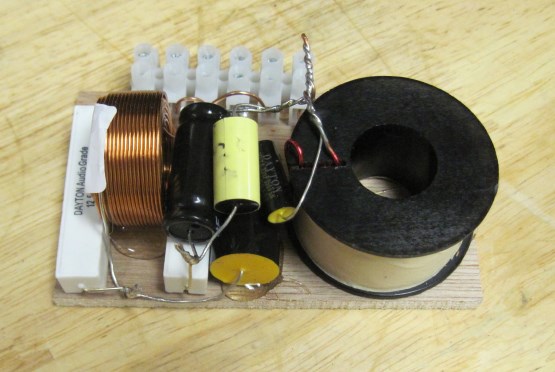
The crossover is mounted on a board and attached to the side of the cabinet. The terminal strip shown in the pictures hit the back of the CF120 woofer so the crossover had to be mounted higher up the side of the cabinet. The crossover in a picture is the test x-o but the final x-o is very close.
The cabinet has about 4 oz. of poly stuffing around the port tube. A piece of batting is glued to the port tube to hold the stuffing in place. There is no stuffing above the opening of the port.
Crossover Design:
Two (2) crossovers were designed. One for the stock drivers with a sealed cabinet and one with all new drivers ported.
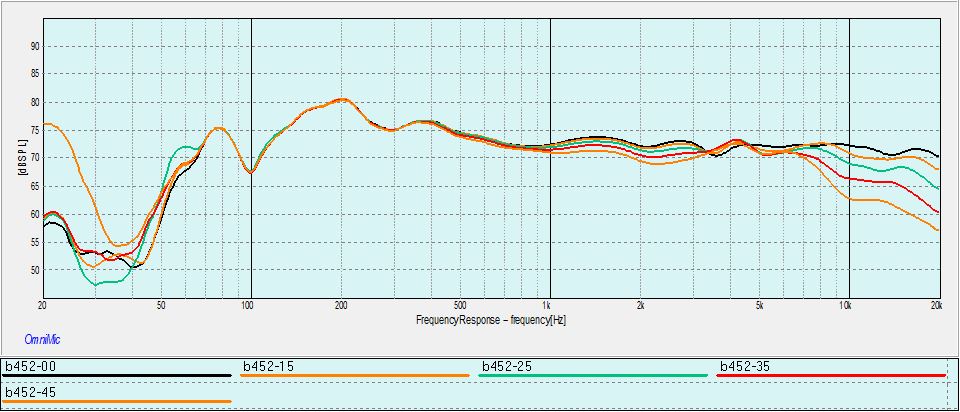
All the measurements were done with the grills in place.
The stock B452 speakers run the woofer full range then add the tweeter to fill in the top range. The tweeter has an electrolytic cap and resistor.
The modified x-o has the stock woofer notched to smooth the baffle step then the tweeter rolls in to support the highs similar to the original. The big change was to drop the mid response for better alignment. This will not be very noticeable. Unless you like tinkering and want the perception of more bass, put the money toward upgrading the drivers.
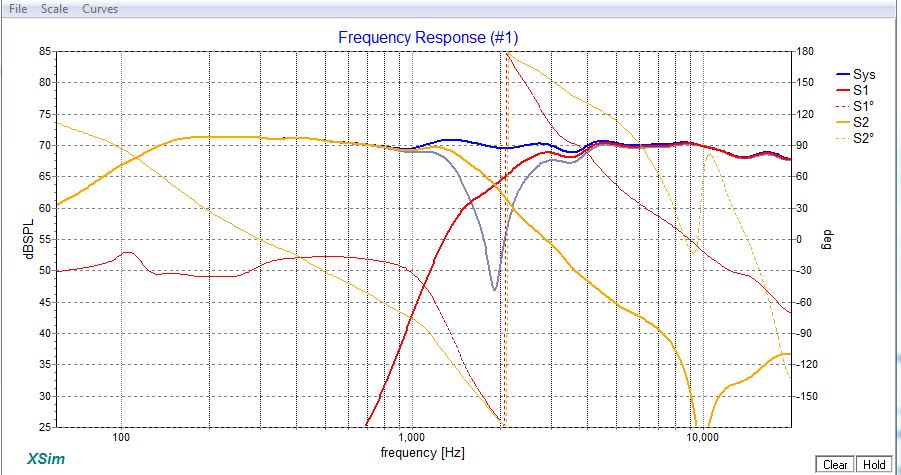
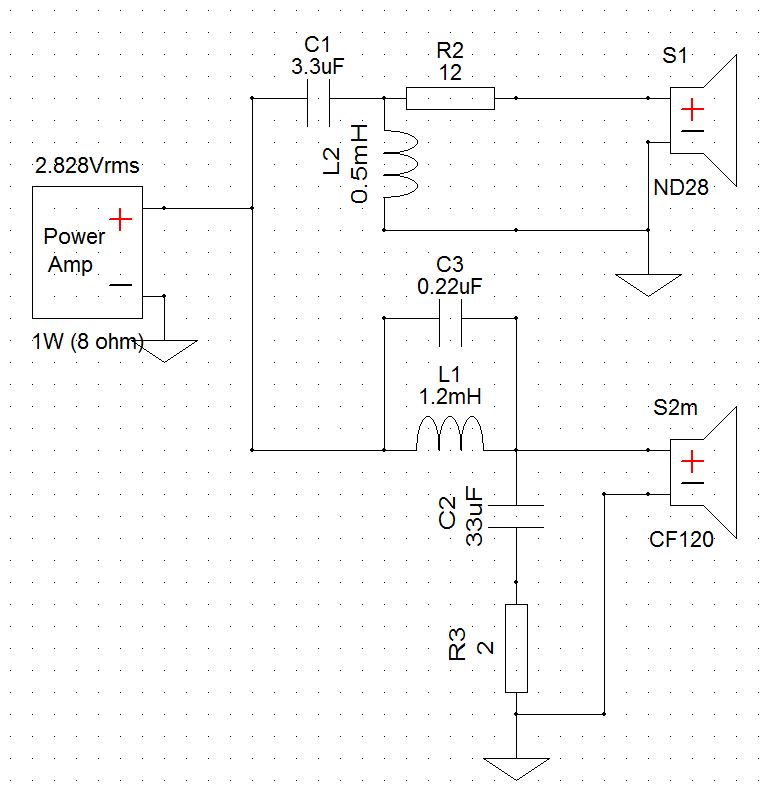
The ND28 and CF120 crossover is Linkwitz Riley 4th order at 2,000 hz. The CF120 has some breakup that needs to be pushed down with a tank filter.
The part list calls for a 12.5 ohm resistor on the tweeter which is not a noticeable difference from the 12 ohm shown.
Tips & Tricks:
Inside the cabinet the MDF blocks and glue can be pried up with pliers, screwdriver or a chisel to make smoother mounting surfaces.
Conclusion:
The Dayton CF120 and ND28 sound good for such a small speaker.
Small cabinets are nice until you have to start modifying them. That said with a chisel and a few hole saws this project should not be too difficult to accomplish.
About the Designer:
John is a member of the Speaker Design Team
Project Parts List:
VERY nice. One other option is to use the MCM 1856 mid/bass. It drops right into the woofer cutout. Of course a new xover would be needed.