Baby Rico satellite & subwoofer mini system
Designer:
ceiol
Project Category:
Bookshelf Speakers
Project Level:
Beginner
Project Time:
8-20 Hours
Project Cost:
$100 – $500
Project Description:
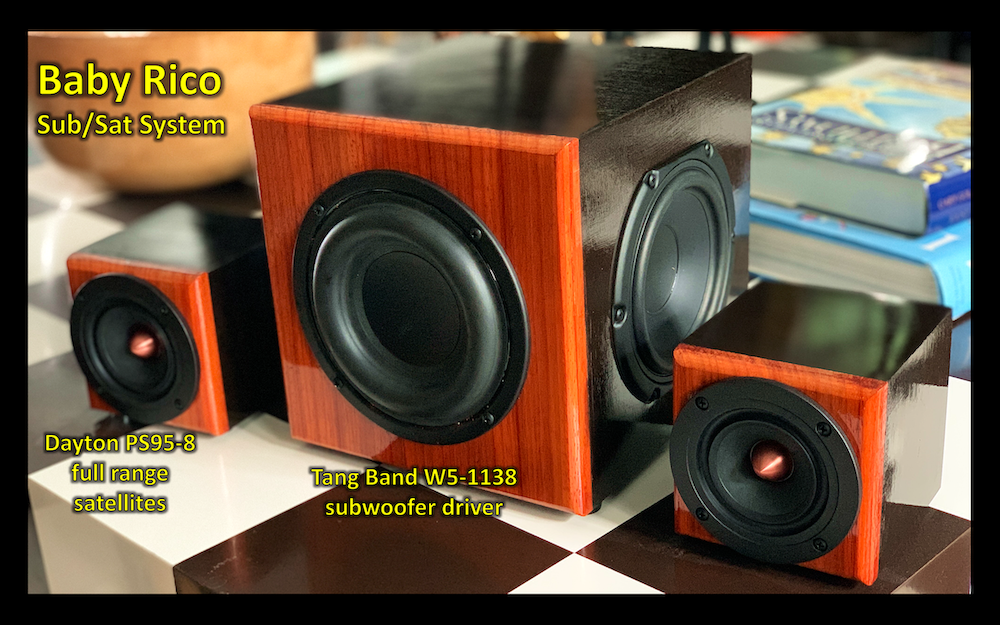
I wanted to make a subwoofer / satellite system for use in my office. It had to be small and it had to sound amazing. The best set-up seemed like full-range satellites for left and right and then a small subwoofer, all powered by a bluetooth 2.1 amplifier.
Design Goals:
This system has to sound great and non-fatiguing since I will be playing these for hours a day. Most of the time at a lower volume, but I want the ability to crank it up if desired.
Driver Selection:
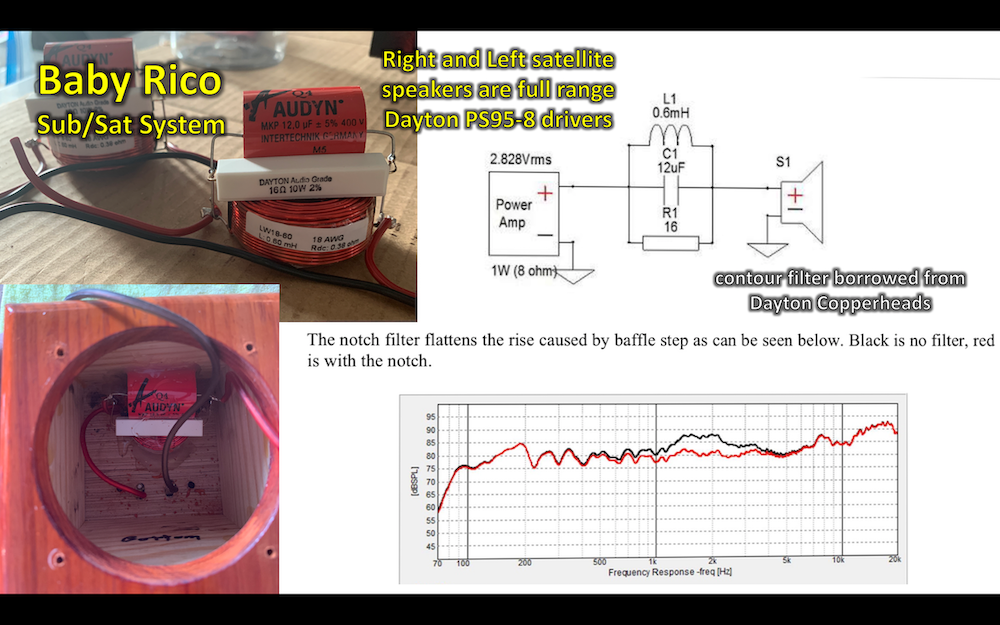
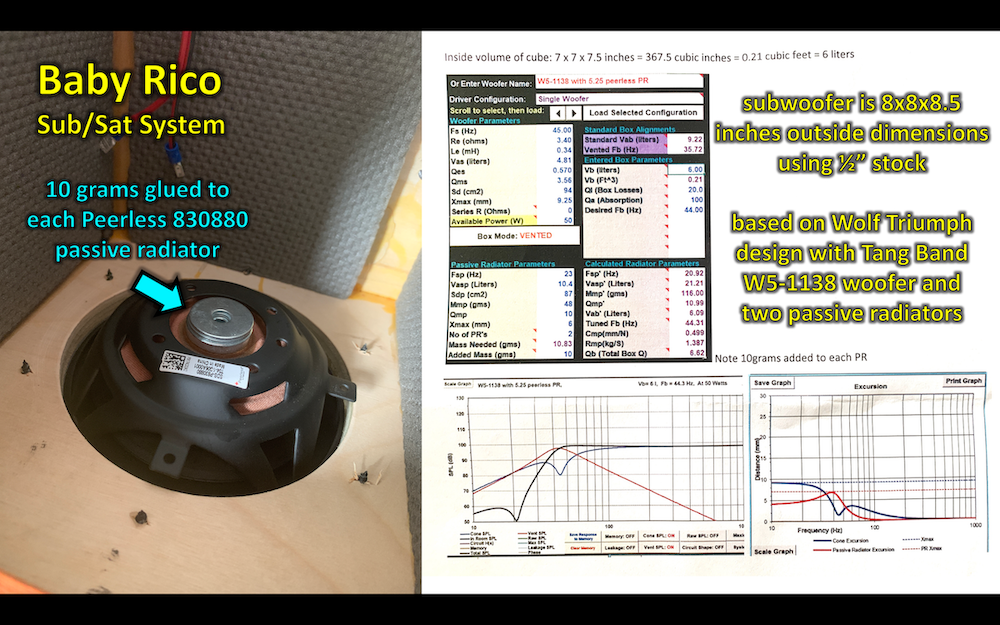
I wanted to use drivers that I know from experience sound great to my ears. This means the Dayton PS95-8 full range drivers and the Tang Band W5-1138 subwoofer.
Enclosure Design:
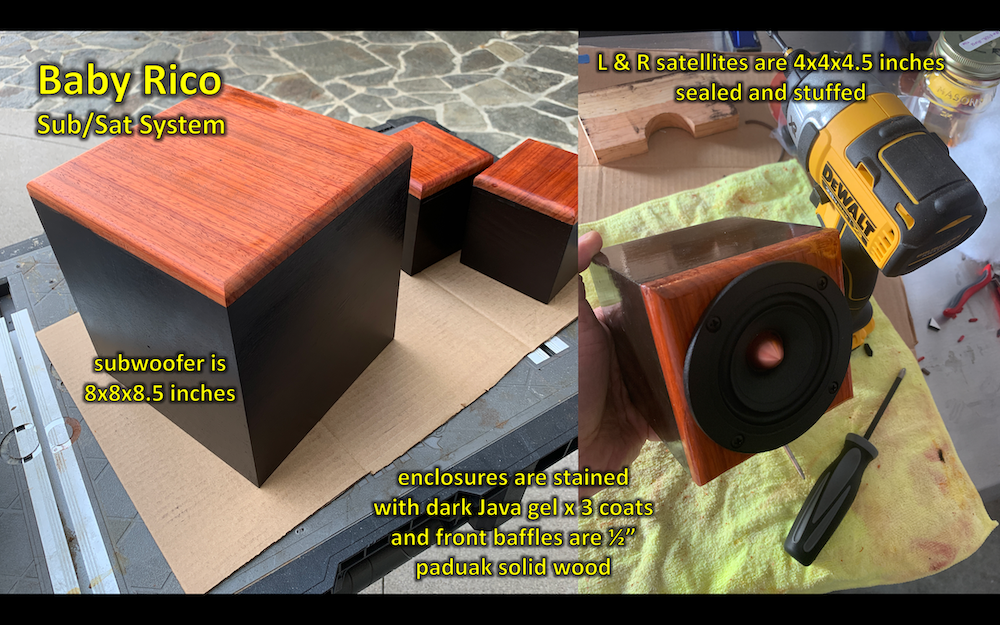
The subwoofer enclosure is 8x8x8.5 inches in outside dimensions, made with 1/2″ stock, that leaves an internal volume of 7x7x7.5 inches which is about 6 liters. Starting with the Wolf Triumph design, the weights on the passive radiators was increased by 10 grams to achieve the goals. Even at 50 watts, the xmax of the driver and passive radiators is not breached. The satellites are small, sealed enclosures measuring 4x4x4.5 inches and using 1/2″ stock. They are stuffed with a fist-full of poly material.
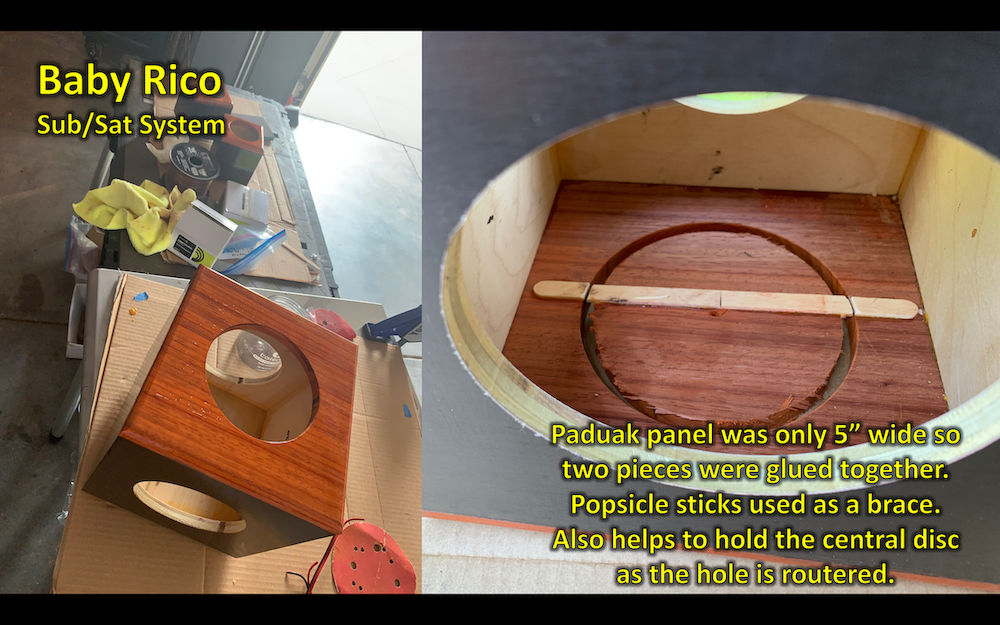
Enclosure Assembly:
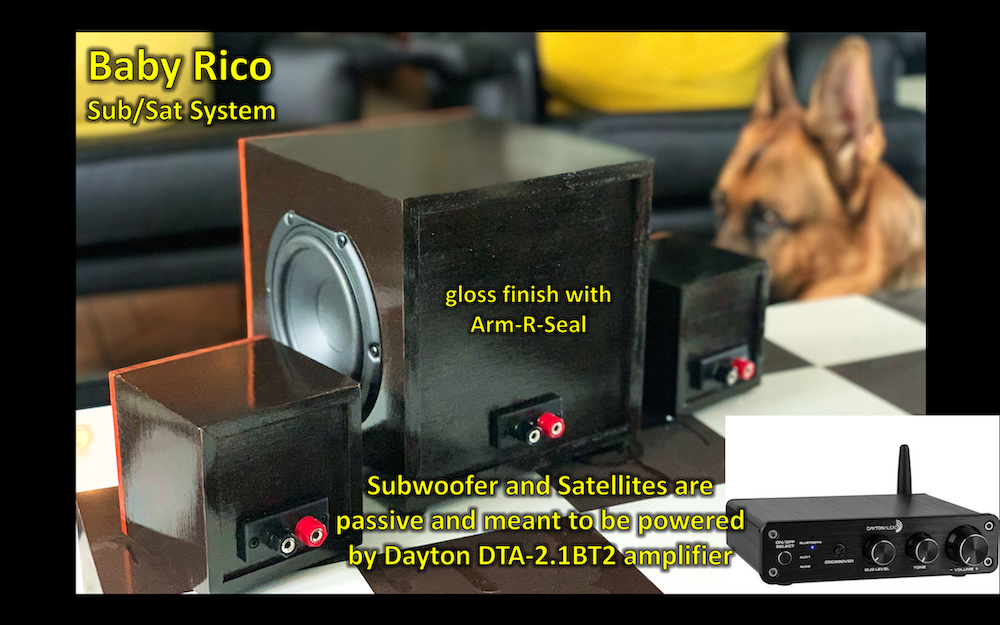
The enclosures (except the front baffles) were glued together using 45 degree angled cuts. Then they were stained with Arm-R-Seal Java gel x 3 coats to really get the dark look. The front baffles are solid 1/2″ paduak hardwood. This single panel was just 5″ wide so two sections had to be glued together to create a wide enough baffle for the subwoofer. A popsicle stick was glued to the inside to act as a brace during routing. The enclosures were then finished with Arm-R-Seal gloss x 3 coats.
Crossover Design:
For the satellites, there is a contour filter which was copied from the Dayton Copperheads kit. While the satellites here are not exactly the same dimensions as those in the Copperheads kit, they are close enough. It sounds great
Tips & Tricks:
Stain the enclosures first before gluing on the front baffles. The front baffles are cut a bit generous and then a flush-trim router bit is used to make them a perfect fit once the glue has dried.
Conclusion:
What a sweet sounding system! It sounds best at moderate listening levels and is smooth and articulate. It can approach 100 dB if needed and the Dayton 2.1 amplifier can supply plenty of power. People are amazed when they see and hear this system in my office and they ask where they can buy one.
About the Designer:
I’ve been reading the TechTalk forum for the past 3-4 years and I enjoy learning more and more about these speaker projects. The best part is giving them away as gifts.
Project Parts List:
They look great!
Vince Huff, this is the right size for for a small bedroom / computer get away room. What passive radiator did you use and how many? If you used 2 did you add weight to them separately? I definitely want to build a set.