
Besta Subwoofer


Designer:
Paul Graves
Project Category:
Subwoofers
Project Level:
Beginner
Project Time:
8-20 Hours
Project Cost:
$100 – $500
Project Description:
IKEA furniture hack into a real Home Theatre subwoofer.
Design Goals:
This project was born of necessity to replace a 30 year old DIY cabinet that had been beat up over the years and left in pretty rough condition. Years of moving, pets, and re-builds had taken a toll on the wood. A new and improved cabinet was needed to keep the woofer running for years to come. My home entertainment center equipment is in an IKEA Besta cabinet already, and I had another cabinet sitting in storage that was just about the right size for the woofer and amp to be transferred into. This allows me to complete a cabinet for little money, avoid the hassle of finishing the cabinet to match the rest of the system, and focus just on the internal structure, baffle, and rear panel finishing.
Driver Selection:
This was predetermined as an Eminence Lab 12 driver purchased and fitted into the old cabinet a little over 10 years prior. The woofer had been doing a fine job in the old cabinet powered by a 200W subwoofer plate amplifier, so there was no reason to hunt for a replacement.
Since this driver was in use for so long, the woofer was measured with DATS to determine its current parameters. Using added mass technique, I took 2 measurements and averaged them to get a good set of specifications to model the box.
Enclosure Design:
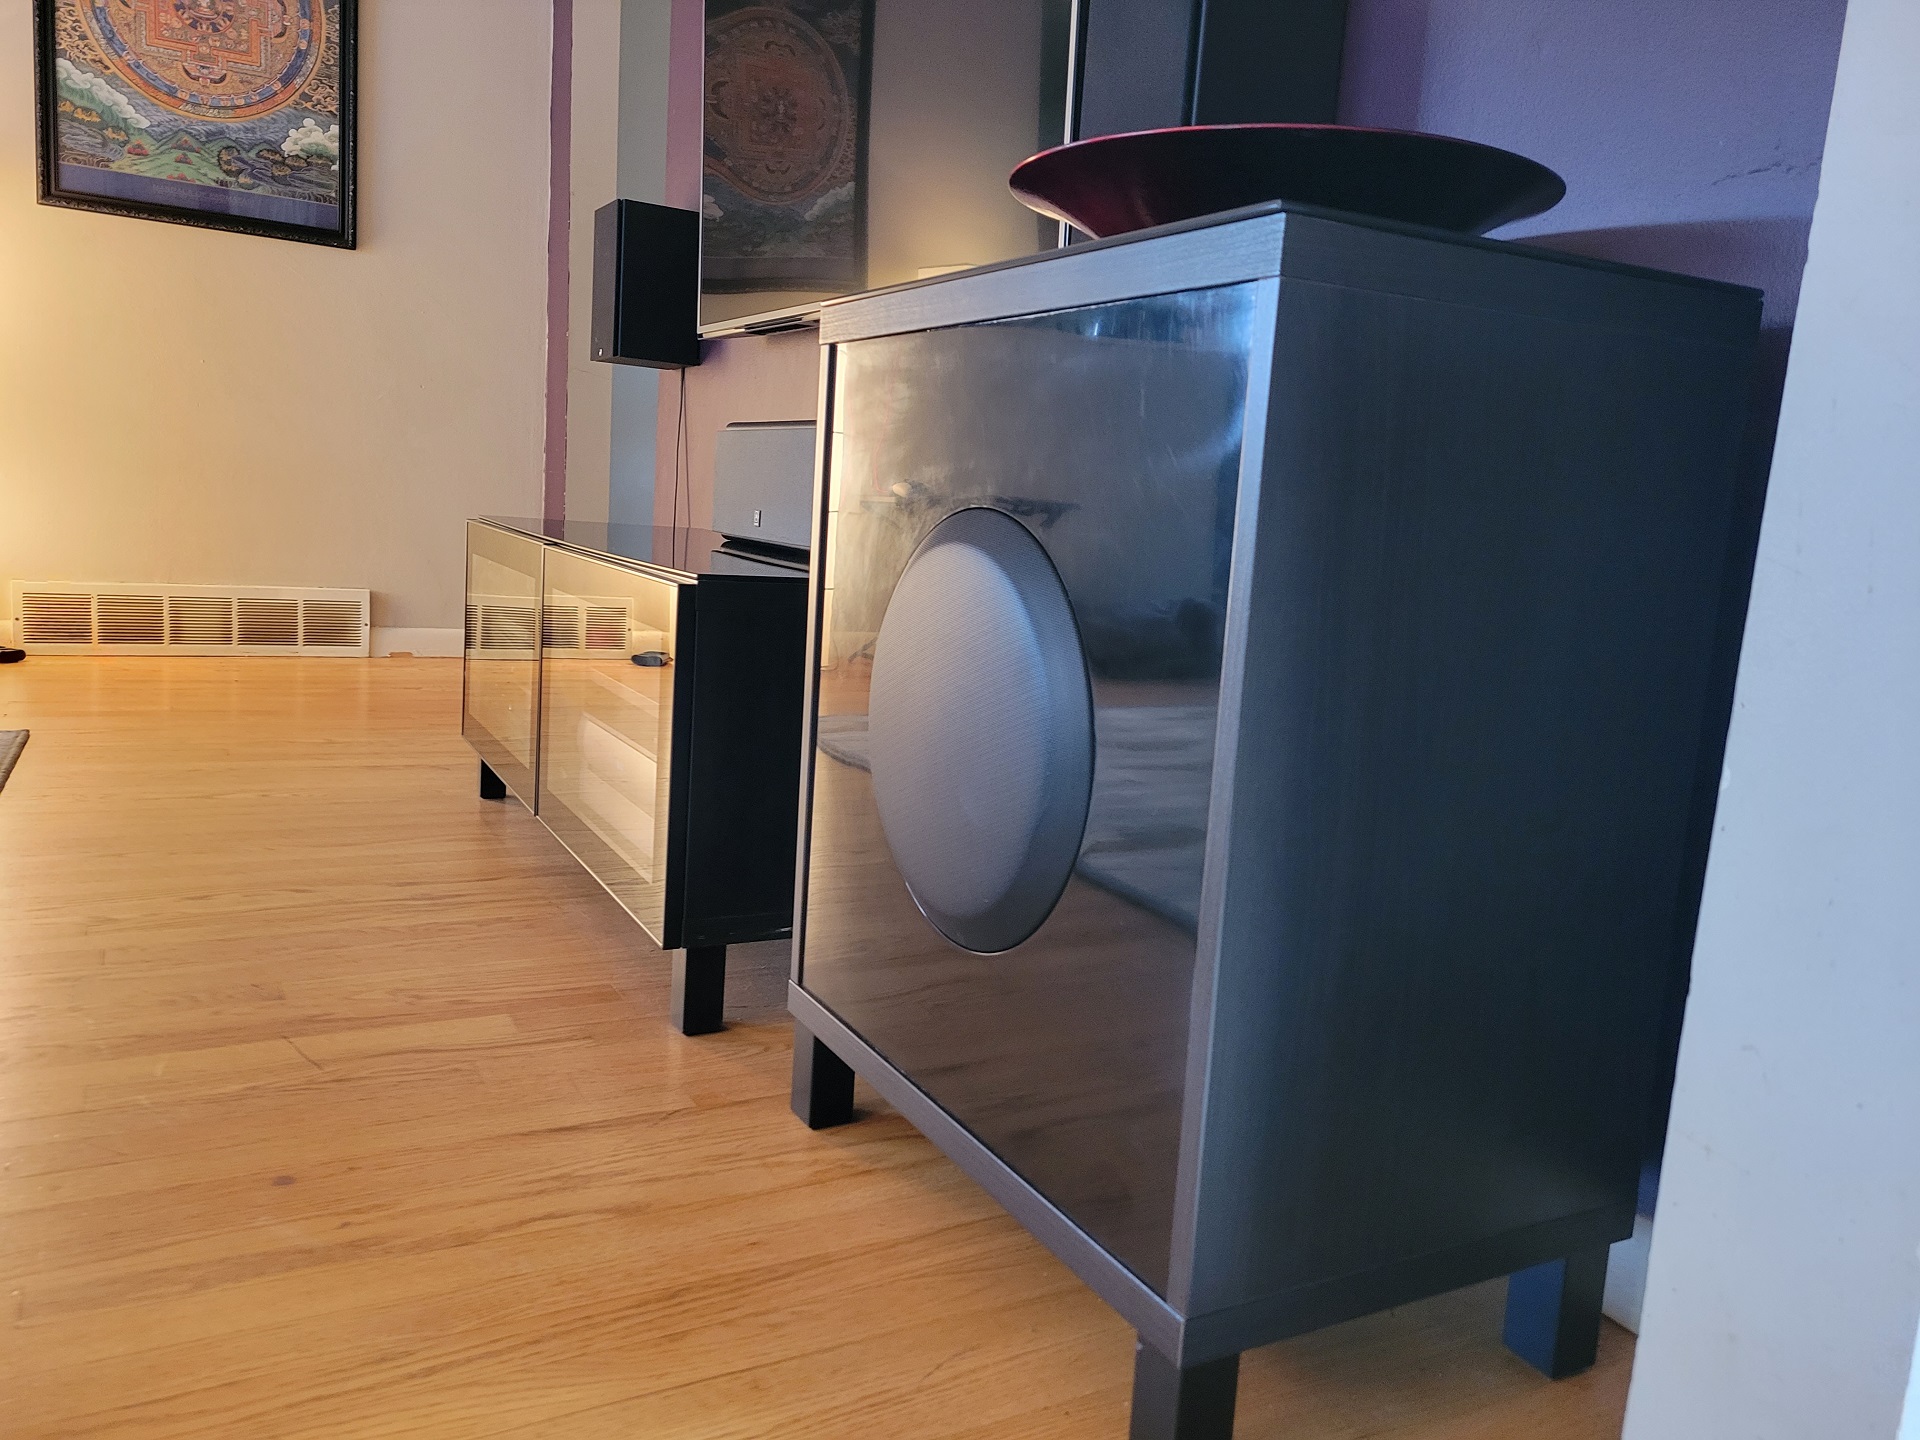
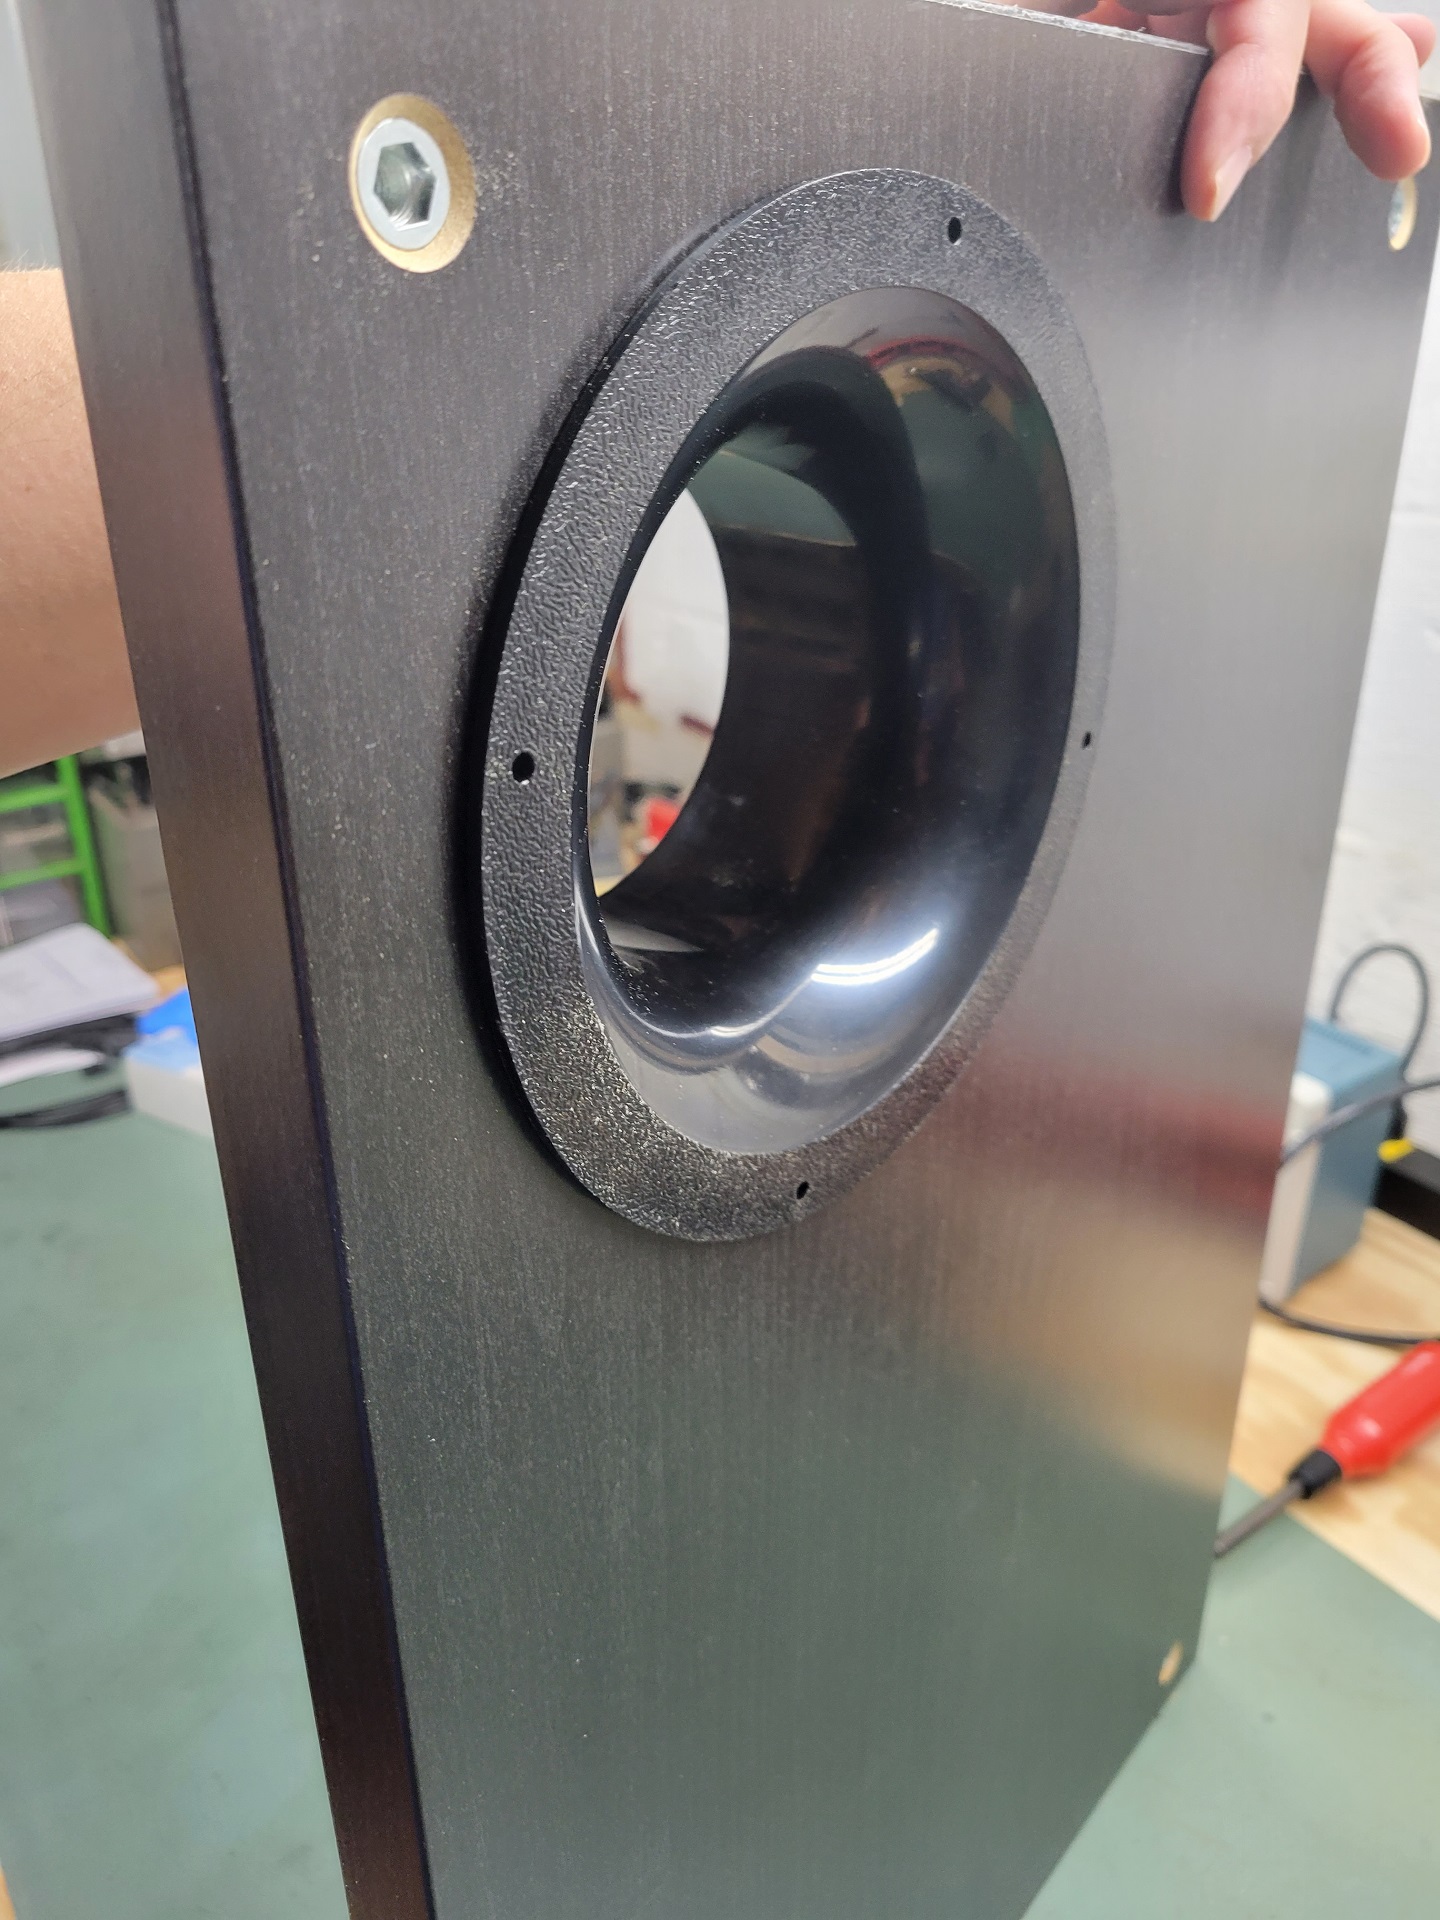
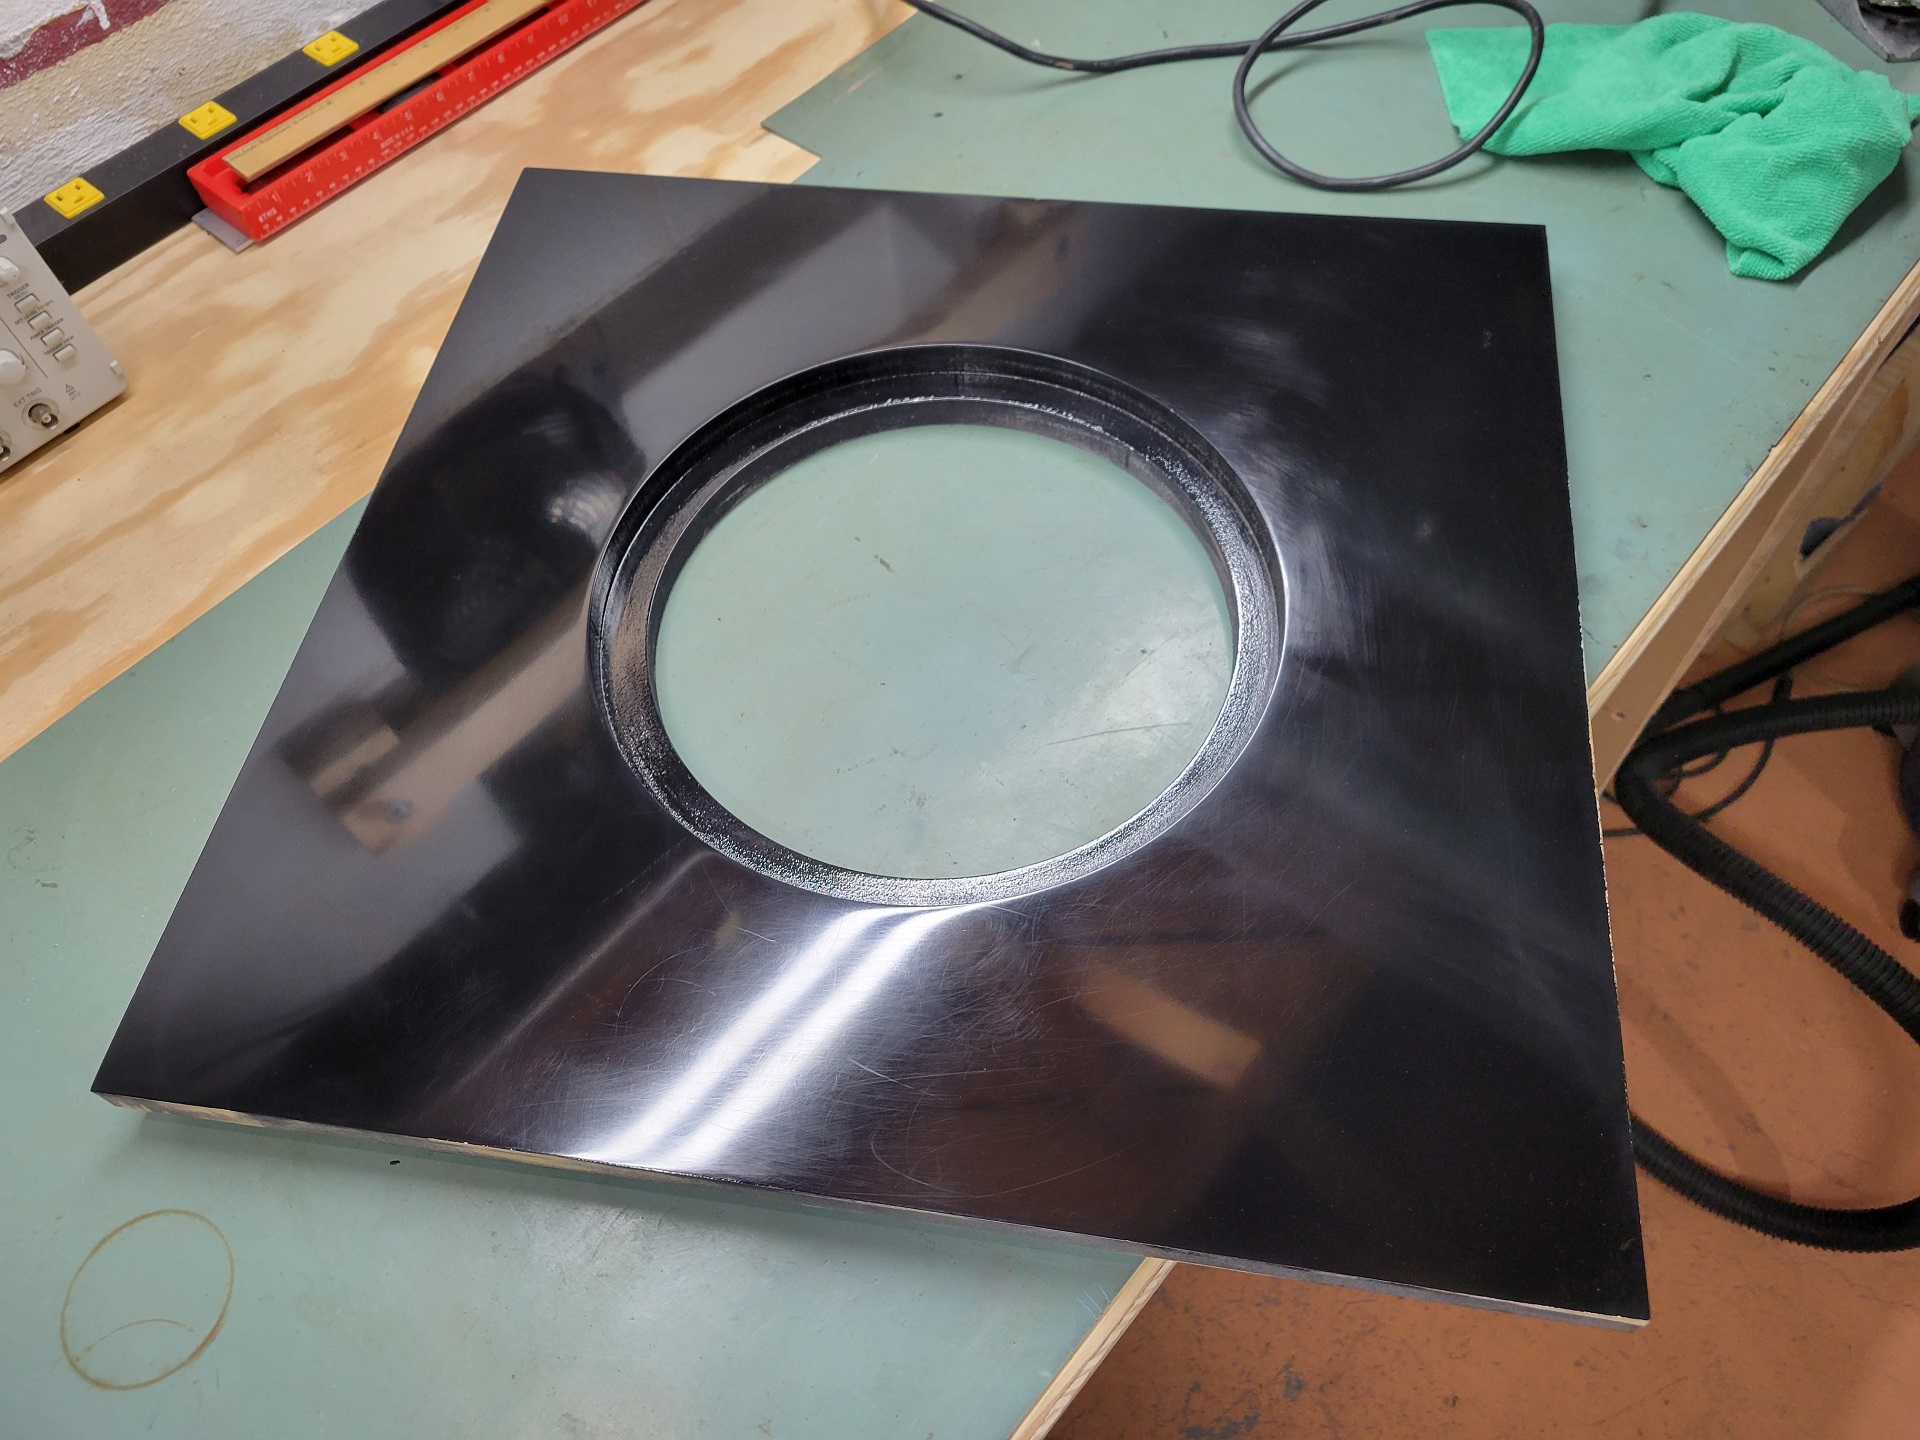
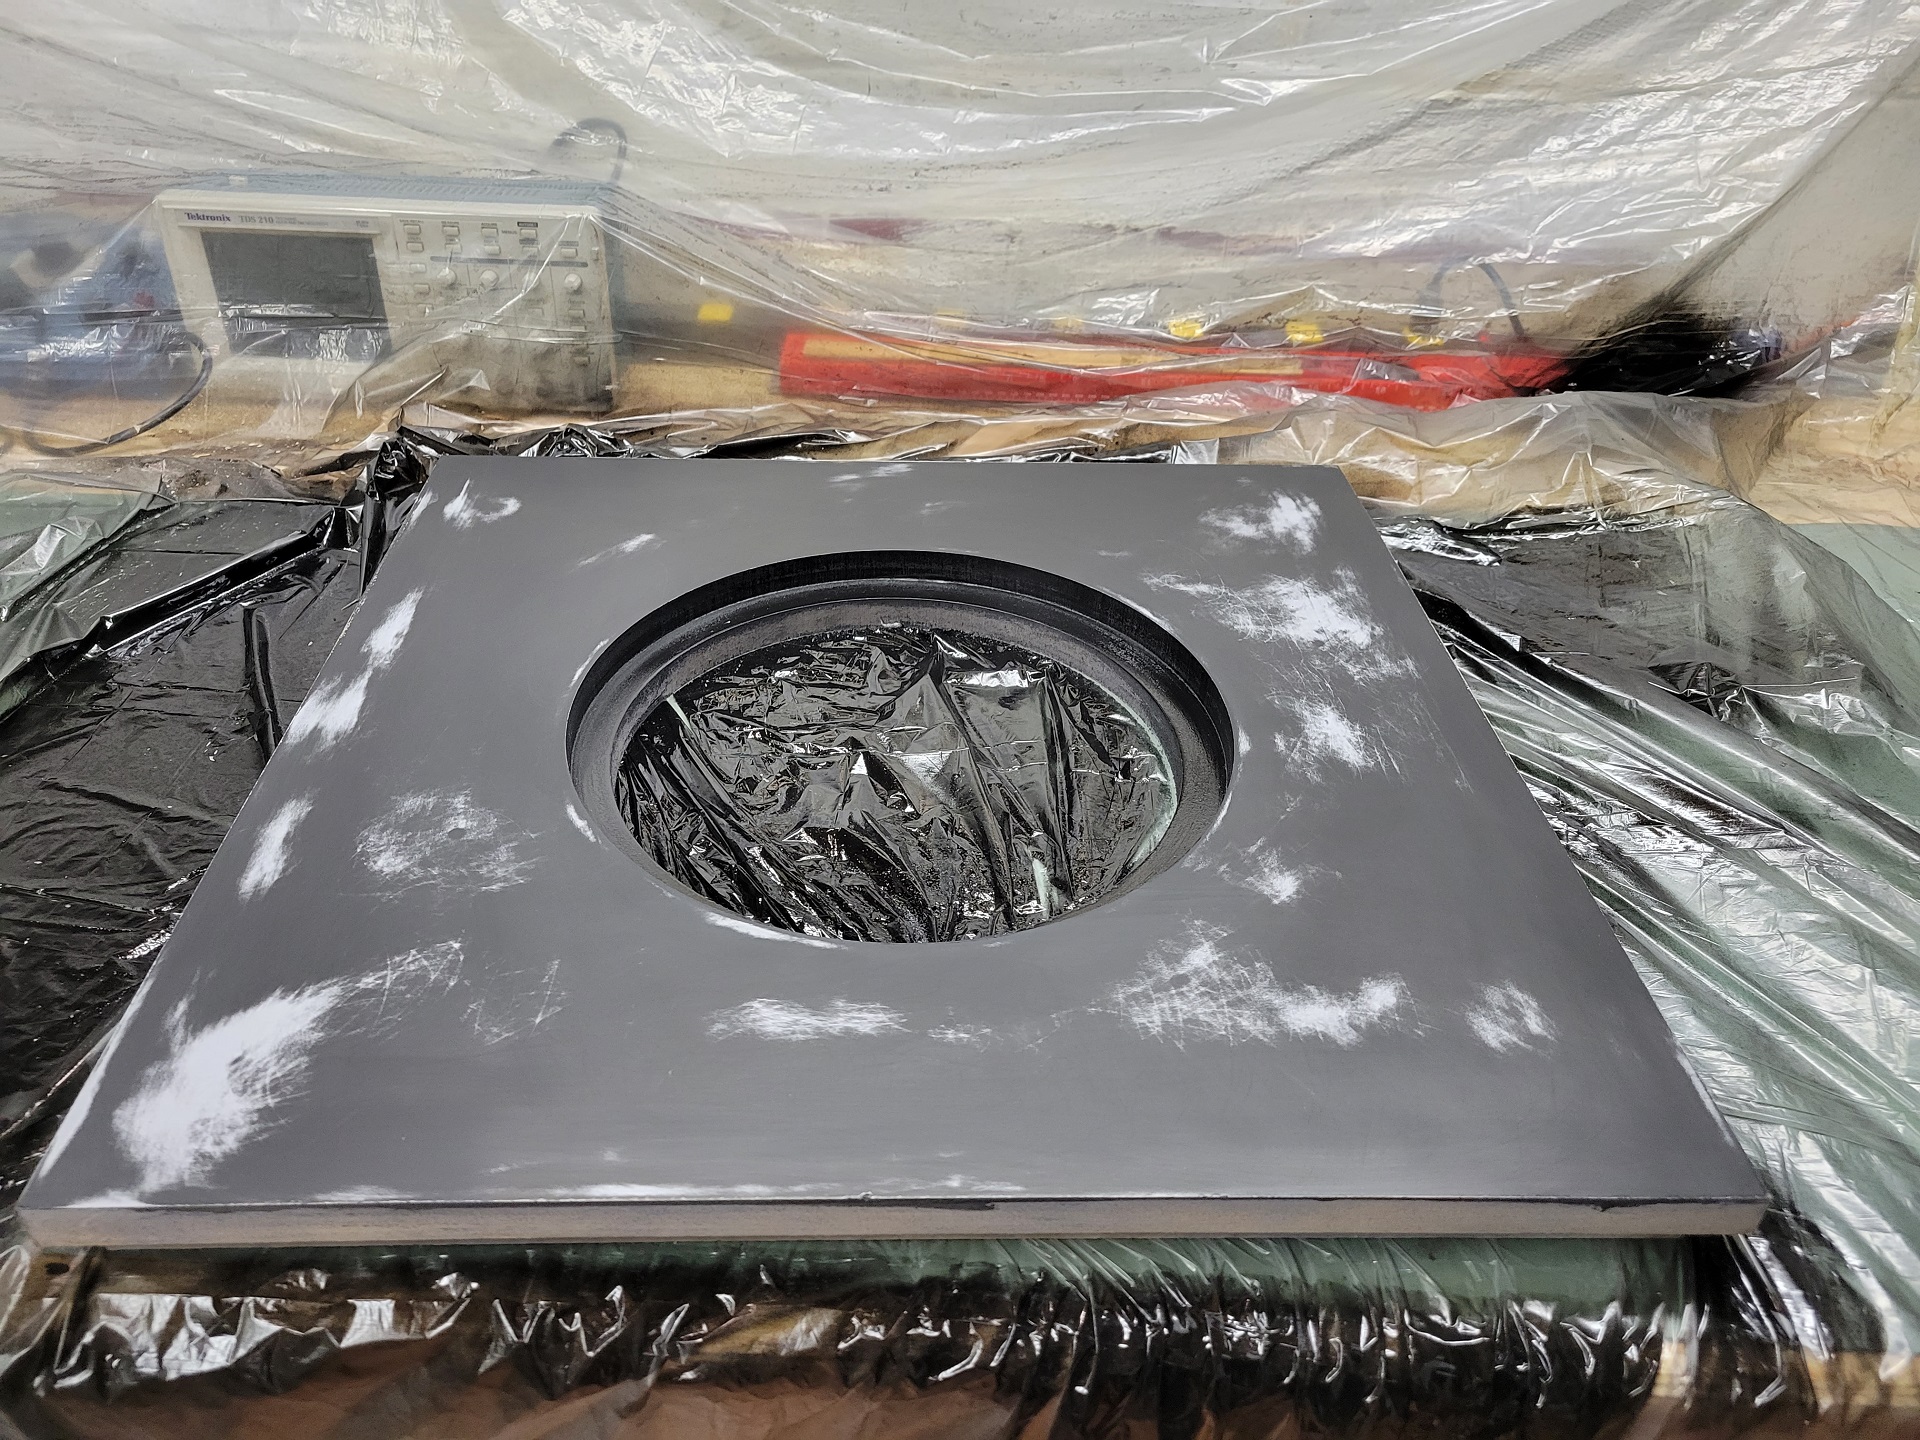
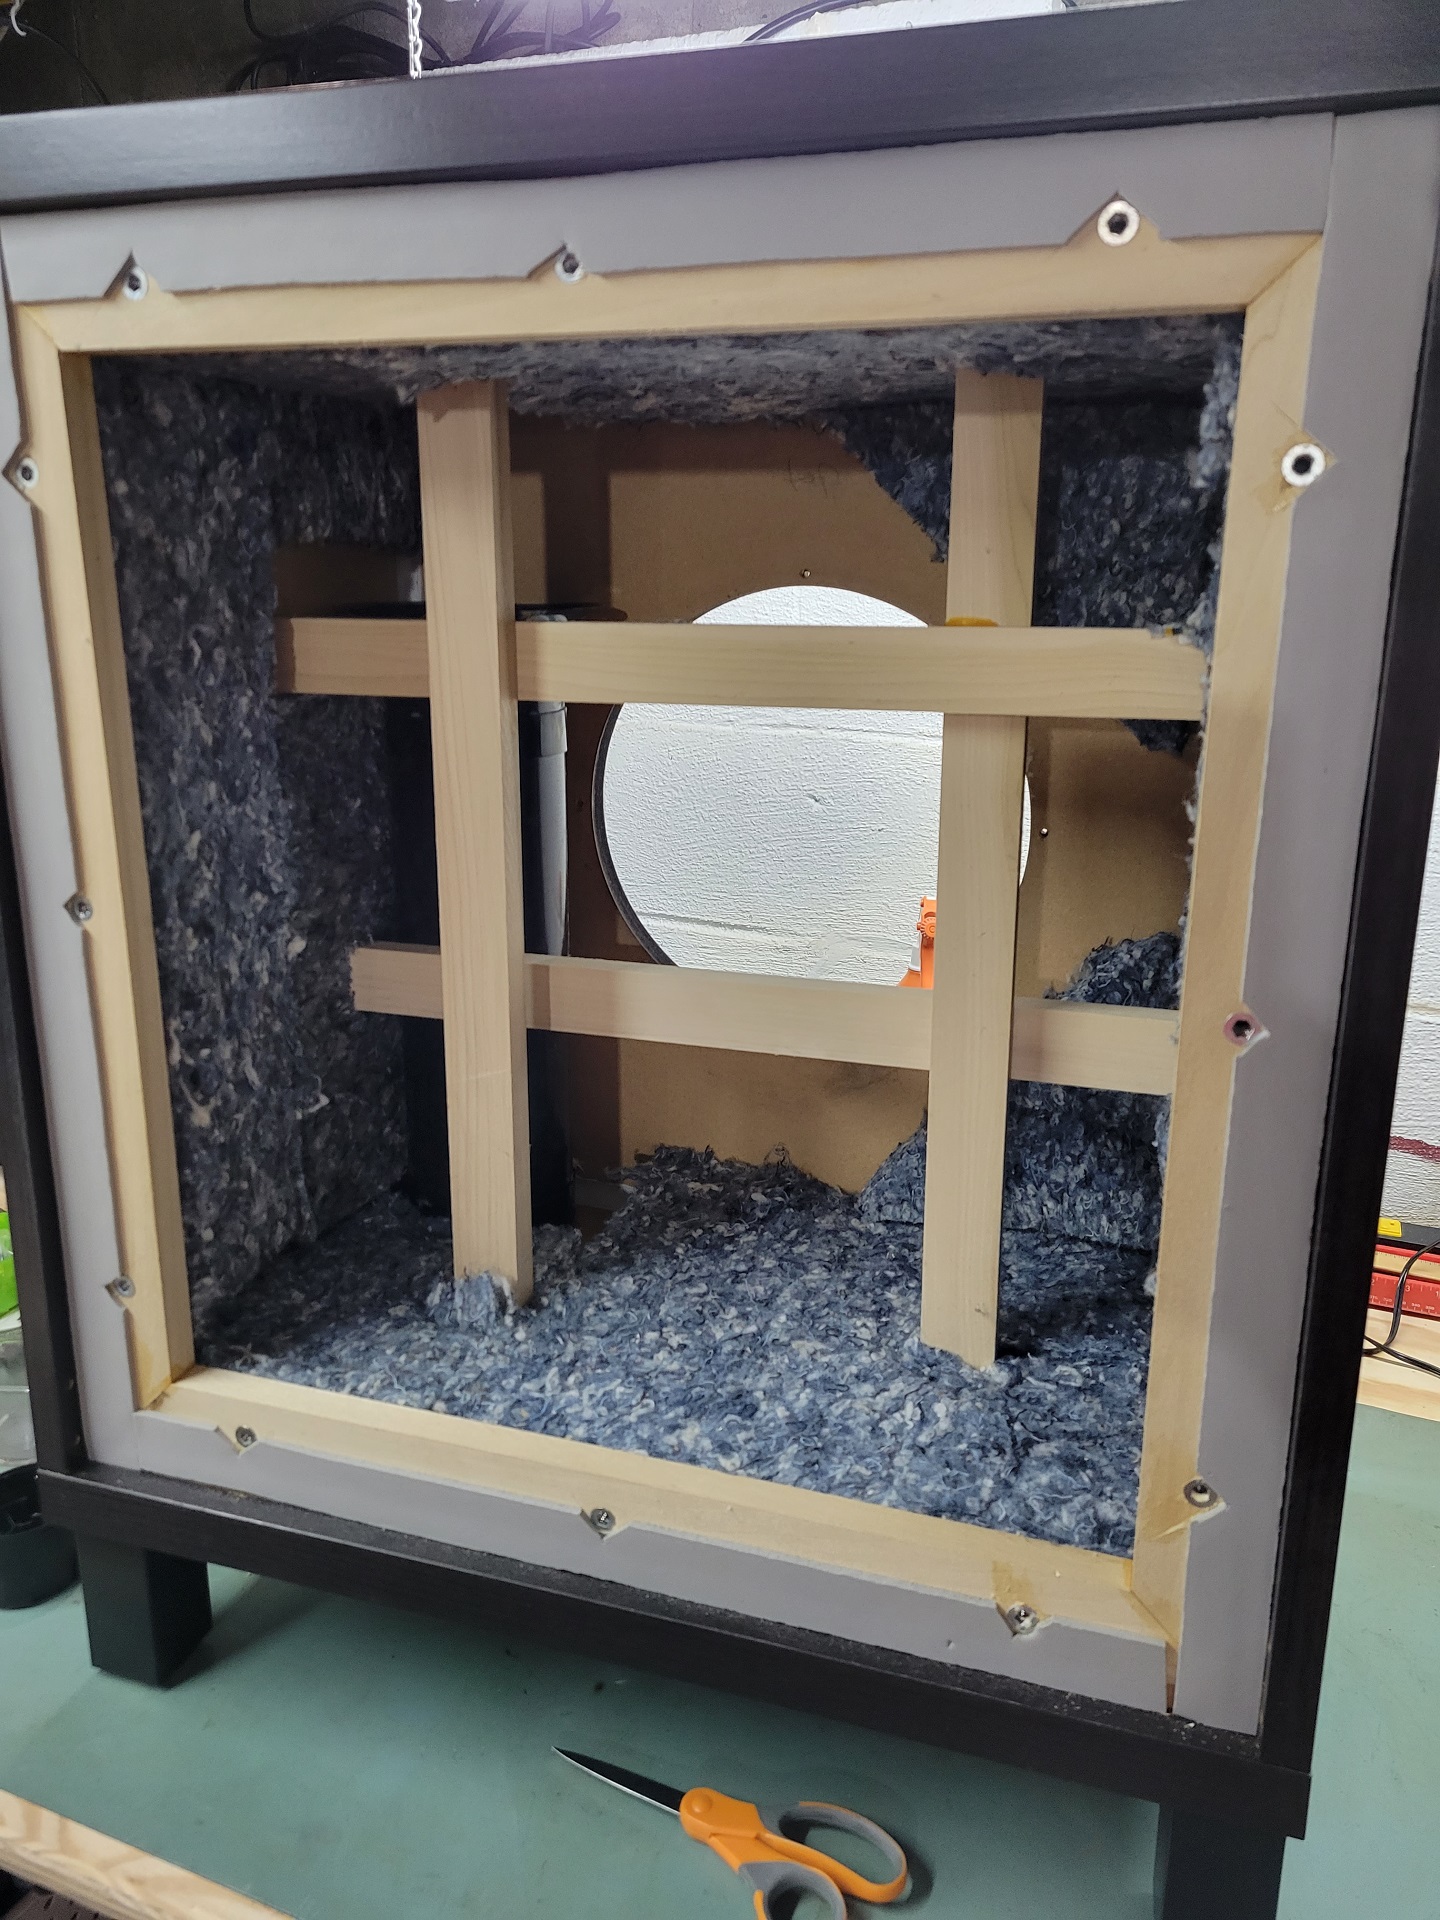
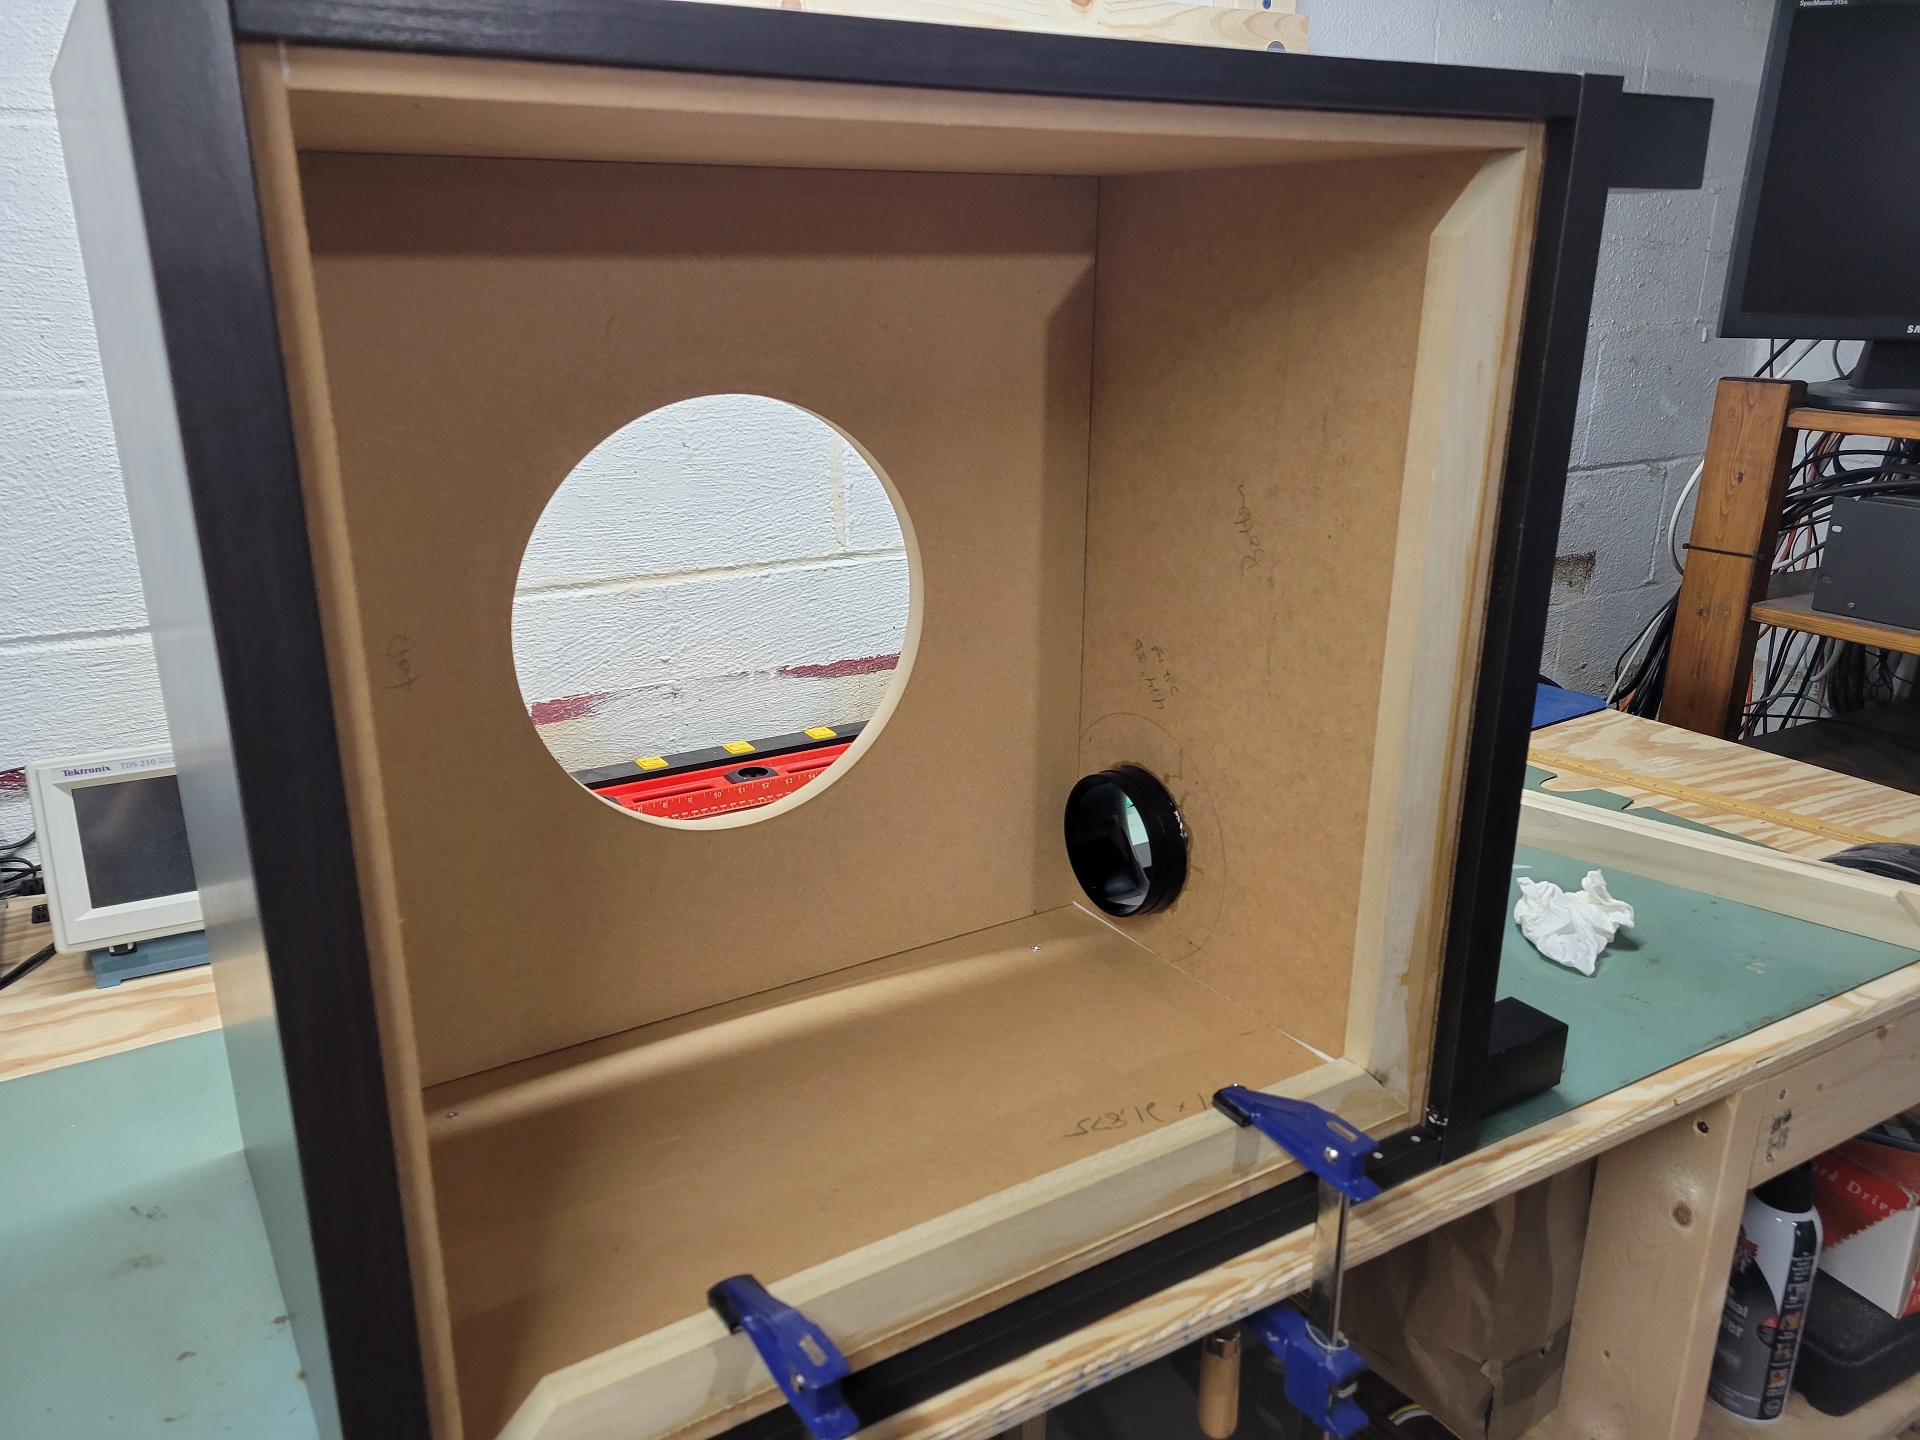
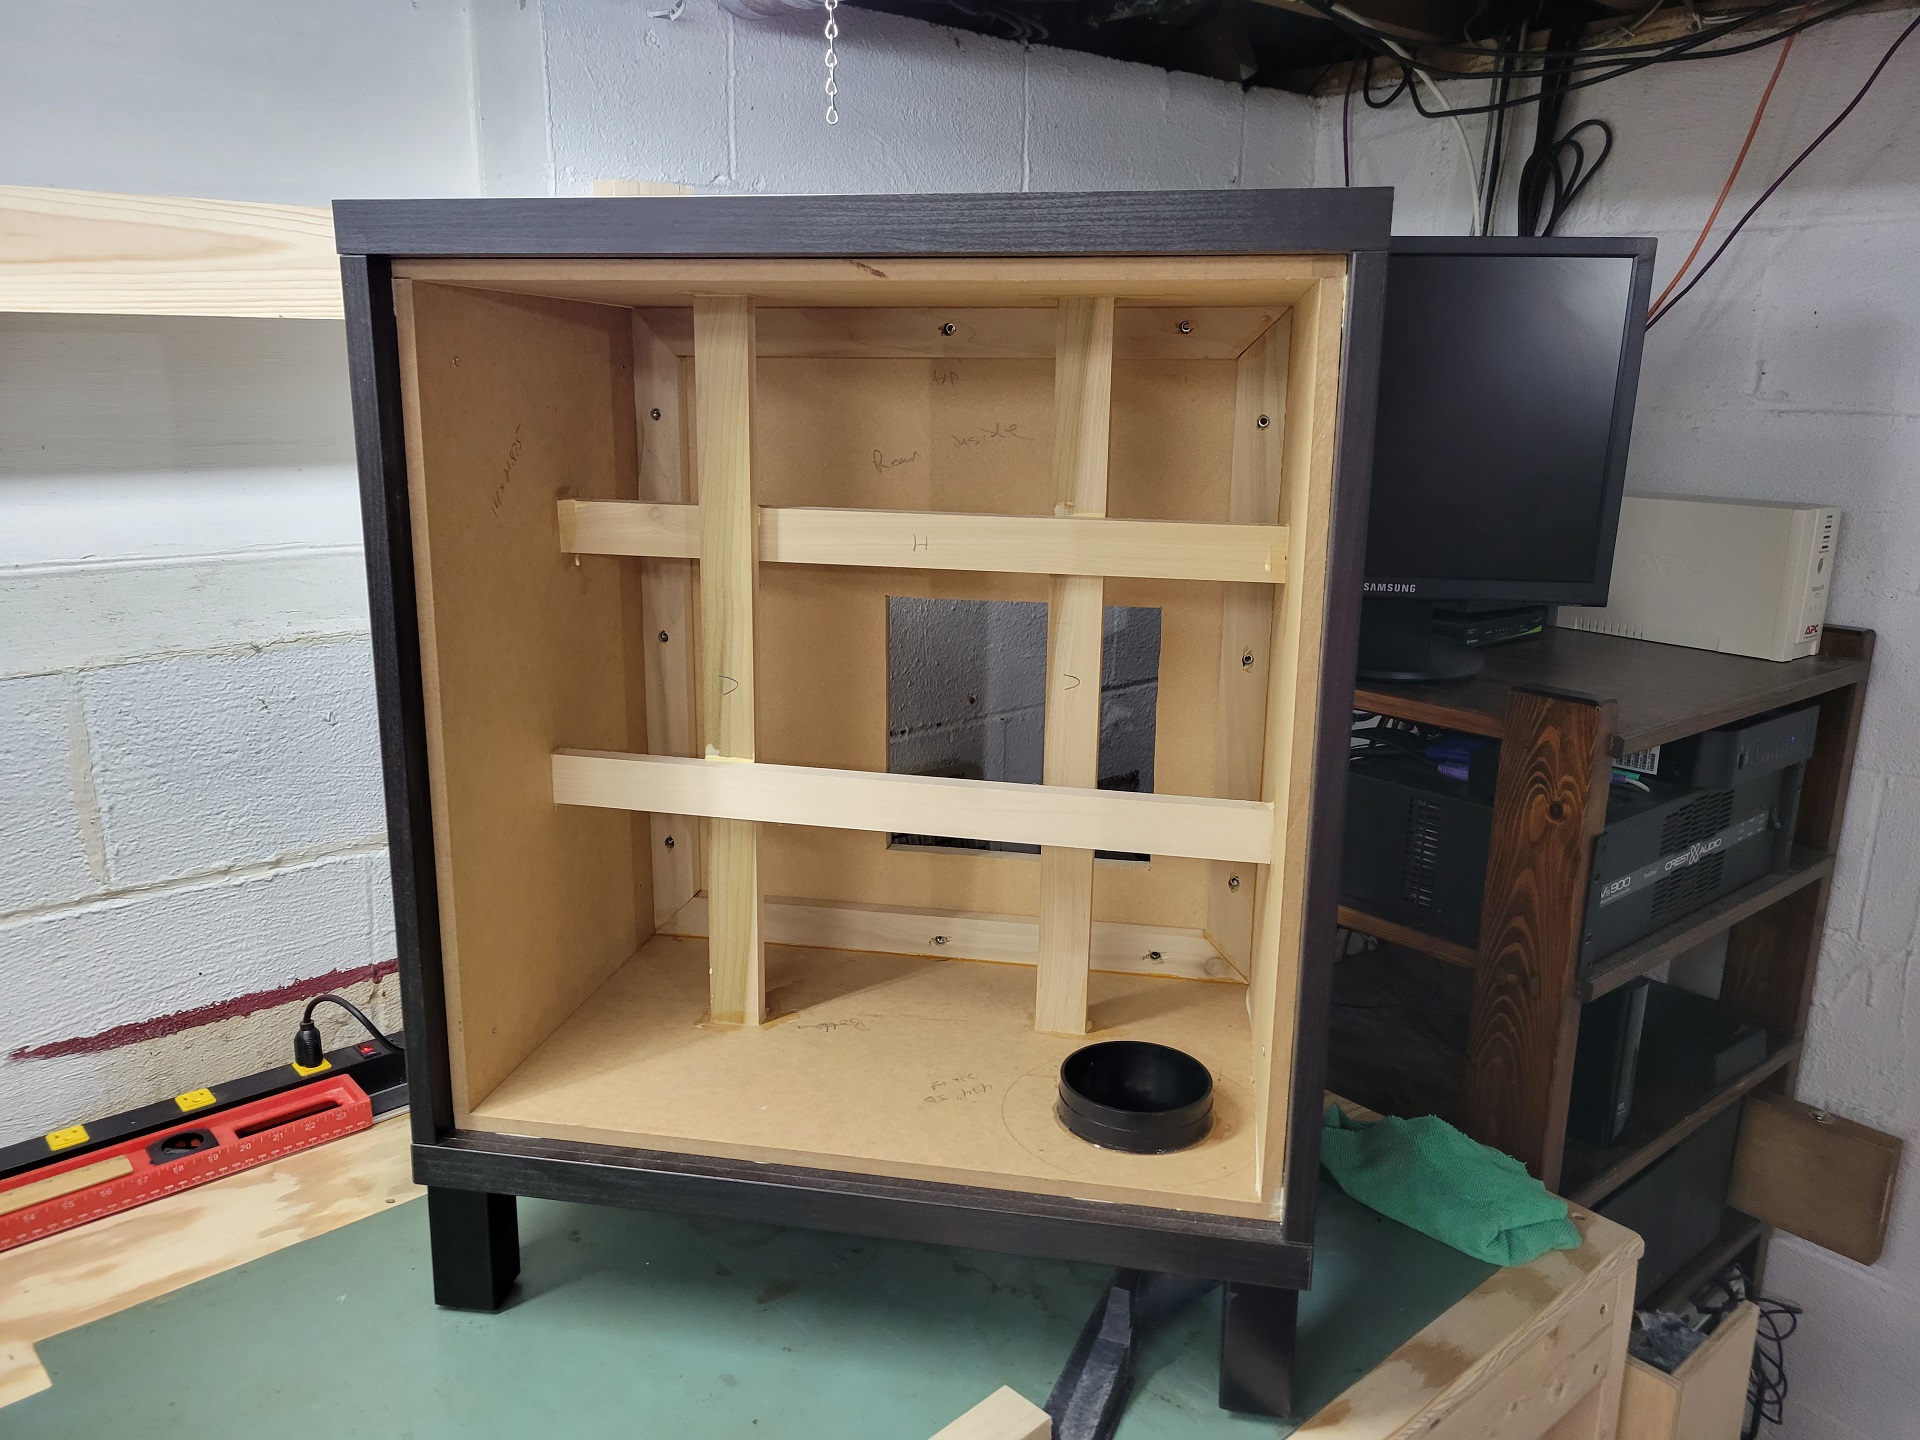
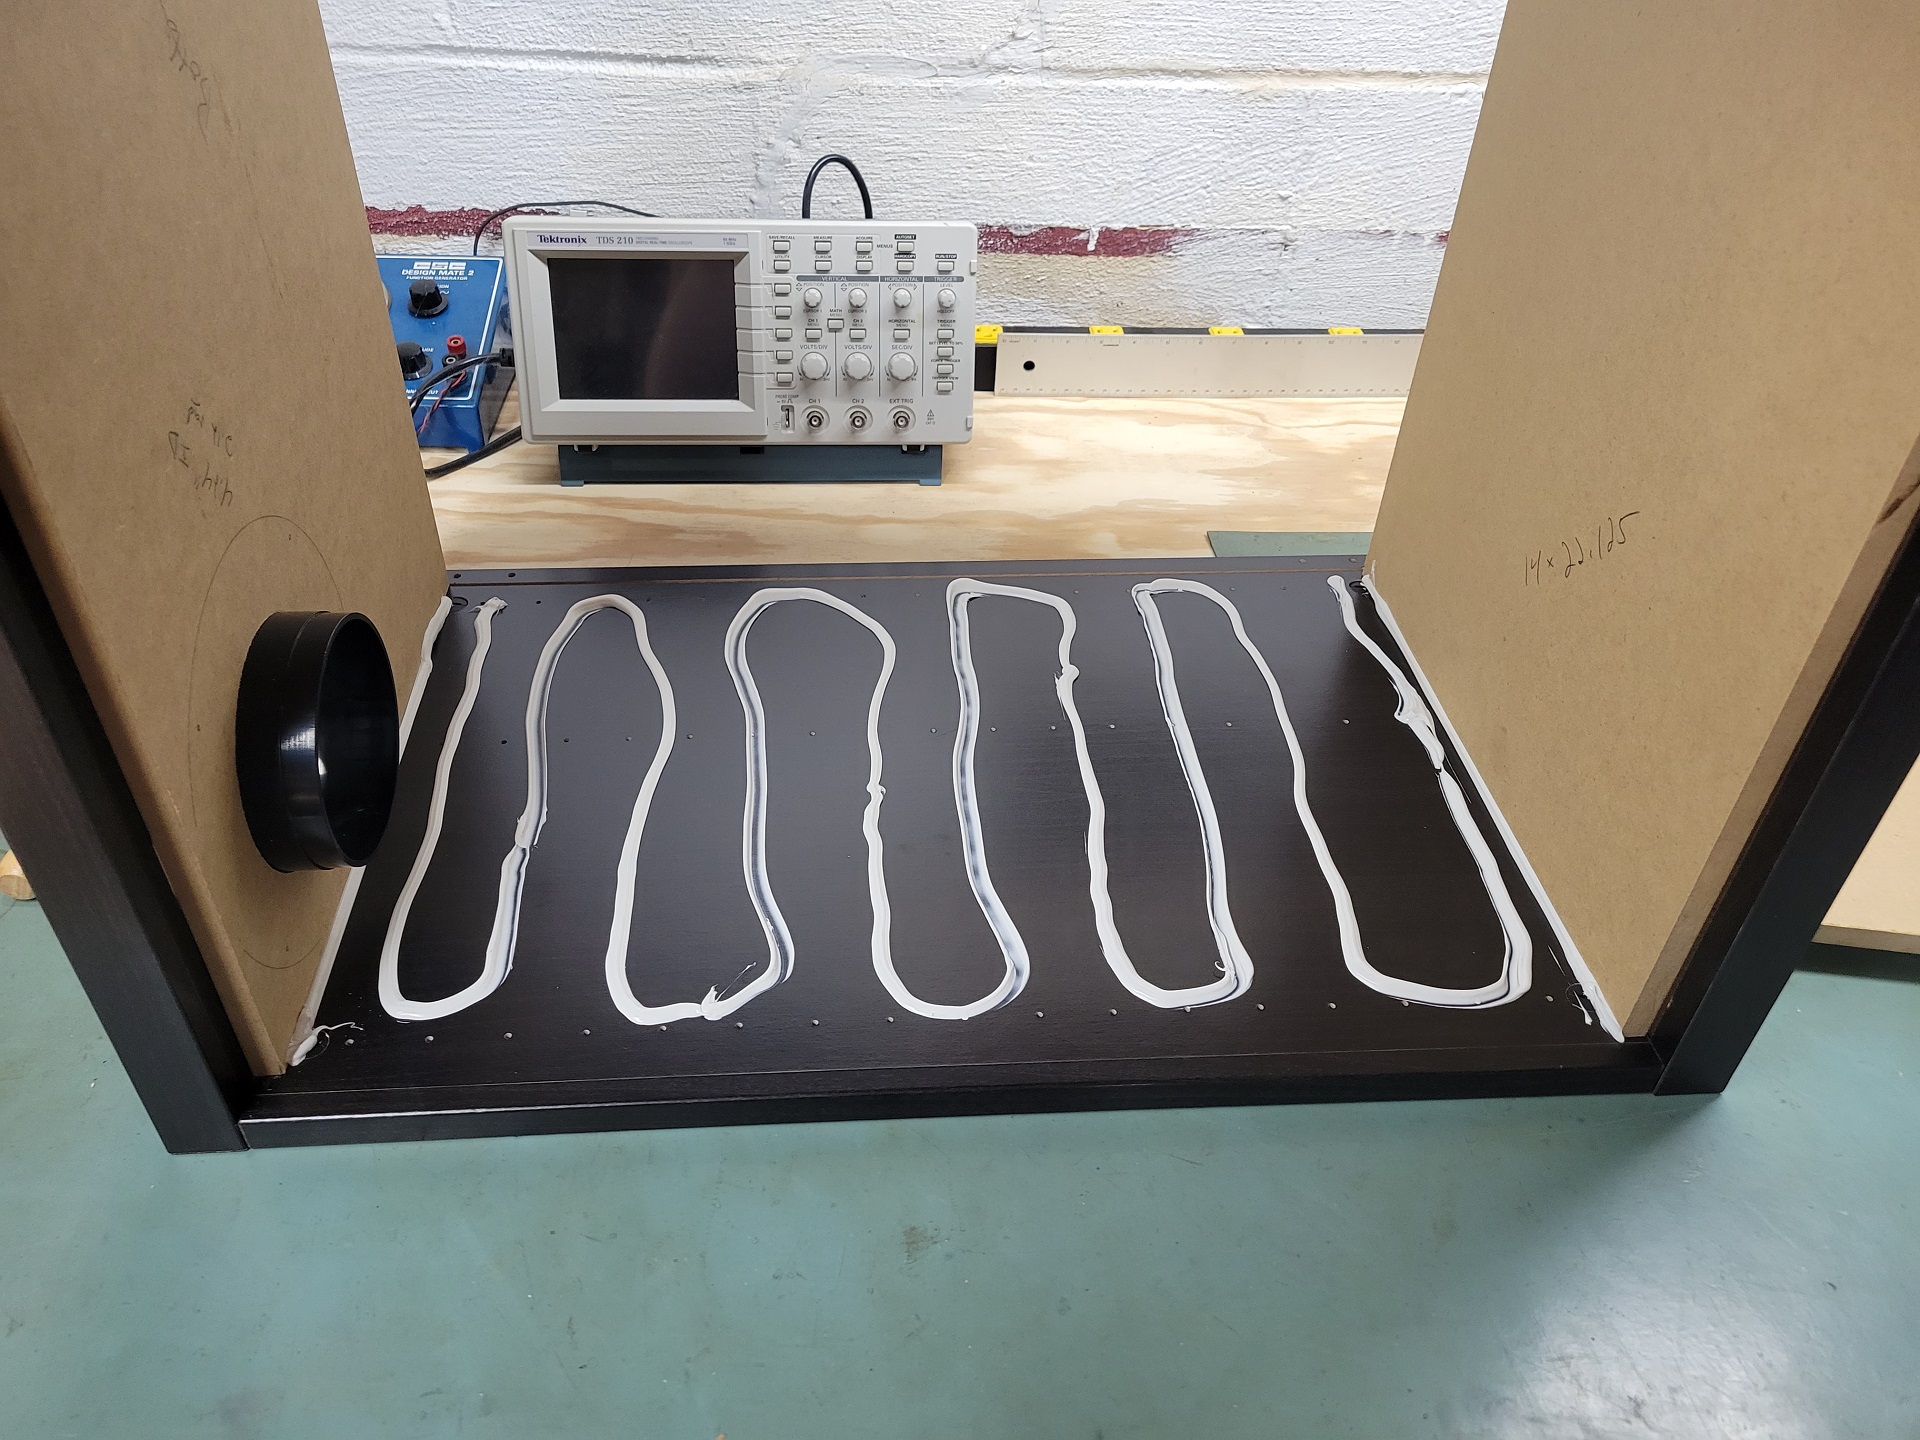
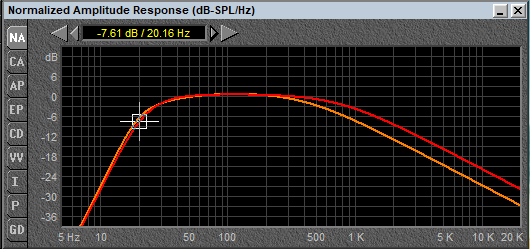
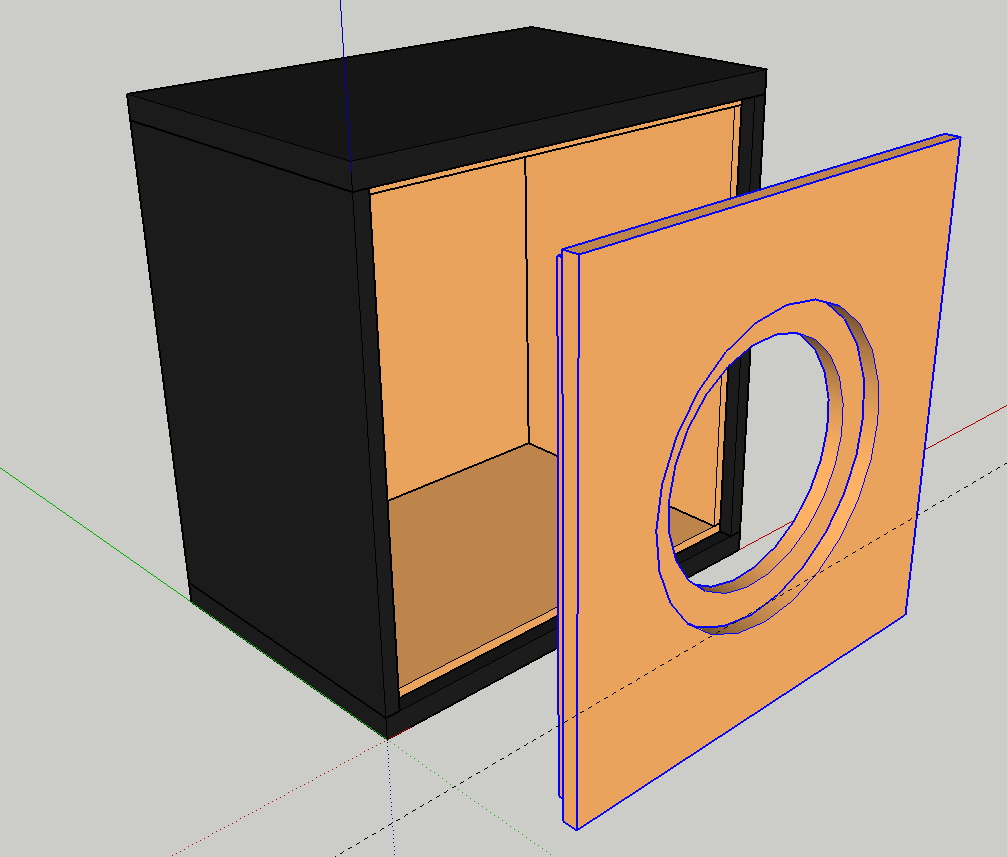
With the IKEA Besta as the target skin, I set to design a method to strengthen the particle board structure with an internal MDF shell of ½” stock, a double thick baffle using ¾” stock for a total of 1.5” of MDF, and a ¾” MDF rear panel where the plate amp will live. The baffle will use the ½” inside as a rabbet joint, increasing strength. The ½” MDF is a little thin for subwoofer standards by itself, but together with the IKEA shell consisting of ¾” particle board on the sides and 1.25” composite board on the top and bottom the structure should be more than rigid enough to handle the woofer. Mocking up in SketchUp using the measured dimensions of the Besta pieces gave me my target volume to validate the woofer alignment. Calculations came up to 3.4 cubic feet, and modeling with the OEM parameters and the actual broken in driver measured parameters came up with a target tuning of 23Hz. The modeling was compared between the OEM specifications and the current parameters of my woofer. Even though the parameters definitely changed over time, the model was remarkably similar. The red line is the OEM spec, while the yellow is as measured. In this cabinet, my Lab12 will achieve a -3dB point of 27Hz and be down only 7.6dB at 20Hz. That’s plenty deep for an enjoyable home theatre experience and overkill for music. The port was choosen as a 4” Precision Port kit, the combined diameter and large flares will all but eliminate chuffing and power compression. The assembly will be on 4” high feet, so the port can fire out the bottom without any worries. The box size is a bit big and the tuning is a little low for the Lab 12, leading to a little drop in maximum electrical power. However, Xmech is large in this woofer, and the plate amp in use is only 200W so this is no threat to the woofer at all. The internal MDF shell will be glued to the IKEA cabinet using some flexible construction adhesive, and Titebond for the baffle connection. The rear panel will be removable and screwed and sealed against 1×2 hardwood around the back side lip. Since this is a powerful subwoofer, cross bracing will be utilized using 1×2 stock to minimize cabinet resonance. Aesthetically, the majority of the cabinet finish is dictated by the Besta assembly, with a Stubarp 4” high feet, and a glass top. The baffle was planned as gloss black, and a JL Audio 13” grill was picked to hide and protect the woofer cone recessed ¾” into the baffle. The rear panel was planned with a simpler Duratex finish as it will be hiding.
Enclosure Assembly:
After some measurements of the port kit and grill, the cut plans were made for the MDF and all pieces were cut and set aside for assembly.
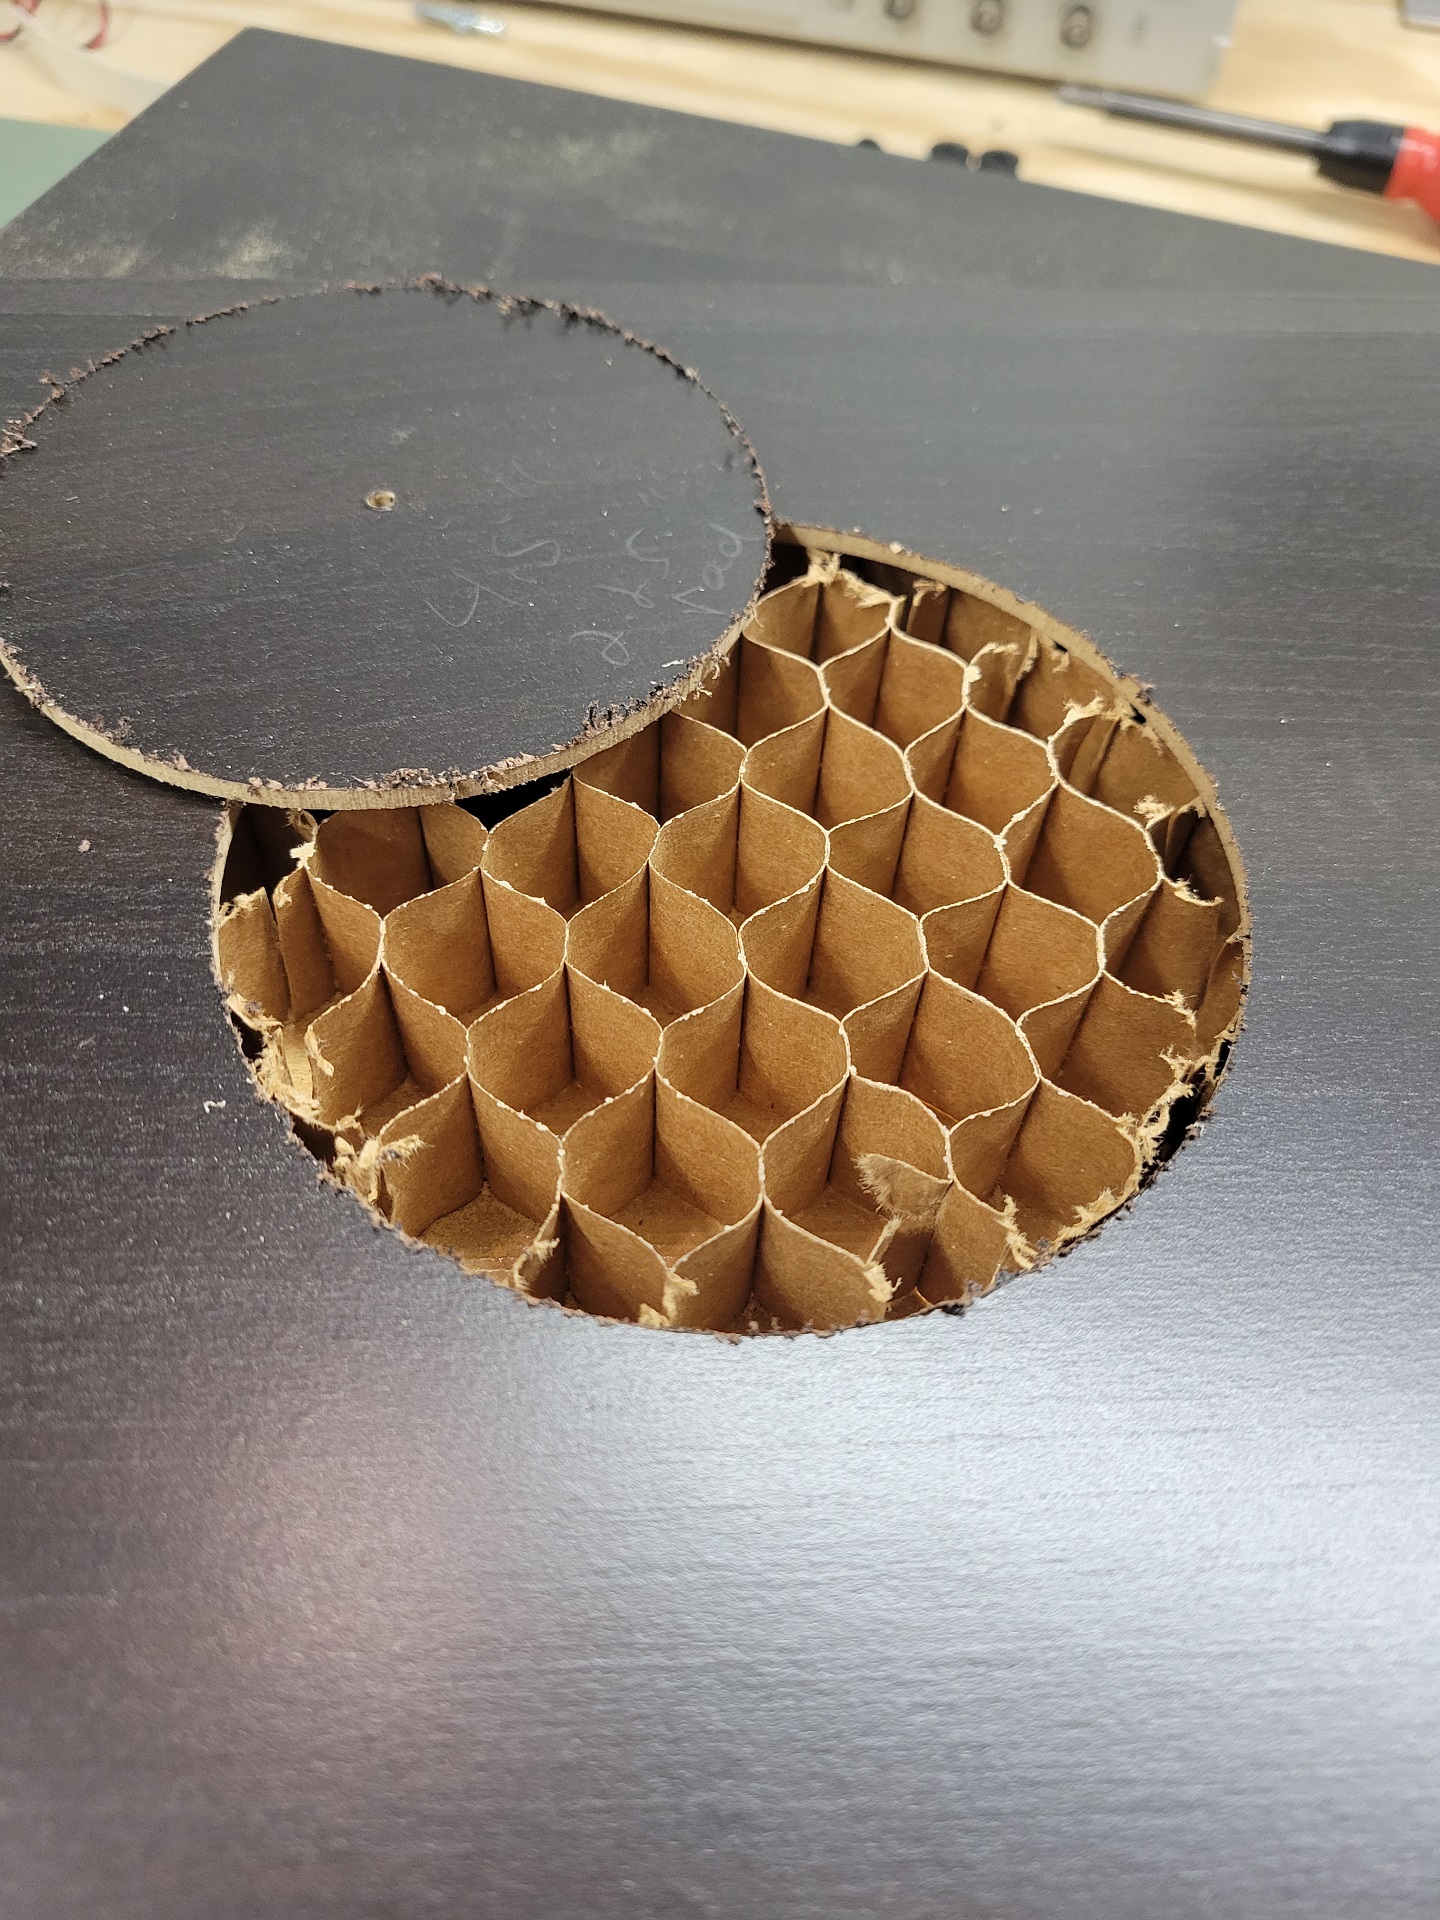
First up was the port. The 1.25” thick top and bottom panels of the IKEA Besta are a special kind of assembly made of 1/8” hardboard with a cardboard lattice in the middle for strength and rigidity. The cardboard is glued throughout, so there is no risk of rattling but this still necessitates a bit of creative cutting. The port was cut to fit in 3 different size holes corresponding to the outside surface, the in-between surface, and the ½” internal MDF panel that would be the glue point to hold the whole thing in place. With the holes in place, the ½” MDF internal was glued to the assembled Besta shell one side at a time using glue and weight for the top and bottom, and a couple wood screws to apply pressure on the sides where the particle board had a chance to hold a screw. Meanwhile the baffle was cut with the inside hole to mount the Lab12, and the outside hole dimensioned to press fit the JL Audio grille. The rear panel was snugged in there to keep the whole assembly square while the glue cured. When that was solid, the 1×2 lip was miter cut and glued on one side at a time with clamps, this time using the baffle board to keep things square. The rear panel was prepped for hardware and the plate amp, and 10-32 inserts put in to run hardware for mounting the panel. Now it was time to work on the gloss black finish for the baffle before mounting it. This was started with the tedious process of primer, sand, primer repeat until thick. That was followed by black enamel, one coat at a time with 48 hours of cure time in-between. After each coat, wet sanding with 600 grit. Each round resulted in fewer spots of primer coming through until it was thick enough to start the increase in grit and polish process for a good gloss. While the baffle work was in process, the 1×2 cross braces were cut to press in and glued in place for rigidity. Then the baffle was dropped into the assembly on a liberal bead of Titebond for permanent assembly and left to cure. Once the wood glue was done, a bead of the construction adhesive was applied around the inside to ensure no air leaks were missed. Finally, some denim insulation ~1” thick was cut to size and hot melt glued around as much of the outside surface as possible. Now it was organ donor time! The old sub cabinet was emptied and put out to the curb. The sound of Taps could be heard in the distance as this 30 year old cabinet built by myself and my late father was honored for its years of faithful service. After some struggling with 8-32 inserts, screws, the amp cutout that never seemed to get to the right dimensions, and some mild explicatives, the assembly was ready to roll. The JL Audio grill fit right in the recess cutout and finishes the box with a slick look.
Crossover Design:
No crossover in this thing, so the design validation consisted of testing the port tuning with DATS prior to gluing up the Precision Port. The tuning came to 24Hz using the full length of the Precision Port kit in the cabinet, no cutting needed! After an initial test, the port was fixed in place with a little super glue. Note these cross braces are glued together where they meet to eliminate the chance of rattling internally. Some sine wave sweeps to test the end results were successful, no rattle, leaks, whistles, just loud and low bass!
Off to the living room to take its place next to the Besta with the equipment.
Tips & Tricks:
Make sure you add glue to your threaded inserts as you put them in place. Forgetting to do so may result in them pulling out!
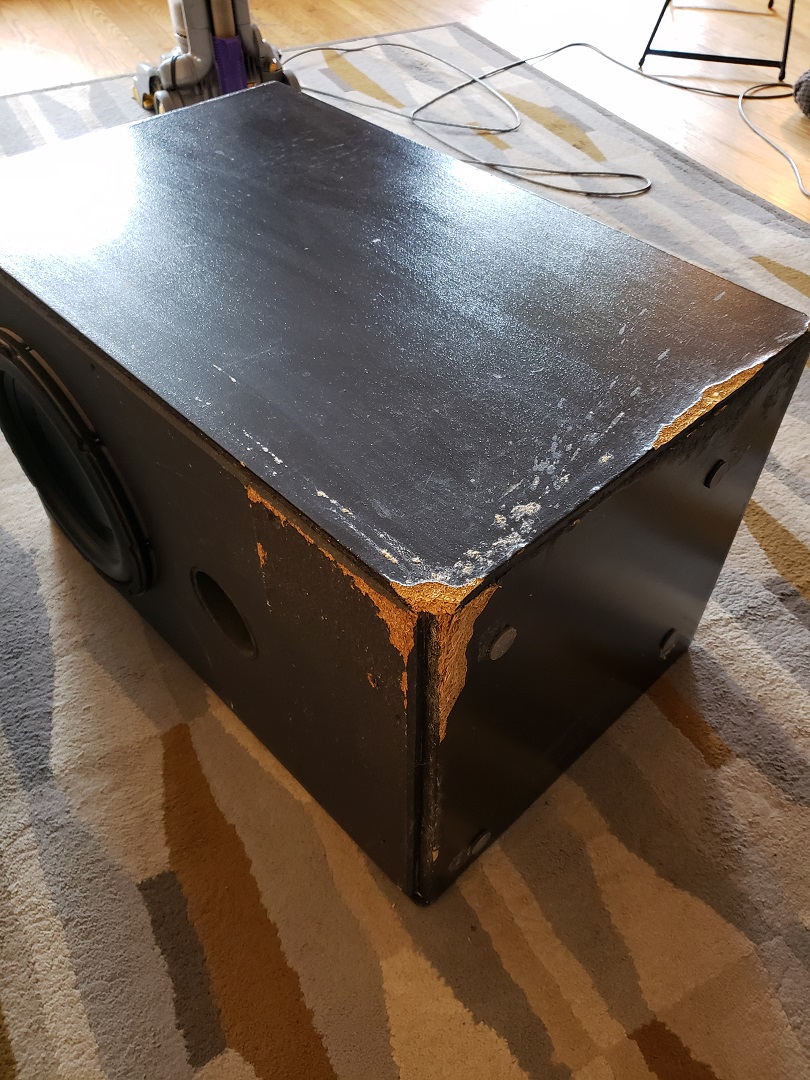
Gloss black enamel is time consuming, have patience! Also, it’s fragile and will shatter if hit, as evidenced when I dropped the woofer a fraction of an inch on the edge of the cutout. This was very difficult to fix, and ended up permanent. It’s small enough to not notice, but I know it’s there! Other things I messed up while assembling: Didn’t measure the front / back spacing around the perimeter when I glued in the 1/2″ MDF. I had a little slop around the port to get closer to center, but I didn’t even check. The front will be recessed slightly while the back sits proud. The rear panel was beveled to make it look like it was on purpose. Mis-assembled the top panel of the Besta by putting it on backwards. There is a very slight difference in the faux finish on the front vs. back edges of the Ikea cabinet, it will likely only bother me. I meant the port to be firing out of the rear left of the cabinet, but wasn’t paying attention to front / back there either so now it’s firing out of the front right. Due to the baffle coming in 3/4″ I had to shave a flat spot in the internal port flare. Will have no effect on the result, but will annoy me slightly. Moral of the story: pay attention!
Conclusion:
Mission successful, this thing kicks butt. Compared to the old cabinet, which was thinner material, not braced at all, and had a smaller 3.5” port, this cabinet produces cleaner and tighter low bass. The only distortion I can hear is the various rattling things around the house.
About the Designer:
Paul Graves is an electronics engineer and speaker enthusiast, working on woofers and full range speakers since being a teenager in the late 80’s. Find Paul in TechTalk posting as Wogg.
Project Parts List:
|
Part # |
Description |
Qty |
|
268-352 |
Precision Port 4″ Flared Speaker Cabinet Port Tube Kit |
1 |
|
290-570 |
Eminence LAB 12 Professional 12″ Subwoofer Speaker 6 Ohm |
1 |
|
300-803 |
Dayton Audio SPA250 250 Watt Subwoofer Plate Amplifier |
1 |
Nice build. I really got a kick out of the oscilloscope picture….