
Charlotte’s Speaker


Designer:
Bobby Kinstle
Project Category:
Freestyle Speakers
Project Level:
Intermediate
Project Time:
8-20 Hours
Project Cost:
$100 – $500
Project Description:
After making the Alarm Clock for my son, I noticed my daughter now spends a lot of time in her brother’s room listening to music, so I decided I’ll make one for her too and since we’re all stuck in our homes on quarantine, we have tons of time to create those “always wanted to” projects. This is a powered bluetooth speaker that runs from an Amazon Echo Input.
Design Goals:
The goal was to create a compact bookshelf speaker that not only sounds good, but also looks good in my daughter’s bedroom. More than usual consideration was given to aesthetics including selecting drivers based on appearance more than modeled performance which created some interesting design challenges. My wife requested a “shabby chic” visual style. I also wanted to try out the new DSP boards and build a bi-amp system without a crossover.
Driver Selection:
HiVi B4N 4″ Aluminum Midbass Round Frame 297-429
Dayton Audio DC28FT-8 1-1/8″ Silk Dome Truncated 275-076
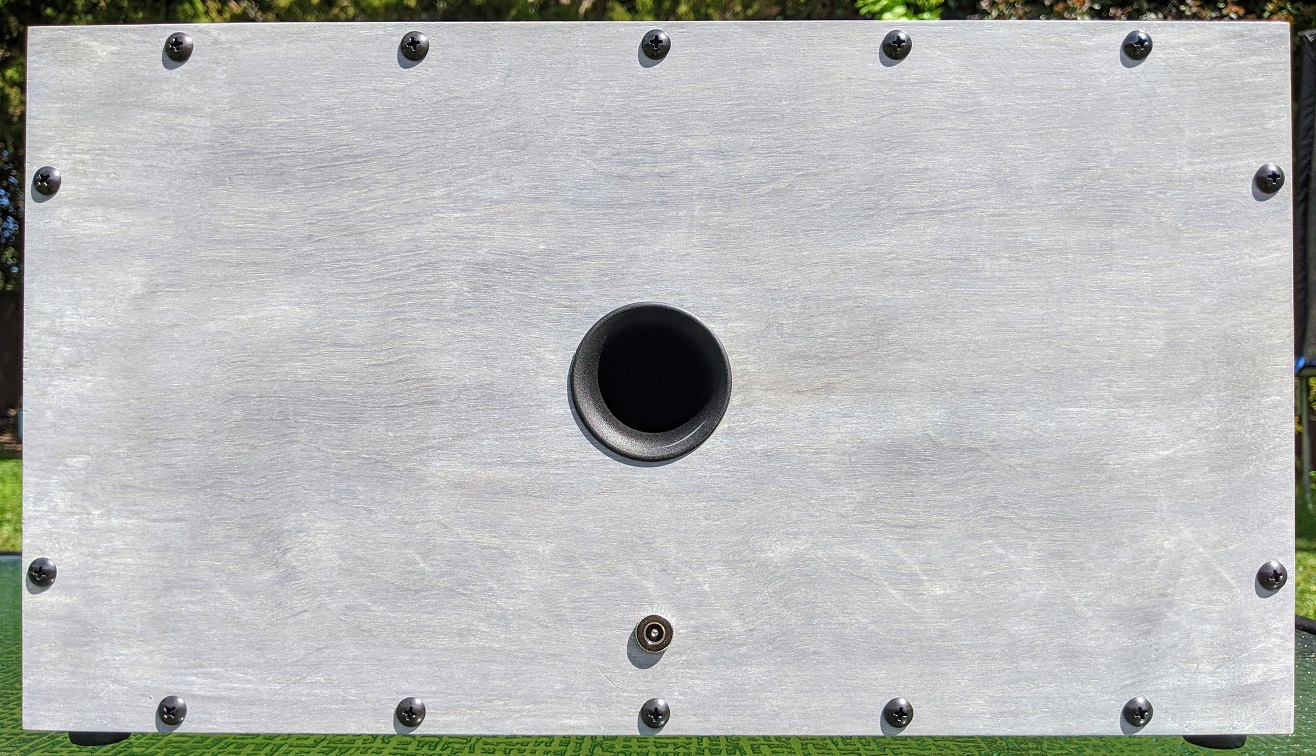
Enclosure Design:
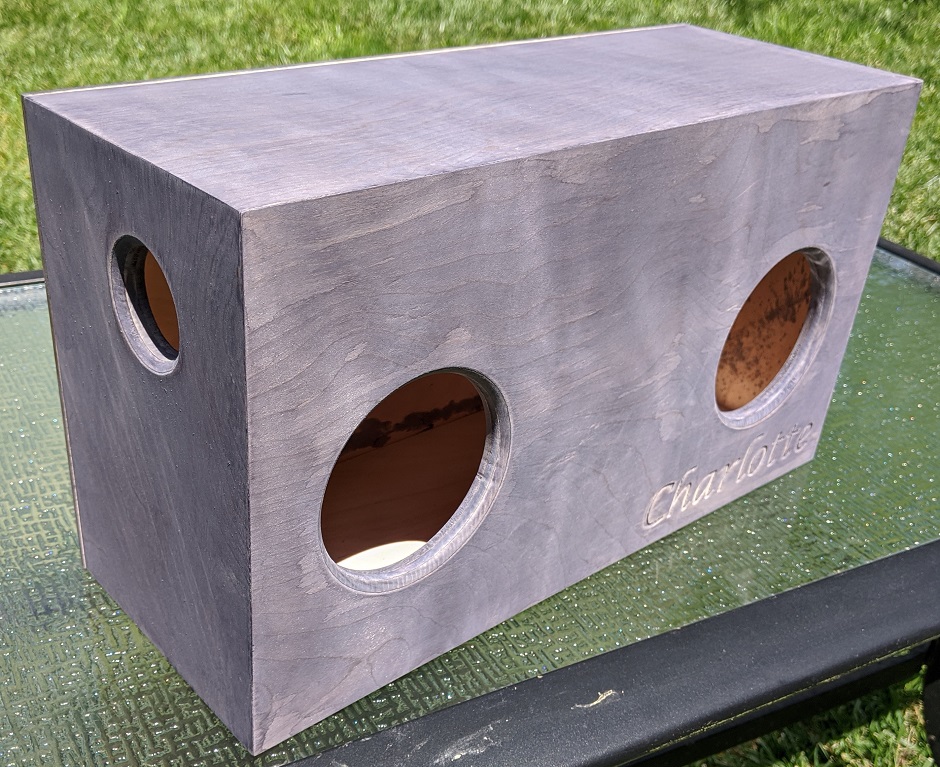
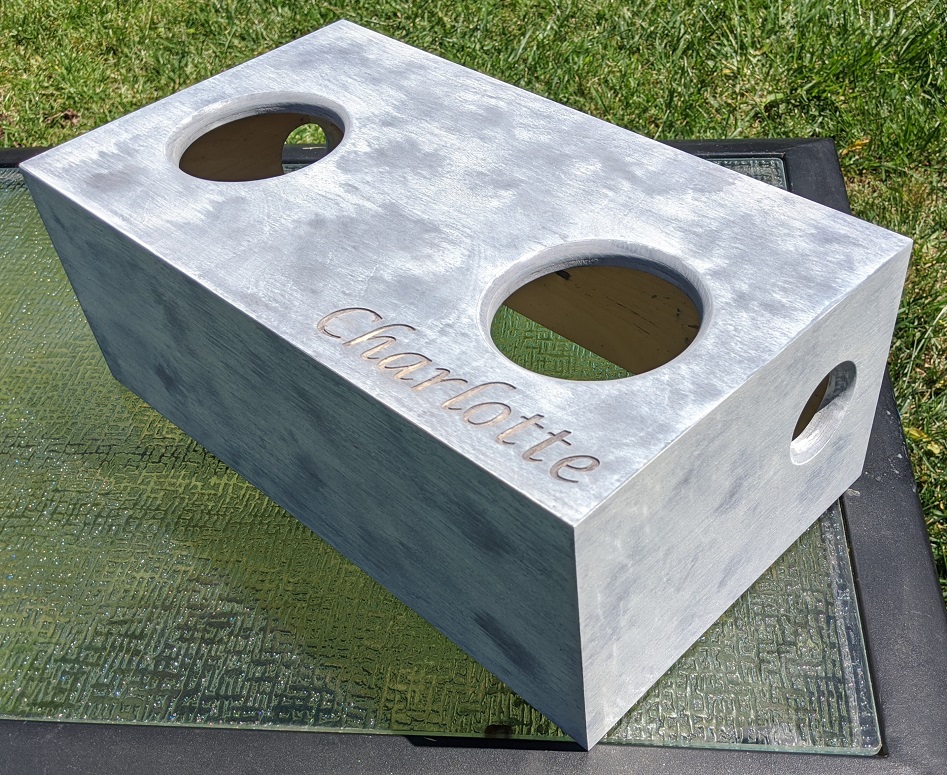
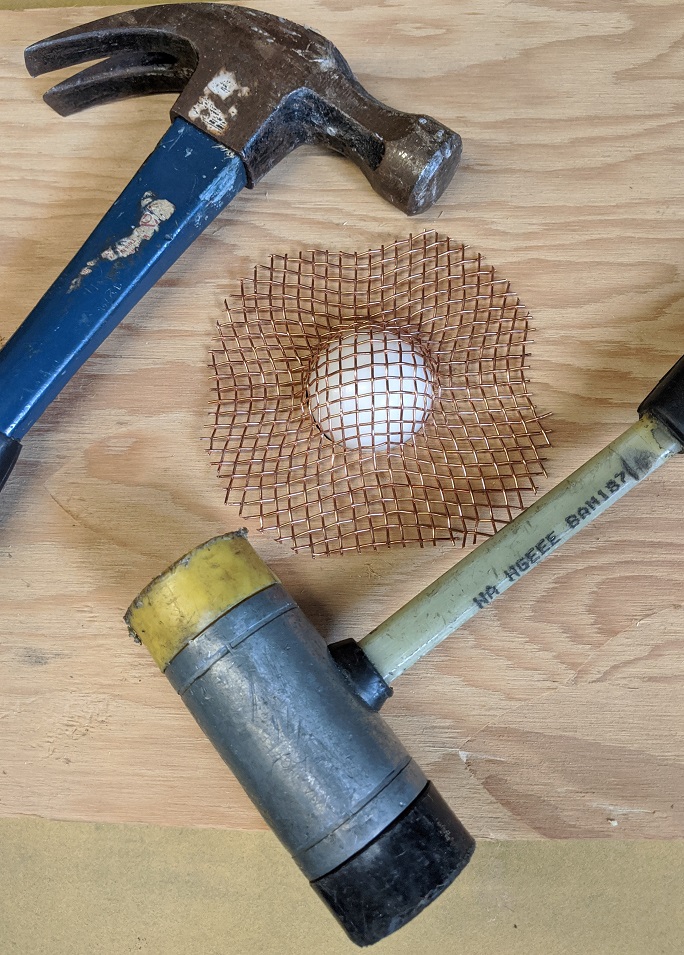
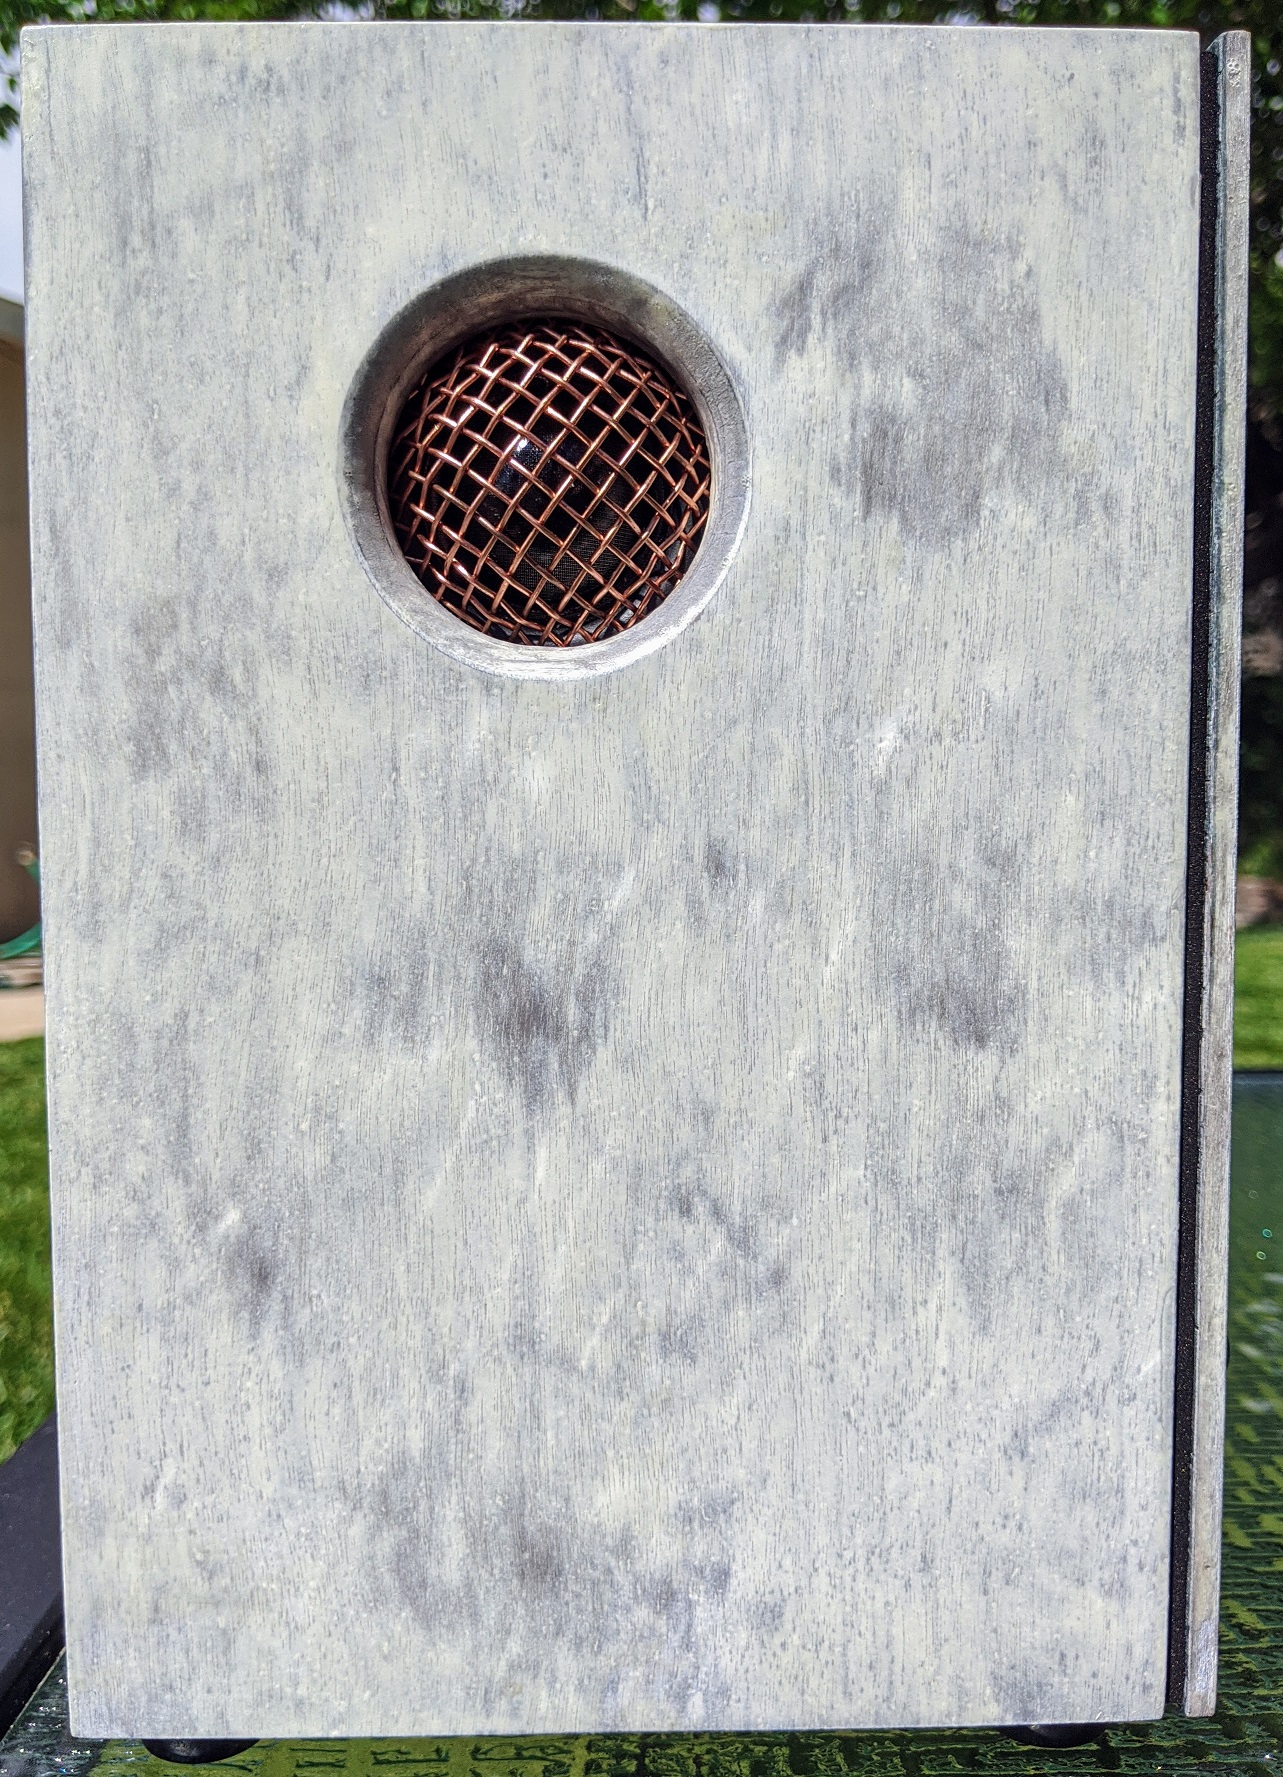
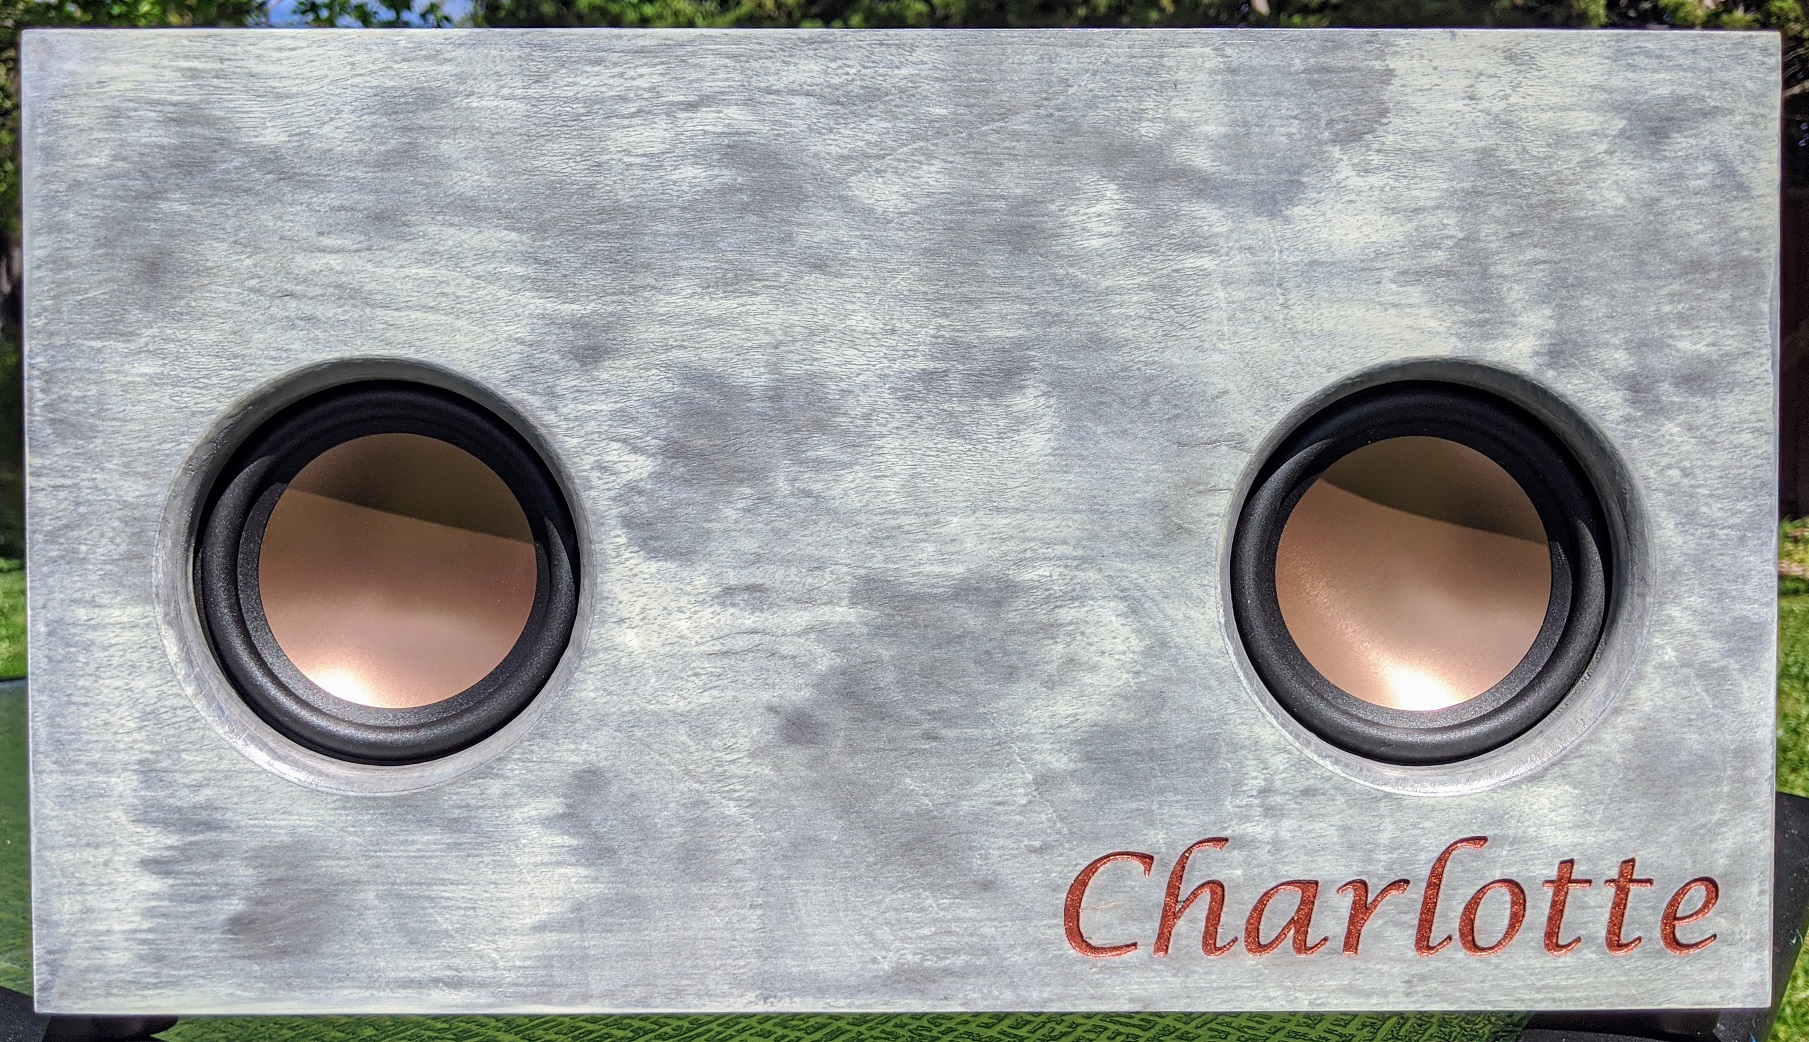
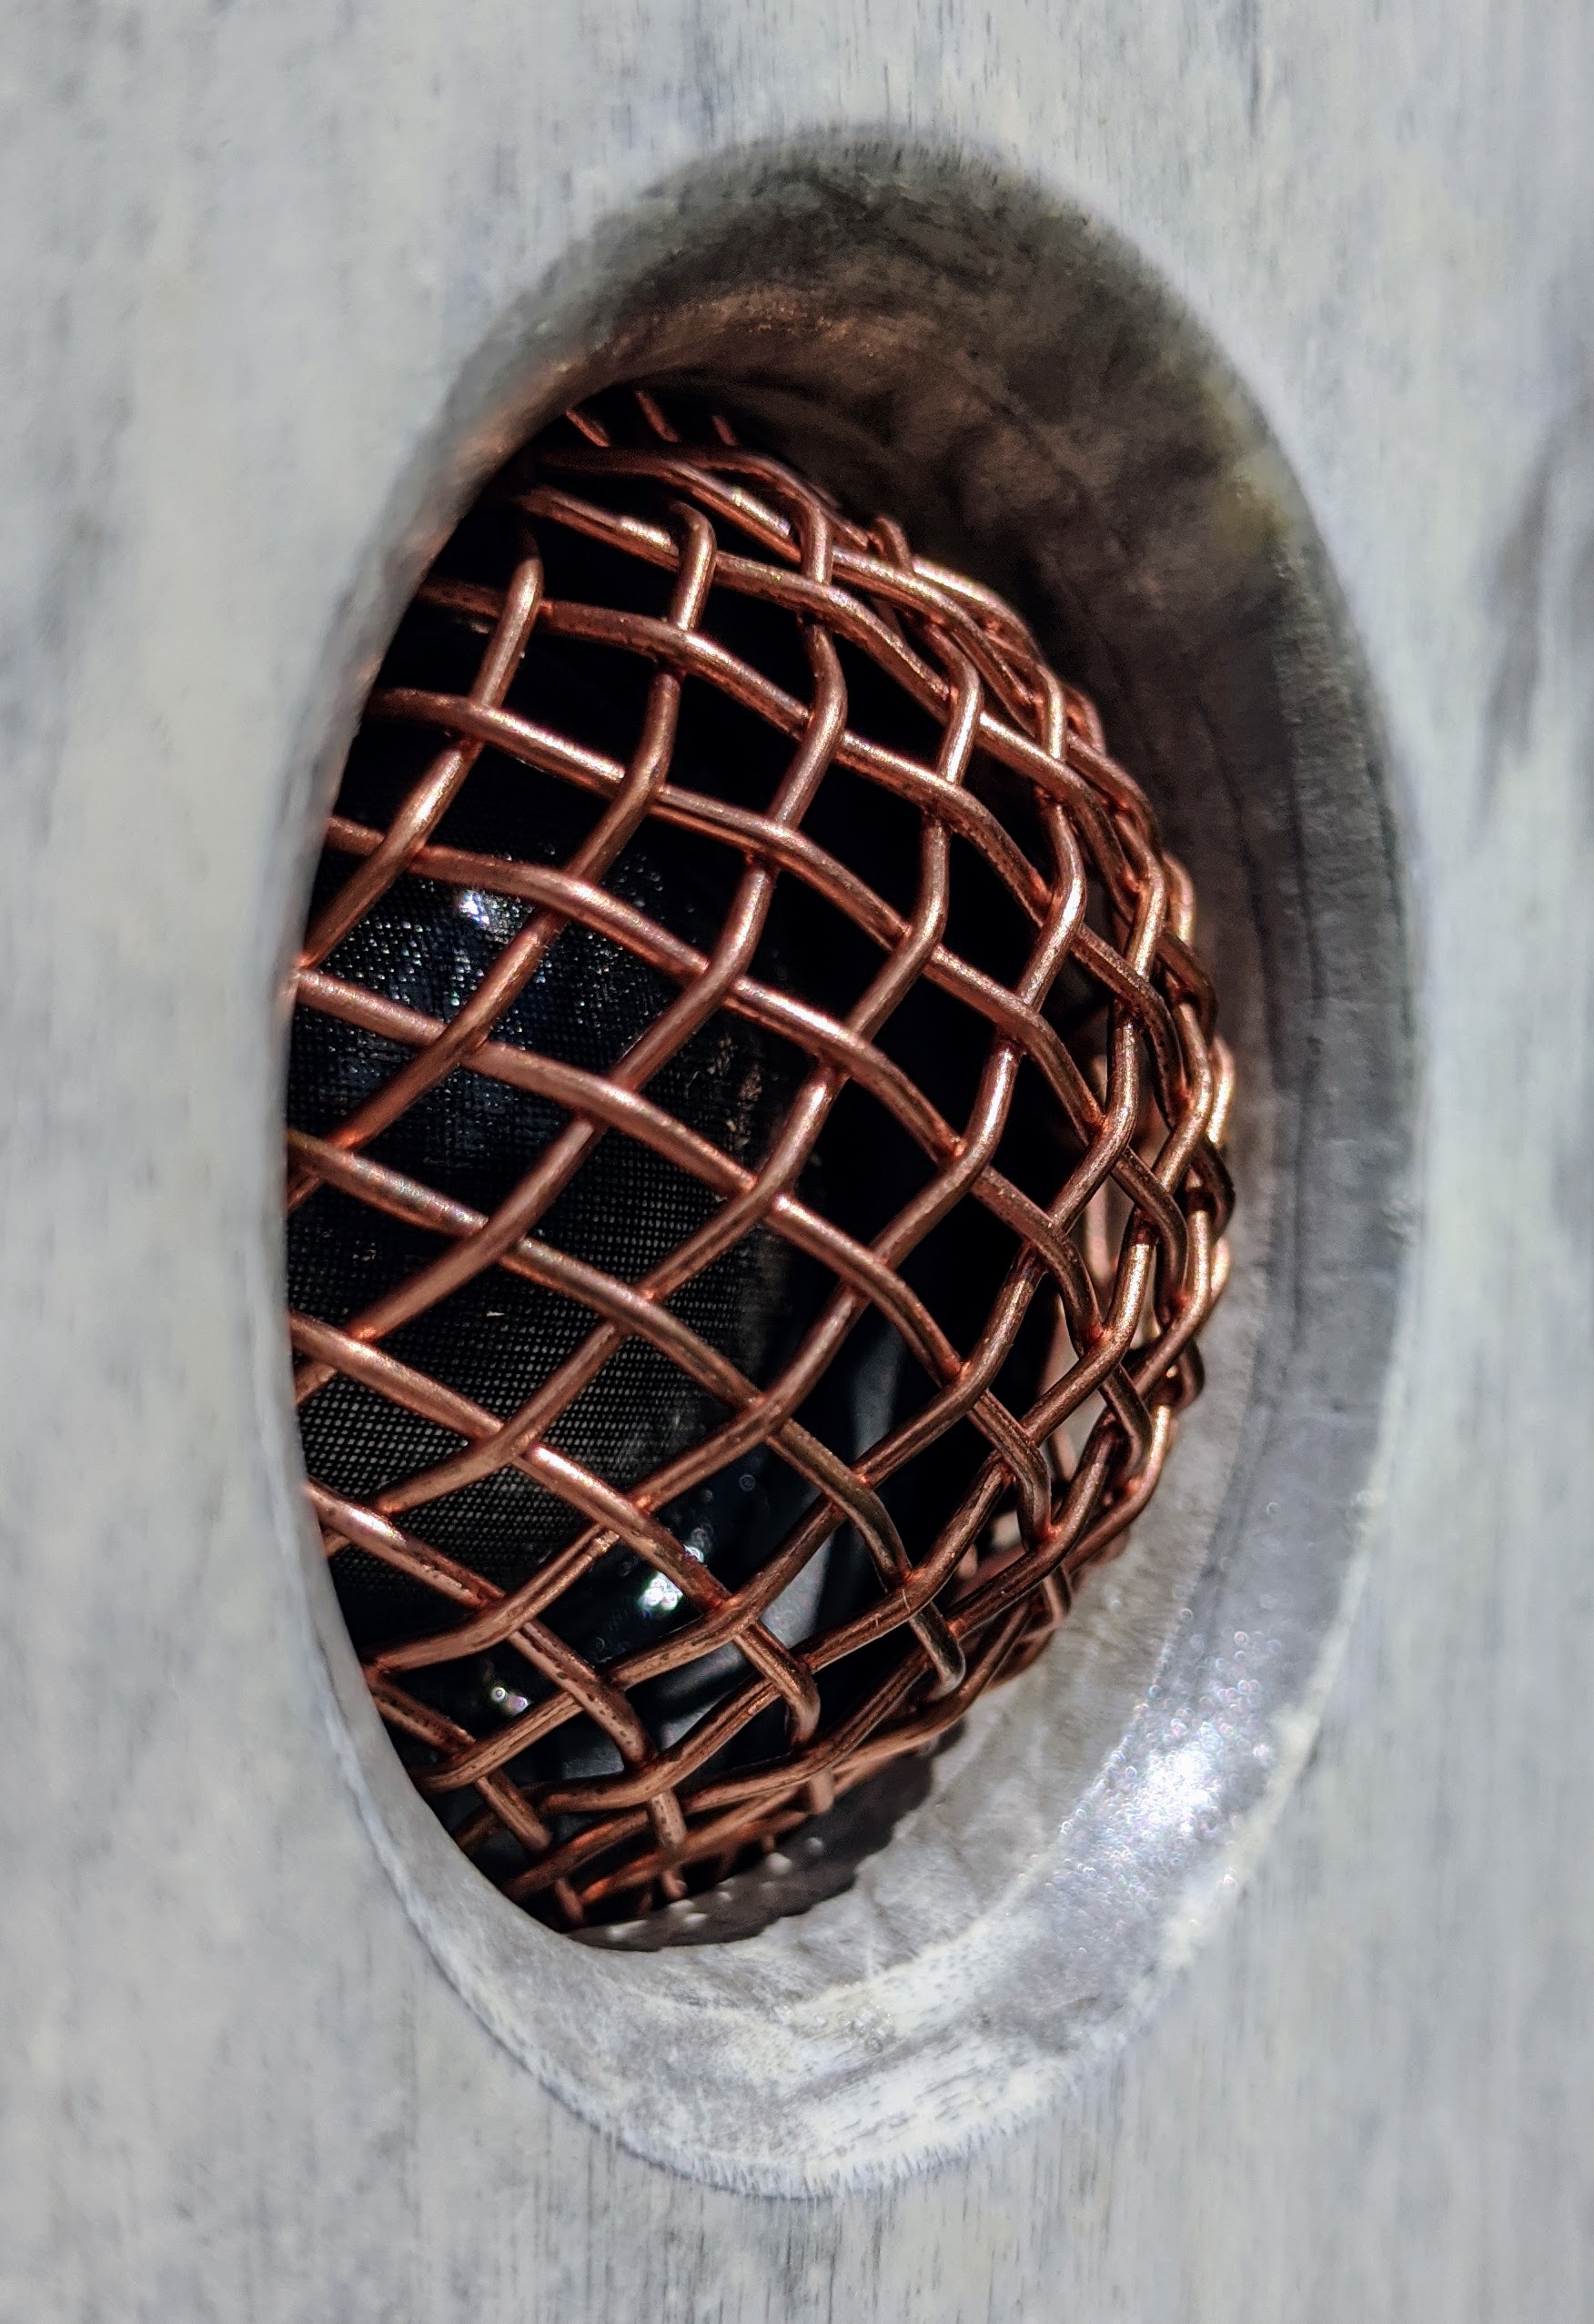
Originally I planned on using a smaller box but the HiVi B4N likes a larger box for bass reflex so I opted for a 7 liter ported design tuned to 57Hz. The enclosure is a drop in lid box from TilnicBox. When I saw they offered custom engraving I decided to have my daughter’s name engraved on the front. I later regretted this impulse decision as it meant it was no longer possible to put the woofers and tweeters on the front face. Looks like we are doing side firing tweeters again. As long as we’re talking tweeters, I was very concerned about my daughter shoving her 1 year old fingers into the tweeters and ruining them so I bought some heavy gauge copper mesh and hammered it over a Delrin sphere to make a dome shaped finger guard. I used copper to match the other color highlights of the speaker and the engraving, but also because it’s non magnetic and I didn’t want the powerful tweeter magnet to suck the screen into the dome like a black hole and ruin the thing it’s supposed to protect.
Enclosure Assembly:
First I used my router to cut out the holes for the speaker drivers and the bass port. Next after sanding the entire box I applied 2 coats of weathered wood accelerator which turned the wood grey. After that I applied 2 coats of whitewash, and on the second coat instead of wiping all the stain off, I only wiped off in certain random areas and then very lightly dragged a wide paint brush over the surface to conceal the marks I made. Next I injected copper paint onto the engraved letters. After that was allowed to dry for a couple days, I brushed on 3 coats of Old Masters clear finish which left thick chunky brush strokes all over the surface and also yellowed the white wash slightly to make it look older. Finally after a light sanding I applied thee coats of Minwax spray lacquer. Normally I shy away from Mixwax products but their spray lacquer is super easy to use and always gives me great results. Once that was all done it was just a matter of bolting everything down with generous amounts of gasket tape.
Crossover Design:
Initially the entire crossover was to reside in the DSP, however out of paranoia I decided to connect the woofers to the tweeter channels to verify the high pass was working OK and whenever I unplugged the amp from power the woofer cones visibly jumped forward so I decided I’ve better have a capacitor on the tweeters to protect them from that.
Tips & Tricks:
1. Use the highest voltage power adapter the amp can support to increase dynamic headroom on class D amps. Use the volume as a gain control by setting the source to it’s highest level playing music, then adjust the amp volume knob to be a little louder than you’d ever want it to be, and the only use the source’s volume control to adjust playback after that. This will give you the lowest idle hiss from the amp while supporting the range you want and not run the risk of clipping.
2. Use a good quality circle jig that has absolutely zero movement, wiggle, or flexibility. No matter how much it costs.
3. Spray the final coats in thin light layers and sand with light pressure every 1 or 2 coats.
4. If box building is too intimidating or time consuming, there are many great craftspersons out there who’d be happy to cut and glue some wood for you.
5. When removing material, it’s best to go slow and careful. Be patient because a mistake with 600 grit sand paper is a lot easier to fix than a mistake with a chisel.
6. When tuning a DSP, get a microphone and first tune the speaker as flat as you reasonably can and use a filter to block frequencies below the woofer’s capability. After that, tweak the final settings by ear to what you like the most.
7. DSPs allow the use of crazy exotic crossover topologies that would be very impractical to build in real life. Plus you don’t have to get everything right on the first attempt.
8. If your woofer comes with a gasket, you can use it as a hole alignment guide to pre drill the screw holes.
Conclusion:
In general I’m very happy with how it turned out. The box looks fantastic. I’m really blown away by the controls and flexibility of the DSP. Analog Devices releases the software tools for free and Dyaton provides several good templates to get you started.
About the Designer:
I grew up in the Mojave Desert in a small community of scientists, craftsmen, and engineers. We were the kind of people who didn’t accept “it’s impossible” or “you can’t do that”. If I want something that doesn’t exist, I’ll just make one. Now I’m a thermal engineer in the computer industry and I currently hold nine US patents.
Project Parts List:
Other Items Used:
Varathane Weathered Wood Accelerator
Varathane White Wash
Old Masters Semi Gloss Water based finish
Minwax Semi Gloss spray lacquer
24V 5.5A Meanwell power supply
Copper Wire Cloth, 6 x 6 Mesh Size, 0.132″ Opening Size
Jasper Tools Model 200 router circle cutting guide.
+ There are no comments
Add yours