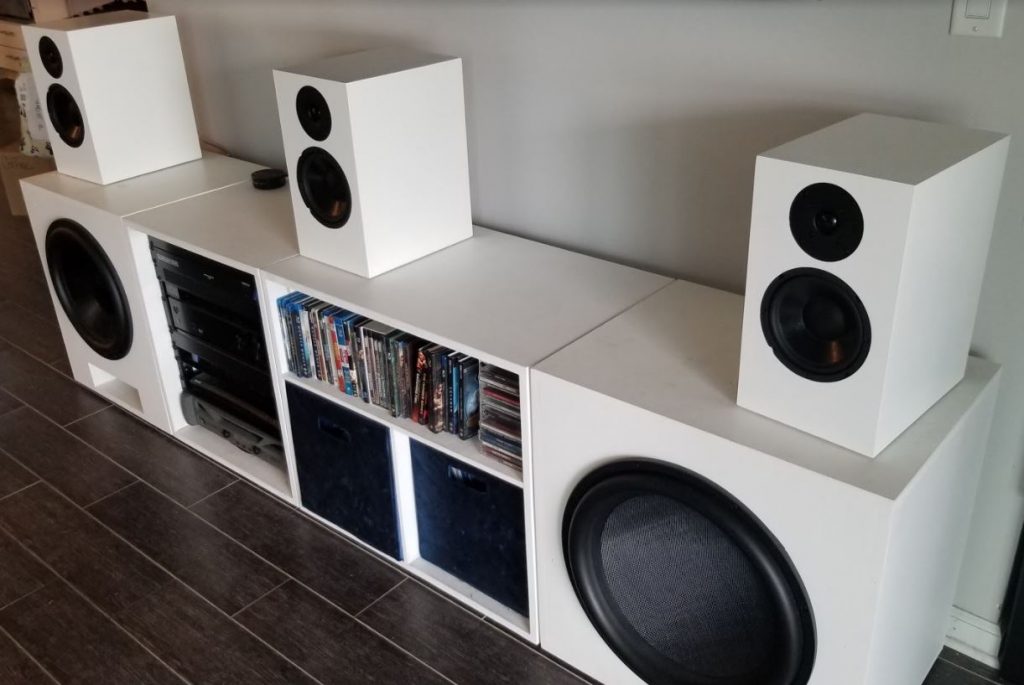
Classix II LCR Left Center Right Bookshelf/Stand-mount set for Home Theater


Designer:
RYAN M
Project Category:
Bookshelf Speakers
Project Level:
Intermediate
Project Time:
8-20 Hours
Project Cost:
$100 – $500
Project Description:
My previous LCR project taught me that my ambition to be a speaker designer greatly exceeded my knowledge and skill to do so. I didn’t understand the impact of well-designed crossover so I poorly matched two good drivers with a standard crossover. The results were speakers that masked their spikey response when watching movies but were harsh to listen to music with.
We listen to music a lot with our home theater system so I wanted aesthetically pleasing speakers that were first, enjoyable for a variety of music styles, and secondly, good for movies.
After reading reviews and Paul Carmody’s design page, I selected the Classix II kit. Everything pointed to these being the best fit and I could buy 3 individual kits to complete the set.
Design Goals:
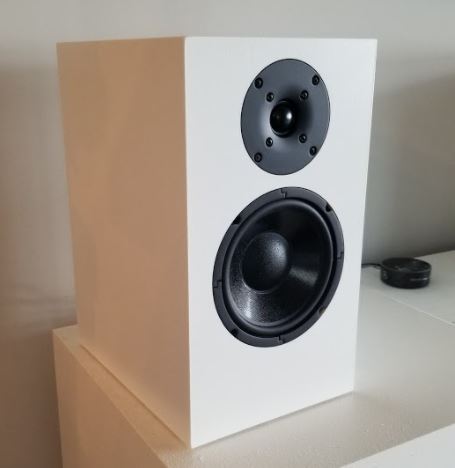
My entertainment center and wall mounted TV allow for a taller center channel speaker. I subscribe to the idea that the best matched front 3 speakers are… well 3 identical speakers. I went with white furniture enamel paint to match the other components. I wanted speakers that sounded good for long listen sessions and even with the sub off.
Driver Selection:
Paul Carmody Kit
Enclosure Design:
Paul Carmody Kit
Enclosure Assembly:
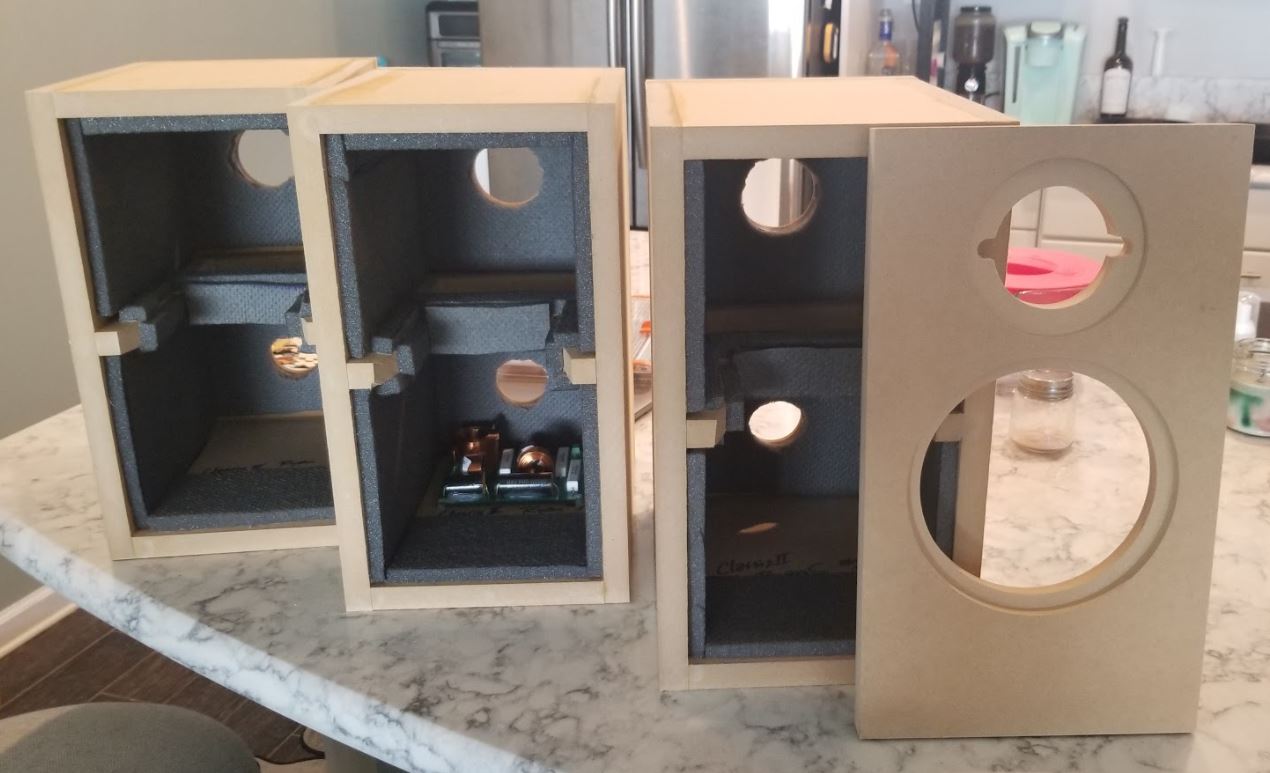
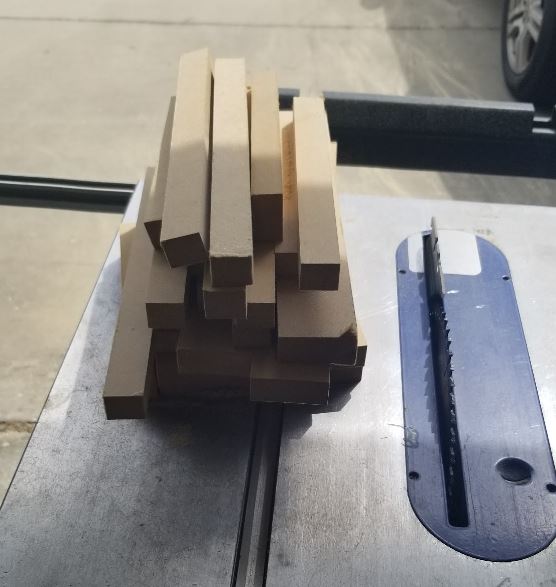
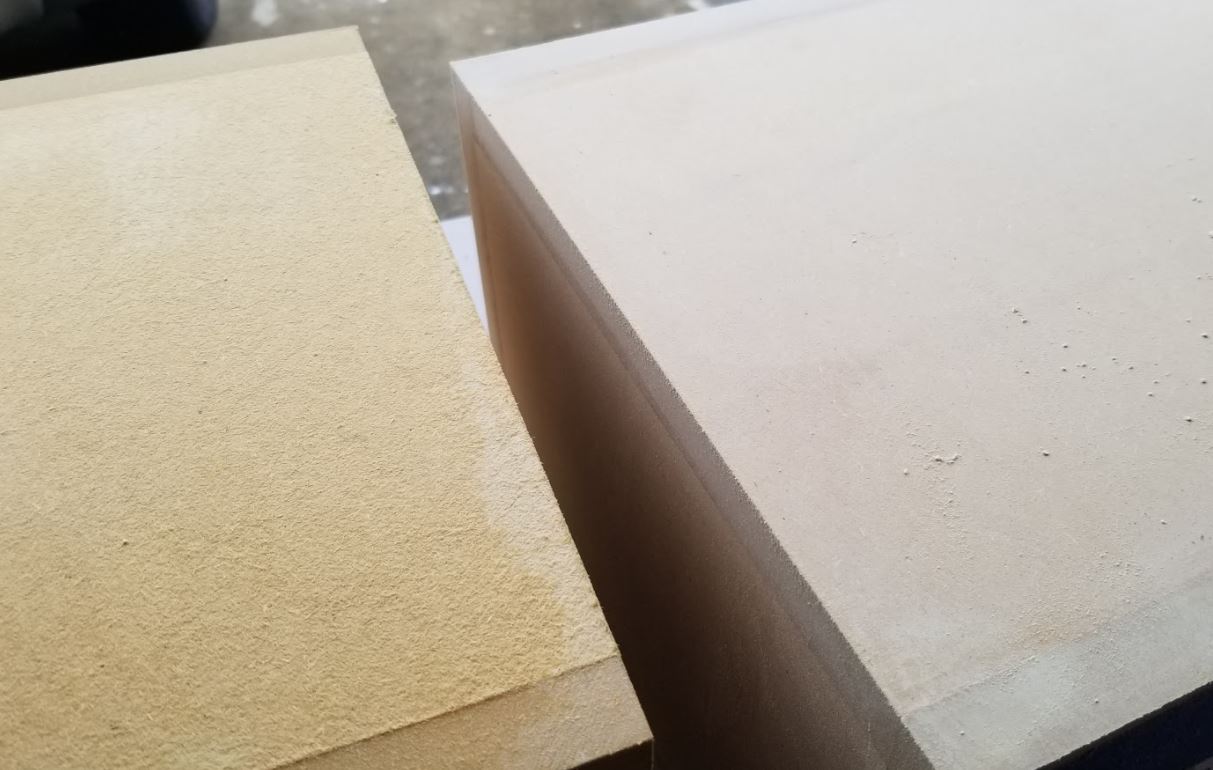
To complete the remainder of each cabinet I was able to get all 5 pieces out of 16” x 48” ¾” MDF boards purchased at Home Depot for only $5 each. These were clearly not the quality of the baffle MDF but worked and I didn’t have to deal with a large sheet of MDF. This is a great option for many of us that don’t have large table saws. As long as you can rip 15” you can build these cabinets.
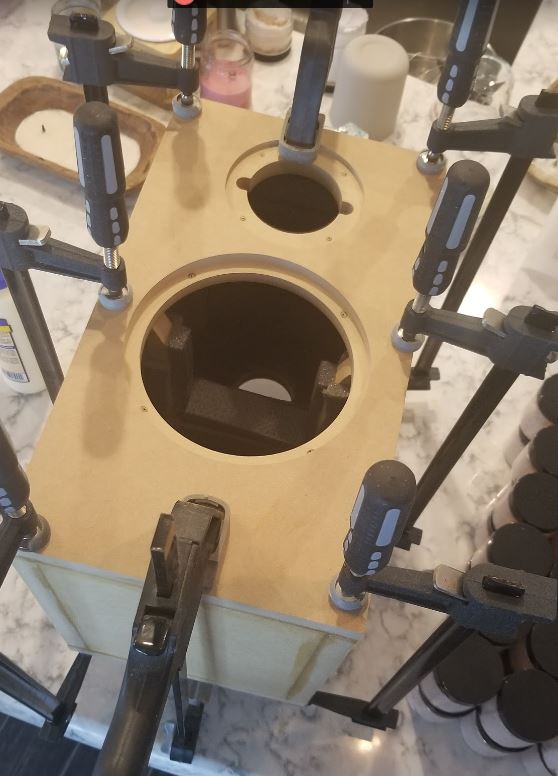
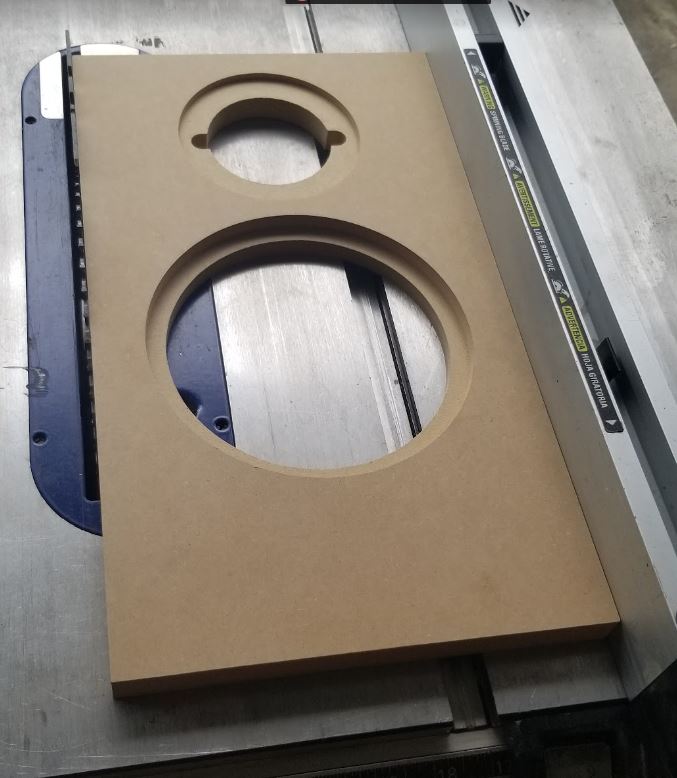
I used my drill press to cut the holes for the port and terminal plate. I used a 2 ½” hole saw for the port (it calls for 2 5/8”?) and a 2” hole saw for the terminal plate.
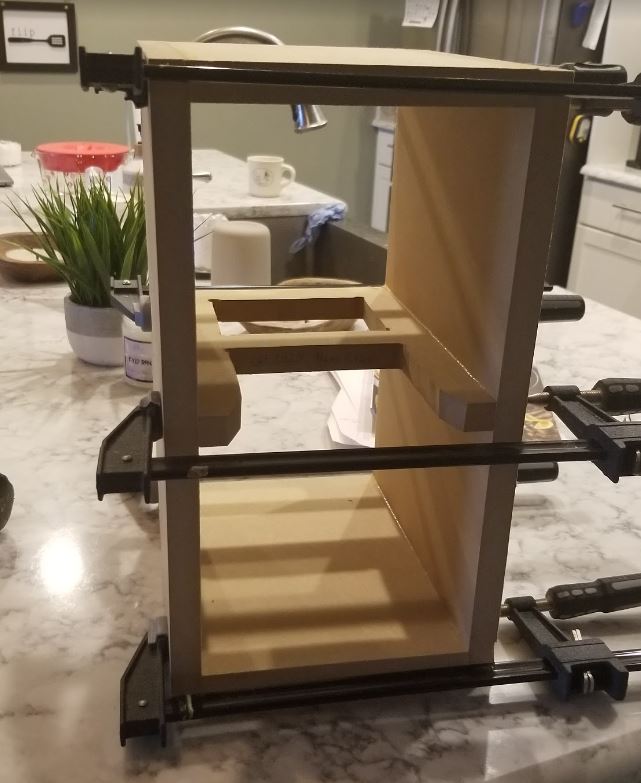
I glued together the top, bottom, sides and brace first, lying flat on the speaker back. I then glued the backs on.
Before gluing on the baffle, I installed all the dampening material, leaving a space on the bottom for the crossover. I also drilled the driver pilot holes using my small drill press.
After gluing the baffle on each speaker I masked off the holes so that no dust got into the speakers during sanding.
I used a belt sander with ~80 grit to chew off those uneven edges. I don’t think I would do this again, as the lower quality MDF got fuzzy quick with this sander. I then filled a couple small dings wood filler and painted on a ~1:4 ratio of wood glue and water to help prime. Once dried, then used palm sander with 180 grit.
Applied one coat of Valspar white furniture enamel. Let dry for a day, then spot hand sanded with 220 grit for the rough spots. Applied a second coat of paint.
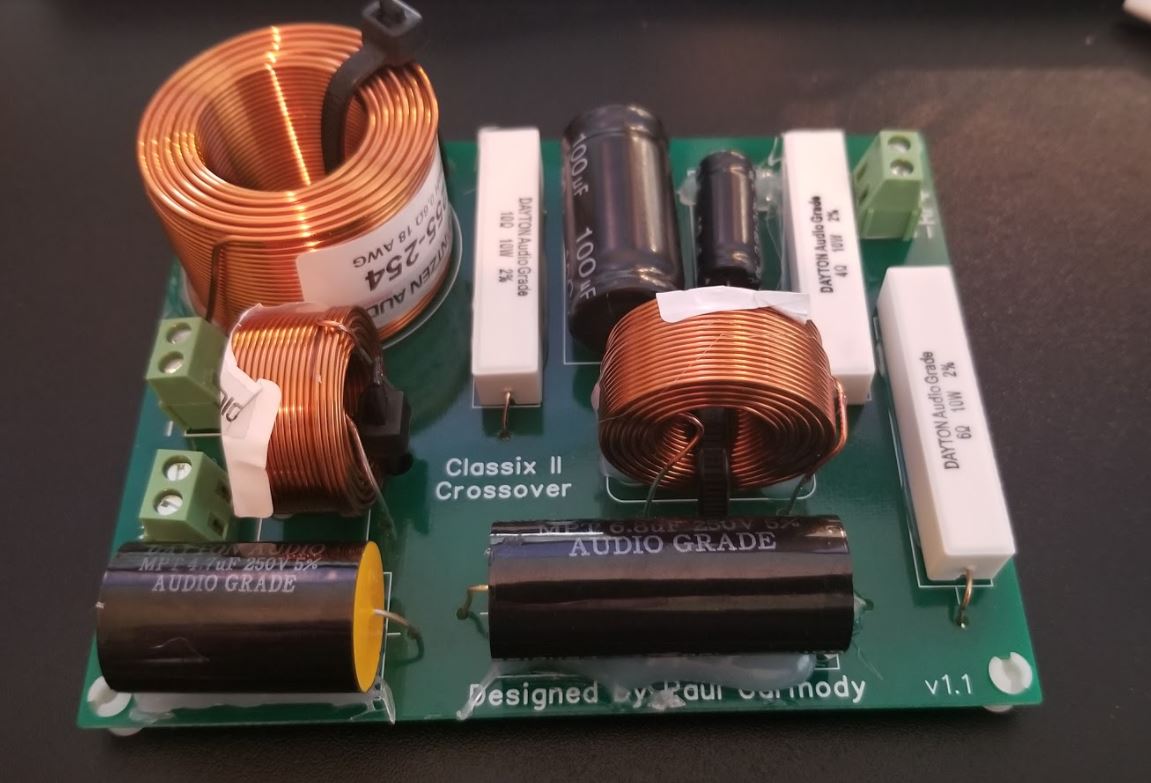
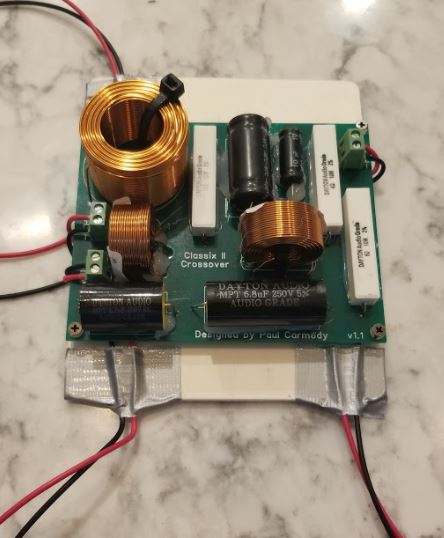
Mounted crossover boards (standoff screws) to pieces of lauan. Attached all speaker terminals and wire to the crossover.
Used industrial double-sided tape to stick to the bottom of the cabinet.
Connected and mounted drivers.
Crossover Design:
I highly suggest purchasing the PC crossover boards for these. You can find these on eBay for ~$18 a pair. This takes the guess work out of the crossover and leaves you with crossover so pretty you want to display it on the outside of the cabinet ?. Next time I use these style boards I think I will solder the wire leads directly to the board and not use the terminals. They were not that secure.
Tips & Tricks:
Plan your cuts well. If at all possible eliminate having to change your rip fence for the same dimension.
Utilize the supplied baffle to set you table saw cuts for 8.5” and 15” cuts.
Install dampening material before gluing on the baffle.
Tape off opening before sanding.
Buy the PCB crossovers
Conclusion:
I am very satisfied with the sound and the look. Only been playing for a couple hours (still breaking in) but sound great.
About the Designer:
I love music, movies and building things out of wood so speaker building is a perfect hobby. I got into audio as a young teenager. I purchased some Infinity SM62 from Crutchfield around age 13 and have been enjoying listening to music ever since.
Project Parts List:
|
Part # |
Description |
Qty |
|
095-282 |
0.205″ (16-14) Female Disconnect Crimp Terminal Blue 50 Pcs. |
1 |
|
095-286 |
0.110″ (16-14) Female Disconnect Crimp Terminal Blue 50 Pcs. |
1 |
|
081-312 |
M5 x 30mm Cap Head Wood Screws Black 100 Pcs. |
1 |
|
300-7110 |
Classix II MT Bookshelf Speaker Kit with Baffle Only |
1 |
|
260-276 |
Parts Express Round Speaker Wire Terminal Cup 2-15/16″ Gold Spring-Loaded |
1 |
+ There are no comments
Add yours