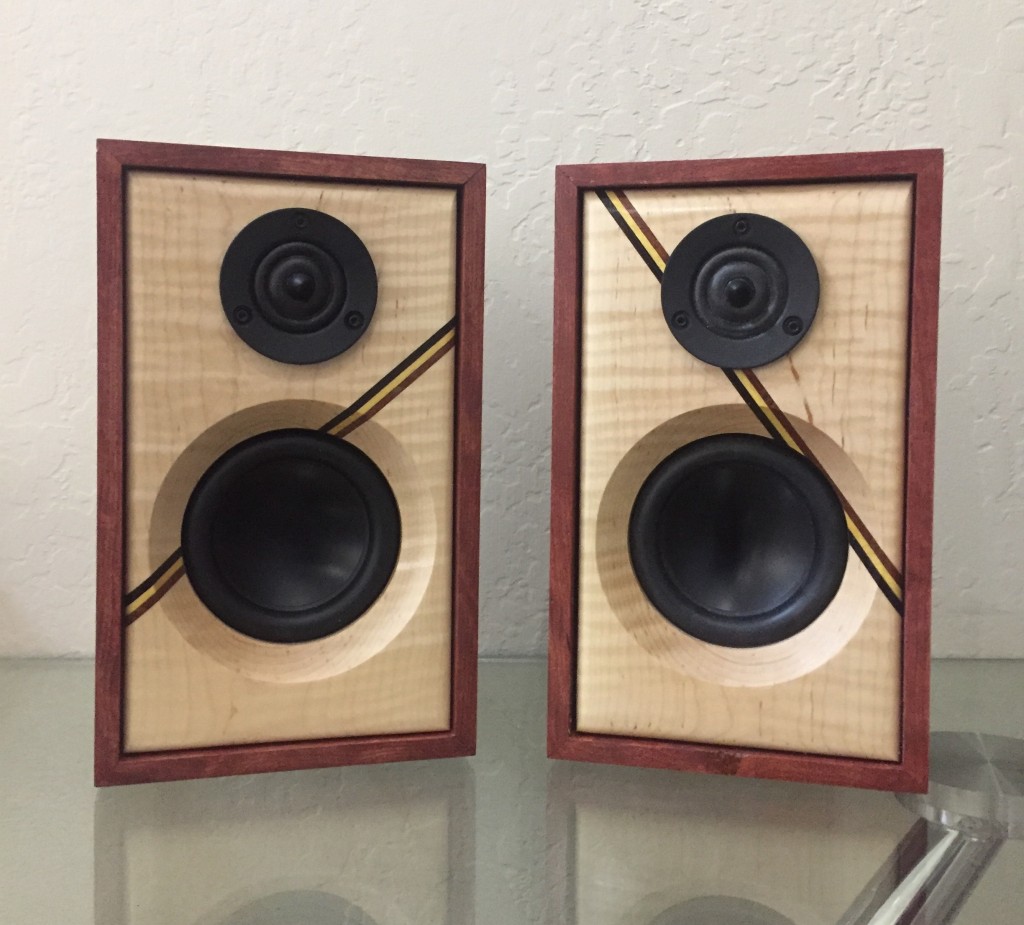
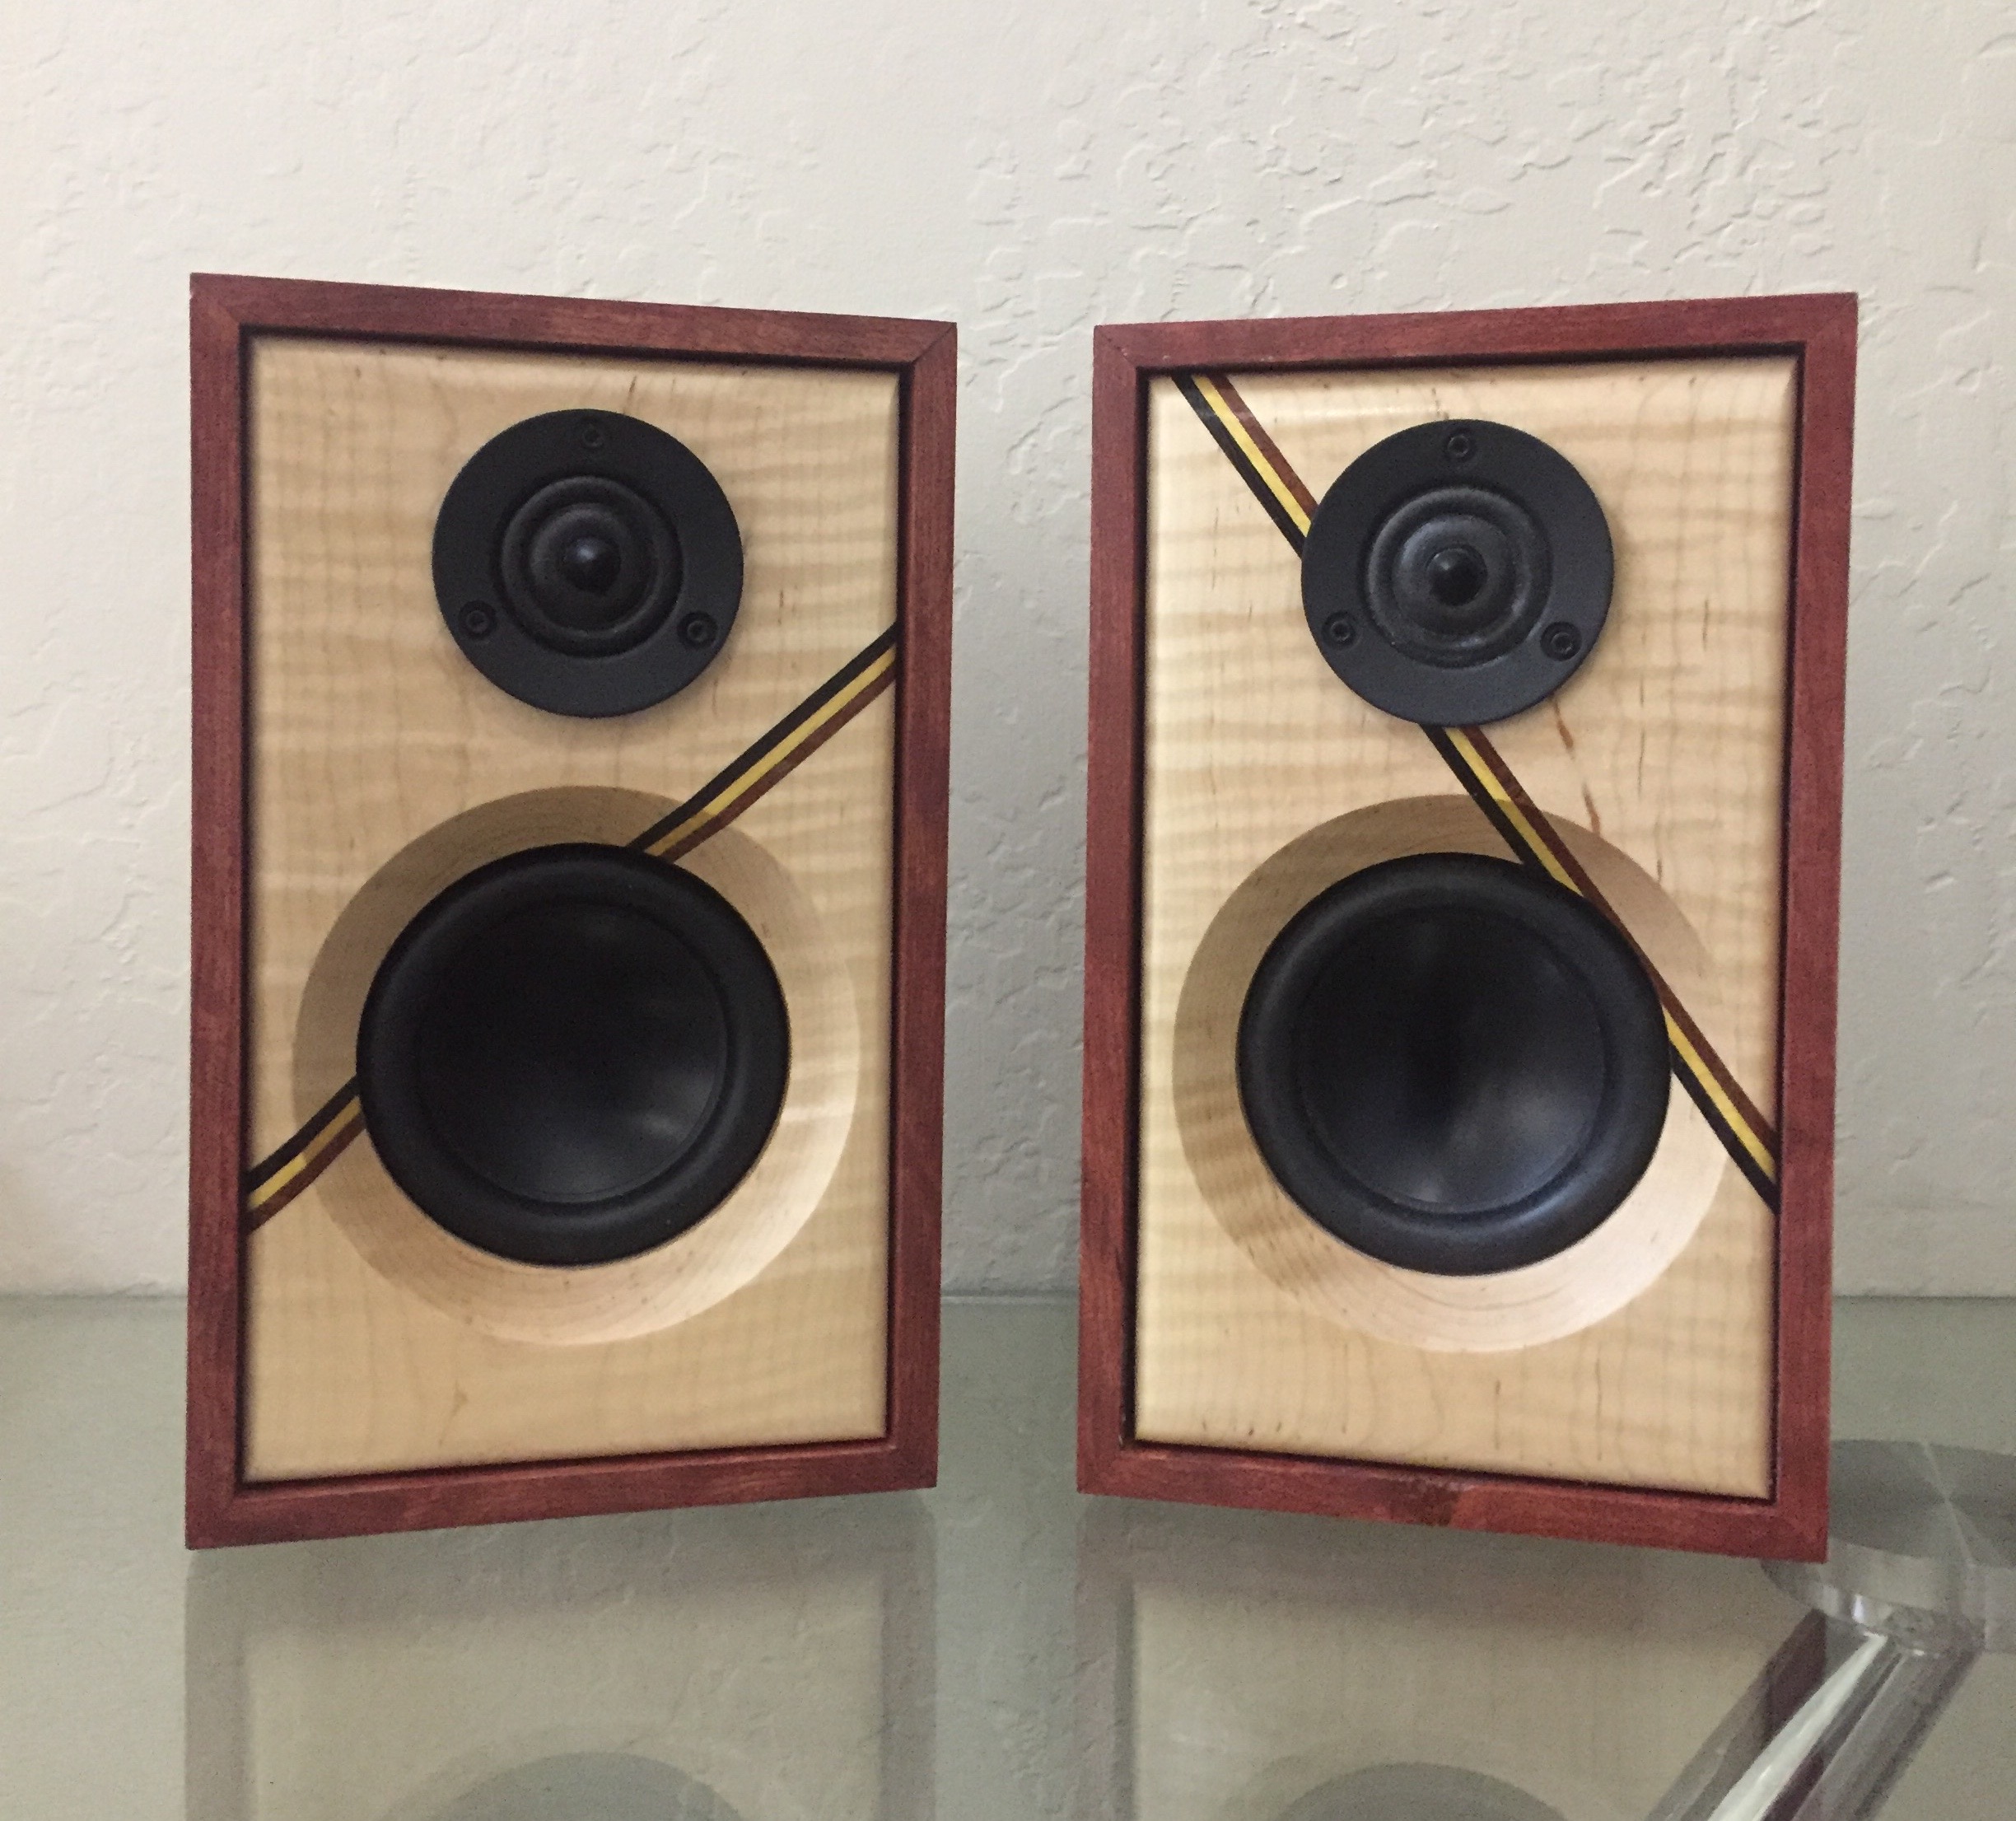
Curly Maple Mini Bookshelf Speakers

Designer:
David Hall
Project Category:
Bookshelf Speakers
Project Level:
Intermediate
Project Time:
8-20 Hours
Project Cost:
$100 – $500
Project Description:
Curly Maple Mini Bookshelf Speakers with Accent
Design Goals:
• Accurate and clean sound reproduction
• Extended low end despite the small size of the enclosure
• Small enough to fit on a narrow shelf
• Visually appealing (if not eye-catching)
While sitting in my office one day, in between jobs, it occurred to me how ironic is was that I had no permanent speakers in my office for listening for my listening pleaseure. I spend the majority of my time in my small office designing speakers when not in the shop fabricating, finishing or assembling speakers. Space is at a premium. There is barely enough room for my desk, electronic bench, file cabinet and a wall covered with books, and not much else. I checked my inventory to see what I had on hand to work with and a few days later music filled my office.
Write up:
curlymaplespeakerproduct_writeup
Driver Selection:
The focus of the design was to design and build small two-way speakers having a supportive low frequency response despite its modest size. I am a fan of the ND series of drivers has they typically have larger than typical excursion as well as good power handling capability for their size. For this build I chose the ND105-8 (290-214). It provides more than adequate frequency response in the lower end given is size and mass. Their look is clean and simple allowing the cabinet’s design to pop.
For the high end, I used the Peerless XT25SC90-04 (264-1014), featuring a 22 mm voice coil mounted in a neodymium motor. This is a good choice for many 2-way speaker applications. It has relatively good off-axis response producing a bright sounding high end without being harsh. Despite its modest price and looks, it handles a lot of power (100 watts rms). The only real detractor are the solder tabs. They are molded into the plastic body requiring you to be fast at soldering because the tabs and the surrounding plastic will melt if disconnect crimps are not used.
Enclosure Design:
The enclosure design is relatively simple as it required no complex baffling. The four sides were fabricated with solid cherry wood. The front baffle is made of curly maple with an added accent stripe made of some exotic strips of wood I had laying around the shop. The back panel is stained 3/16” plywood to accommodate the 1” port and terminal cup.
The inner chamber dimensions are 12 1/4” x 7 5/8” x 4 3/4” for a volume of ~0.235 ft3. The port dimensions are 1” diameter x 4”. This configuration yielded an Fb of 44.8 Hz, further boosting the low end.
Enclosure Assembly:
The front baffles were fabricated from a solid piece of curly maple. These were then bisected at random angles on the table saw. Thin strips of Movingui, African Padauk, and Wenge were laminated together to serve as an accent stripe on the front baffle. The accent piece was then glued between the two maple pieces of each front baffle. Since I compromised the strength of the baffle with the accent stripe, it was glued to a 1/4” piece of maple for structural support. This additional layer was thankfully hidden by the large rubber surround of the speaker. Holes for the drivers was cut using a router and a circle cutting jig and the edges of the woofer holes where chamfered with using a chamfer bit.
The corner joints are miter joints for visual appeal. To accommodate for wood expansion, the front baffle is about 1/8” undersize with the edges rounded over to visually minimize the gap between the front baffle and the edges of the enclosure. The front baffle is secured to the enclosure using silicon caulking rather than wood glue, again to accommodate the movement from wood expansion in the humid months.
Because the miter joint is an end-grain joint, ½” gussets running the length of the joint were glued to the interior of each joint providing strength/rigidity to an otherwise questionable joint. An alternative could have been to use remaining accent stripping for splines in the joint itself (but that would have required building another jig for the table saw and more time).
The finish is a sprayed gloss polyurethane, 3 layers.
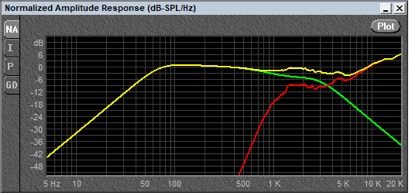
Crossover Design:
The tweeter uses a 3rd-order Butterworth filter design while the woofer used a 2nd order Butterworth. Both drivers require some equalization in order to achieve a somewhat flat response. The tweeter’s higher frequencies tend to increase in volume as seen in the frequency response graph below. Thankfully, those frequencies tend to become in audible as they increase. Still an L-Pad was required to tame tweeter down and flatten the frequency response a bit. The ND105-8 had a sharp peak in the frequency spectrum at about 3200 Hz requiring equalization to flatten it out as well.
Tips & Tricks:
Take your time when making miter joints. Everything must be perfect and orthogonal in order to avoid any external gaps in the joint. To accomplish this, I used an Incra Miter1000se miter gauge with telescoping fence to maintain perfect registration during cutting operations.
Butt joints are quicker, easier and stronger, but look cheap so that was not an option. Another joinery option still appealing and very strong are finger joints, but again that would require more time and material to make a fixture for cutting the fingers of the joint.
To cut clean and centered holes for the drivers in any speaker I highly recommend using a Jasper 200J Model 200 circle cutting jig for plunge router. Warning, the 200J is a very delicate piece of thin plastic mounted to a relatively heavy router. Because of all the registration holes in the fixture it WILL snap in two if you’re not careful setting it down. When setting the router down after cutting a hole, make sure the router end of the two, not the far of the plastic fixture, contacts the surface first or the jig will snap and you will spend another $40 to replace it.
Conclusion:
The build was fairly straightforward. As with all my designs, they must accurately reproduce sound and look as good as they sound. This one hit on all goals/objectives. The sound reproduction is excellent with a full but not overpowering low end, small footprint, and they are eye-catching.
About the Designer:
David Hall is a custom speaker and home theater designer, and the owner of SounDesign. The favorite part of his job is speaker design and fabrication. His enclosure designs start with sketch pad and pencil. A lot of paper finds its way to the trash can before a design goes to CAD (computer-aided design). He pursues unique cabinet design and drivers that offer his clients both the look and quality of sound they desire. David’s philosophy is audio should be as pleasing to the eye as it is to the ear. It has to look as good as it sounds and it must sound awesome! David focuses on choosing drivers with optimal qualities to achieve the finest sound in order to diminish or avoid the electrical and acoustic challenges of crossover design. He has, in one way or another, been involve with electronics since he graduated from DeVry (decades ago). Music is a major source of enjoyment in his home. In his younger years David was a bass trombonis t in jazz ensembles and sung and played in several venues throughout the southwest. He is a desert rat living in Phoenix, Arizona with his hot wife, Debbie. Occasionally, in the cool months, he enjoys a good cigar and bourbon (when his wife is not around).
Project Parts List:
very attractive speakers. Well done.
Nice job mate! For next build please flush mount the tweeter on the baffle. It will sound better although you might need to adjust the crossover afterwords. Good luck!
Agreed. It would look better. Thank you for your input. D
How do you feel these would perform with just the front mounted in a wall as an infinite baffle?
The Q of the ND105 would likely not lend itself to an infinite baffle configuration because OB speakers typically need a Qts above 0.7. Since the ND105 has a Qts of 0.65 (close) I tried it experimenting with different configurations. It sounded thin, cheap and tinny. That being said, they weren’t mounted in a wall but on a relatively large piece of 3/4″ baltic birch plywood. Mounting in a wall with a reflective surface might work OK, but you’d have to try it to see if it would yield what you hoped for. Thank you.