Longboard

Designer:
David Hall
Project Category:
Tower Speakers
Project Level:
Intermediate
Project Time:
20+ Hours
Project Cost:
$100 – $500
Project Description:
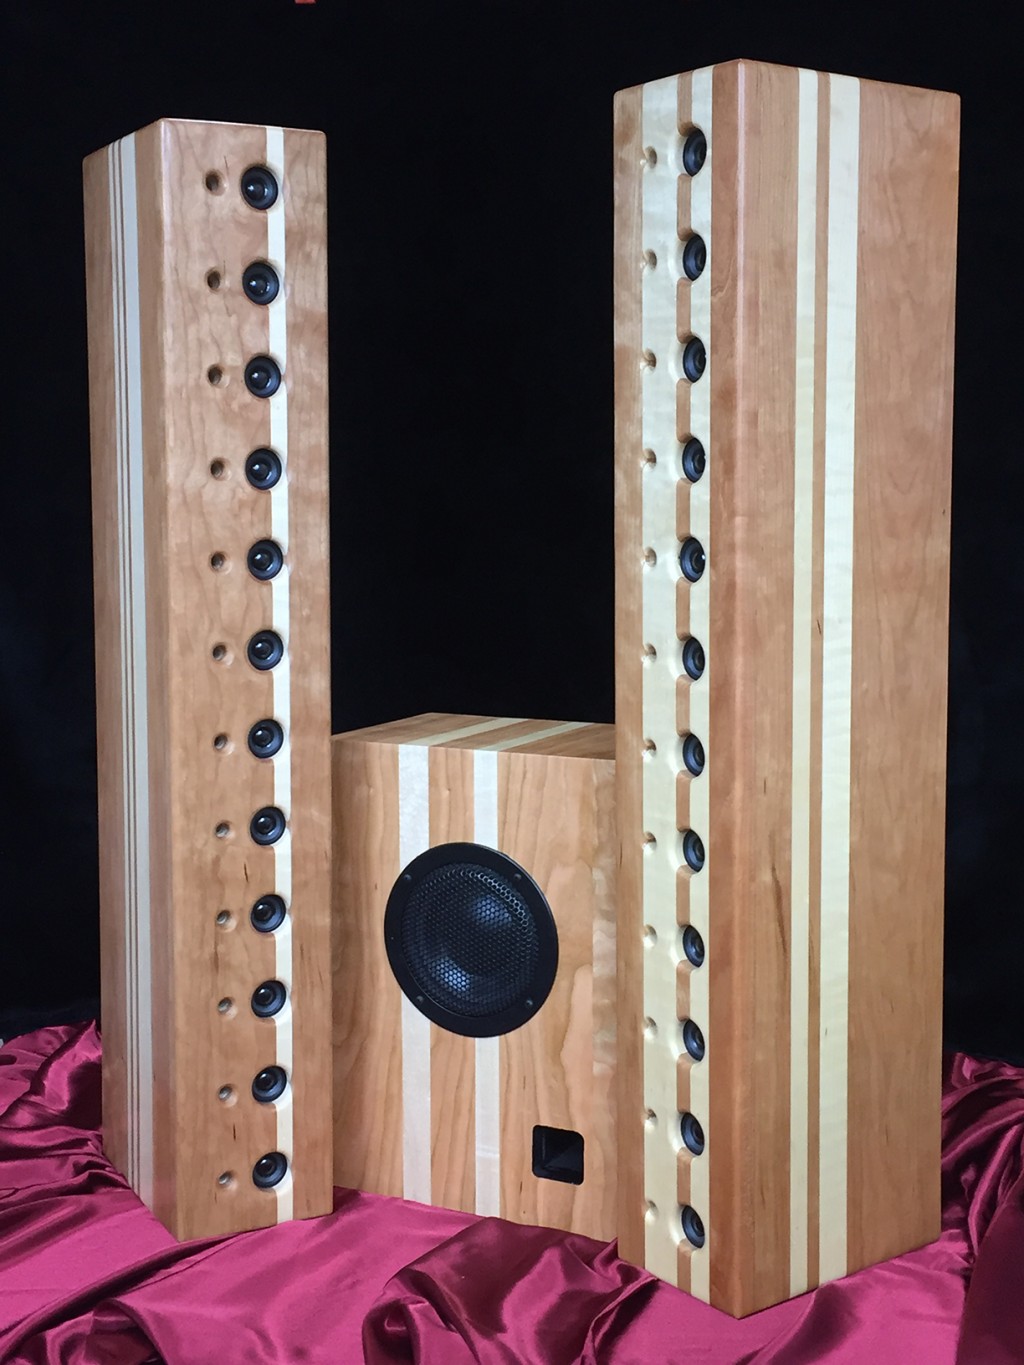
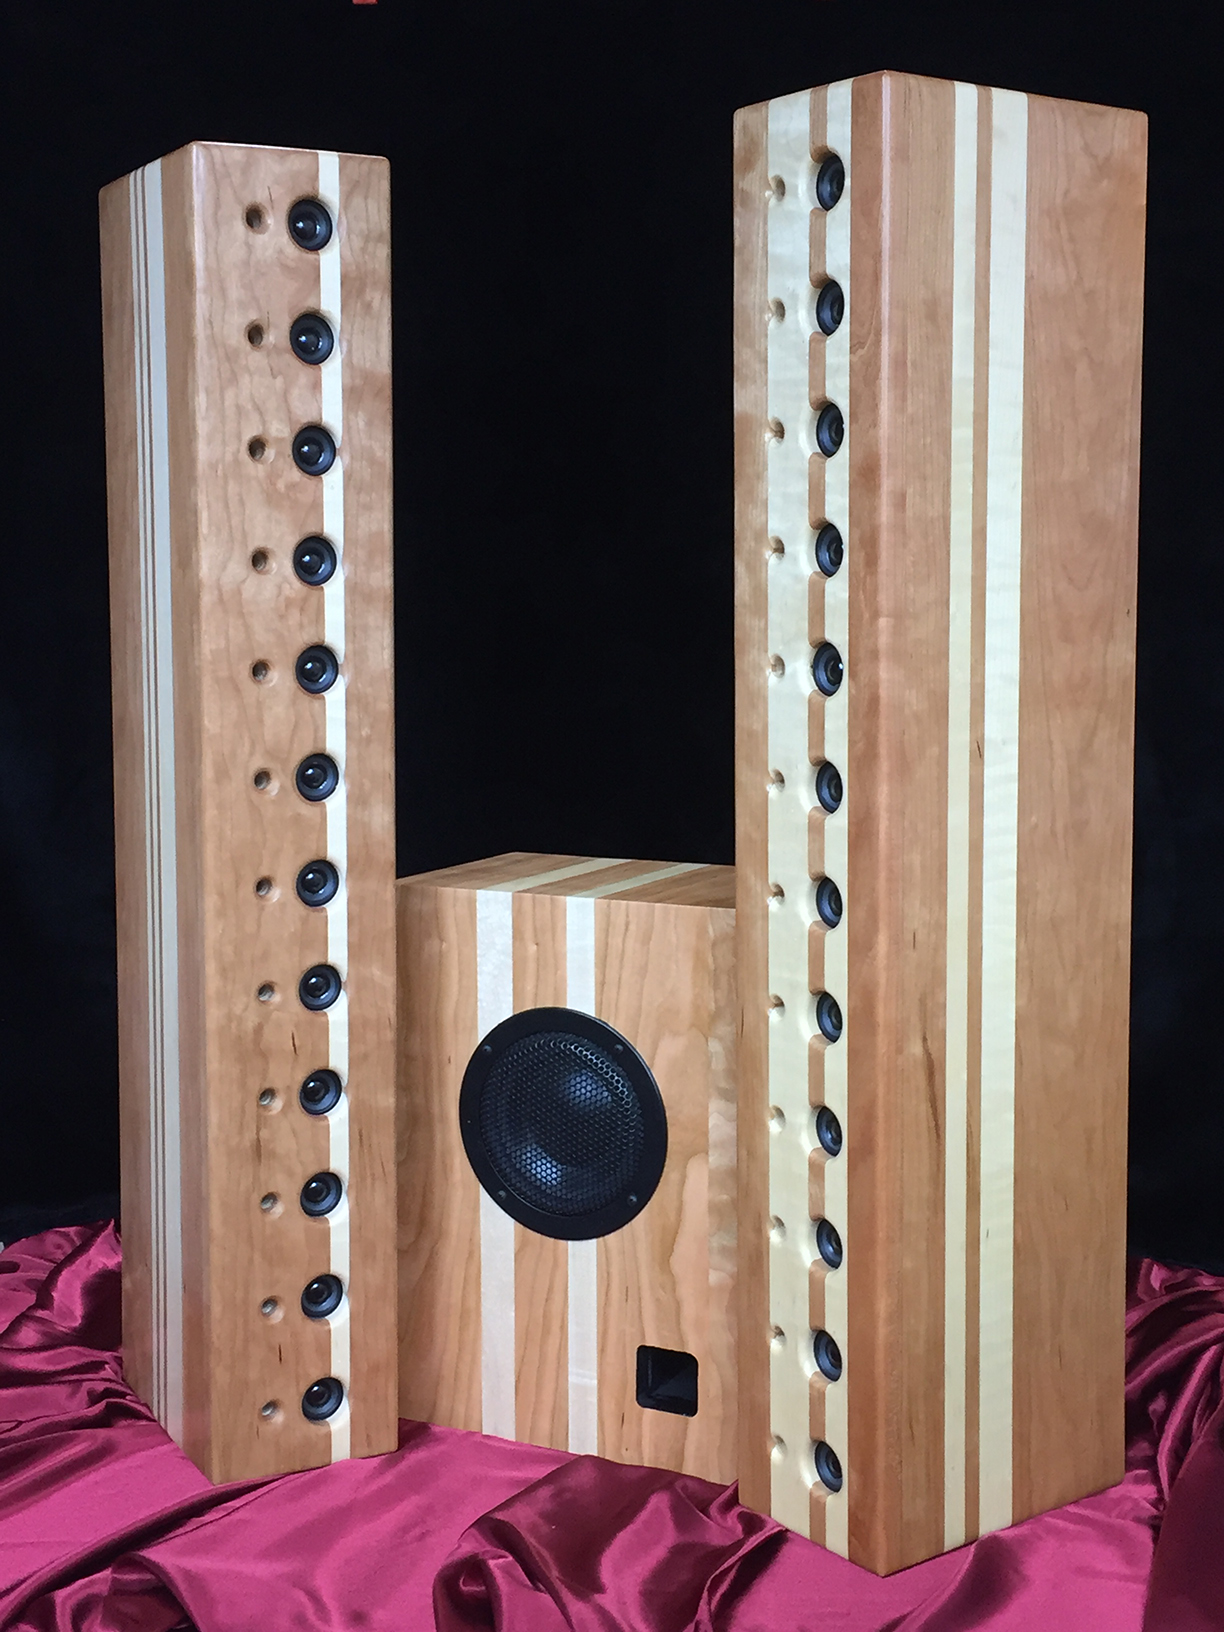
Longboard Line Array – There is something alluring about line arrays that caught my eye. And after doing some research, I decided to dip my toe in the water and build a “Reader’s Digest” small version of line arrays.
Design Goals:
• Cost effective
• Sound great
• Drivers individually amplified with low cost low noise PAM8403 3-watt stereo amplifiers
• Visually striking
The first goal was to cut my teeth on line arrays without breaking the bank. You’ve heard the expression, “Good, cheap and fast – pick two and call me back.” Well, this build was good and relatively inexpensive (if I don’t consider my time), but did take some time. Secondly, despite the frugal budget objective, I wanted the arrays to produce decent quality sound. That being said, considering the cost of my choice of driver, the CE40P-8, my expectations were not too high. Yet in the deep recesses of my mind, I was hopeful the arrays might have some potential for “presence” and sound as if performers were actually in the room (or at least the next room). Also, to maintain a low cost of the project I wanted to power each CE40P-8 driver with the inexpensive PAM8403 stereo amplifier boards as they are low cost (about $1) and they are advertised as “low noise without a lot of external noise filtration capacitors and inductors.” Yep , I admit it. I was lured into the “cheap” trap. Lastly, I wanted the aesthetics of the arrays to be visually appealing. A large black monolith with lines of drivers installed was out of the question. The arrays had to pop with colors found in natural wood. As far as the design style, I designed this prototype to loosely emulate the old school look of “longboards”, the surfers of the 60’s used to ride the waves.
Driver Selection:
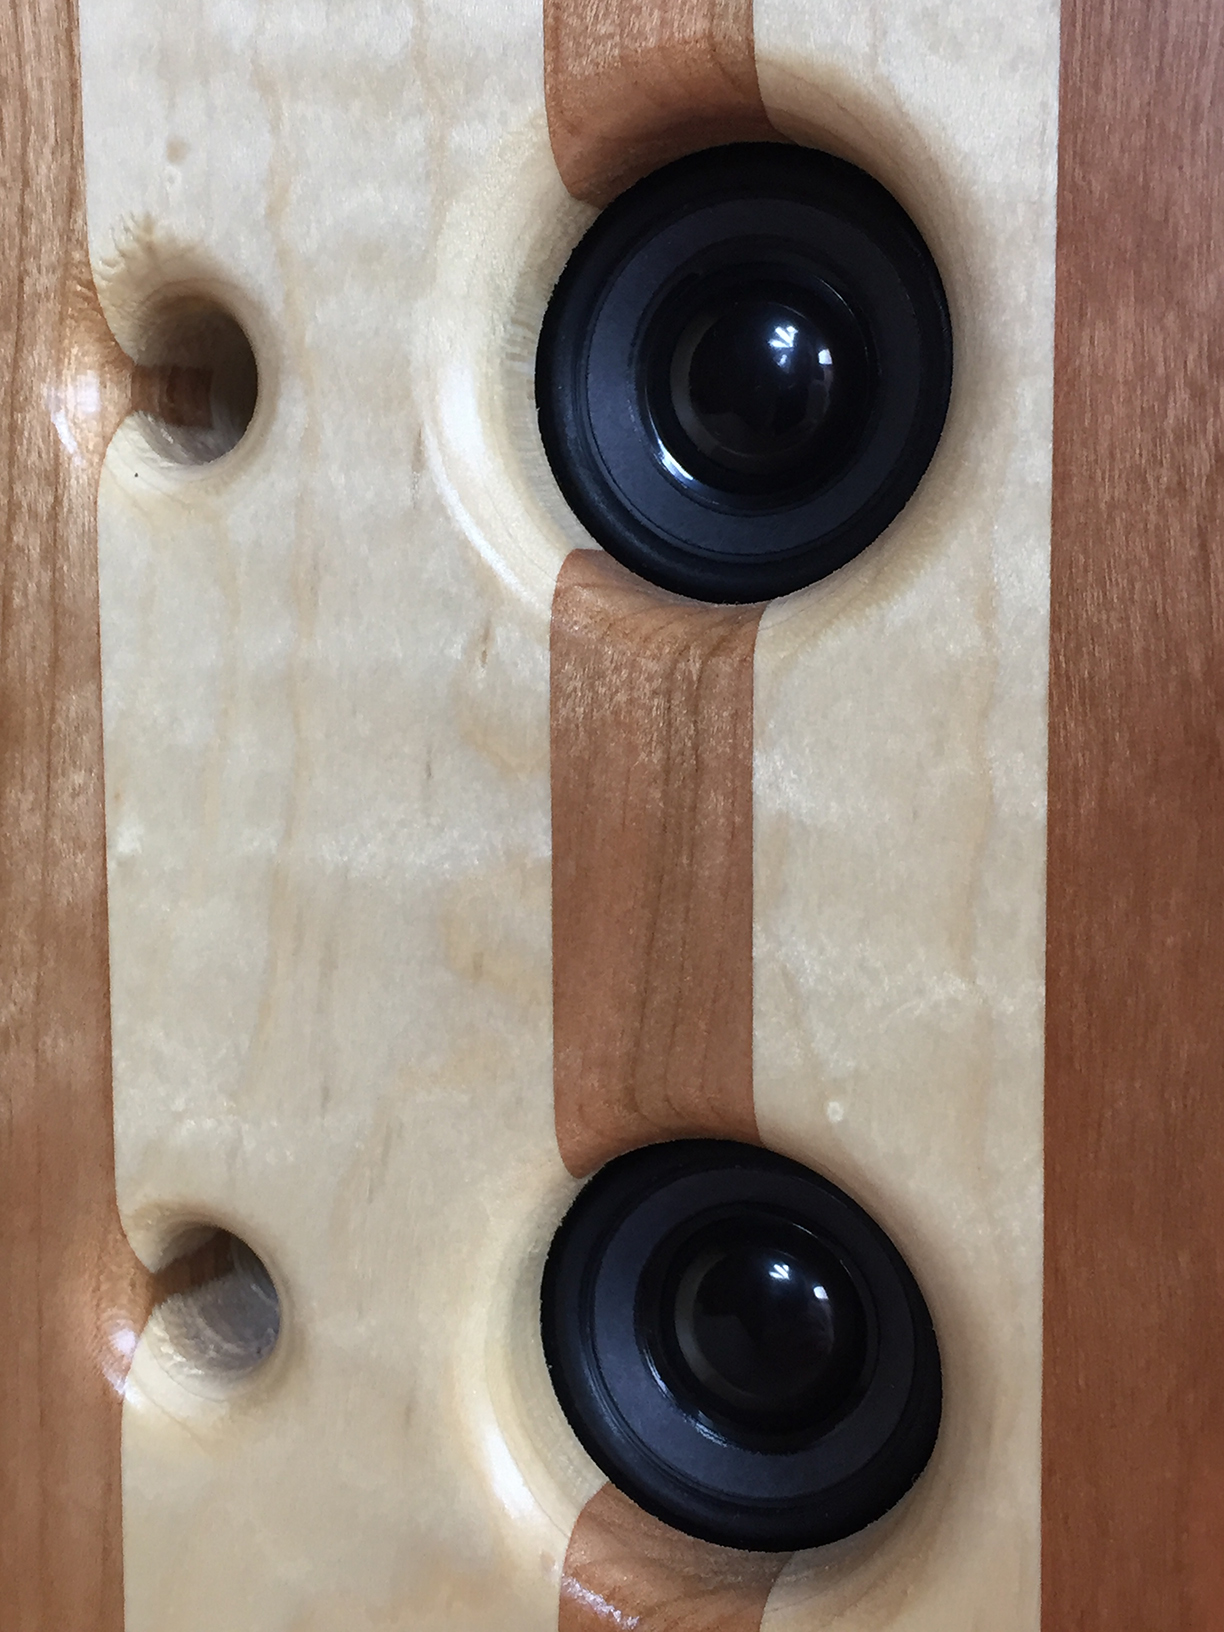
CE40P-8 — I was intrigued by the claims made in the Parts-Express video on CE40P-8 (which is no longer on the site at this time 8/10/17). Initially, I ordered three drivers as experimental drivers to see how they actually performed. According to the datasheet and the video, these cute so-called “full-range” little drivers (that look like something Santa’s elves would make) should handle the high end as well as the mid-range. As an avid fan of physics (yes I am a geek), I had no delusions these tiny 2-watt CE40P-8 were capable shaking the art off the wall. The initial test of an unmounted driver sounded like I bought the best speaker one could buy for 10 cents. After some cursory calculations I built one small enclosure for one speaker and a dual chamber for the other two, both of them ported. I was pleasantly surprised so I asked the elves at Parts-Express to ship me 24 more drivers. I tested them all using the DATS V2 audio test system and entered the test data into Excel. The statistical distribution of all the drivers was surprisingly consistent +/- 5% on critical Thiele small parameters. No drivers were rejected so basic driver quality was not expected to be an issue in the build.
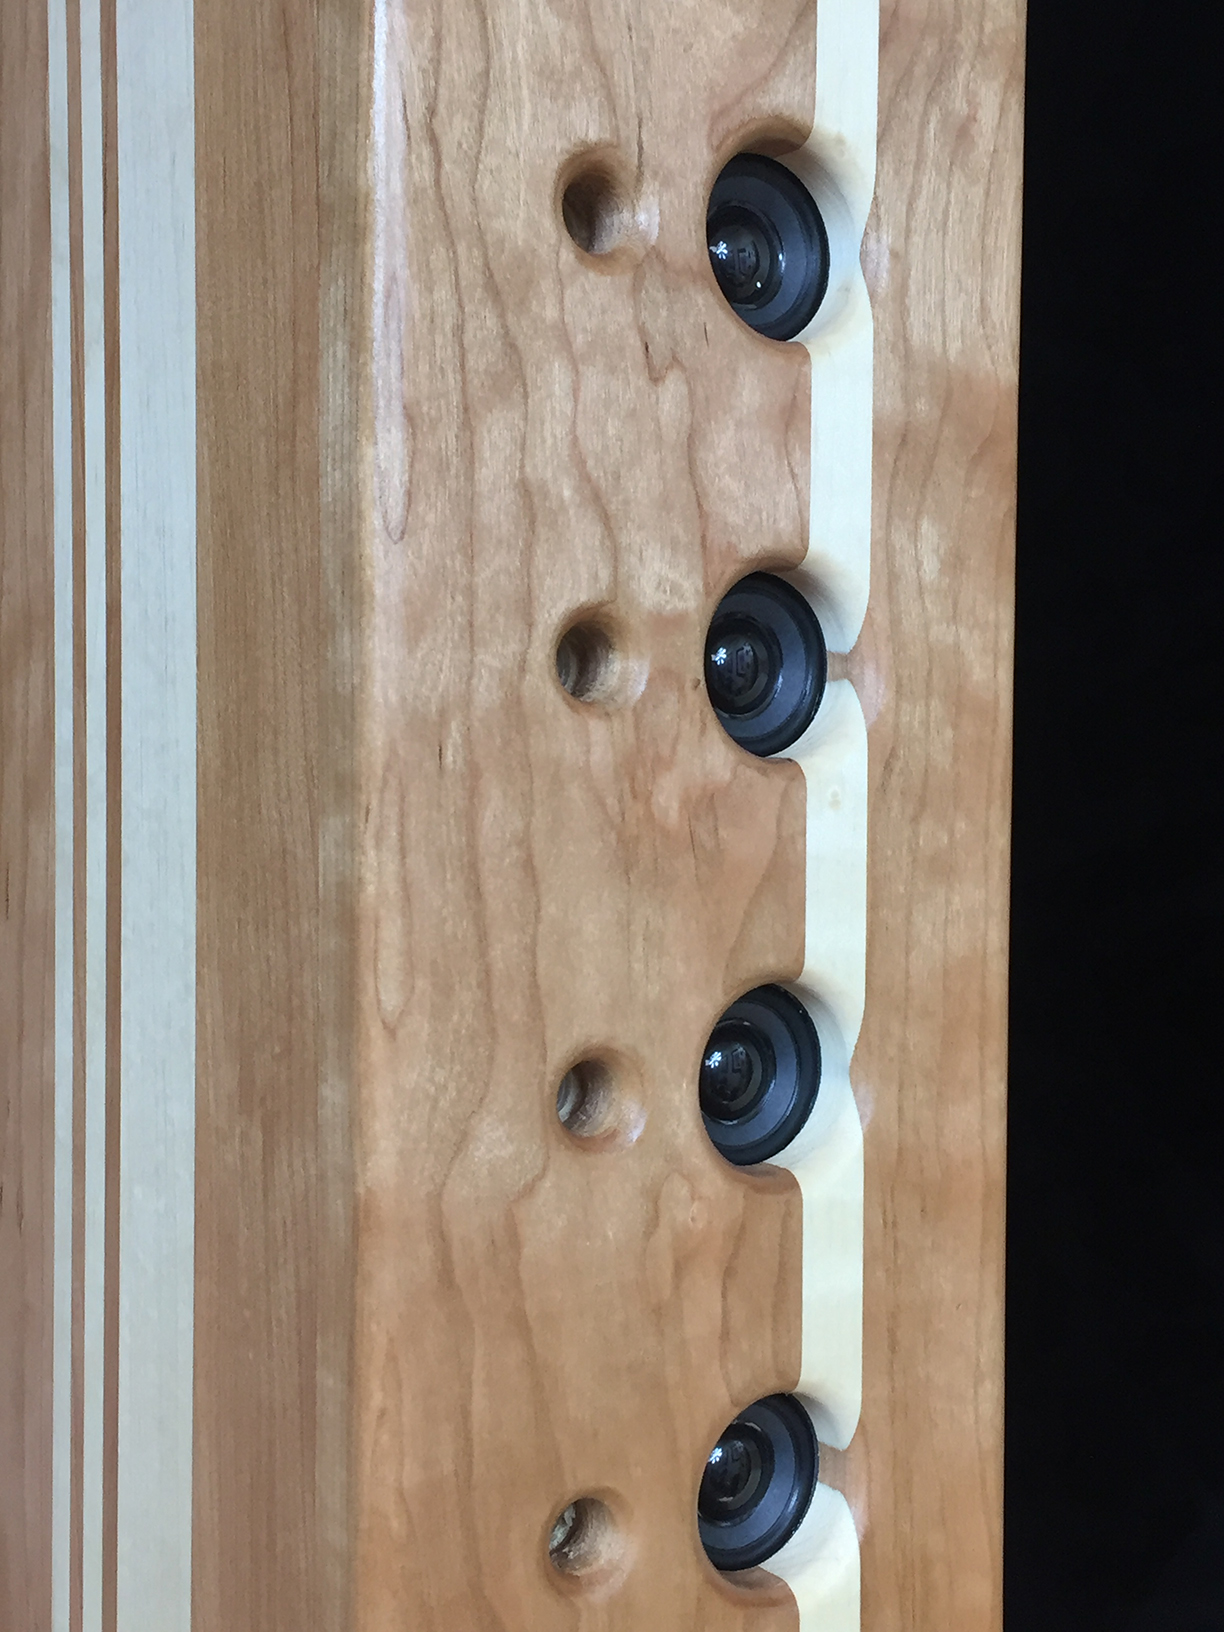
Since 12 of these were going into each array, at a listening distance of 3 meters, the calculated SPL obtained should be about 87 dB, which should be enough for most listening in the home (when the wife is not around). The final measured values from each array was actually closer to 85 dB.
The PAM8403 circuit boards proved to be rather noisy and unreliable. The “low noise” was not as low as I had hoped and produced an intolerable hissing that irritated me enough to toss them into the trash. After wasting too much time with different filtration schemes, I abandoned this approach. Instead, out of frustration I changed direction and wired all the drivers in each cabinet in a series-parallel configuration yielding a little less than 6-ohms for each array and used a Lepy LP-168 Plus Bluetooth 2.1 channel amplifier to drive the arrays as it was the closest thing to grab. This amp enabled me the choice of either a 3.5 mm input jack or Bluetooth and had treble and bass adjustments for the arrays and a sub.
Enclosure Design:
The design was first modeled using Sketch-up to determine the number of board-feet of lumber to purchase as well as the port and driver positions. Calculations dictated that each driver needed an 86 cubic inch chamber with a ½” diameter port 1 ½” long. This configuration yielded an Fb = 106.8 Hz. Due to the narrow design and the number of partitions supporting the sides no bracing was needed.
Since one of the goals was to have visually appealing line arrays, I made the speakers out of solid wood instead of MDF. I was going for the “old school” accent striped look of the longboard design of the 60’s. For contrast in color I selected maple and cherry.
Because cross-sectional dimensions of the cabinet are small and the wall thickness was relatively thick (read dense) any absorption of acoustic energy from the drivers was minimal and did not produce standing waves or introduce distortion or significant dead spots in the frequency spectrum.
Enclosure Assembly:
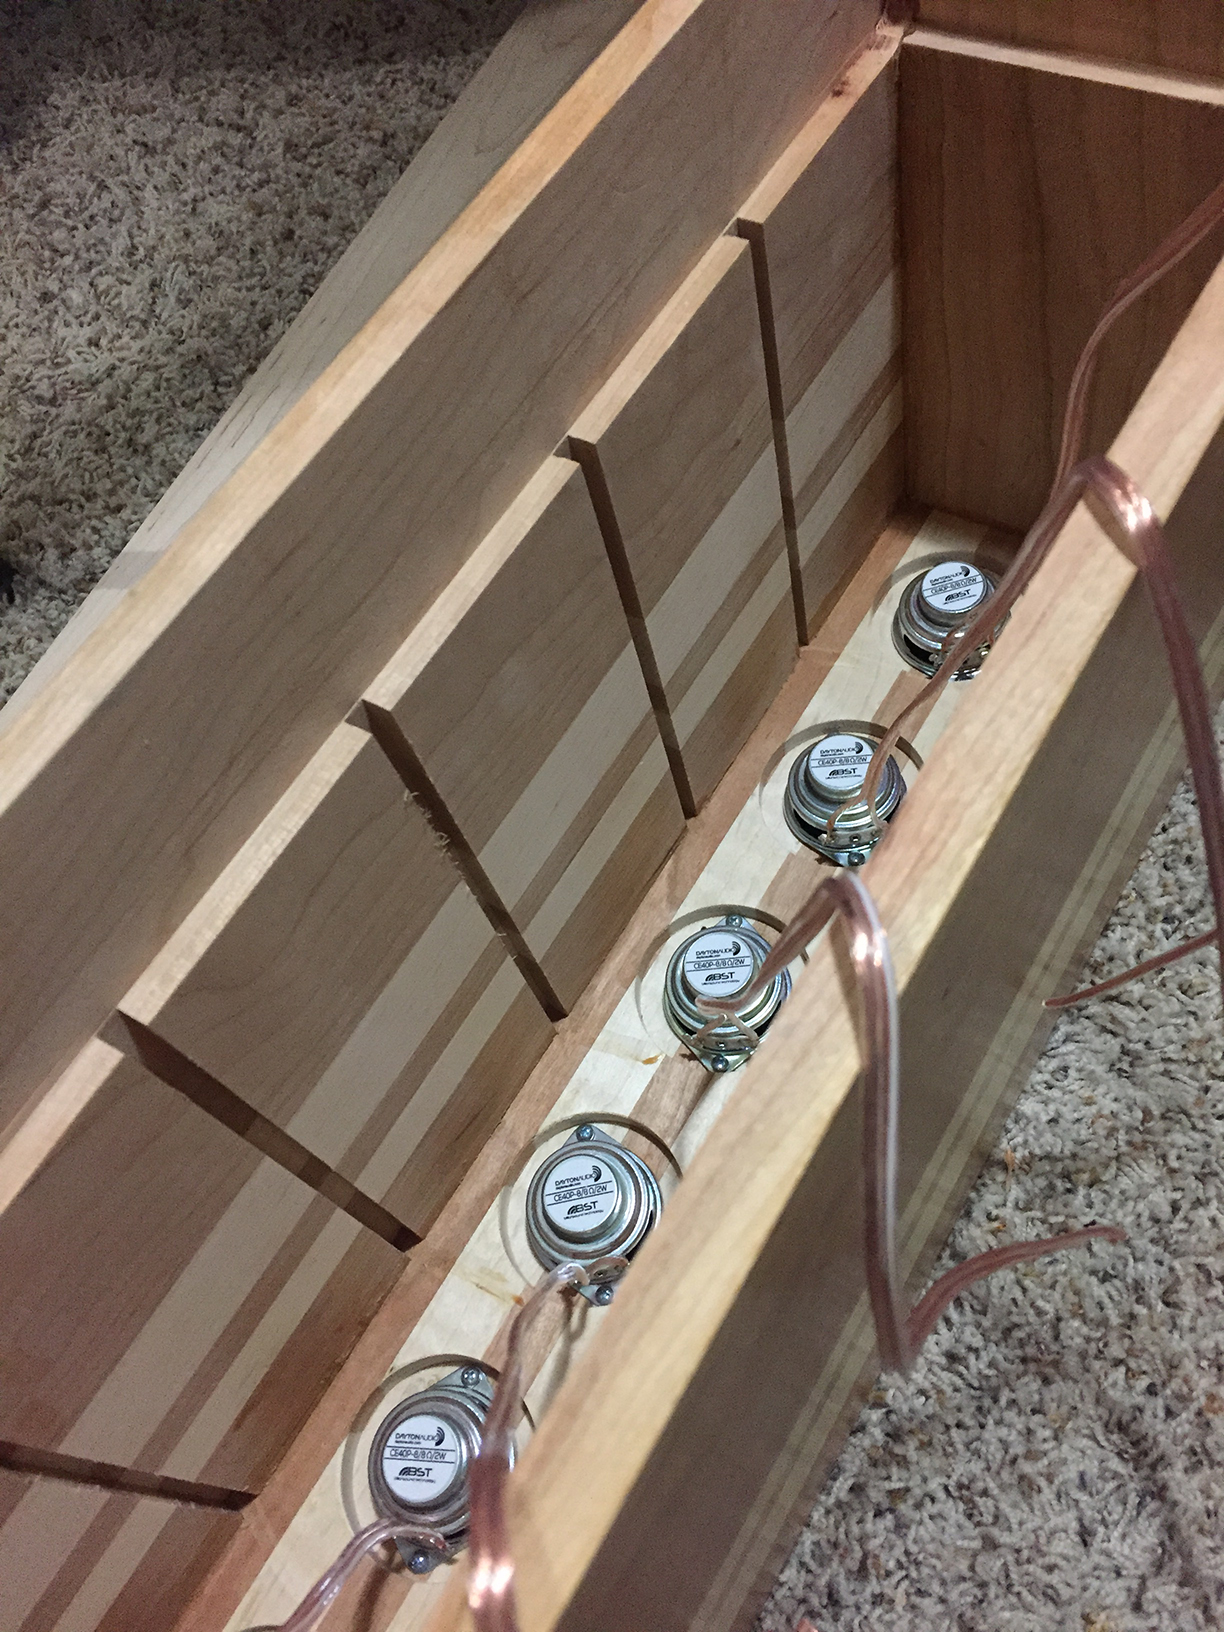
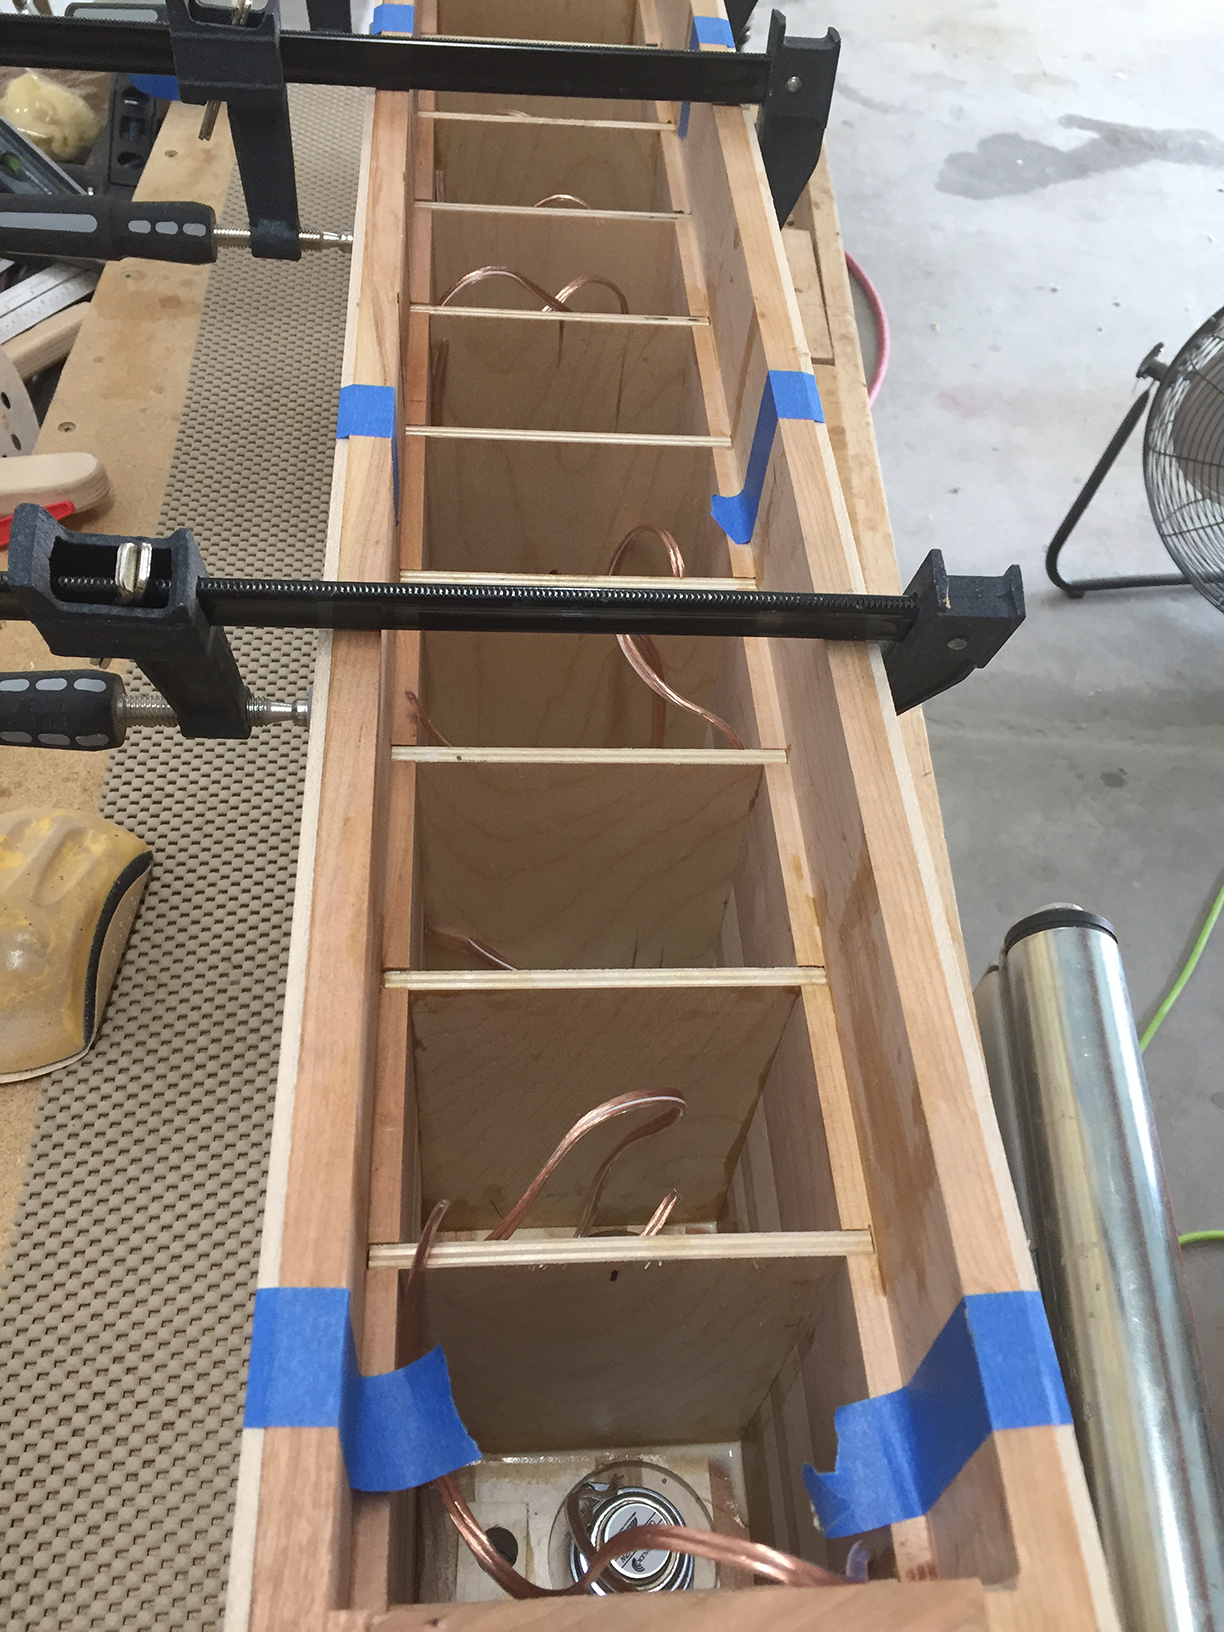
I jointed and planed inexpensive rough-hewned lumber to make the wood flat with clean orthogonal edges. Varying widths of wood were then ripped to random widths to produce visual contrast in the two arrays. The strips of lumber were then laminated (glued) together and planed. Once all the lumber was milled, jointed, ripped, glued, then cut to size, I used a router to cut dados in the side boards to accommodate the individual chamber partitions. Because the cabinets are solid wood I needed no fasteners, screws or nails; I used simple glued butt joints as they provided enough bonding surface area. The ports were made by gluing small blocks into the inside of the driver panel then drilling through the front panel and block once the glue had dried.
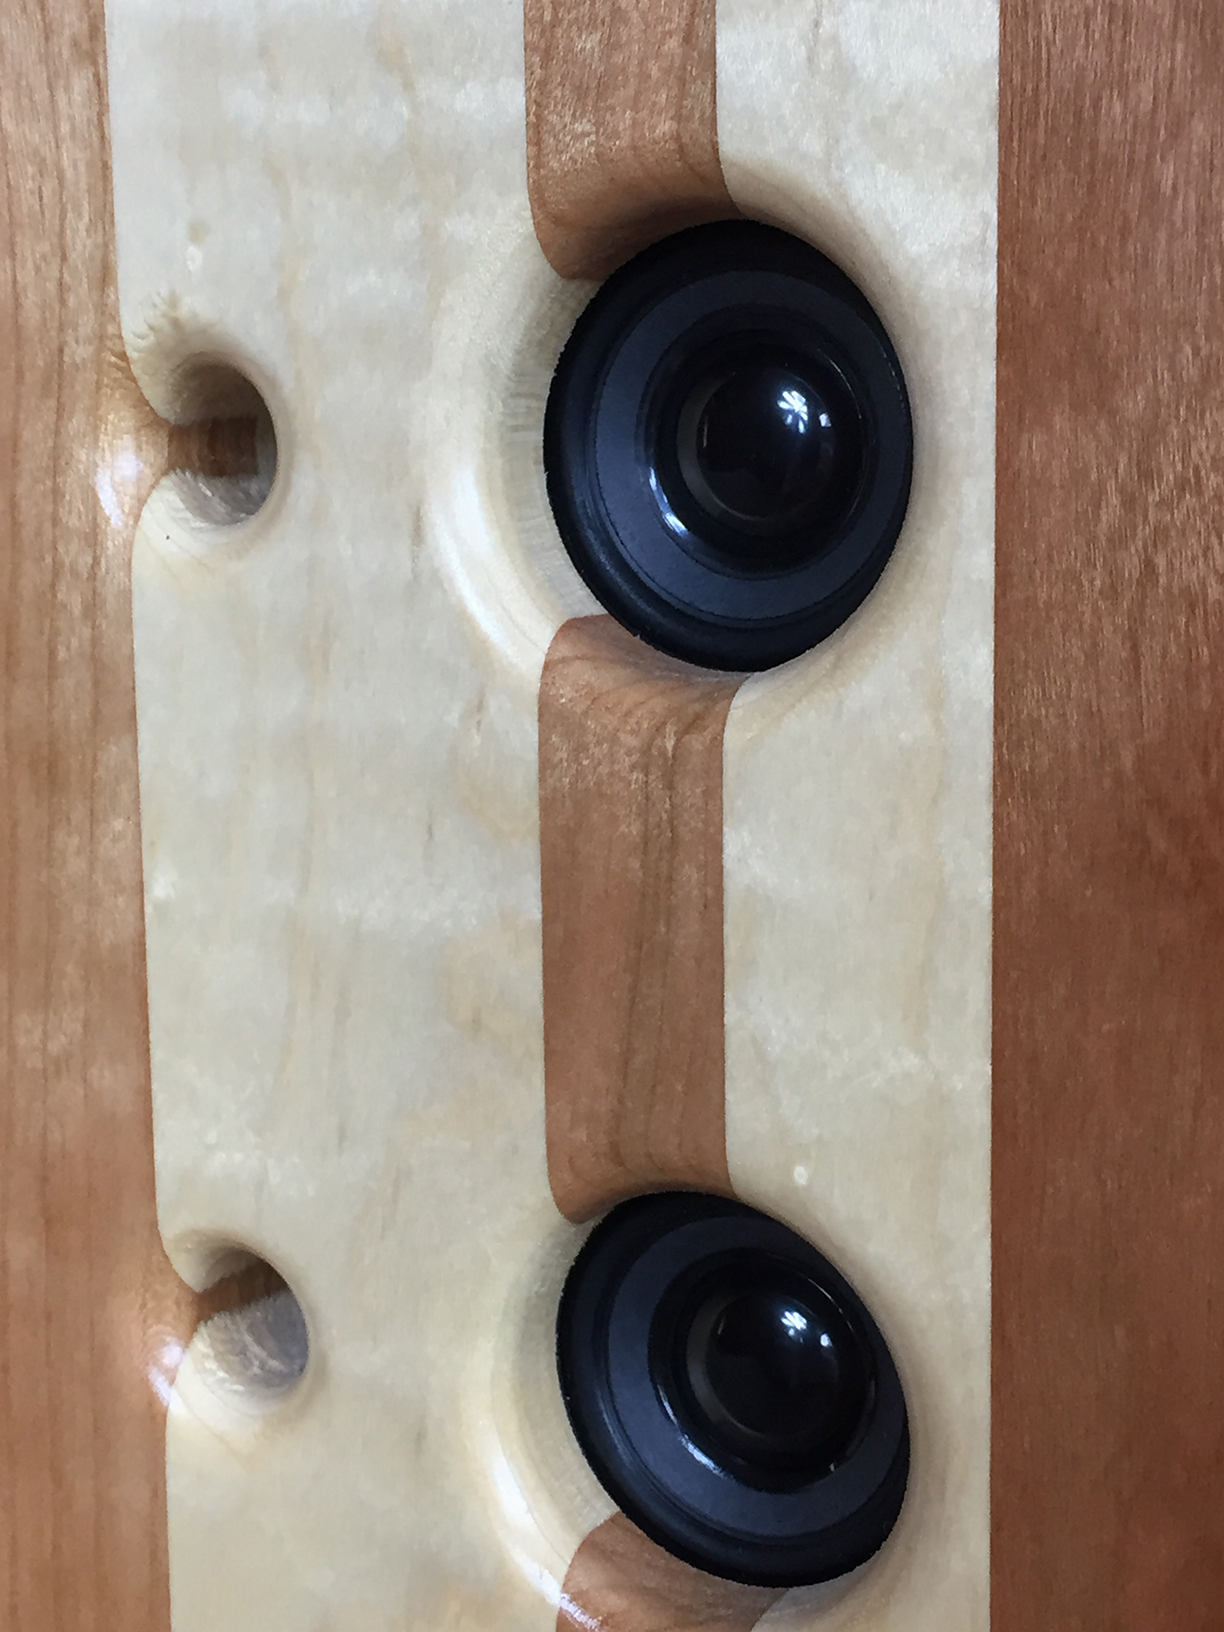
The partitions are made on ¼” plywood. I glued and sealed them into the cabinet slots. Due to the small size of the chambers (and the size of my hand), I initially installed every other divider panel in order to leave enough room for my hands to install the drivers. The holes in the front panel for the drivers were cut using Freud scalloped edge Forstner bits as this yields a clean smooth cross-grain edge compared to most other bits available. The edges of the holes were rounded with a ½” round-over router bit. The wood was sanded to 220 grit then sprayed with 3 coats of gloss polyurethane followed by one coat of satin polyurethane.
Next, the drivers were installed as were the remaining partitions. As before, the panels were glued and sealed. To seal the back of all the driver chambers, I made a backplane using contact cement to bond a ¼” sheet of closed-cell neoprene foam to ½” plywood. The speaker wires were then routed through small holes in the backplane. The neoprene covered backplane was compressed into the back of the speaker and secured to the cabinet by driving screws into the sides thereby sealing each individual chamber. The neoprene might serve as minimal acoustic insulation, however I don’t think it provided any significant effect or improvement to the sound. The drivers were wired in series-parallel to achieve about 6-ohms. Note: I initially tried stuffing each chamber with acoustic fill, but the sound became somewhat muddy so I eliminated it from the design.
There remained about 1.5” inches of space in the back of the arrays. This allowed enough space for hardware to hang the arrays on the wall as well as install crossover or DSP. These would be a great left/right speaker for a home theater system (which one day they might become part of a 5.1 system).
Crossover Design:
None.
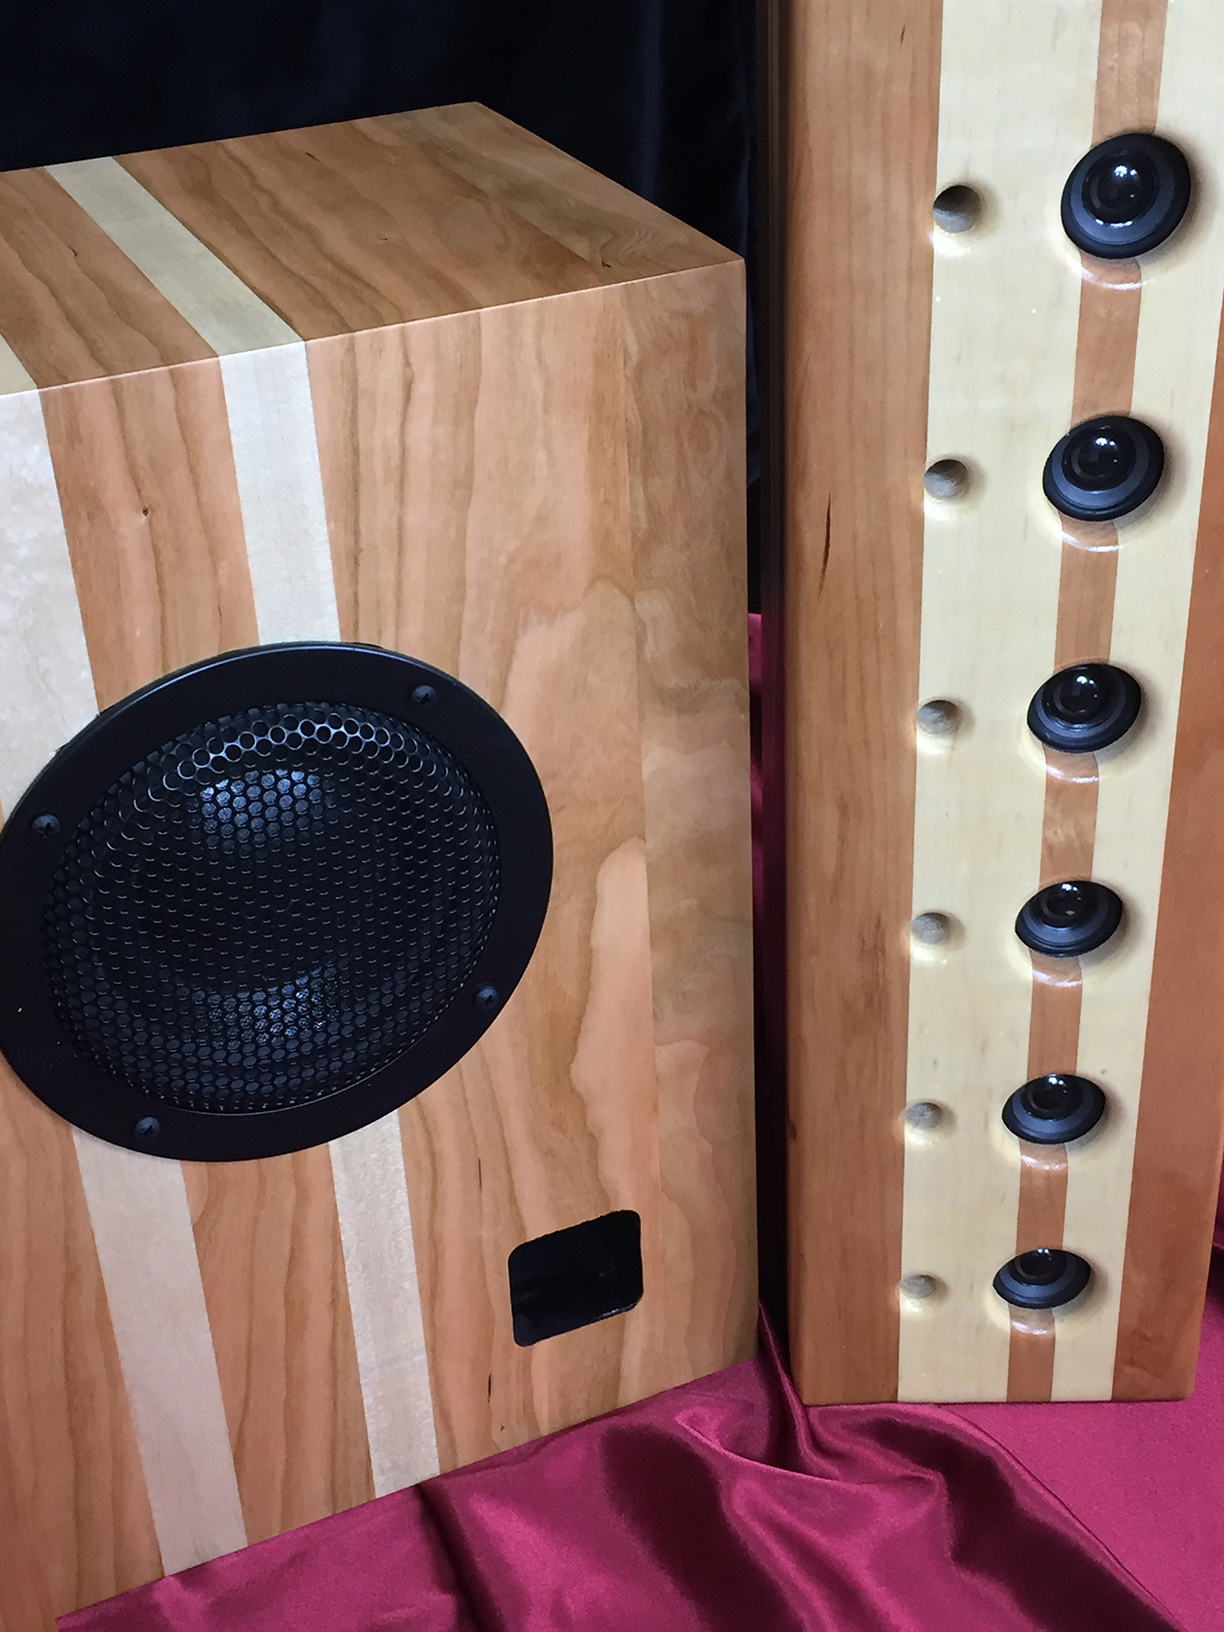
The speaker configuration yielded relatively good results for such small drivers which is why I selected the CE40P-8. As one would expect, the bass portion of the spectrum was thin but better than expected. To provide the needed low end, I built a ported subwoofer using a Dayton Audio DCS165-4 6″ Classic 4-ohm subwoofer. I chose this driver because the frequency response curve is very flat in the low end and nicely tails off at about 2kHz. This configuration allowed me to forego the need for a crossover. The subwoofer cabinet was constructed of ¾”MDF and tuned to about 40 Hz. I had enough leftover maple and cherry wood to fabricate the veneer needed to cover the subwoofer.
The testing was performed with a Lepy LP-168 Plus Bluetooth 2.1CH amplifier. Fortunately, the Lepy LP-168 has independent bass adjustments that enable me to easily balance the low end from the sub with the arrays. For testing, the bass and treble adjustments for both the subwoofer and arrays were set to mid-point.
Tips & Tricks:
Be patient. Allow yourself time as the CD40P-8 are very small and the spaces to install are tight.
Conclusion:
This was a fun build that looks and sounds pretty great. My goal was to build line arrays using cost effective drivers, and we’ll stamp this one a “success.” While these line arrays aren’t going to rattle the art off the wall, there is certainly more than enough volume to fill the room with no perceptible distortion.
Overall the build was labor-intensive because of the sheer number of drivers and woodworking involved, but the work was worth it. The quality of sound was delightful and greater than expected. These currently sit next to our Klipsh RF16 speakers and sound as good or better though not capable of handling higher volumes than the Klipsh do. Still, these fill the room with quality sound and I’m pleasantly surprised with the results. We’re now using them as our primary choice of speakers.
The listening test included jazz, classical, a cappella, rock, symphonic, blues and hip-hop. The subwoofer was truly needed to supply the lower end for the rock and hip-hop genres. The vocals of the a cappella group Home Free had great presence, especially in the mid-range. They image very well, especially with about seven to eight feet between arrays. I got some low-end excursion noise from overpowering the drivers. To protect the drivers from bottoming out from lower frequencies, I installed an inductor to shunt the lower frequencies as I noticed slight distortion at higher volumes. The subwoofer will do the heavy lifting just fine.
I was disappointed that the PAM8403 amplifier boards did not produce the results I wanted, but in the end, the Lepy amp allowed me adequate adjustability in the sound profile.
The next array build will include larger drivers accompanied with tweeters, a miniDSP HD, and possibly the LinkPlay EVB kit with A31 Wi-Fi Audio Module capable of Bluetooth and Alexa Voice service.
About the Designer:
David Hall is an avid custom speaker and home theater designer, and the owner of SounDesign. The favorite part of his job is speaker design and fabrication. His enclosure designs start with sketch pad and pencil. A lot of paper finds its way to the trash can before a design goes to CAD (computer-aided design). He pursues unique cabinet design and drivers that offer his clients both the look and quality of sound they desire. David’s philosophy is audio should be as pleasing to the eye as it is to the ear. It has to look as good as it sounds and it must sound awesome! David focuses on choosing drivers with optimal qualities to achieve the finest sound in order to diminish or avoid the electrical and acoustic challenges of crossover design. He has, in one way or another, been involve with electronics since he graduated from DeVry (decades ago). Music is a major source of enjoyment in his home. In his younger years David was a bass trombonis t in jazz ensembles and sung and played in several venues throughout the southwest. He is a desert rat living in Phoenix, Arizona with his hot wife, Debbie. Occasionally, in the cool months, he enjoys a good cigar and bourbon (when his wife is not around).
Project Parts List:
|
Part # |
Description |
Qty |
|
285-117 |
Dayton Audio CE Series CE40P-8 1-1/2″ Mini Speaker |
1 |
|
295-198 |
Dayton Audio DCS165-4 6-1/2″ Classic Subwoofer 4 Ohm |
1 |
I can’t believe there aren’t comments on these but these are fantastic and could easily be standalone furniture. I’ve always loved Cherry and Maple together. Your description of the long board inspiration has sent me spinning up a classic woody boombox design.
Thanks for taking the time to write this up and Great Job!
Thank you for the kind words John. This was a fun build. These are the speakers we use daily specifically for listening to music (vs. the speakers we use for television). They image quite well, which was surprising to me because the drivers are so inexpensive. It’s a great example that great value doesn’t necessarily cost a lot. Be well and be blessed.