NRNP No Router, No Problem Computer Sub


Designer: DanP
Project Time: 1-8 hours
Project Complexity: Novice
Project Cost: Under $100
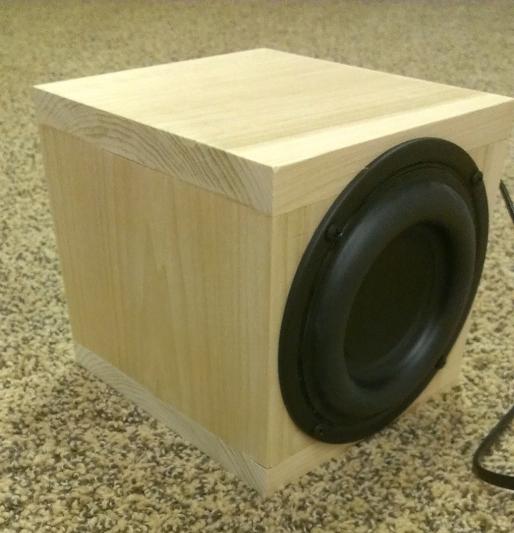
Driver Selection
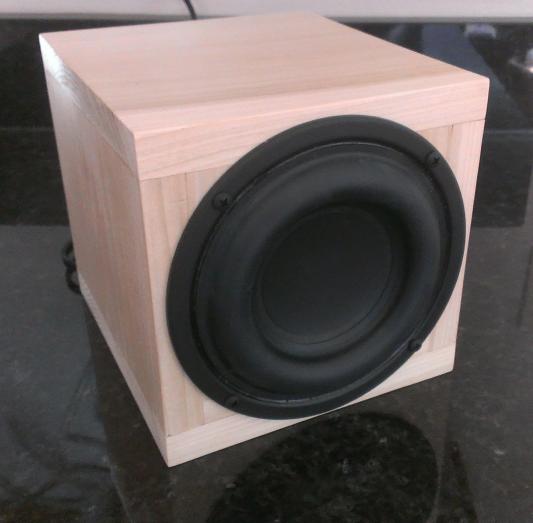
I wanted a driver that could reach relatively deep in a small sealed enclosure and also had a large enough Xmax to overcome its smallish cone area. The Tang Band W5-1138SM immediately came to mind. Its parameters are perfect to be crammed into a 2.5L box without getting boomy and its flange and cutout size are perfect to be mounted in the NRNP Sub’s non-standard baffle, making construction a breeze. As a side note, the W5-1138SMF (ferrite magnet version) can be substituted for the neo version, saving a few dollars, but wasting some space inside the enclosure.
Enclosure Design
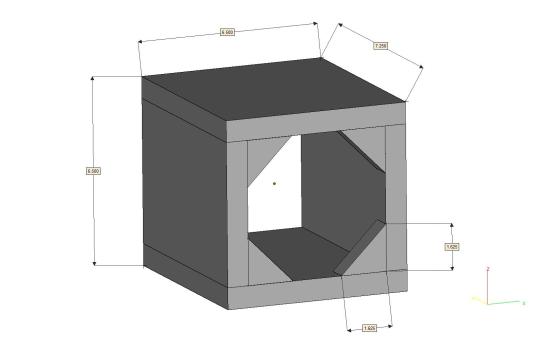
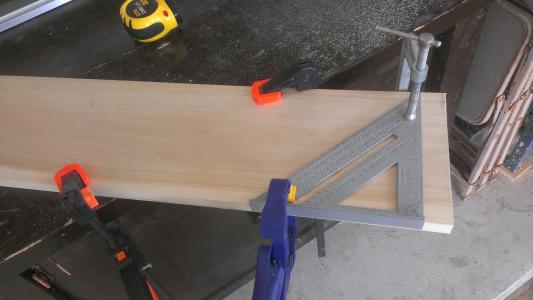
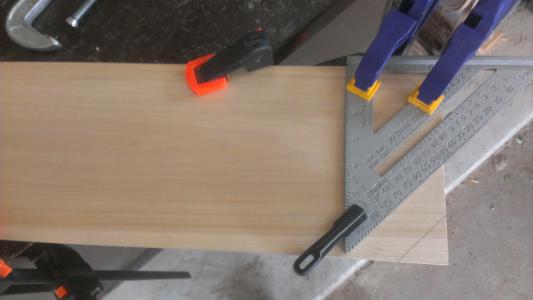
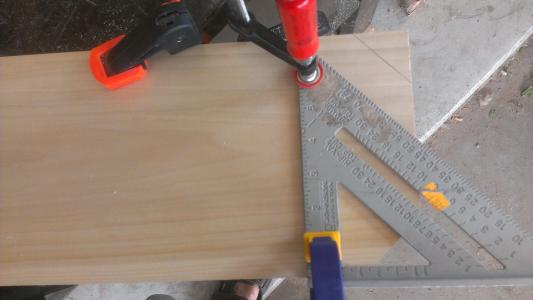
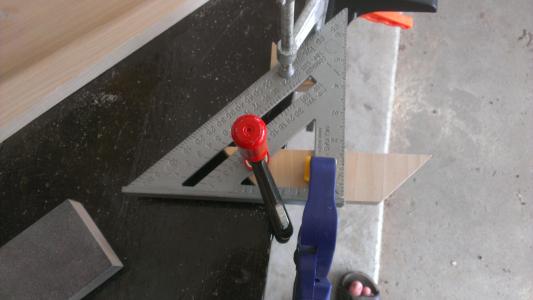
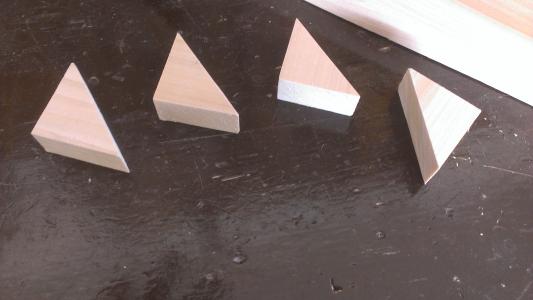
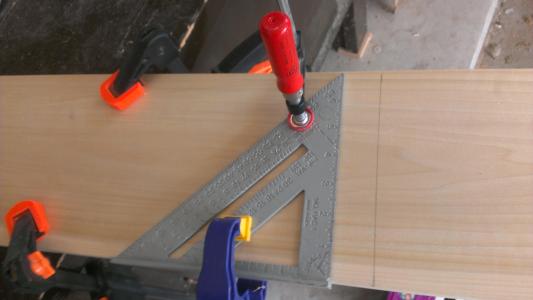
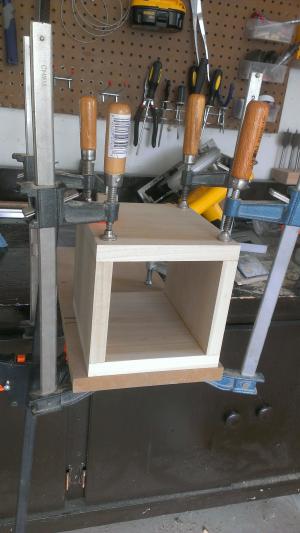
This is where everything comes together. Using a single piece of 1 x 8 lumber about 3ft long, you can build the entire enclosure with nothing more than a circular saw and a triangle square. 1 x 8 is actually 0.75″ thick and 7.25″ wide, which is narrow enough to allow the triangle square to be used as a straight edge to guide the circular saw across the board when making cuts. I used poplar because it was convenient and cheap, but anything could be used with good results. The box is 6.5″W x 6.5″H x 7.25″D, enabling all 4 panels to be cut to size with one cross-cut of the 1 x 8 board. Top and bottom are 6.5″ x 7.25″ and sides are 5″ x 7.25″. The corner gussets are triangles with 1.625″ legs. The internal volume comes out close to 2.5L, which, with a little stuffing, gives the system a Qtc of around 0.85 and an F3 of around 70Hz. This is not exactly subwoofer territory, but when placed on the floor against a wall, the boundary reinforcement will extend the low end response nicely. This works especially well because of the shallow 12dB/octave roll-off inherent in a sealed box system.
Amplifier/Crossover Configuration
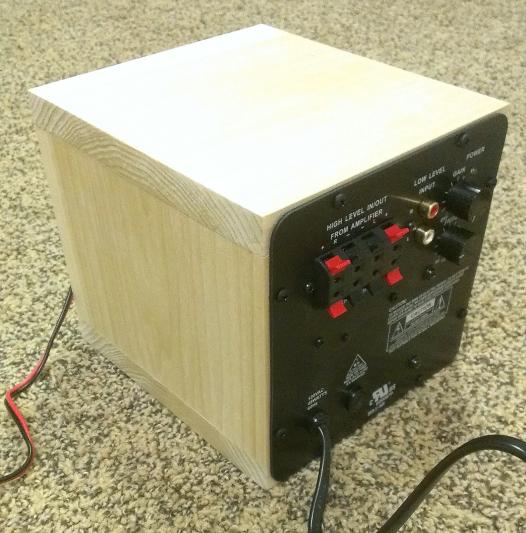
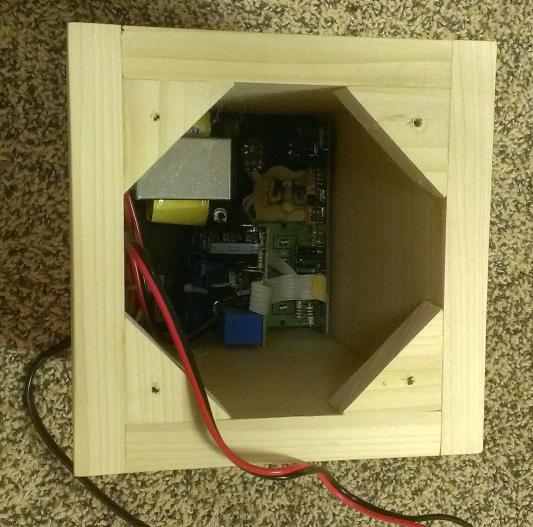
In order for the woofer to be able to mount in the octagonal opening as described below, the box needed to be exactly 6.5″W x 6.5″H with 0.75″ wall thickness, leaving a 5″ x 5″ opening. This just so happens to be the dimensions that are necessary to mount the Dayton Audio SA25 Plate Amplifier, which does double duty as the rear panel of the sub enclosure. At 25 watts into 4 ohms, this amp has plenty of power to drive the W5-1138SM to its ample Xmax. The adjustable gain and crossover frequency allow the sub to integrate well with any size or type of satellite speakers.
Enclosure Assembly
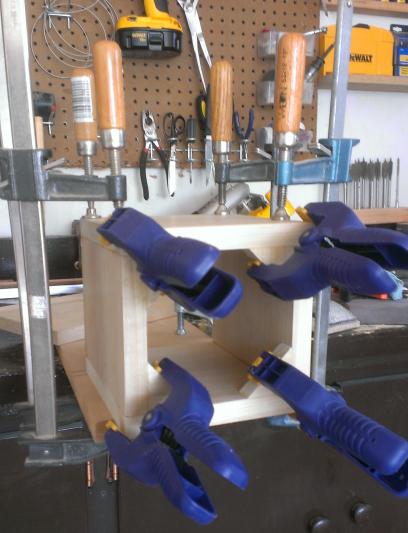
Enclosure assembly couldn’t be easier. Once the 4 panels and the 4 corner gussets are cut, they just need to be glued together as shown in the photos. By making 4 sides of a box and adding 4 corner gussets as shown in the pictures, you end up with a box with a square opening in the back perfect for the SA25 plate amp and an octagonal hole in the front that the W5-1138SM can securely mount to. Adding some 3/8″ x 1/4″ weather stripping on the woofer flange ensures an air tight seal against this faux baffle. No holes to cut – it doesn’t get any easier. At this point sanding and finish can be applied as desired. Mount the amp to the back, add a little pillow stuffing, connect the amp to the woofer and mount the woofer to the front. Done.
Conclusion
This sub blows away any commercial offerings of similar size, which usually make use of a 3″ or 4″ woofer with limited Xmax. This Tang Band woofer is an absolute monster for its size and the SA25 amp is a great match for it. When placed on the floor against a wall, the sealed box roll-off and the boundary reinforcement allows this diminutive sub to be a legitimate bottom end for my small computer speakers, with great low end extension and higher output capability than I want to subject myself to while working at the computer. Considering the price point and ease of construction, the NRNP Computer Sub would be a great first foray into DIY speaker building.
About The Designer
I have been building speakers for 20 years and I am an active member on Parts Express’s Tech Talk forum.
I built this project recently using one piece of solid oak 1×8 (.75″ x 7.25″) to add to my little setup in my family room to supplement the bottom end of custom speakers I designed and built 30 years ago as a teenager. It turned out really nice and provides that little bit extra I was after. I especially like the way it turned out because I was able to use the same exact stain as the A/V cabinet it sits next to because I built that too. Thanks for sharing this design!