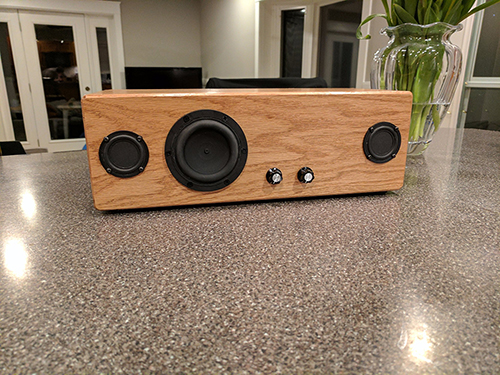
Oak 2.1 Boombox
Designer:
Jonathan
Project Category:
Portable Speakers
Project Level:
Beginner
Project Time:
8-20 Hours
Project Cost:
$100 – $500
Project Description:
A compact bluetooth boombox with the power supply and subwoofer built in.
Design Goals:
This was one of my first complete builds. I wanted a bigger boombox for my workshop that I could also use around the house. It replaces a miniature box I built with BMR drivers that had almost no low end. I wanted it to be compact and clean with no external power brick and minimalist interface.
Driver Selection:
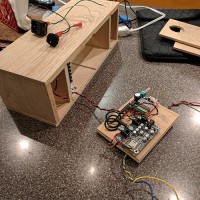
I chose the Tectonic Elements TEBM35C10-4 BMR 2″ Full-Range Speaker (#297-216) and the Tang Band W3-1876S 3″ Mini Subwoofer (#264-909) for their similar appearance and small size. I also liked the wide dispersion from the BMR driver in my work area. The whole thing is powered using the buyout Mini Hi-Fi 2.1 Class D Audio Amplifier Board (#329-608) which sounds pretty good and has an integrated volume pot.
Enclosure Design:
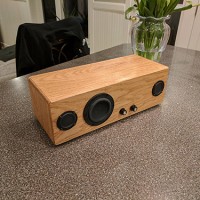
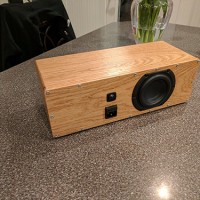
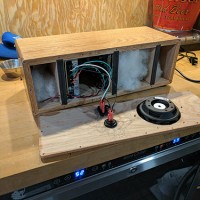
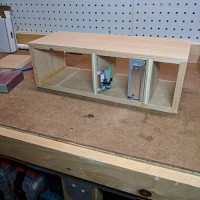
The box is a long rectangle approximately 15″ x 5″ x 6″. The subwoofer is mounted in roughly 1.4 L with a passive radiator. The BMR drivers are sealed in roughly 0.7 L. A fourth chamber houses the amp, Bluetooth reciever, and 75W power supply.
Enclosure Assembly:
The box is assembled from 1/2″ oak board from the big box store. The front and back panels are 1/4″ oak board. Besides the back panel, everything is rabbeted / dado’d and glued. I cut the driver holes with a router circle jig and everything else with a jigsaw. I rounded all the edges with a router and sanded the joints flush. I used Minwax ‘Cherry’ stain (though not as dark as I’d like, for some reason) and three coats of satin polycrylic.
Crossover Design:
There is no crossover but I did put a 3-ohm resistor in series with each of the BMR drivers. It sounded a little ‘shouty’ and the bass had to be maxed out to match it — the resistor quieted it down and the levels match better now. I didn’t use an L-pad because the speaker was 4 ohm impedance and the amp is rated for 8 ohms. The amp board has a fixed 150Hz low-pass filter for the sub channel. There’s also a separate pot to adjust the subwoofer level.
Tips & Tricks:
The box depth is 6″ — 5.5″ standard board width and 1/4″ baffles. This way I didn’t have to rip-cut any boards.
The Q&A sections for all of the Parts Express products I used typically have enclosure recommendations and box tuning information. Lacking access to any special software, this was a big help to double-check calculations.
Conclusion:
The sound is really great for what I listen to, mostly rock and electronic/pop music. There’s a surprising amount of low-end thump from the little subwoofer, and the full-range speakers are clear and loud.
I was really pleased with the clean physical appearance of the box. It’s nice to plug it directly into a wall socket with no brick or anything. It’s small enough to fit on a shelf above my bench, or on the kitchen counter.
About the Designer:
I’m a mechanical engineer who got into building speakers when I saw a DIY tabletop speaker in a store and I thought “I can build that!”. I enjoy woodworking but had minimal prior experience with electronics or music.
Project Parts List:
|
Part # |
Description |
Qty |
|
297-216 |
Tectonic Elements TEBM35C10-4 BMR 2″ Full-Range Speaker 4 Ohm |
1 |
|
264-909 |
Tang Band W3-1876S 3″ Mini Subwoofer |
1 |
|
264-1060 |
Peerless by Tymphany 830878 3-1/2″ Passive Radiator |
1 |
|
329-608 |
Mini Hi-Fi 2.1 Class D Audio Amplifier Board 2x15W + 30W |
1 |
|
320-351 |
Sure Electronics AA-AB41136 Bluetooth 4.0 Audio Receiver Board aptX +EDR 12 VDC |
1 |

What parts are missing on the parts list.. I see 3 drivers in front and one in the rear.. Where are the dials? Do you have plans for this project that I can follow>
Thanks
Bob
curious if one of these http://www.parts-express.com/dayton-audio-kab-250-2x50w-class-d-audio-amplifier-board-with-bluetooth-40–325-104 could be used with a battery so it portable if wanted? My soon to be teenage son is wanting to work on something like this as a first project but not sure I’m seeing enough details yet for him to go for it. I have not touched anything like this since college physics classes so not up to speed on all the new technologies etc… that was back in the 80’s. Any updates or more details on the electronic side would be appreciated.