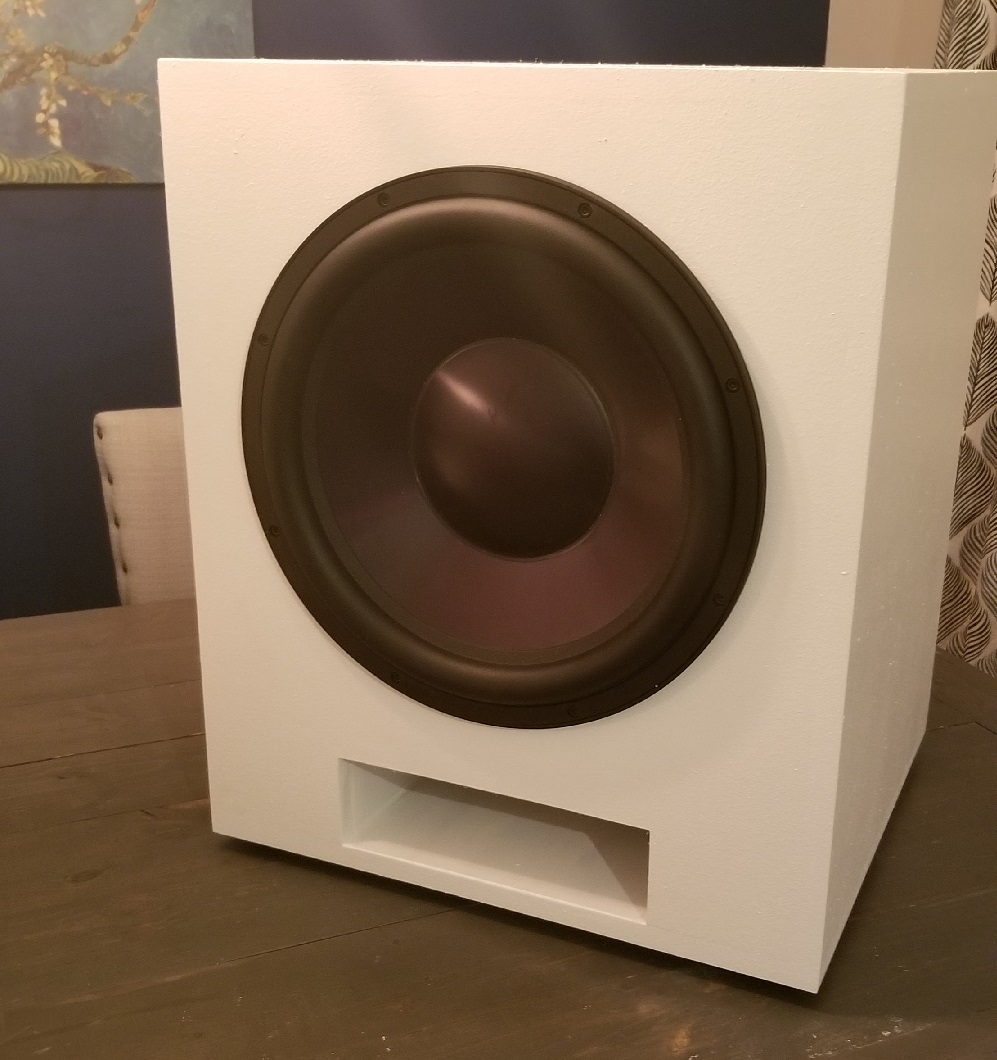
Slot Vented 15″ Subwoofer
Designer:
Ryan Clark
Project Category:
Subwoofers
Project Level:
Intermediate
Project Time:
8-20 Hours
Project Cost:
$100 – $500
Project Description:
Slot vented cabinet. MDF joined with glue and pocket screws. Painted with interior white paint to match rest of entertainment components. This project was driven by curiosity and that I was fortunate enough to get the driver as a restock deal. My entertainment center had space for one more subwoofer so… why not?
Design Goals:
Optimally performance in relatively small vented cabinet
Aesthetically pleasing and matching cabinet
More delicious bass ?
Driver Selection:
295-469
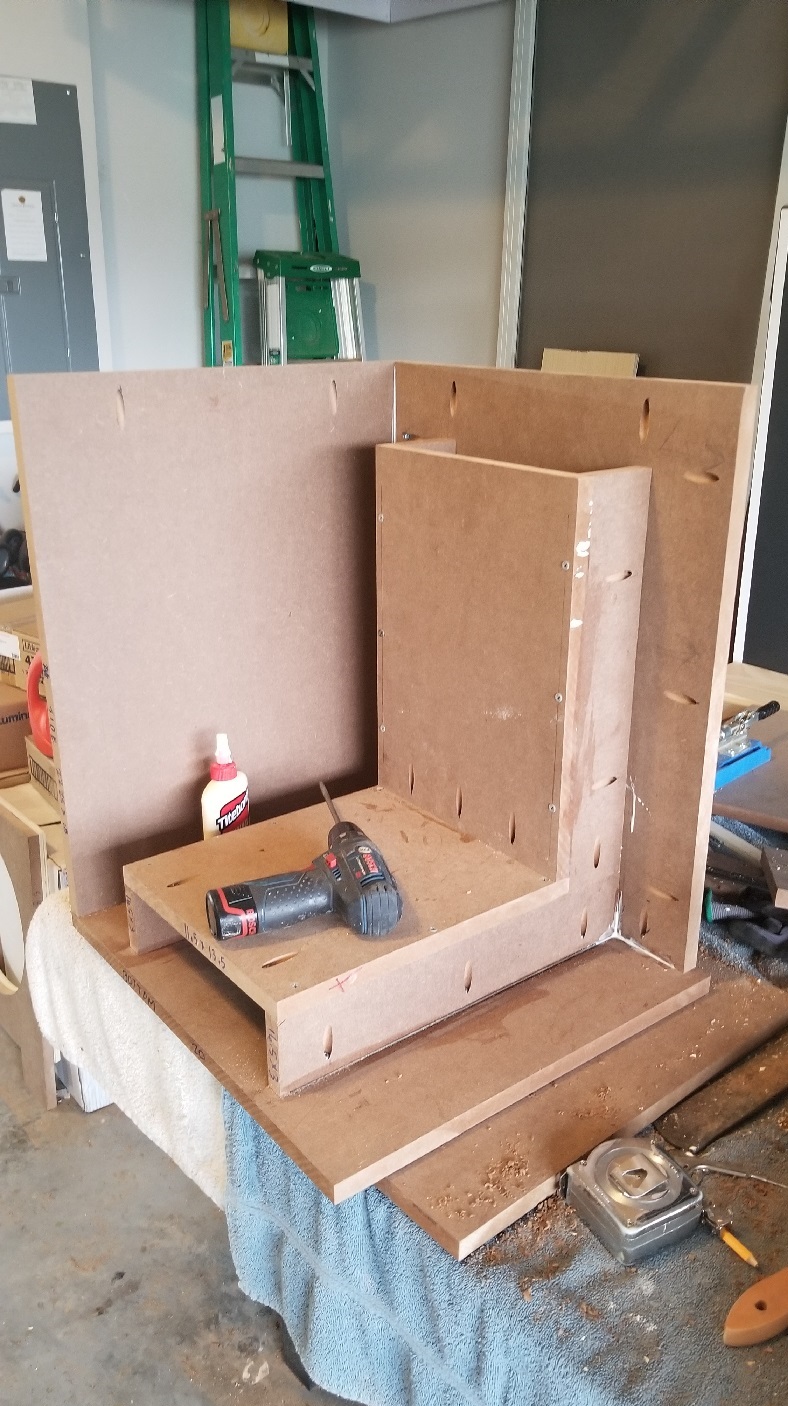
Enclosure Design:
This was my first sub build with a slot vent. I used an online box calculator to recommend 2.76 ft3 tuned to 27 Hz with an F3 of 30 Hz which was consistent with the PE recommendation on their product page. My finished design ended up slightly larger at 2.86 ft3 which after modelling made little variation to original plan.
I designed the L-shaped slot vent to also functioned as part of the cabinet bracing system.
Slot vent 3” x 10” ~32.75” long
Enclosure Assembly:
0.75″ MDF
0.50″ plywoof for internal baffle section. I like using plywood here because the T-nuts set much better in it then MDF
Crossover Design:
The speaker is powered by a Crown XTI 4000, utilizing the built-in DSP functions, specifically high pass crossover, which it set at 12db/oct at 22 Hz. I may tweak this, but I think it is adequate to protect the driver from heavy subsonic excursions well below the tuning frequency. (My 18” Ultimax is boosted 10db at 20Hz to get those lows this guy doesn’t get and flat out its ~30Hz F3)
Tips & Tricks:
Plan – being that this was the most complicated enclosure I have built to date, I took extra time to lay out the pieces and make sure I had a well-order construction plan.
Baffle – I like to make sure the baffle is cut correctly before attaching to the cabinet. I also set the t-nuts in the baffle and mount the driver to make sure they all line up well. It is much easy to fix any issues before the cabinet is mounted.
Conclusion:
This is a great subwoofer and I am pleased that the cabinet came out well. It is fun to compare it to my 18” Ultimax in a sealed enclosure by turning on/off each channel. It is definitely not the beast of the UM-18, however it is a great subwoofer and is on the top of my list for bang for the buck in relatively little space. Considering you can put this 15” sub in a ~1.5 cubic foot sealed enclosure is awesome! Would be great for a car.
About the Designer:
I have always been an aspiring audiophile, although I don’t consider myself one. I am just a guy that loves music (listening and making), movies and building things out of wood. I still have my Infinity SM-62’s I bought out of a Crutchfield catalog in the early 90’s (~14 years old).
Project Parts List:
|
Part # |
Description |
Qty |
|
295-469 |
Dayton Audio RSS390HO-4 15″ Reference HO Subwoofer 4 Ohm |
1 |
|
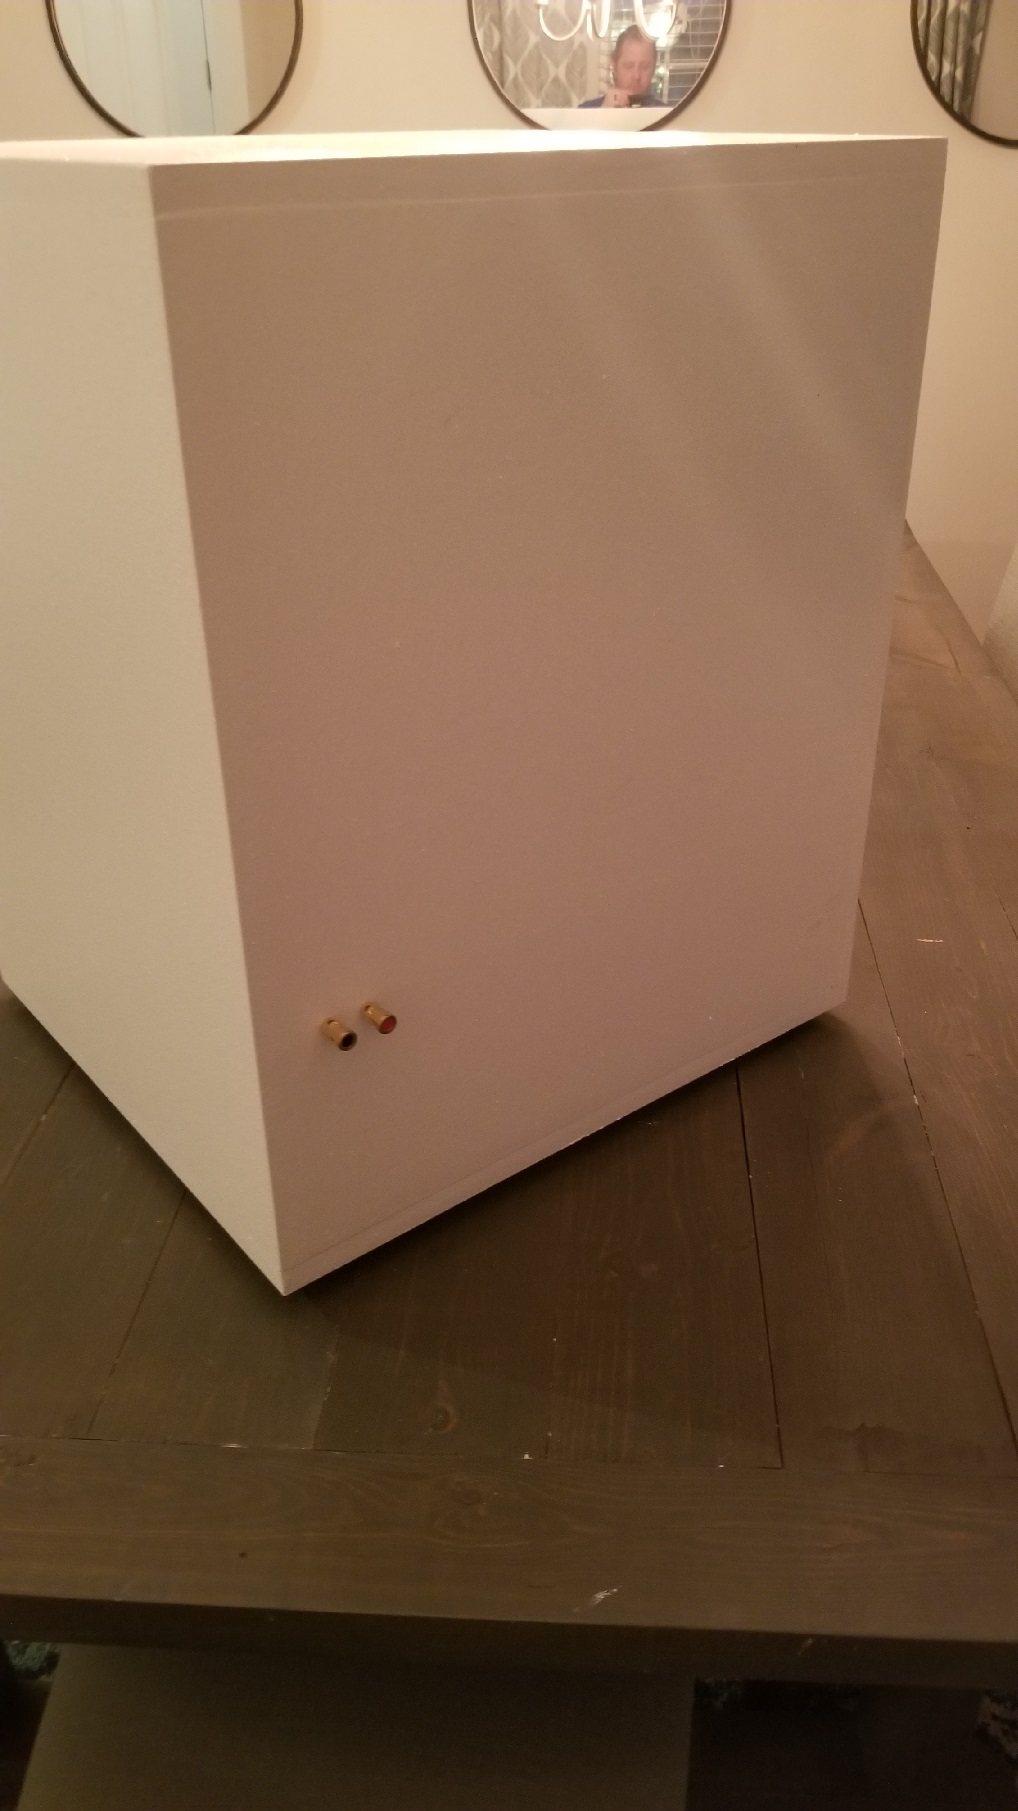
091-1154 |
Parts Express Dual-Ended Gold Binding Post Speaker Terminal Pair |
1 |
|
260-770 |
Penn-Elcom F1686 Rubber Cabinet Foot 1.57″ Dia. x 0.61″ H |
1 |
|
260-776 |
Parts Express Cast Frame #10-32 Speaker Mounting Kit |
1 |
Do the 4 90-degree vent corners and the 90-degree vent turn cause some whistling?
I have not experienced any port noise/whistling. I was concerned about that so I put a 45 degree piece at the inside of the turn and spaced it so the minimal vent height did not go under the 3″ of the vent channel. I also rounded the inside of the turn. I think my vent channel is so large it isn’t as sensitive to port noise.
What about 4 cylindrical vents at the four corners of the baffle – I saw this used by a new loudspeaker system advertised in Stereophile?