The JK’s Bluetooth Speaker


Designer:
Zarbo Audio Projects
Project Category:
Freestyle Speakers
Project Level:
Intermediate
Project Time:
1-8 Hours
Project Cost:
Under $100
Project Description:
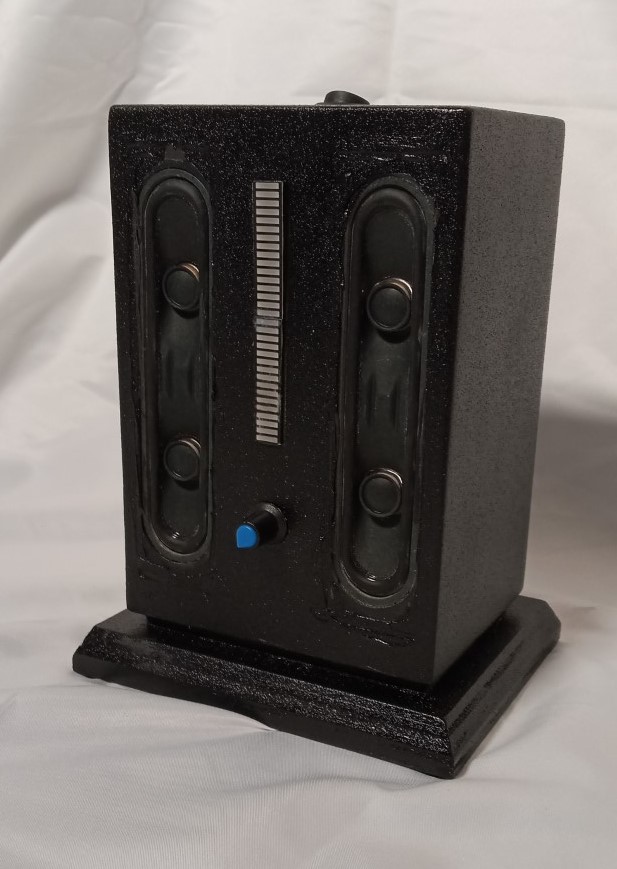
This is a fairly easy to construct Bluetooth-only stereo project that uses ¼” plywood and ¾” material of your choice. It is an inexpensive project, has decent sound, and with its vertical orientation, is a unique-looking radio that has a few features that many Bluetooth radios do not.
Design Goals:
To create a unique Bluetooth speaker using PE’s buyout racetrack speaker and implement an interesting LED VU meter. I also wanted that VU meter to show the full range of its display regardless of the volume level, so I hacked the Bluetooth daughter board to ‘borrow’ the audio signal before it went to the amplifier. It worked well, now regardless of how loud or soft I want to play the radio, I still get to enjoy all the nice lights from the VU meter.
Driver Selection:
Parts Express has secured a large quantity of Phillips #289-2378 branded buyout racetrack speaker modules. The modules work fine on their own, but for my particular application, I ended up modifying them by cutting most of the enclosure off and just using the front portion of the module.
Enclosure Design:
The two speaker enclosures ended up being around 28 cu. Inches each, which was a bit larger than the original enclosure. I used the same 3/8” by 2 3/8” long vent as the original cabinet. I basically tried to emulate the original cabinet as it actually sounded fine.
Enclosure Assembly:
The cabinet is assembled with ¼” nominal plywood. I also used a few small ¾” thick pieces for the base and bottom. Butt joints and glue are all that is needed. I actually made two of these speakers, one with very basic tools, and the other with the full compliment of power tools that experienced woodworkers might have. I would recommend using a foaming glue such as Gorilla Glue if your panels are not exactly the same as it will foam out some to fill up any small gaps that may exist. Either way it’s constructed, it’s fairly easy to build and sounds much better than the money invested in them would suggest.
Crossover Design:
I tested these drivers with the Dayton Omnimic and found the frequency response to be reasonably flat with great midrange (vocal) clarity, as you would expect from a TV speaker module. No crossover was needed.
Tips & Tricks:
I glued a piece of sandpaper to a paint stir stick to make a poor-mans file, which actually ended up sanding the various rectangular openings better than my set of files and rasps did. Sometimes the best tool is the simplest.
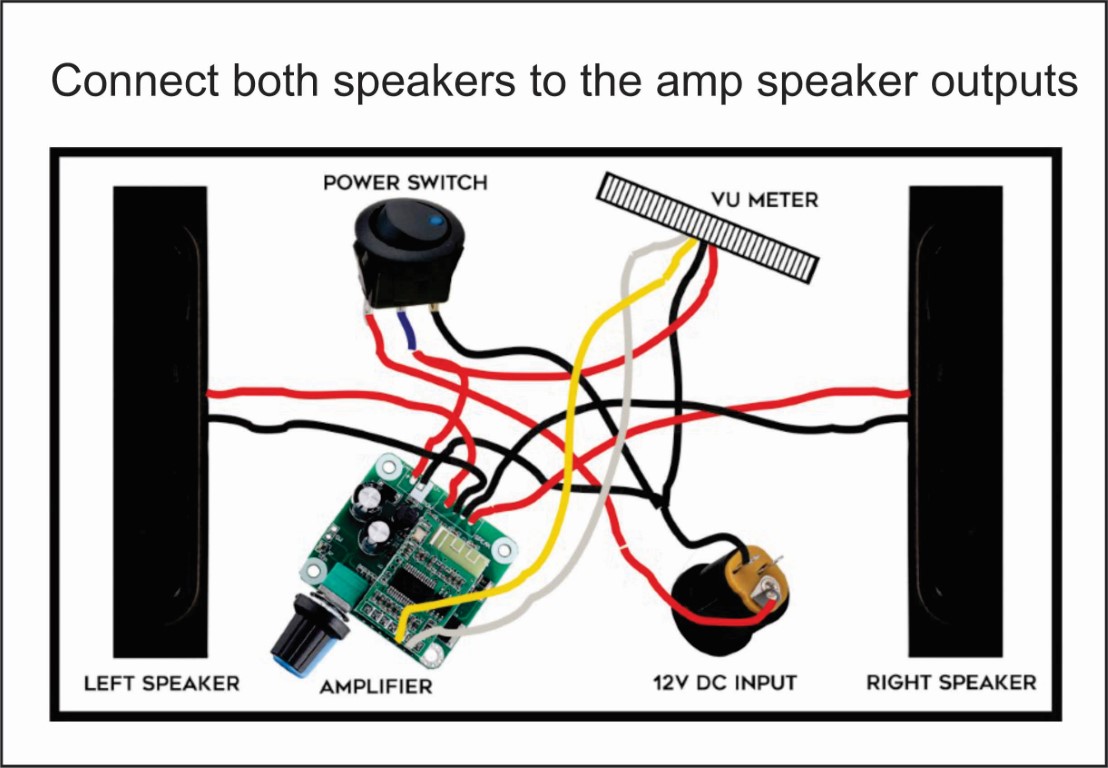
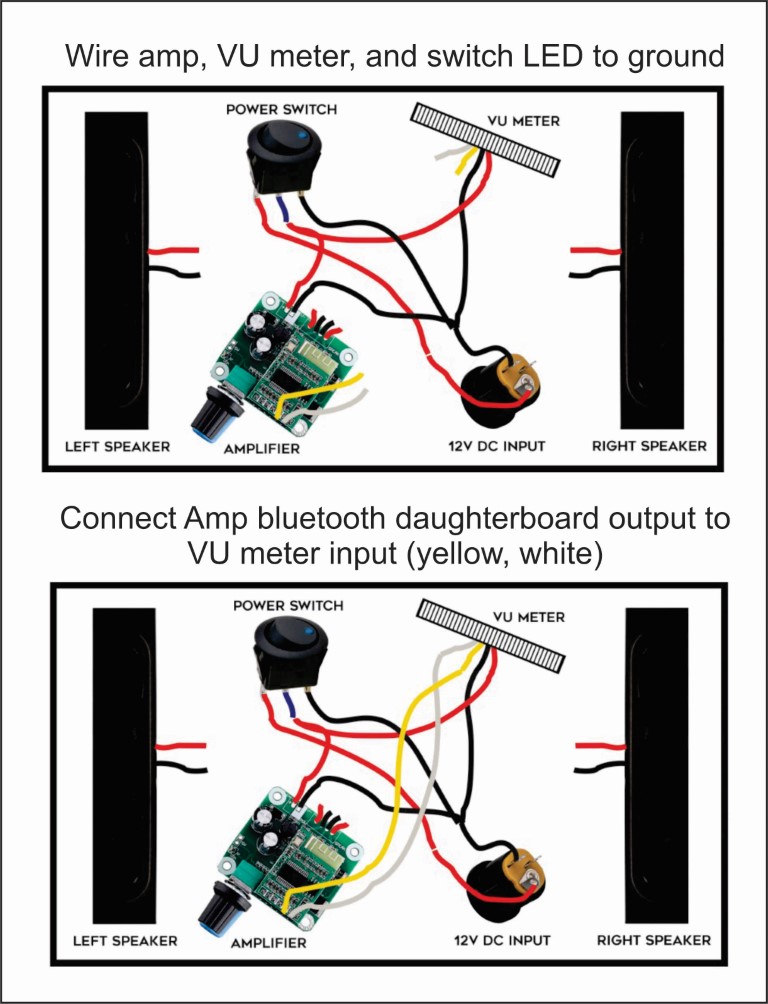
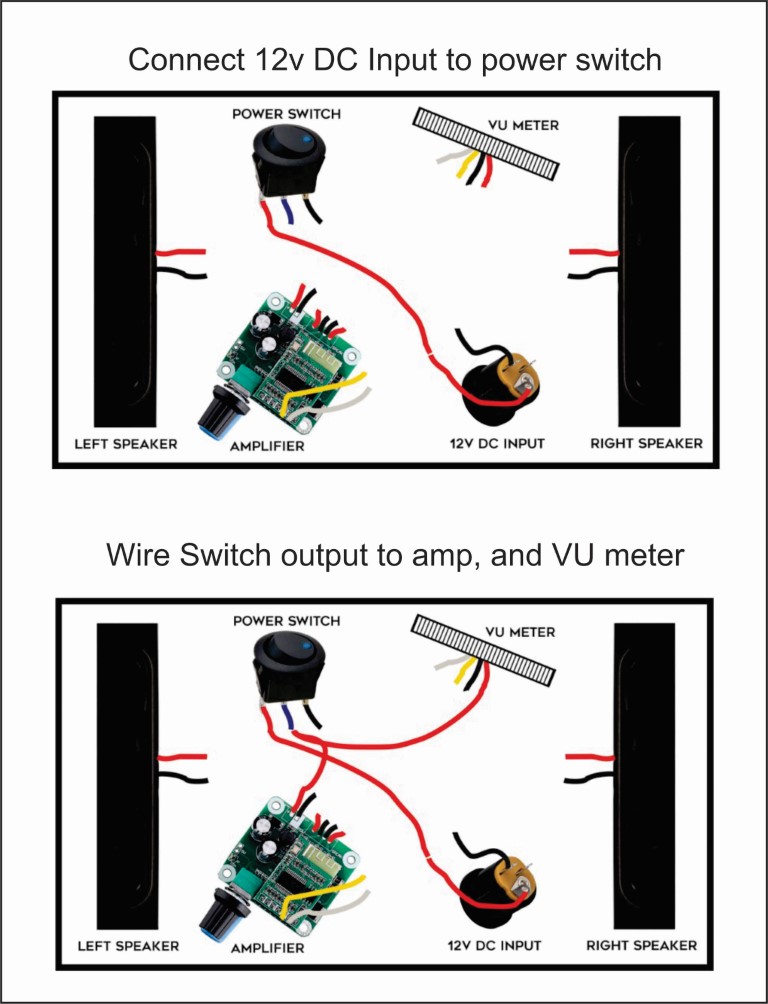
I’ve created a wiring diagram that shows the process step-by-step using pictures of the actual parts. Solder on leads to the parts to extend out of the bottom of the cabinets. That will make connecting everything much easier as you get ready to put it all together.
Conclusion:
I like the vertical orientation of the speakers; it matches the vertically-oriented VU meter nicely. These speaker modules don’t have a great deal of bass, given their small size, but it is rather nice sounding otherwise, and pretty unique looking if I do say so myself.
About the Designer:
I’ve been designing speakers since I was a child, and have recently started to enjoy designing and building radios and Bluetooth speakers. I enjoy helping others learn some of the facets of speaker building, especially the woodworking aspect of it.
Project Parts List:
|
Part # |
Description |
Qty |
|
289-2378 |
Philips 242226440048 LCD TV Full-Range Speaker Module 1-1/4″ x 6-3/8″ x 5-1/8″ |
1 |
|
060-770 |
Parts Express SPST Automotive Round Rocker Switch with Blue LED 12V |
1 |
|
129-1203 |
12V DC 3A AC Adapter Power Supply with 2.1 x 5.5mm Center Positive Tip |
1 |
|
090-5044 |
5-Pack DC Coax/Barrel Jack 2.1 x 5.5mm Panel Mount |
1 |
+ There are no comments
Add yours