The Naked T-Amp

Designer: Thinner321
Project Time: 1-8 hours
Project Complexity: Amateur
Project Cost: Under $100
Overview
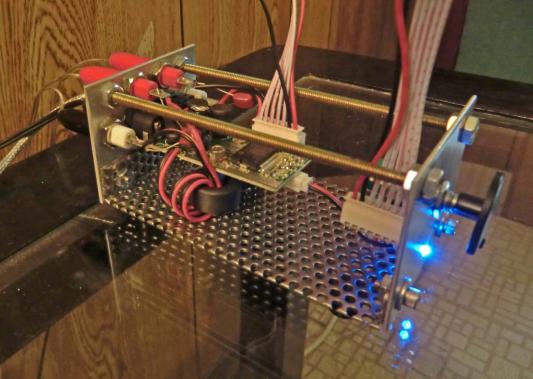
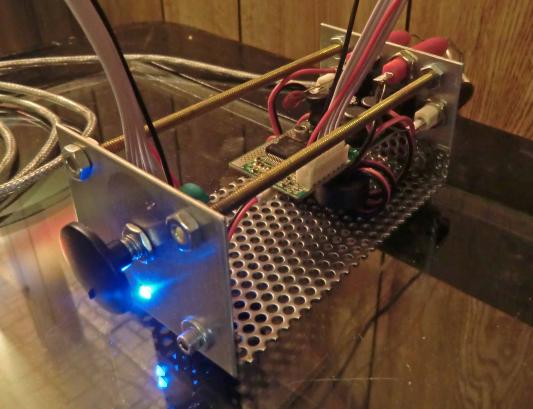
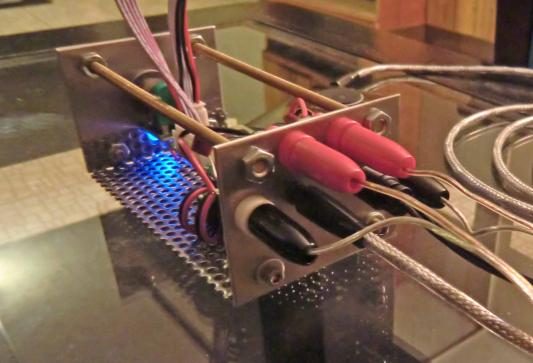
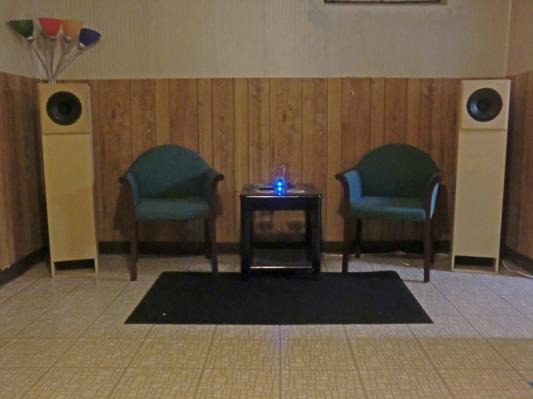
After doing some research online about DIY amplifier building I cam across his website and became immediately engrossed in the information that he has shared. It is a great resource for misc. information regarding DIY electronic projects in general and I highly recommend checking it out if you have some spare time. (I have also built the passive pre-amp project that he has on his site with good results as well.) I used very simple scrap materials to build the enclosure. I cut out two 2.5×2.0x0.062in aluminum plates for the front and back face plates and used a scrap piece of 2.5x5in perforated steel as the base. As luck would have it, there were two holes in the perforated steel that lined up precicely with where the holes on the PCB were located for mounting the amp PCB to the base with threaded barrel stand-offs. The second bit of luck happened when I noticed that the ferrite rings fit snugly around the stand-offs, even with the speaker output wires wound around the rings allowing me to not have to mount the rings with anything. Plus the wires wound around the rings give it a nice finish. Some drilled holes, nuts and bolts, and a couple of inexpensive banana plug connectors later and I had a pretty clever little enclosure to showcase my mini-amp project. I would definitely recommend using a drill press on the metal plates if you have access to one. Even an inexpensive drill press would have done a better job drilling the holes in the plates for the volume knob, LED light, input/output connectors, and enclosure screw-holes than I was able to with a hand drill. Even with a metal bit punch the bits wandered from where I needed the holes to be located. Fortunately this did not need to be a highly-precise drill job. The sound quality is great! Based on the other reviews of this kit in particular, and of the TA2024 chip in general, I was expecting quality a step above your basic disposable computer speaker amplifier and my expectations were more than met. This amp does a fantastic job running my 8″ TQWP floorstanding speakers with ease. The drivers are 8ohm full range Radio Shack speakers with wizzer cones for extended response #from back when they actually carried decent drivers in-store.# The amp doesn’t hesitate at the 8ohm load and very readily fills my basement with a lot of sound at only 50-60% on the volume control. It is quite surprising how much air you can move with only 5-10 watts! I was slightly disappointed at the quality of the surface-mount solder job of the components on the PCB. It definitely looks like the boards and components had a pretty rough ride through the solder-reflow oven when they were assembled as there wasn’t a single cap or resistor that mounted in a straight line between contacts. Even some of the parts that were soldered on by hand were left in fairly precarious orientations. However, the board works as advertised, and very well indeed. This kit is very simple to construct, though it will take a slightly practiced hand to make the few required connections to the PCB #namely the speaker outputs.# That amp board #and subsequently the component spacing and nearby solder joints# is absolutely tiny. You will appreciate a fine tipped iron if you have one. I just ordered the recommended power supply and it seems to power the amp adequately. I will probably not take the time to construct a 12V supply from scratch as I don’t think that it would be very cost effective and would probably not improve significatnly upon the overall quality of the output. That adventure will be saved for my next project using the Sure 2 x 100W board that PE carries. I think that this is an excellent beginner project with very many applications. It will fit just about anywhere, and with the option to power it from 8 AA batteries, it can be completely portable as well.
About The Designer
I am a lab technician that performs thermal, electrical, and mechanical testing and application analysis. I have been designing and building subwoofer enclosures, 2 and 3-way loudspeakers and crossover networks, and other DIY audio projects as a hobby for about 10 years now and continue to get excited every time I get an idea for a new project. I also enjoy tinkering with computers and other A/V technology in general. However, when it is nice out in the summer, you’ll hardly ever catch me indoors.
Project Parts List
|
Part # |
Description |
Qty |
|
090-480 |
1 |
|
|
090-485 |
1 |
|
|
300-385 |
1 |
|
|
120-052 |
12 VDC 2000mA 2A Switching Power Supply US and EU 2.5mm plug |
1 |
+ There are no comments
Add yours