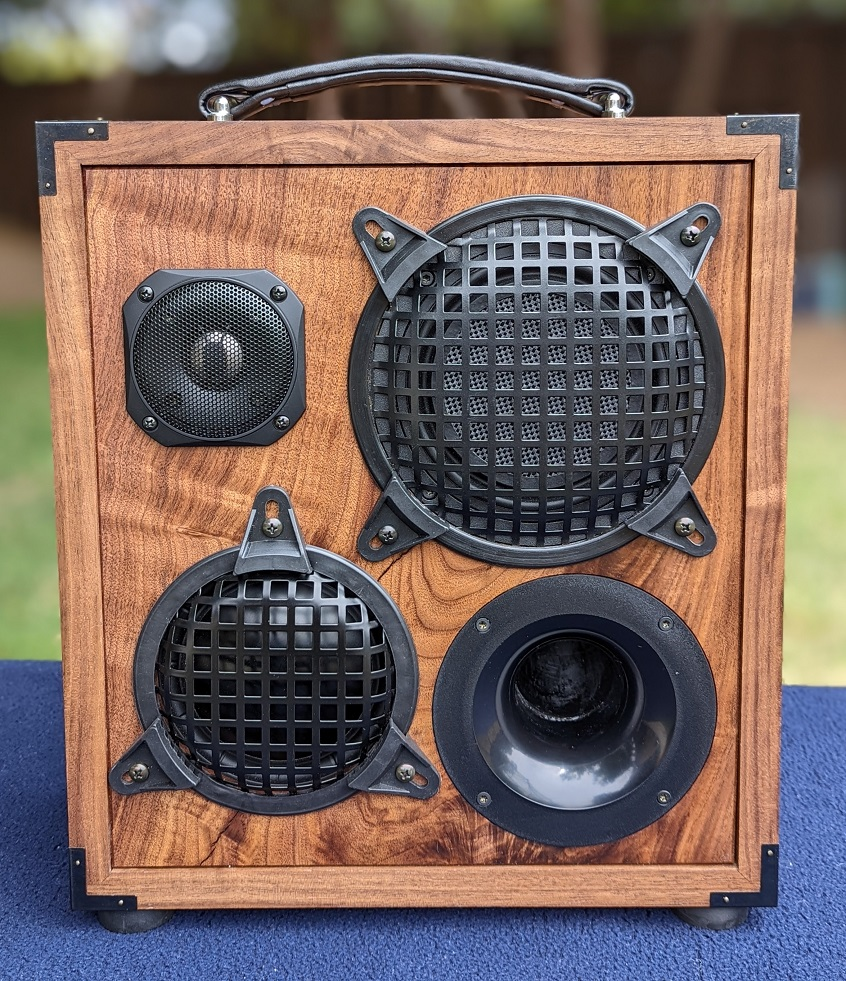
Walnut Dreams
Designer:
Bobby Kinstle
Project Category:
Portable Speakers
Project Level:
Advanced
Project Time:
20+ Hours
Project Cost:
$500 – $1,000
Project Description:
This is a portable high quality 3 way Bluetooth Speaker for a music teacher who wants to evaluate his students in remote learning as well as enjoying high quality music. It was very important to cover the full capabilities of the instruments, especially Violin, Piano, and Cello.
Design Goals:
Design Goals
1. Be battery powered
2. Cover the entire frequency range of musical instruments
3. Be able to play over 100dB
4. Have enough armor to take on the NYC subway
5. Solid high figure black walnut
Driver Selection:
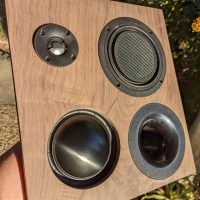
The heart of the system is the Peerless GBS135F25AL02-04 5-1/4″ midrange. This along with the 4-1/2” little brother offer tweeter level crispness on midrange detail, most especially evident in string instruments, but also really cover the human vocal range with authority and without harshness. If you were a music teacher you could hear what brand of rosin your students were using.
For Bass I selected the Dayton Audio LW150-4 6″ Low Profile Woofer. It was a toss up between this and the Tangband 4.5” subwoofer. The TB would play deeper, but it needed 4x the power and weighed a lot more. The Dayton slim woofer was able to meet the required frequency range just fine. Note, the Dayton woofer has some strange characteristics in its “ideal” box size and actually performs much better in an undersized box. Undersized to 8.1L flattens the bass response and even gives it a little boost from 50-100hz which saves power.
For the tweeter I selected the Vifa/Peerless DQ25SC16-04, 1″ Titanium Dome Tweeter because it had a reputation for playing flat to very low crossover points. I found the tweeter sounded pretty thin below 2.8hz which forced me higher than the 2.1khz I originally planned on. This tweeter also has lots of sibilance that had to be corrected in the DSP.
Enclosure Design:
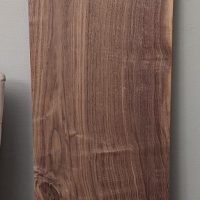
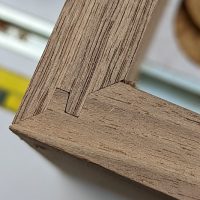
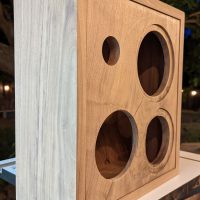
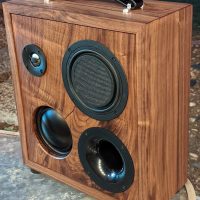
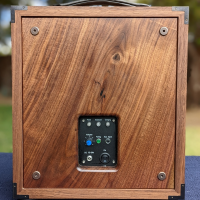
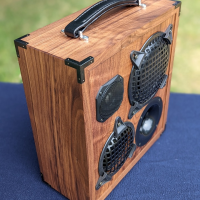
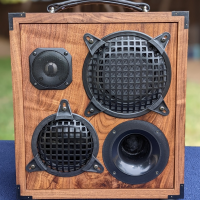
The enclosure is made from a single slab of high figure black walnut. No MDF, no veneer. It’s a standard box with lock miter joints in the corners for extra strength. The front and rear faces sit 3mm recessed to protect from scratches and provide a nice cosmetic look. Every outside corner has a metal cap to protect from damage and the outside 4 corners of the box frame are chamfered 45 degrees again so the sharp corners on the lock miter joints won’t take damage from being bumped into things. The end user intends to take this speaker places and make it work. Not just a beautiful thing to sit on the shelf. All drivers have metal protection grills. Internal volume after subtracting the port and midrange sub enclosure is 8.4L. Accounting for driver displacements and the battery board brings it closer to 8.1L. Enclosure tuned to 48Hz. For portability I added a soft synthetic leather handle and to keep it from shaking the table too much I added some rubber feet. Final finish after sanding to 320 was Osmo Polyx Oil which is a super durable treatment for hardwood floors that can be easily applied in a dusty shop.
Enclosure Assembly:
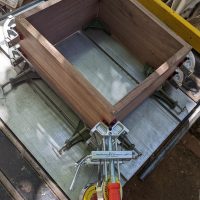
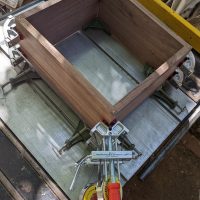
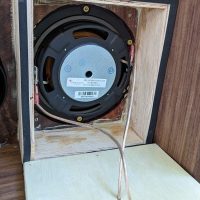
I glued the box together with band clamps and Titebond 3 wood glue. The front panel is held in with metal L brackets and sealed with silicone all around its perimeter. The rear panel sits on a shelf with threaded inserts for the screws to really clamp down on. It’s sealed with gasket tap on the inside edge of the rear panel. The midrange sub enclosure is made of plywood and secured with screws in case I ever need to replace it. The midrange sub enclosure has a moderate amount of poly fill to prevent reflections. This limits the bottom usable crossover frequency of the midrange to 200hz.
The woofer, tweeter, and port are mounted on the front but the midrange is mounted on the back side because it’s frame is unattractive, and because the dome protrudes substantially. I decided not to cut a recess pocket for the tweeter because the faceplate was a perfect fit inside the grille cover and the two locked together into a very strong structure. To compensate for the tweeter moving forward, I freehand cut a recess pocket in the back side allowing the midrange dome to protrude forward of the front panel and have the same acoustic center as the tweeter. Because of the grille I wasn’t concerned with edge diffraction effects.
Mounting the port was very challenging. I like the precision port products because they roll in and out so smooth and you can mount them close to the walls but I needed 7” of pipe in between and PSP doesn’t make elbows. I used a normal ABS 2” pipe elbow and ABS cement to join them together. It’s not a perfect fit because the PSP tube wall is much thinner than a normal Sch40 ABS pipe.
Crossover Design:
Instead of a passive crossover I opted to use the new 4 channel DSP amp from Dyaton KABD-4100. They have a 3 way speaker template which I modified to include an analog input EQ (because the analog input sounds dull compared to Bluetooth) and I deleted the POT controls for individual channel output volume. I opted for 4th order Linkwitz Riley alignment on all the drivers because I had to cross the midrange/tweeter higher than I originally planned (2.1khz vs 2.8Khz) because I felt the tweeter sounded thin at its lower range. Also, the midrange had some nasty breakup at 4.5Khz that I needed to stay well away from.
I think active crossovers are the way of the future for powered speaker design. The DSP is incredibly powerful, and you can fix your mistakes with a few keystrokes. Even professional speaker designers say they usually have some trial and error in a good 3 way design. I don’t have a big wall of high quality crossover components to swap in and out to try. For using the DSP, I set up my measurement mic and play some test tones. First, I adjust the speaker for a flat response and then tweak by ear for personal taste. I always try to use the minimum amount of corrections to get to the final product. After that I listen to a lot of music on it and see if I find any aspect annoying, then sleep on it, and make another pass of minor corrections the next day.
The tweeter has a large cap to protect it. I’m not ready to fully trust software not to break things yet.
Tips & Tricks:
1. DSP lets you do crossover topologies that would be incredibly expensive or impractical to build with passive components. On battery powered projects software crossover can as much as double your battery runtime on a complex setup like this
2. Apply a high pass filter below the F3 of the woofer. This will protect the woofer from mechanical over extension trying to play notes that it can’t play anyway. This lets you listen at much higher volume levels with less distortion.
3. Apply a low pass filter to tame cone breakup
4. Using steep crossover slopes minimizes driver overlap and the often difficult problems they can create
5. Use a calibrated measurement mic for tuning like the Dayton Omnimic or UMIK-1. Tune the speaker reasonably towards a flat response first, and then adjust for your personal taste second. If the speaker if for another person, tune it for their taste with music they like to listen to.
6. Don’t calibrate a speaker at the tail end of having a head cold.
7. Always use a high quality battery board with individual cell monitoring and balance charging. Cheapo lithium battery systems are a house fire waiting to happen.
8. When applying a finish like Osmo, sand the wood as smooth as it will take, usually 240-320 depending on the wood. Generously rub the oil on every surface (including the back side so it doesn’t warp the panels). When areas look dry, push oil form the wet areas for a good 10-15 minutes. Then using a buffer pad on a random orbital sander or polisher buff the surfaces smooth and let harden overnight. Apply a second coat a few days later if desired for more sheen but never a third coat or it will feel waxy. The final color won’t be visible for about a week.
9. High figure woods like walnut often have numerous internal cracks, rotten areas, and inclusions that you will have to deal with. It’s just the way it is. For deep cracks I used ultra thin CA glue to run all the way through the crack until it came out the bottom. This stabilizes the weak areas of the wood. For large cracks, voids, and rotten wood I carefully cleaned out all the bad wood I could get and then filled the area with Starbond black thick CA glue and accelerator. This is a fantastic product just be sure to follow their directions and be patient. I spent 3 evenings filling cracks and voids before breaking down the slab too much, and even then had some surprises when I cut new holes like the rectangular cut out on the back.
10. When you have only one shot at making the perfect cut out in your expensive material, make the shape first on a piece of scrap wood and then stick it over the fancy wood with double sided tape and use the scrap as a template with a flush trim top bearing router bit.
11. Always use a high quality router circle jig like the one from Jasper Tools.
12. Find a handle that’s soft to touch but has a stiff core inside to help distribute the weight of your fingers.
13. Lock miter joints are a pain to set up but fantastically strong and never walk off during glue up.
14. Band clamps are great too but corner clamps help hold things in perfect 90 degree angles while clamping.
15. You can never have too many clamps.
Conclusion:
The speaker sounds fantastic. It smashed the design goals for musical instrument ranges. I don’t think I would use this tweeter again as it has some strong sibilance problems around 6K that thankfully I was able to fid in the DSP. Strings and vocals are just incredible. My favorite cello pieces give me goosebumps. The battery board works great and provides quite a long runtime even at pretty darn loud levels. I love that it can charge from 5V to 24V and that it even included a car cigarette lighter port adapter with the battery board kit.
Walnut is a fantastic material to work with. I was privileged to work with some high end parts and materials on this project and advanced my skill considerably.
About the Designer:
I grew up in the Mojave Desert in a small community of scientists, craftsmen, and engineers. We were the kind of people who didn’t accept “it’s impossible” or “you can’t do that”. If I want something that doesn’t exist, I’ll just make one. Now I’m a thermal engineer in the computer industry and I currently hold 17 patents worldwide.
Project Parts List:
|
Part # |
Description |
Qty |
|
264-1486 295-255 264-1468 325-212 142-107 027-352 268-348 325-434 120-055 325-116 260-7706 260-371 269-2100 292-526 262-302 260-540 |
Peerless-GBS-135F25AL02-04-5-1-4-Aluminum-Cone-Woofer-4-Ohm
Dayton-Audio-LW150-4-6-Low-Profile-Woofer-4-Ohms Peerless-DQ25SC16-04-1-Titanium-Cone-Tweeter-4-Ohm Dayton-Audio-LBB-5v2-5-x-26650-Lithium-Battery-Charger-Board-Module-21V-with-Charge-Protecti 5-Pack-26650-5000mAh-Li-Ion-Flat-Top-Rechargeable-Battery 47uF-100V-Non-Polarized-Capacitor Precision-Port-2-Flared-Port-Tube-Kit Dayton-Audio-KABD-4100-4-x-100W-Bluetooth-Amp-Board-with-DSP 24-VDC-5A-Switching-Power-Supply-with-2.5-x-5.5mm-Plug Dayton-Audio-KAB-PMV3-Panel-Mount-for-KAB-v3-Boards-with-Function-LED-and-Install-Kit Penn-Elcom-9120-Rubber-Cabinet-Foot-0.88-Dia.-x-0.31-H 6-Economy-Speaker-Grill 5-1-4-Economy-Waffle-Style-Steel-Speaker-Grill Visaton-Grill-for-FRS8-Series Penn-Elcom-H1008-Black-Leather-Look-Strap-Handle-8.57-Long Speaker-Gasketing-Tape-1-8-x-3-8-x-50-ft.-Roll |
1
1 1 1 1 1 1 1 1 1 1 1 1 1 1 1 |

Excellent write up! As I approach the end of my first large DIY OB speaker system (solid mahogany & ipe’), the #8-15 tips are especially helpful. I have learned a ton about woodworking, wood, glues and finishes, tools, hardware and techniques in the process and look forward to the next stages of listening and optimization. No DSP or multi-drivers complexity for me, if it can be avoided. High efficiency performance achieved with simplicity is (to me anyway) much more elegant.
Going to try this design out.