Infinity SM 120 Rebuild


Designer:
Stephen
Project Category:
Tower Speakers
Project Level:
Intermediate
Project Time:
20+ Hours
Project Cost:
$500 – $1,000
Project Description:
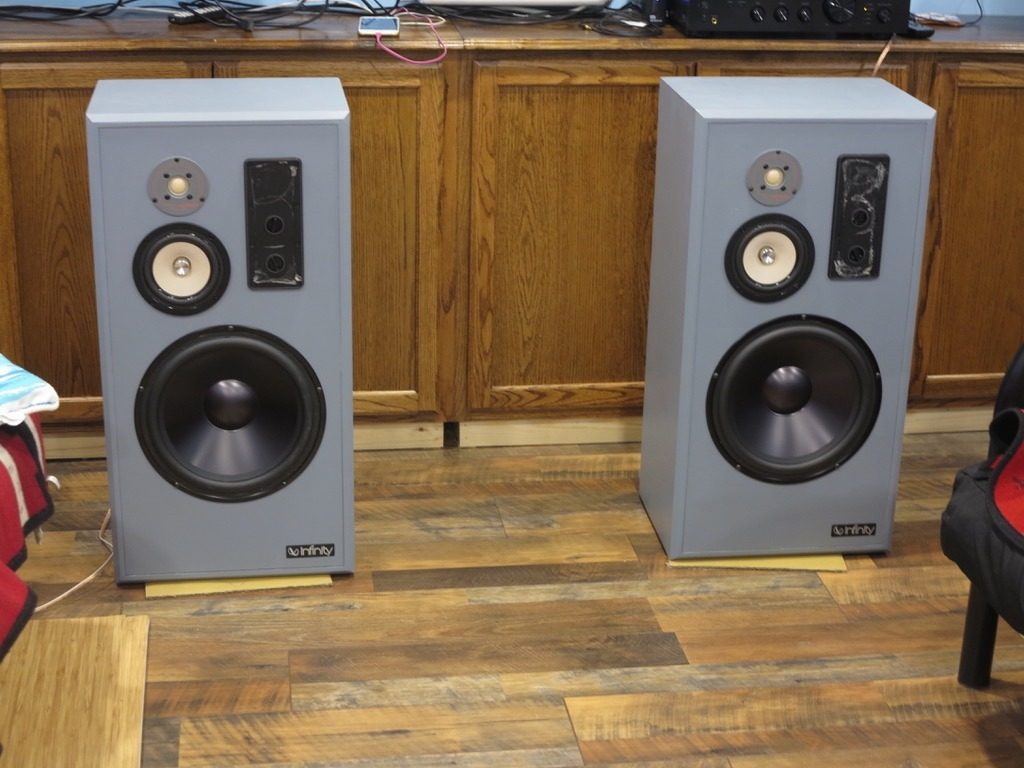
Rummaging through a junk shop and spied this pair of Infinity SM120s up in the loft. I said I’d think about it. The fella shrugged and suggested “ten bucks?” I thought this might be fun and a deal was struck. They were bigger than I thought and I’m still not sure where they’ll fit. But they sound good!
Design Goals:
I wanted primarily to build a good sounding set of speakers appropriate for the kind of music I really like, i.e. mostly 70s rock but still competent on other things. I still use amps that can adjust the sound as well as processors in Audirvana if it needs a lot of work. Often though I’m using Volumio on a Hi-Fi-Pi with an Allo top hat through a Topping DAC and into a either a newish Pioneer D-class or a vintage HK with 300 watts of grunt. I’m not seeking “purity” but something that I like the sound of.
Driver Selection:
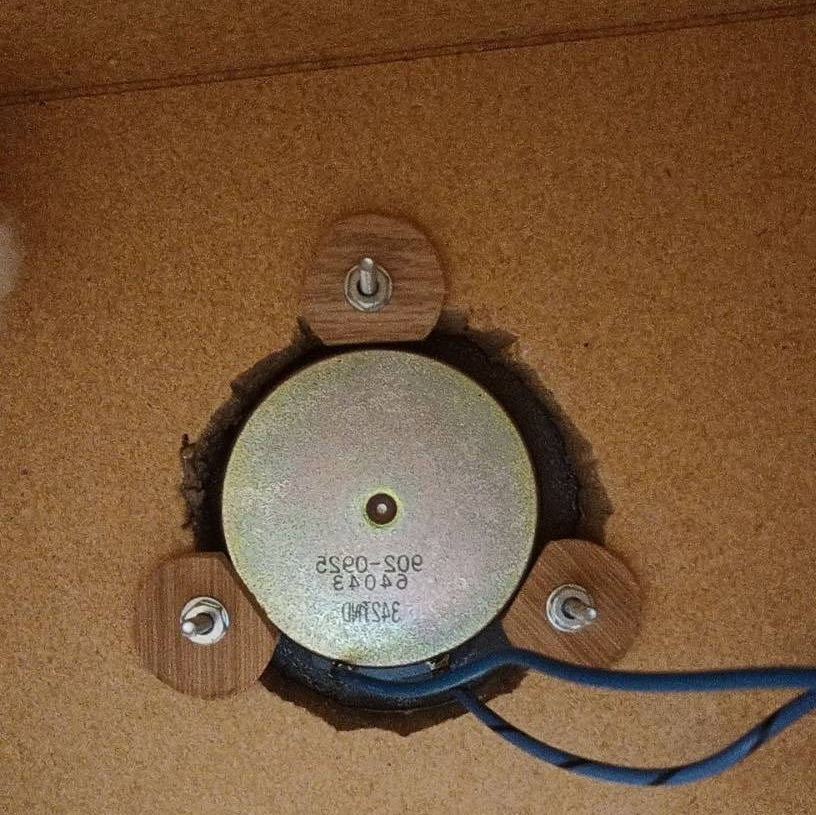
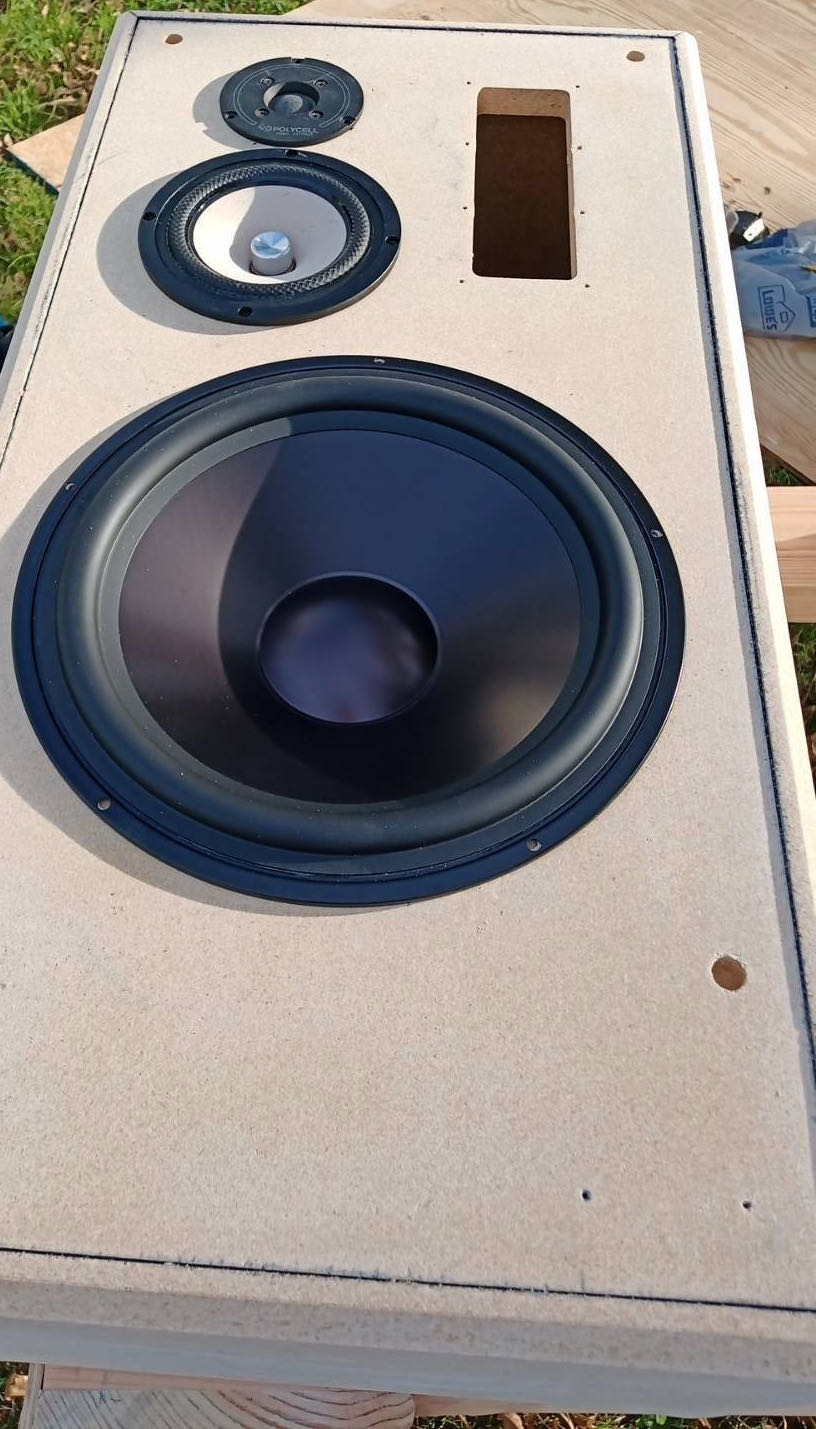
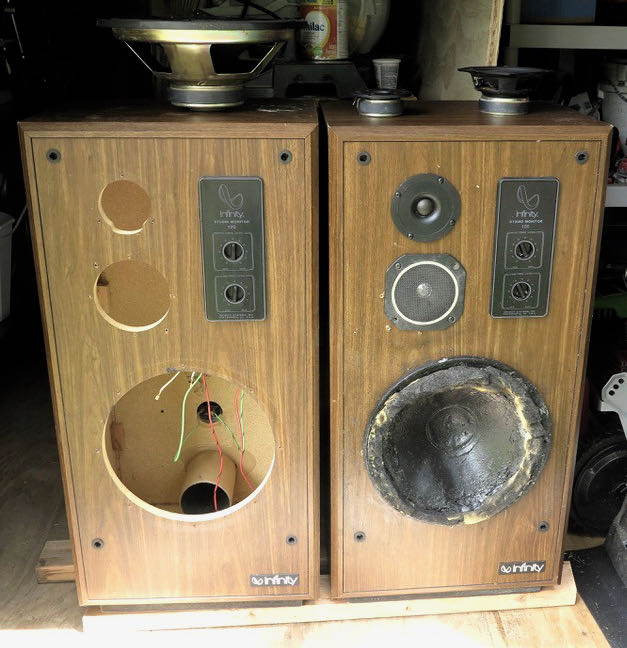
The photos show how NOT to do a refoam job on a woofer. The mid-range had been replaced with car speakers, and the tweeters – one original but shot and another shoehorned into the opening with a drill and a screwdriver. Obtained original PolyCell tweeters but used a full-range driver as the mid and a Dayton aluminium cone 12″ woofer. Selection was largely what would fit and not what was on the spec sheet. About the only consideration was whether the crossover points were adequately covered. The full-range driver might not be the best choice as a mid but, actually, it’s good.
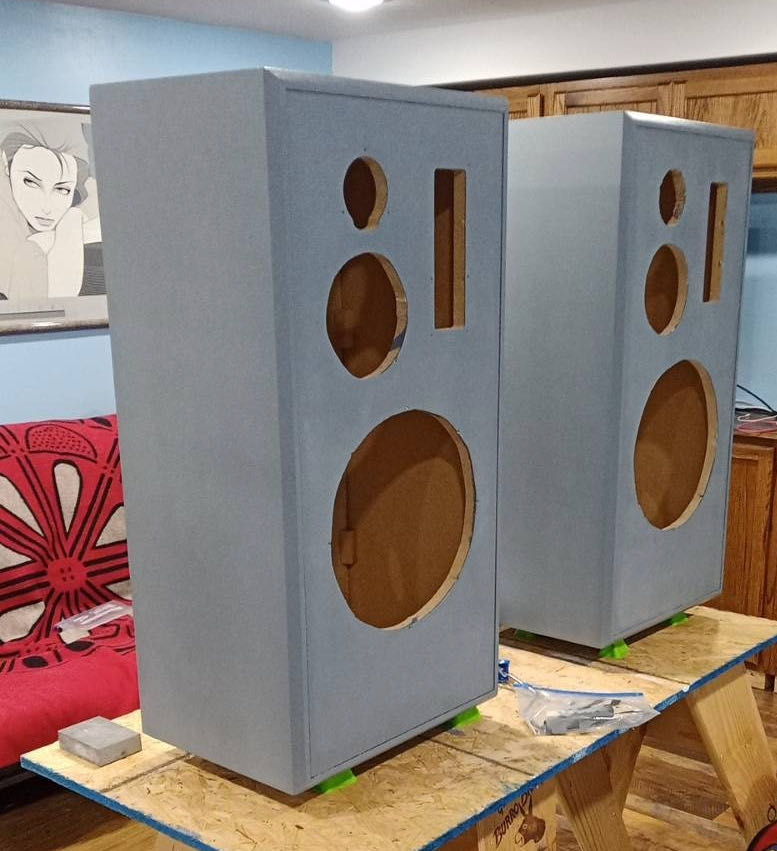
Enclosure Design:
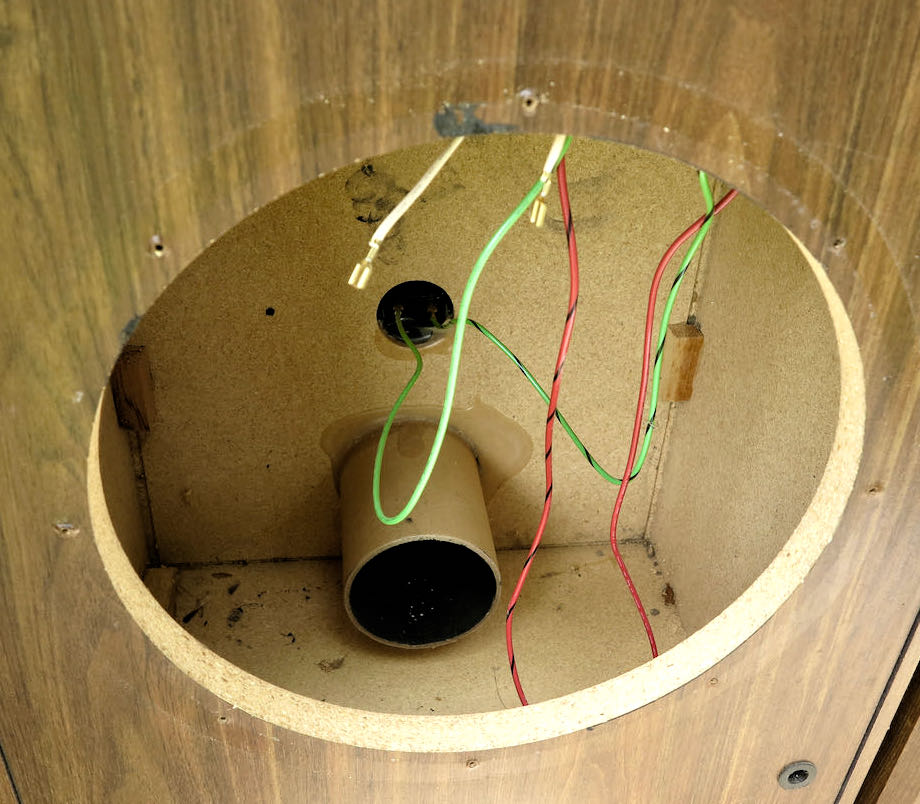
The enclosure is an Infinity SM-120 with no baffles, braces, or sound dampening provisions. No enclosure around the mid-range. It was veneered in vinyl which was removed over several tedious hours with a heat gun and a stiff putty knife. Reviews vary, as they always do, but armchair experts aside, most speaker makers knew what they were doing. Whether the result pleased buyers is another story. Most commonly these were party pleasers.
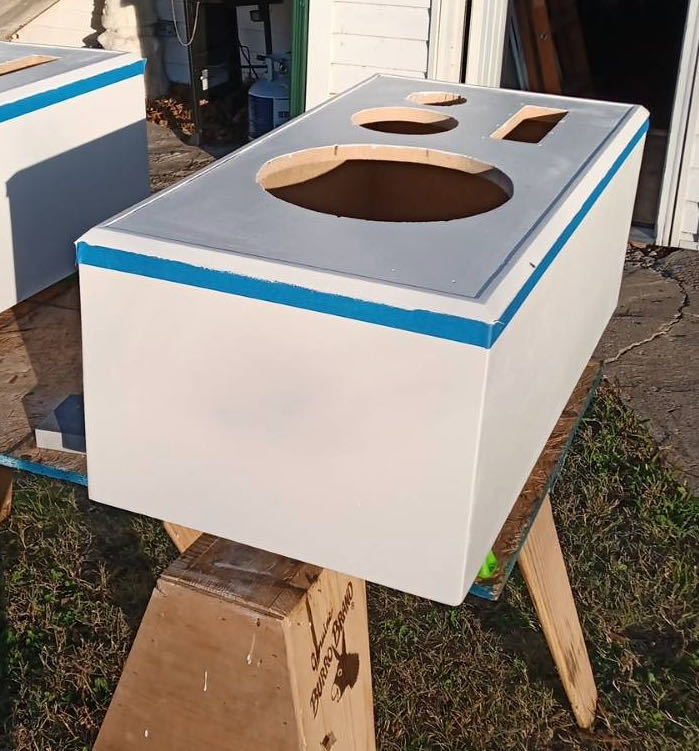
Enclosure Assembly:
Assembly of a new speaker might have been easier and as the finishing went along it became apparent that applying a new veneer would be futile and look silly. I sanded it clean, making sure all adhesive was gone. I did have to design a mounting system for one of the tweeters and it worked out fine. I chose not to add bracing or baffles or enclosures. More about laziness and thinking “they designed it this way so let’s see how it sounds.” I did add an inch of poly. The finish turned out remarkably well — BIN shellac based primer, a couple of coats with a gentle sanding, followed by Lowes best quality trim paint to match my home interior. Just careful rolling and about three coats. It’s a good result actually.
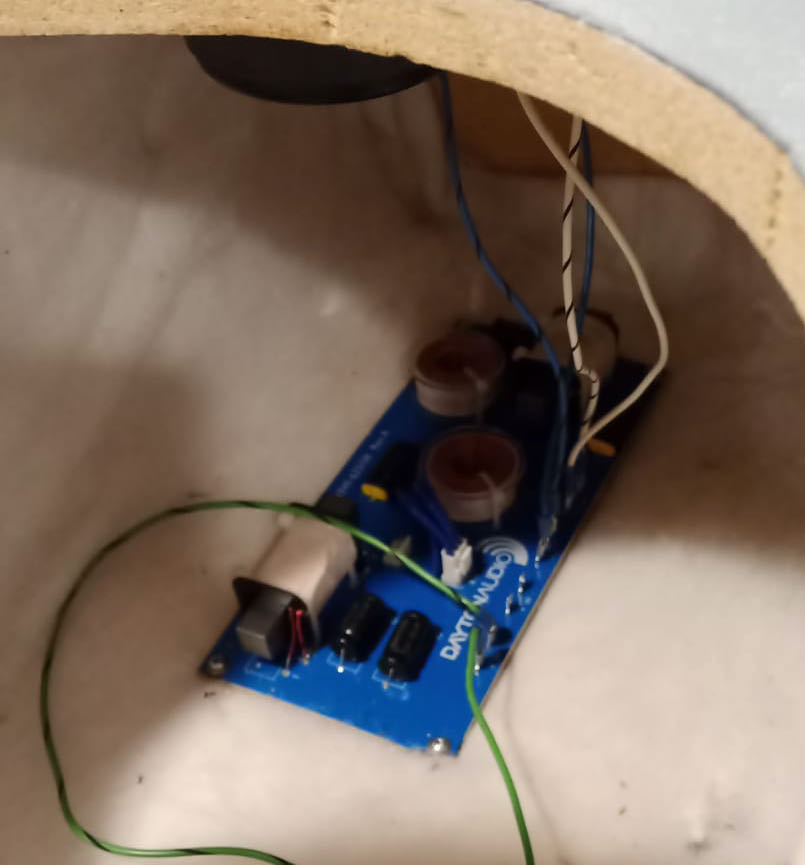
Crossover Design:
I replaced the caps on the original crossovers with high quality ones from PE but when I tested the speakers one of them was tripping the overload on the amp. The other one sounded great. I shrugged my shoulders (a lot of that in this project) and ordered new 3-ways from PE. Turns out I had misread my diagram and wired one wrong. It was probably fine. I’ll use the L-pads with the Dayton 3-way.
Tips & Tricks:
Put aside all the audiophile debates and advice on forums and YouTube. In seeking perfection that last 20% is expensive and time-consuming and even after you’ve done it, you’ll likely spend your time listening for faults rather than enjoying music.
Spend good money on drivers and try to match them fairly closely to your box.
You’re not making a piece of furniture. Make a speaker instead.
Preparation is the key to getting a good finish, no matter what finish you choose. I was dubious but latex trim paint worked well and looks nice. BIN shellac primer on MDF is the only way to go to seal MDF.
On a rebuild, try not to reinvent the wheel. Go with what you’ve got and if you can improve it without too much trouble give it a go.
Conclusion:
Last night a group of us from the 70s listened to Styx, Kansas, James Taylor, and others with great satisfaction. The bass is strong and clean (yes — size matters), the midrange is precise, and overall these are very musical for the purpose intended. They are huge. 34 inches high and 16 inches wide with a heft to match. In rebuilding speakers remember that someone who knew what they were doing — at least on mainstream companies — and that the rules for much of speaker design hasn’t changed although materials have improved. Although I was beginning to doubt how they would turn out — the result is spectacularly good.
About the Designer:
I built my first speakers in 1974 using a book from Radio Shack. I still have it. It works. Now 63 with an upper range of hearing around 14khz and, yes, this influences my driver choices! Did a decade as a nuc in the navy. More in computers. And now sort of retired. No audio expertise — this is a plus, in my opinion.
Project Parts List:
|
Part # |
Description |
Qty |
|
260-311 |
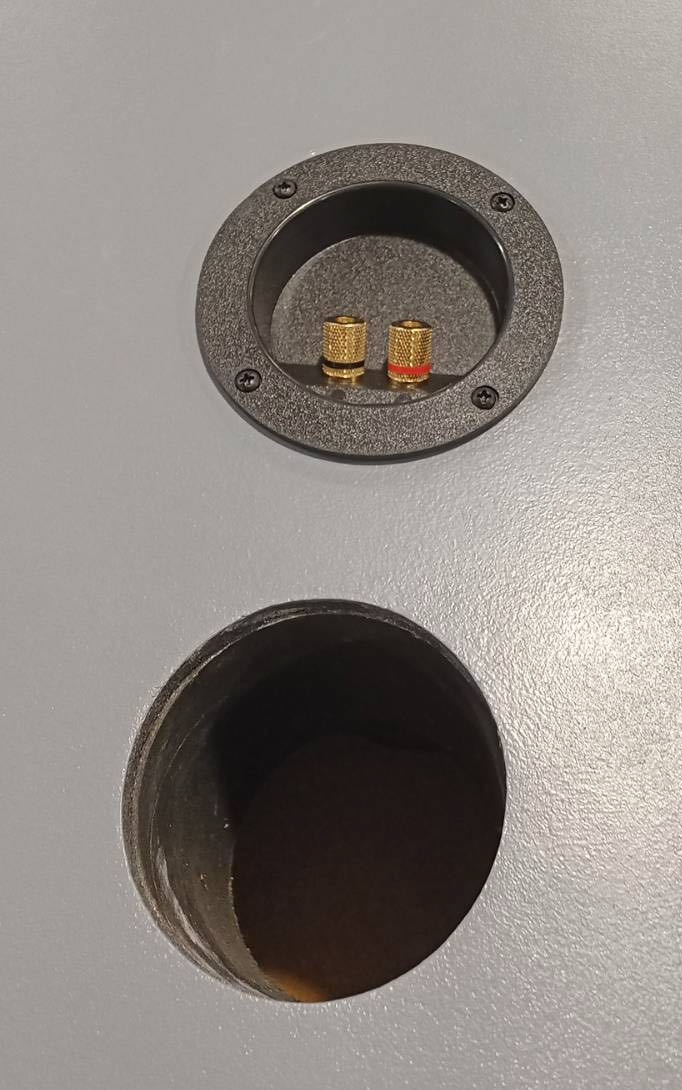
Gold Banana 5-Way Binding Post Banana Jack Round Recessed Speaker Terminal Cup |
1 |
|
264-958 |
Tang Band W5-2143 5″ Paper Cone Full Range Driver 8 Ohm |
1 |
|
295-534 |
Dayton Audio DSA315-8 12″ Designer Series Aluminum Cone Woofer |
1 |
|
260-154 |
Dayton Audio XO3W-625/5K 3-Way Speaker Crossover 625/5,000 Hz |
1 |
I had a set of SM112’s as a teen. The original midrange had a big plastic tube capped at the end behind it that acted as the midrange enclosure. I sure enjoyed listening to those speakers. Lasted almost 20 years before the woofer surrounds gave out.
The original mids likely had a sealed back on the driver itself so you may want to consider still building a mid enclosure.
I like what you said about listening for faults rather than listening to the music. Many a time I’ve commented in audio fora about those folks who spend too much time listening to their systems that they miss the music.
I love to rebuild retro units too. It is fun to revive the dead.
Your statement “No enclosure around the mid-range,” troubled me. I agree with your assessment that, “most speaker makers knew what they were doing.” The original design incorporated closed back mid-range drivers.
A three-way speaker with an open back mid-range and no internal enclosure, is a cardinal sin of speaker building. Either replace the drivers with closed back units or provide an internal enclosure and turn away from sloth.
Companies manufacture a simple solution for isolating mid-range drivers with an open back. They are easy to install sub-enclosures that minimize resonances. They protect the mid-range driver from the woofer in open enclosure designs. They easily install on the back of a baffle and usually include a hole for wire access. Made of thick ABS plastic with reinforcing ribs to create a rigid and lightweight enclosure, they are inexpensive (about $12) depending on size.
If you choose to make a change, I believe you will be pleased with the improvement.
I’m reminded of what Billy Joel crooned — “I’d rather laugh with the sinners than die with the saints…the sinners are much more fun.” The original drivers were open and these were never audiophile speakers. That said, these have displaced my Klipsch reference towers (which are amazing) as these sound better the way I listen to music. They were for dudes like me who, at the time, were living in a mobile home on a white beach in Pensacola where all we had were clean sheets and towels, some tins of beans, and a Zenith stereo. As for the sins of cardinals I cannot say because, alas, I’m merely a squirrel.
I rebuilt a pair of these years ago for fun. Made them a 6.5″ two-way, with the woofer becoming a subwoofer. Used a front-to-back cardboard tube for the 6.5″ mid. Had some trouble getting an airtight seal so I poured some liquid rubber inside the tube where it sat against the back wall which did the job. They ended up sounding great and sold quickly.
Stephen, What a fun project. Really liked the progress photos. I had to stare at the old woofer shot for minutes. The stories those speaker cabinets could tell. From a plush “Audiophile” showroom to abandoned in a secondhand store. Now, cranking out tunes anew. Well done.
P.S. I had a copy of that Radio Shack Speaker Design Book. From the days when a 1K resistor could be bought in a local store.
I picked up a set of SM120’s for 50 buck and reformed the bass…. I absolutely love these speakers!
I’m the buiider of this project. Nearly three years later…many kind comments above. While enclosing the mid-range seemed like a good idea, and still does, I’ve never gotten around to it. Still listen to these everyday, pretty much permanently connected to a basic Pioneer amp, a Schitt DAC, and RPI 4 running Volumio. The bass is punchy and tight, the mid range lively and I assume the tweeters are doing what they should. I’ve since rebuilt a set of Frazier Monte Carlos using drivers and cross overs from Parts Express and they are very satisfying but need a sub to properly balance. These Infinitys don’t need any help. If you’re thinking about rebuilding or building your own by all means do. I know forums are full of folks saying you can’t do it right, don’t bother. Ignore them. Match the cross-overs as best as you can and spend money on decent drivers. You’ll probably be very satisfied.