
MTA

Designer:
Grant Gustavsen
Project Category:
Bookshelf Speakers
Project Level:
Intermediate
Project Time:
8-20 Hours
Project Cost:
$100 – $500
Project Description:
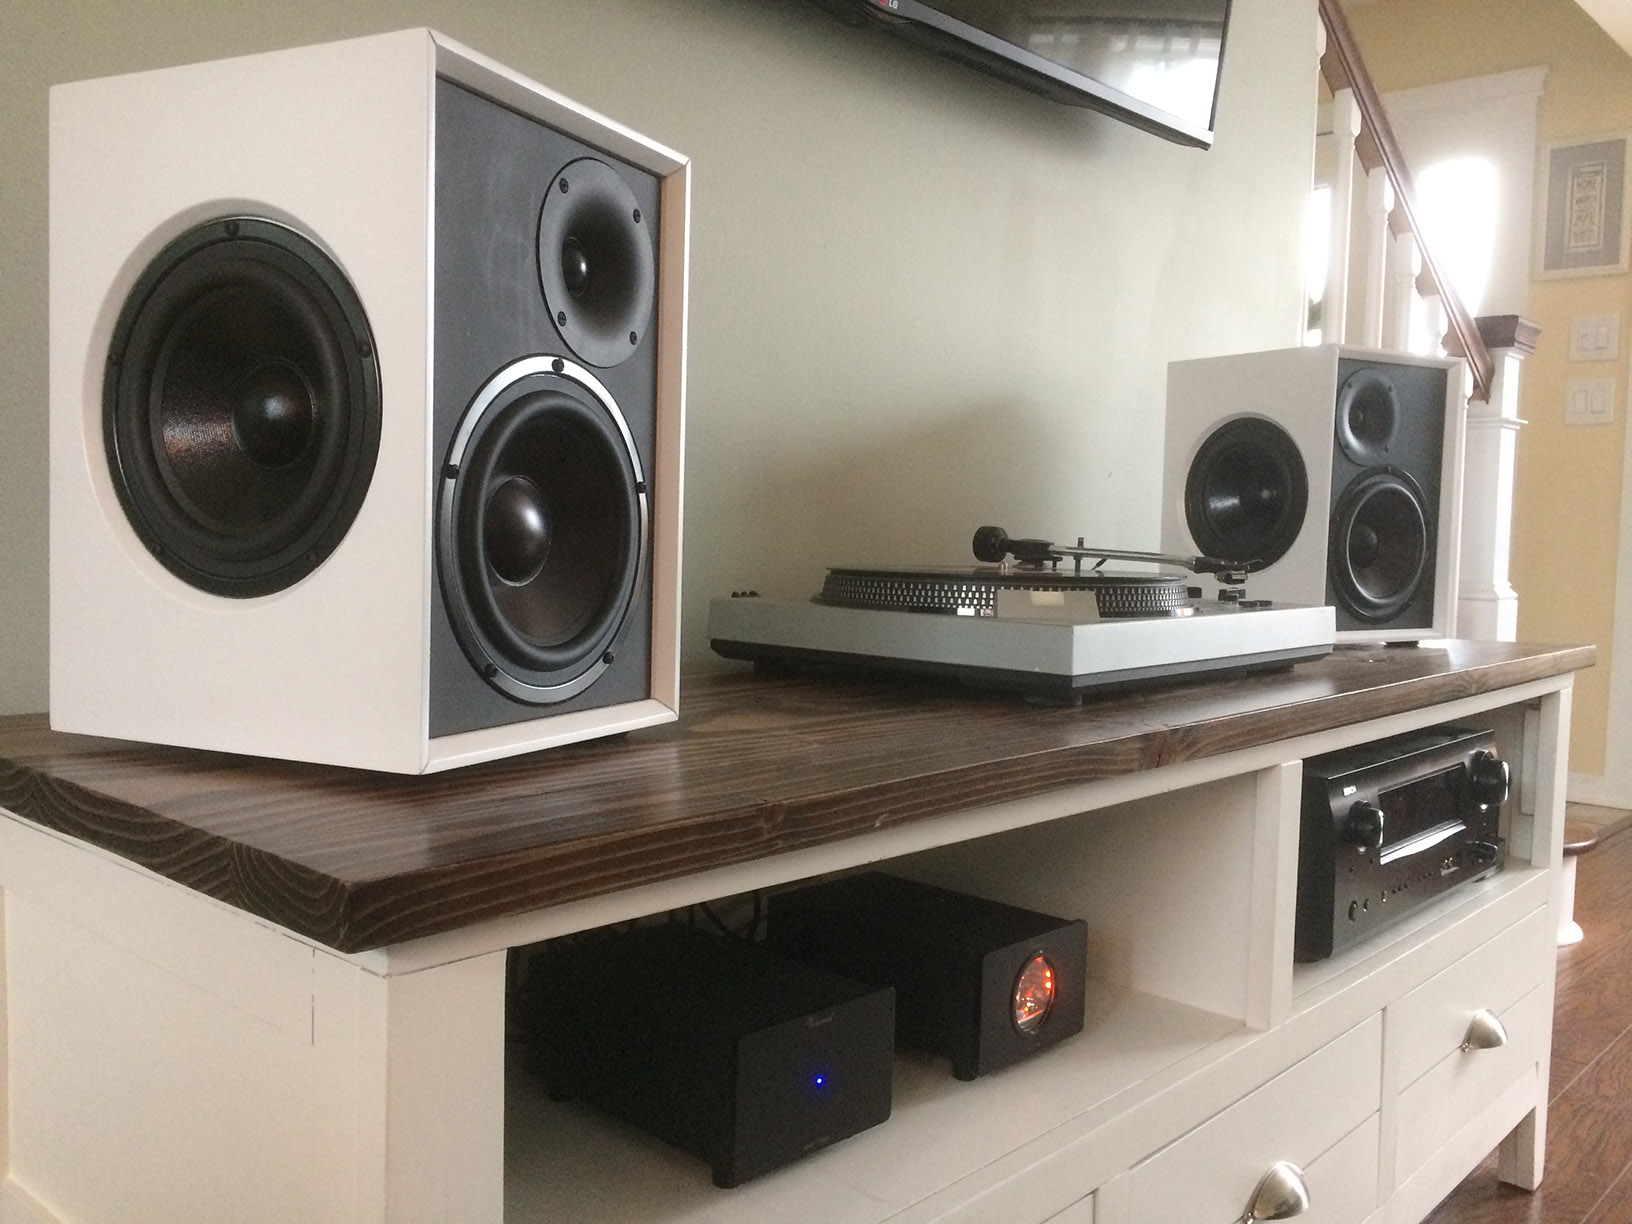
The MTAs are More Than Able to fill a room with sound. This two way bookshelf speaker utilizes a 6.5″ Dayton aluminum mid-woofer and a Dayton waveguided dome tweeter. Their lower end frequency range is extended with two Dayton 6.5″ passive radiators(one on each side).
Design Goals:
I wanted to design a mini-monitor capable of reproducing the majority of frequency range. I also wanted them to have a relatively wide dispersion as not to limit the “sweet spot” to a single couch cushion. The use of double passive radiators provides a force-canceling effect.
Driver Selection:
I have had great results using Dayton drivers in the past. For this build, I intended on modeling the crossover using WinPCD. Dayton provides the necessary FRD and ZMA files for most of their drivers to accurately design the crossover ahead of time. The new 6.5″ Aluminum Designer Series Woofer(DSA175-8) had the appropriate upper frequency extension while modeling well in a relatively small “ported” enclosure. The Dayton Waveguide Neo Dome Tweeter(ND25FW-4) is an inexpensive choice and had the wide dispersion i was looking for. Lastly, the 6.5″ Dayton Passive Radiators(SD175-PR) were the only choice to match the aesthetics of the Designer Series active woofer. The passive radiators were tuned to ~50Hz with the addition of three 3/16″ (1 1/4″ OD) fender washers each.
Enclosure Design:
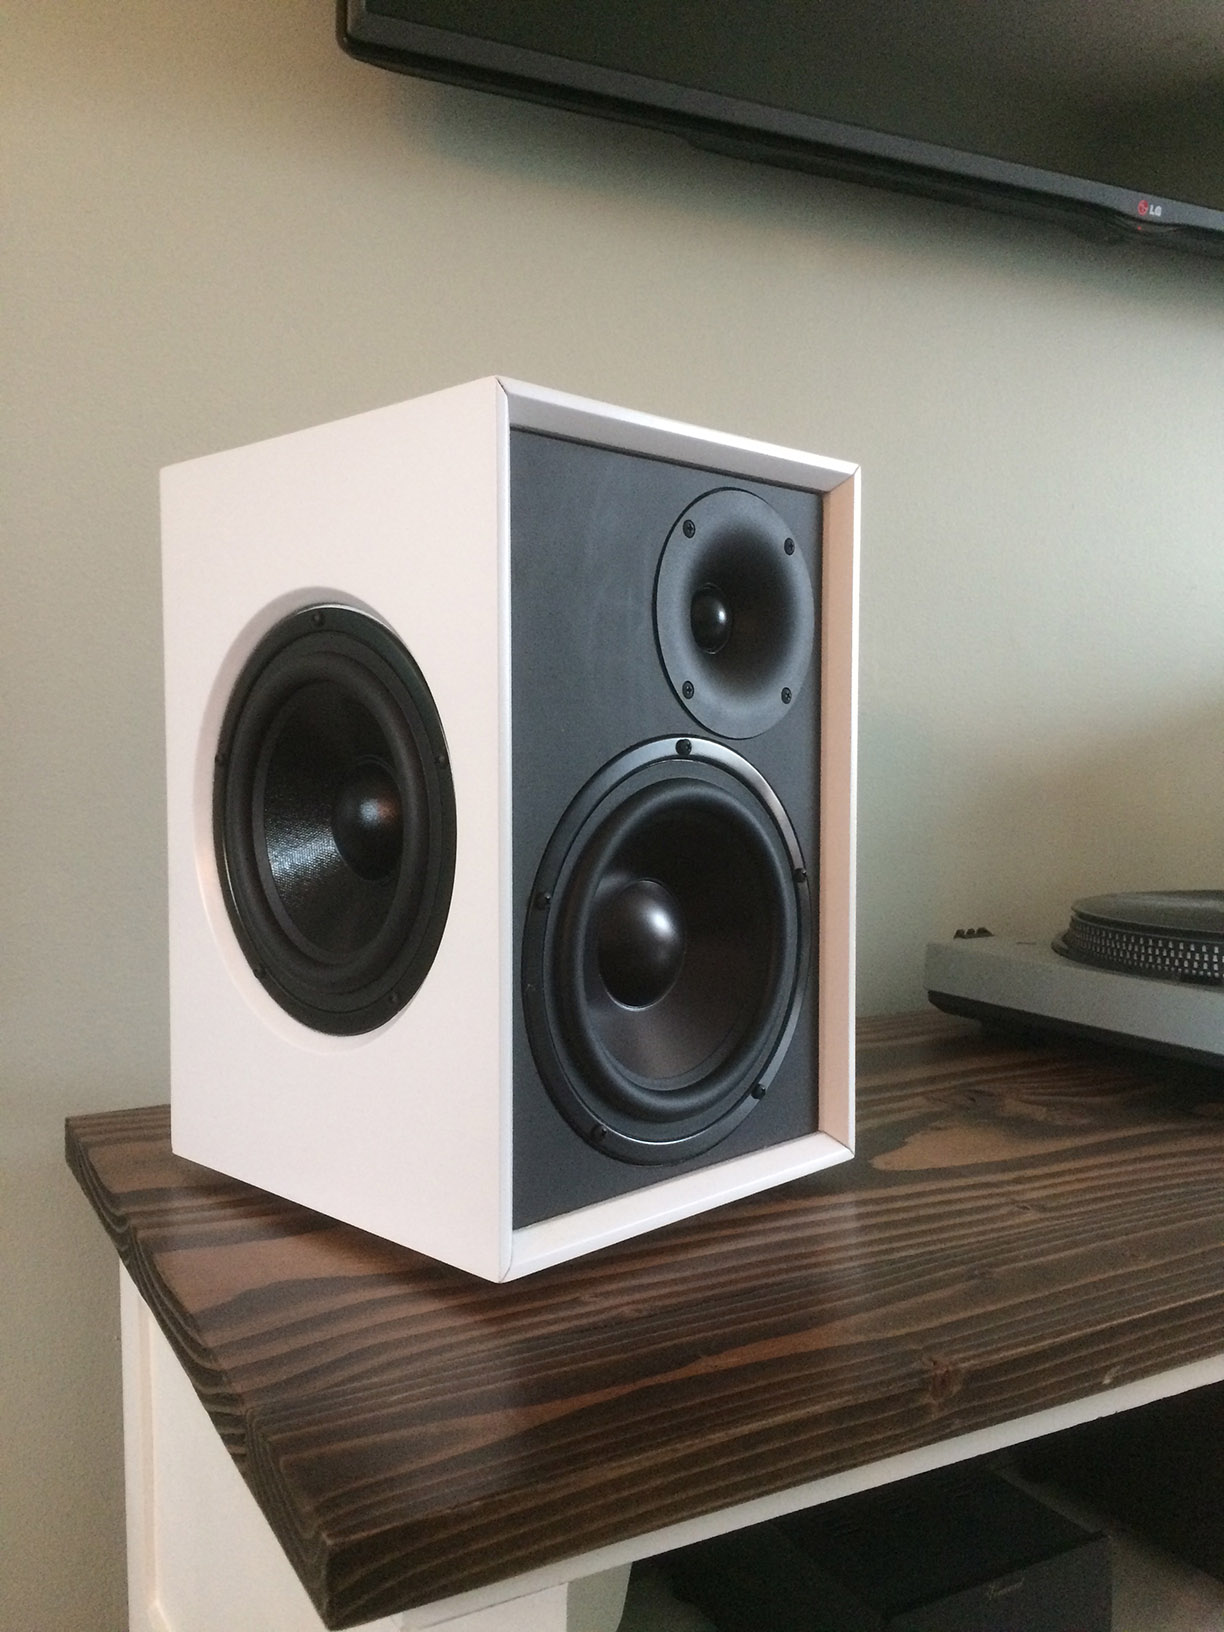
The enclosure is Denovo Audio knock-down MDF 0.23 cu. ft. mini bookshelf speaker cabinet. The woofer is located centered on the front baffle and comes 1/4″ from the bottom. The tweeter flange is off-center and is 1/4″ from the top, side, and woofer flange. Each side of the enclosure has a passive radiator centered on it.
Enclosure Assembly:
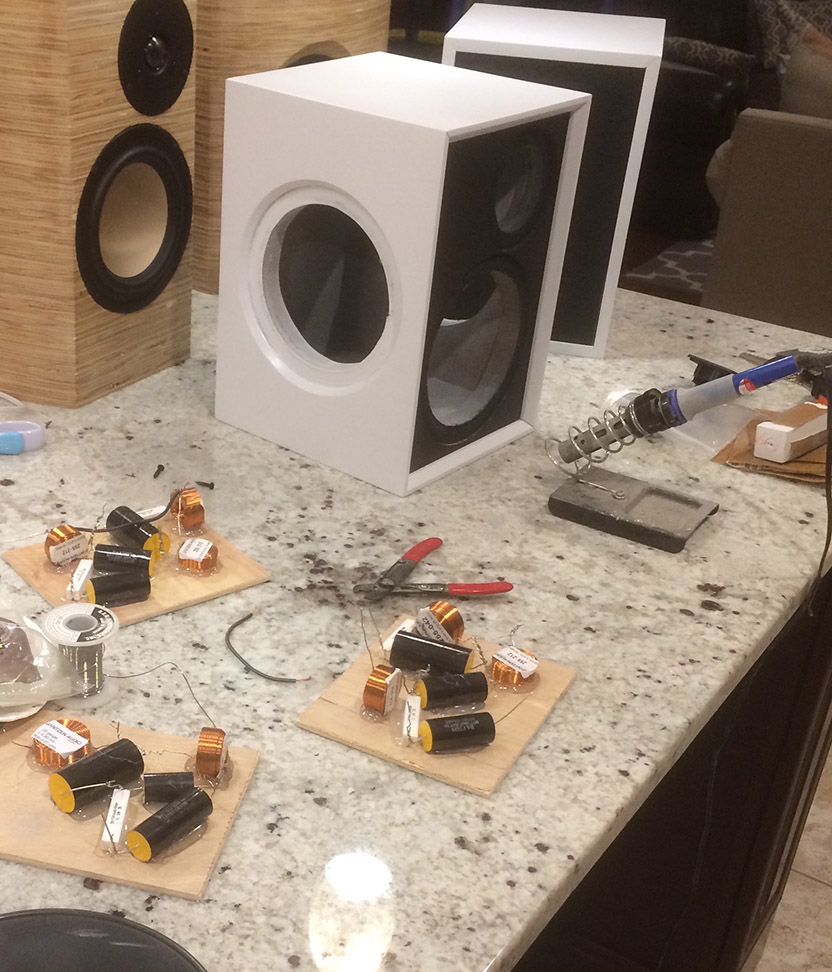
The Denovo Audio flat pack enclosure went together flawlessly. I chose to flush mount the drivers on the front baffle but this was purely aesthetic. I also changed the look of the stock box by capping four sides with an additional layer of 1/2″ MDF. I cut them 1/2″ deeper than the cabinet and back chamfered the front inside edge for a modern look with a vintage feel. I mitered the panels then glued and clamped them in place. I flush mounted the passives in a 45* recess. I accomplished this with my Jasper Jig and a v-groove bit in my plunge router. I glued a 6″ x6″ piece of acoustic foam to the back and filled with polyfill for good measure. I finished the enclosure with sand-able primer and spray enamel. All of these changes in appearance are purely for looks. The stock Denovo Audio box would more than suffice as an appropriate enclosure.
Crossover Design:
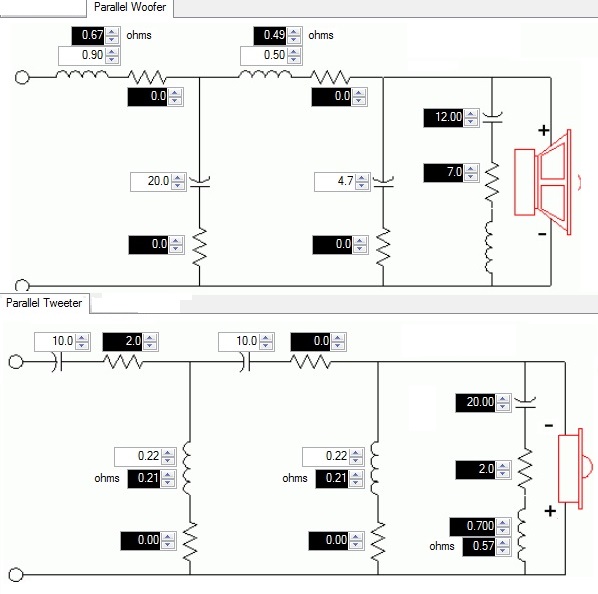
WinPCD and the ZMA and FRD files from Dayton guided me to a fourth-order Linkwitz-Riley at 2000Hz. There is a Zobel on the woofer to flatten out its rising impedance. The tweeter has an LRC after the crossover to flatten the impedance peak at resonance. These two circuits allow the fourth-order components to function as predicted. In crossover schematic above, the inductor values are accompanied by their DC resistance. Those are not additional resistors. However, there is a 2ohm resistor just after the first capacitor on the tweeter high pass filter. Also, keep in mind that the polarity on the tweeter is reversed. I hot glued the woofer filter to the bottom of the enclosure and the tweeter filter to the top.
Tips & Tricks:
Have Fun.
Conclusion:
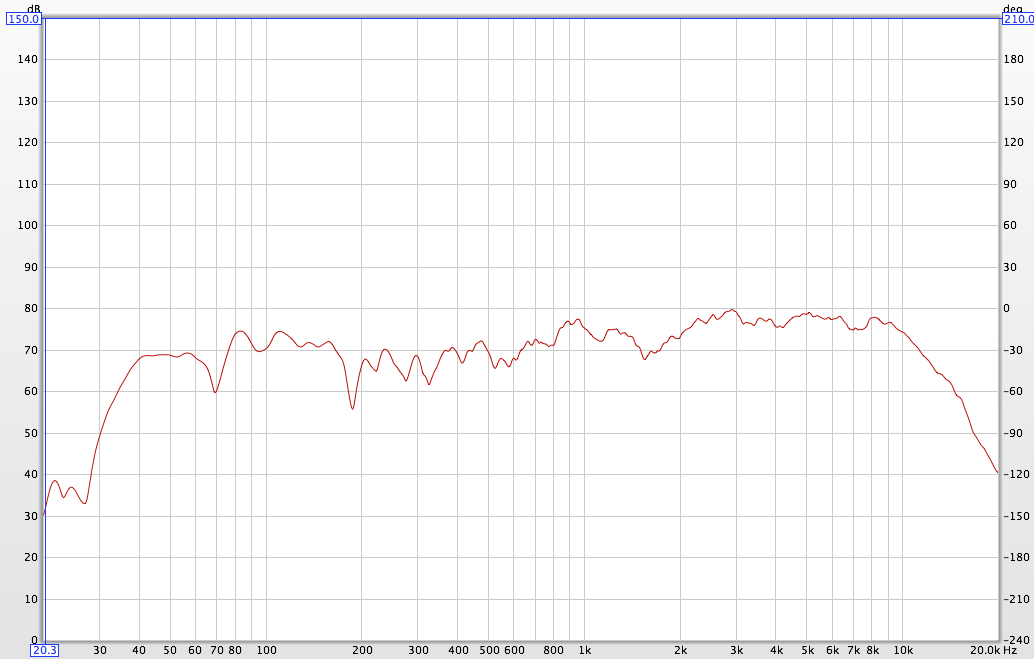
To say that these speakers are “able” would be an understatement. They are More Than Able. They excelled way beyond my expectations. I thought I was going to get an acoustically flat monitor for a desktop or a small format two channel setup. What I got was a knock-your-socks-off, full size loudspeaker experience. The measurements were made using Room Eq Wizard and the Dayton Audio DTA-120 Class T Mini Amplifier at the listening position. If you look at the in-room response, with room gain, the bass extends down to 40Hz. The rising response wasn’t obtrusive either. The upper frequencies were delicate and easy to listen to for hours. Which we did. My father and I put them through their paces with a variety of sample tracks. We start easy with acoustic guitar, make our way through vocal jazz, and end up with full scale orchestral pieces. Imaging with the smaller format music was ever present, while the orchestral music was clear and well defined. As mentioned earlier, the MTAs are “More Than Able”.
About the Designer:
Grant Gustavsen is a member of the Speaker Building Design Team.
Project Parts List
|
255-212 |
Jantzen Audio 0.22mH 18 AWG Air Core Inductor Crossover Coil |
4 |
Nice job
I’ve had this exact style on my mind for a long while- but didn’t have the chops to know if it would be the right move, or just a silly incarnation. Now that I see the stats, how good it looks and how it can be done right… I’m all in. Great write-up as well. The following isn’t a critique of you or the design- but I wish that these projects had (downloadable?) schematics for the enclosure panels. Spelling it out is all well and good, but I am a much more of a visual guy when it comes to woodwork. I would LOVE if one of the Sketchup / CAD experts on the site were to include the technical drawings for the enclosures. I have had much better luck with a mechanical drawing labeled with measurements than I have with the written explanations. That might just be my own handicap, however. Still love this design and am going to go for it! Thanks!
Awesome design. I’m particularly interested in how you used the passive radiators. When you were using WinPCD, did you include the effect of the box and passives in the design of your crossover; and if so, how?? I understand the enclosure will affect the performance of the woofer be it sealed, vented, or some other configuration. But I’m curious how to simulate that affect and convert it into frd files that can be used in WinPCD to design the crossover. Any help you can provide would be appreciated. Thanks.
I’m in the process of building these speakers.
Your parts list is missing 4 – 0.22mh inductors. These are shown on the tweeter crossover schematic.
I opted to use these since a 20AWG is not available at Parts Express:
Jantzen Audio 0.22mH 18 AWG Air Core Inductor Crossover Coil. Part # 255-212
I had to place another order, waste several days and pay shipping again. Please correct this.
How would these speakers perform as fronts in a 5.1?
Hi. Maybe I am missing something (my apologies if I am). What wattage amplifiers are recommended for these cabinets?
Joe – The author mentioned using a Dayton Audio DTA-120 Class T Mini Amplifier as part of his test rig. Might be a good starting point for your research?
Wondering if the author or anyone else has a recommendation on a crossover board to use for the MTA? Sure, I can hot glue the x-over parts to a piece of scrap but I’d rather not.
I’m looking here: https://www.parts-express.com/cat/passive-crossover-boards/305 and specifically, this 2-way board: https://www.parts-express.com/crossover-pc-board-2-way-12-db–260-130. I’m wondering if I’d need a different version for tweeter x-over verses the woofer x-over?
It would be nice if one of these pre-etched boards would work but if not, I might just just some regular perf board I already have.
Thoughts?
_rs
Hi. Anyone having problems with the driver running into the radiators? I triple checked before I cut. And I have now checked again now that I have this problem and I cut according the the directions supplied under “Enclosure Design”.
Are you flush mounting? I figured there would be enough clearance if you surface mount on the Denovo box.
I just pulled off one of my passives and there is only a paper’s width of clearance! They barely fit because I have an extra 1/4″ of material from the painted white sides. I’d say to cap the sides with some sort of material that would give an extra 1/4″ of thickness to the sides. Another option would be to move the passive radiators holes to the top of the sides, instead of centered as in the pictures. I hope this helps.
Hi
Do you have a drawing of these beautiful speakers??
Hello, i’m from Europe, and down here it’s hard to find a source for the DSA 175-8, any suitable replacement for it??
I am going to build these speakers but I was thinking to have a little bit more room in the speaker box they also show a .56 cubic foot cabinet would that be okay to use? And they do have a matching aluminum passive radiator now could I use that and would I have to put washers to tune it to 50hz?