
Bluetooth Speaker Model “33”

Designer:
Chris
Project Category:
Freestyle Speakers
Project Level:
Beginner
Project Time:
1-8 Hours
Project Cost:
Under $100
Project Description:
This is my first audio project and it is about as basic and simple as it gets – like me! It is a Bluetooth speaker made from an old cardboard box. I know exactly how old, because the date it was made because it is marked on the box: February 6, 1974. It is from a case of Rolling Rock beer “ponies” which are just small bottles of beer. It was “union made” in Philly and I guess that is why it has lasted so long. The box does have sentimental value. I found it while I was going through my father’s stuff after he passed away. He marked the box “electronics” and it was filled to the brim with various cords and cables dating from the 60s all the way to the 2000s: RCA patch cables from his reel-to-reel player, tons of phone cords, even some ethernet cords and an ancient dial-up modem. This pretty much counts as “electronics” in my household – no engineers here. Now my father didn’t drink much beer and certainly not Rolling Rock (I hope this isn’t violating some kind of copyright laws!), but the “little old lady” across the street – my adoptive grandmother — used to have a Rolling Rock a day for her health, so I am pretty sure it came from her. I got rid of most of the cables, but didn’t have the heart to get rid of the box for some reason, I guess because it had survived so long, so it sat in my basement. I work at a hospital and the COVID-19 “surge” of this spring was an absolute nightmare. I found my way to this Parts Express project gallery and it was a wonderful distraction during that time. I am so amazed by the creativity talent and intelligence of the folks posting their projects! I decided to try to make an audio project – as simple a project as I could – and remembered the Rolling Rock box.
Design Goals:
My goal for this project was to make use of this old box in a way that would remind me of my dad. My dad loved music, especially old time rock and roll: Fats Domino, Chuck Berry, Little Richard, Elvis and Buddy Holly. His Radio Shack hi-fi was on almost all the time playing WNEW 102.7, when it was a rock station. He played it loudly only once a year, on the winter solstice when he woke us kids up with Jethro Tull’s “Solstice Bells” turned up to 11. (Did anyone else’s childhood include this?!) I also needed a project that was within my very limited skill set, would link to by Bluetooth device on which I had all my favorites and all of my Dad’s 45s digitized, and would fit somewhere in the basement where I work on my projects.
Driver Selection:
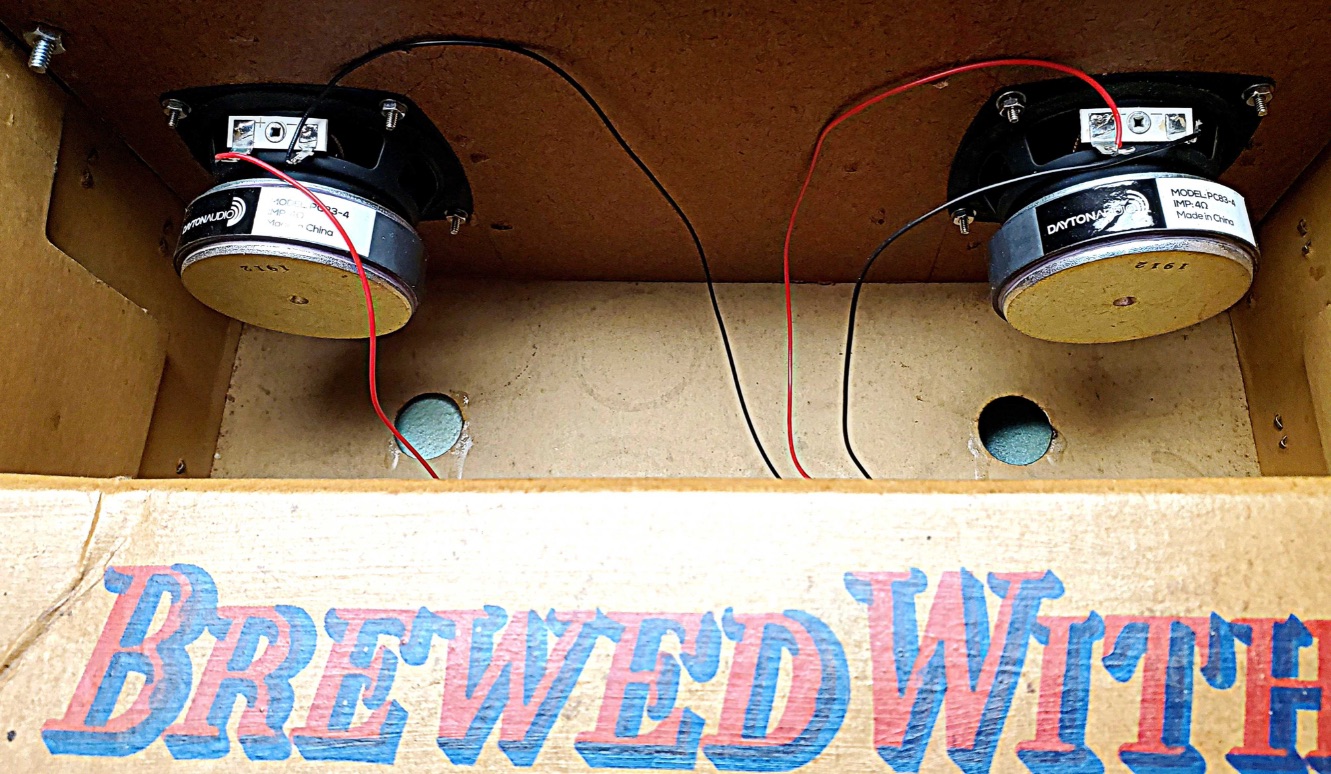
I chose part number 295-154 3″ Dayton Audio Full-Range Poly Cone Driver for its size. By size here, I mean only in terms of aesthetics. Understanding and completing the computations for truly sizing speakers to an enclosure is beyond me, though I continue my studies and hope to one day have some understanding of these concepts. I did figure out that what I needed was a full range driver if I wanted to keep things simple. I don’t want to admit to you how long it took me to figure out that a “driver” is what I call a “speaker”…
Enclosure Design:
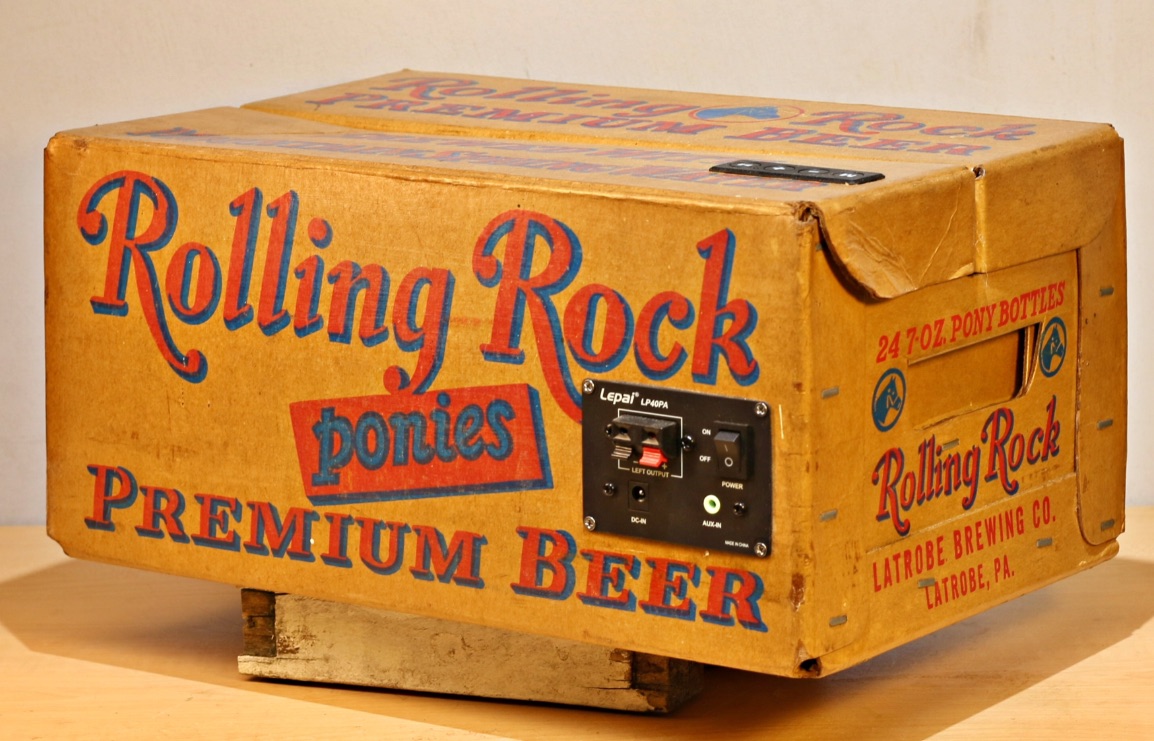
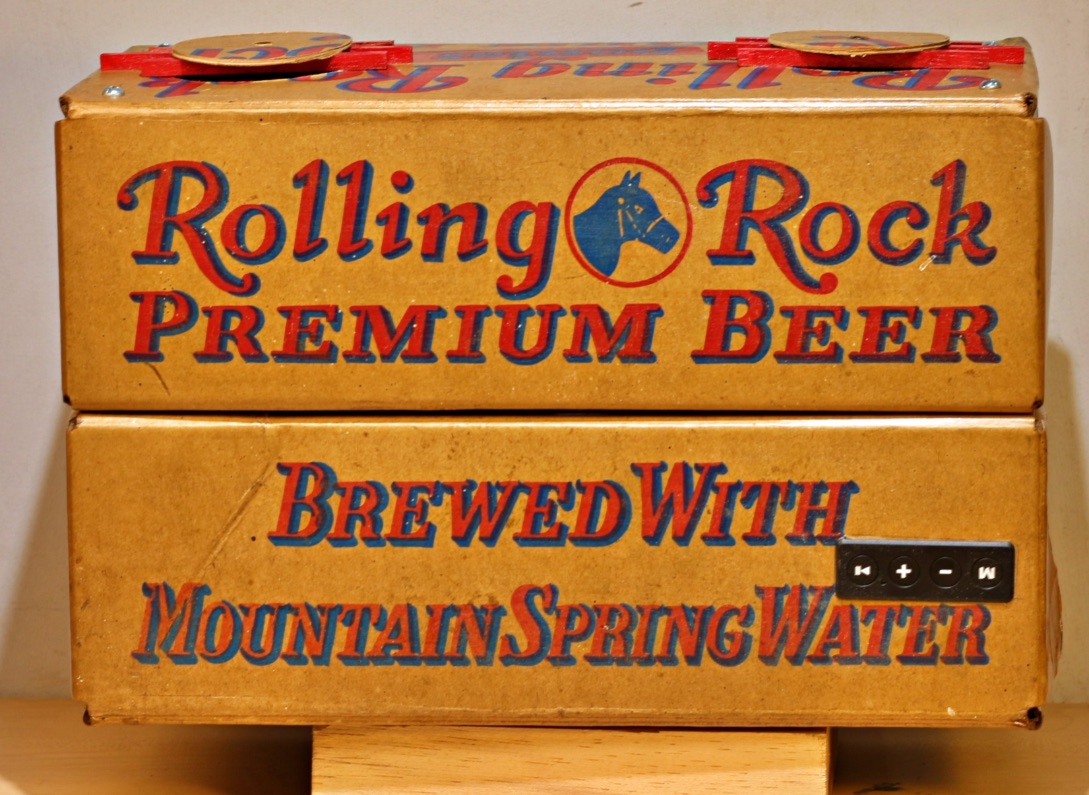
The cardboard box is 15 x 10 x 7 inches, and I modified it only as described below. In retrospect, I think I would have oriented things a little different so the lettering on top of the box faced forward.
Enclosure Assembly:
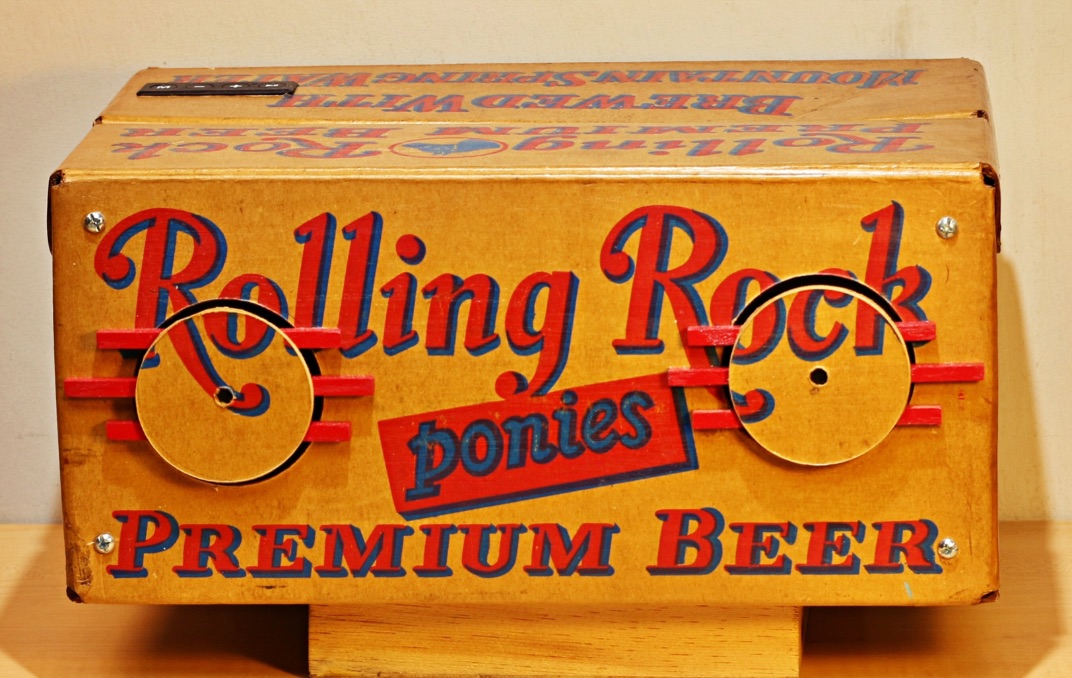
I coated the exterior of the box with 2 coats of a 50/50 mixture of Elmer’s glue and water. After that dried completed I coated the entire exterior with a polyacrylic clear coat. All of this was done to give the paper exterior a bit more durability. I fixed a 15 x 7 inch panel of masonite with bolts to the front side to mount the speakers to. I drilled out two evenly spaced holes with a 3″ hole drill, saving the waste material just because I couldn’t throw it out. The speakers were mounted to the masonite with nuts and bolts and the covered with scraps from a pair of my wife’s old black stockings. (See a pattern here?) The masonite was then re-attached to the box with nuts and bolts. As I mentioned, I couldn’t bear to throw out the waste circles and got the idea I wanted to re-attach them to the box for continuity. Not having high expectations for sound quality from a cardboard box, I glued the circles to some painted wood pegs, and glued those over the speakers in a way such the at words would be somewhat legible. I cut out spaces for the amplifier and control board with a utility knife. The amp is attached with more nuts a bolts directly to the cardboard. The control board required more care as it is held in place by friction, so the hole has to provide a tight fit. Soldering was done by me, so poorly.
Crossover Design:
This did not require any crossover design. Maybe someday.
Tips & Tricks:
The Elmer’s glue and water mixture I used is also used for the DML flat panel project by Rich Meinke. (https://projectgallery.parts-express.com/speaker-projects/dml-flat-pannel/). In fact, I later did this project with my niece who painted the panels with her own design. This is a great and fun project.
Conclusion:
I am no audiophile, I don’t even have particularly good hearing, but I think this thing sounds great! I expected it to sound like a radio in a cardboard box: muted, mushy and muddy. Instead, it fills our small workshop with clean, distinct sound. On a song like Led Zeppelin’s “Since I’ve Been Loving You” I hear everybody, and while Bonzo’s bass drum isn’t causing my heart to skip beats, I can hear him distinctly as Jimmy solos over him. What I really want to know is why? This thing sounds way better than it should, at least I think so. I wonder, if just by chance, it turned out that the enclosure size was a good fit for the components I chose. Or maybe these components are really just that good. Or maybe my hearing is just that bad. At any rate, I am pleased with the results and have tried some more projects since.
About the Designer:
I work as an occupational therapist at a hospital, helping people recover from illnesses and injuries. My hobby is kind of analogous, restoring old lamps, so fastening wire nuts is about the extent of my “electronics” skill. But growing up, my parents had many friends in engineering fields. Several of them worked at Bell Labs when all those amazing things were happening there. After my father retired from teaching school, he would work as helper for his friend who was probably the last Hammond organ repairman in the northeast. They would repair organs in churches all over New York City. They repaired the organ at old Yankee Stadium, and for Bruce’s E Street band. My father claimed that his friend’s every solder was a work of art. If he didn’t like the soldering job he found in the organ he was repairing, he would re-do every joint with no extra charge, or even mentioning it to the customer, just because he wanted things done right. My father had only two complaints. First was his friends taste in food: his “pay” was lunch, which was inevitably McDonald’s despite all the great food in NYC. Second was his friend’s taste in music. There was never any rock and roll on the radio.
Project Parts List:
|
Part # |
Description |
Qty |
|
295-154 |
Dayton Audio PC83-4 3″ Full-Range Poly Cone Driver |
2 |
|
310-4000 |
Lepai LP40PA 40W Mini Plate Amplifier Bluetooth Aux 3.5mm Input and Control Panel |
1 |
|
365-168 |
Grip Tools 42047 16-Piece Hole Saw Kit |
1 |
Sometimes audiophile quality is not the main driver (ar, ar). I’m sure that those with way more knowledge than me could point out the sonic shortcomings of your project, but I think it’s a visually pleasing wonderful tribute to your father. In that respect it’s simply priceless. Bravo!
You did some things you enjoyed. Now you listen to it and dream up more to do. Me, too. And three, olde joke. My Dad bought me a Heathkit radio kit for my birthday. He showed me how to solder. You put the hot end of the soldering iron on the thing you want to solder and then put the solder on the other side of the thing. When the thing gets hot enough, the solder melts onto it. Works perfect every time, if you can figure out how to get the three things to work together. Then he showed me how to hook up a wire to ground and how to hang a wire out for the antenna.
My favorite part was the little earplug to listen. You could turn the knob on the radio and get lots of stations. Nothing else. There was no battery, no volume, no treble, no midrange, no bass, anywhere! He was a radio guy in the Corps in the South Pacific. In those days, they told you to Be Prepared… and then, when that didn’t work: IMPROVISE!