Fantastic 192 Watt DiY DML Panel Speaker build (Bertha)!

Designer:
Matty Hughes
Project Category:
Freestyle Speakers
Project Level:
Advanced
Project Time:
1-8 Hours
Project Cost:
$100 – $500
Project Description:
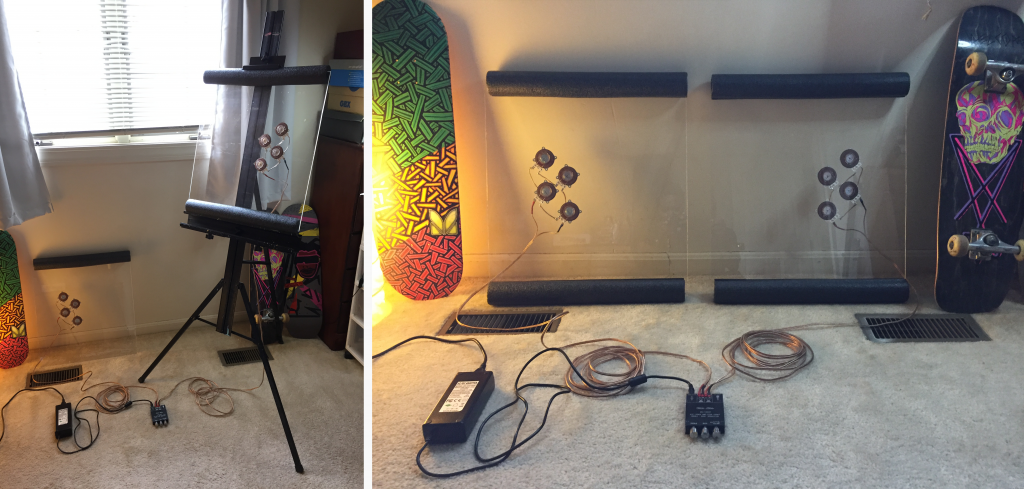
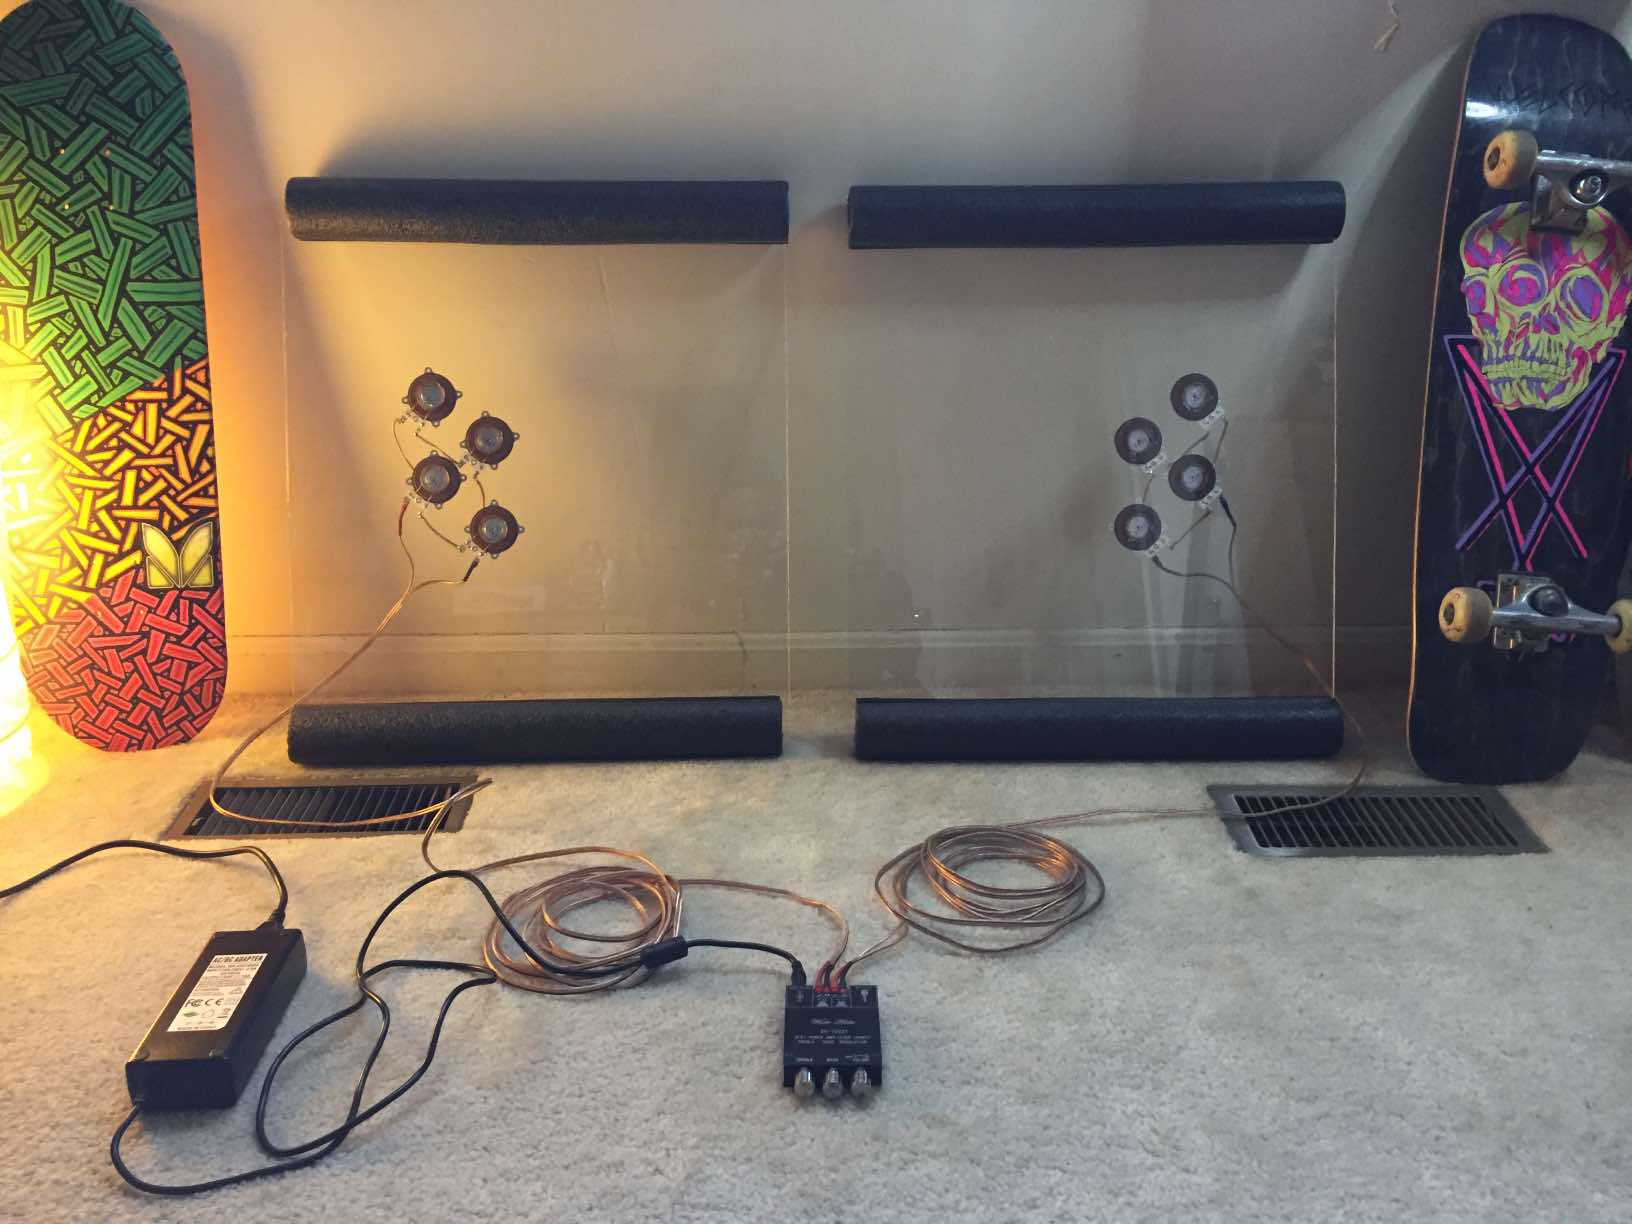
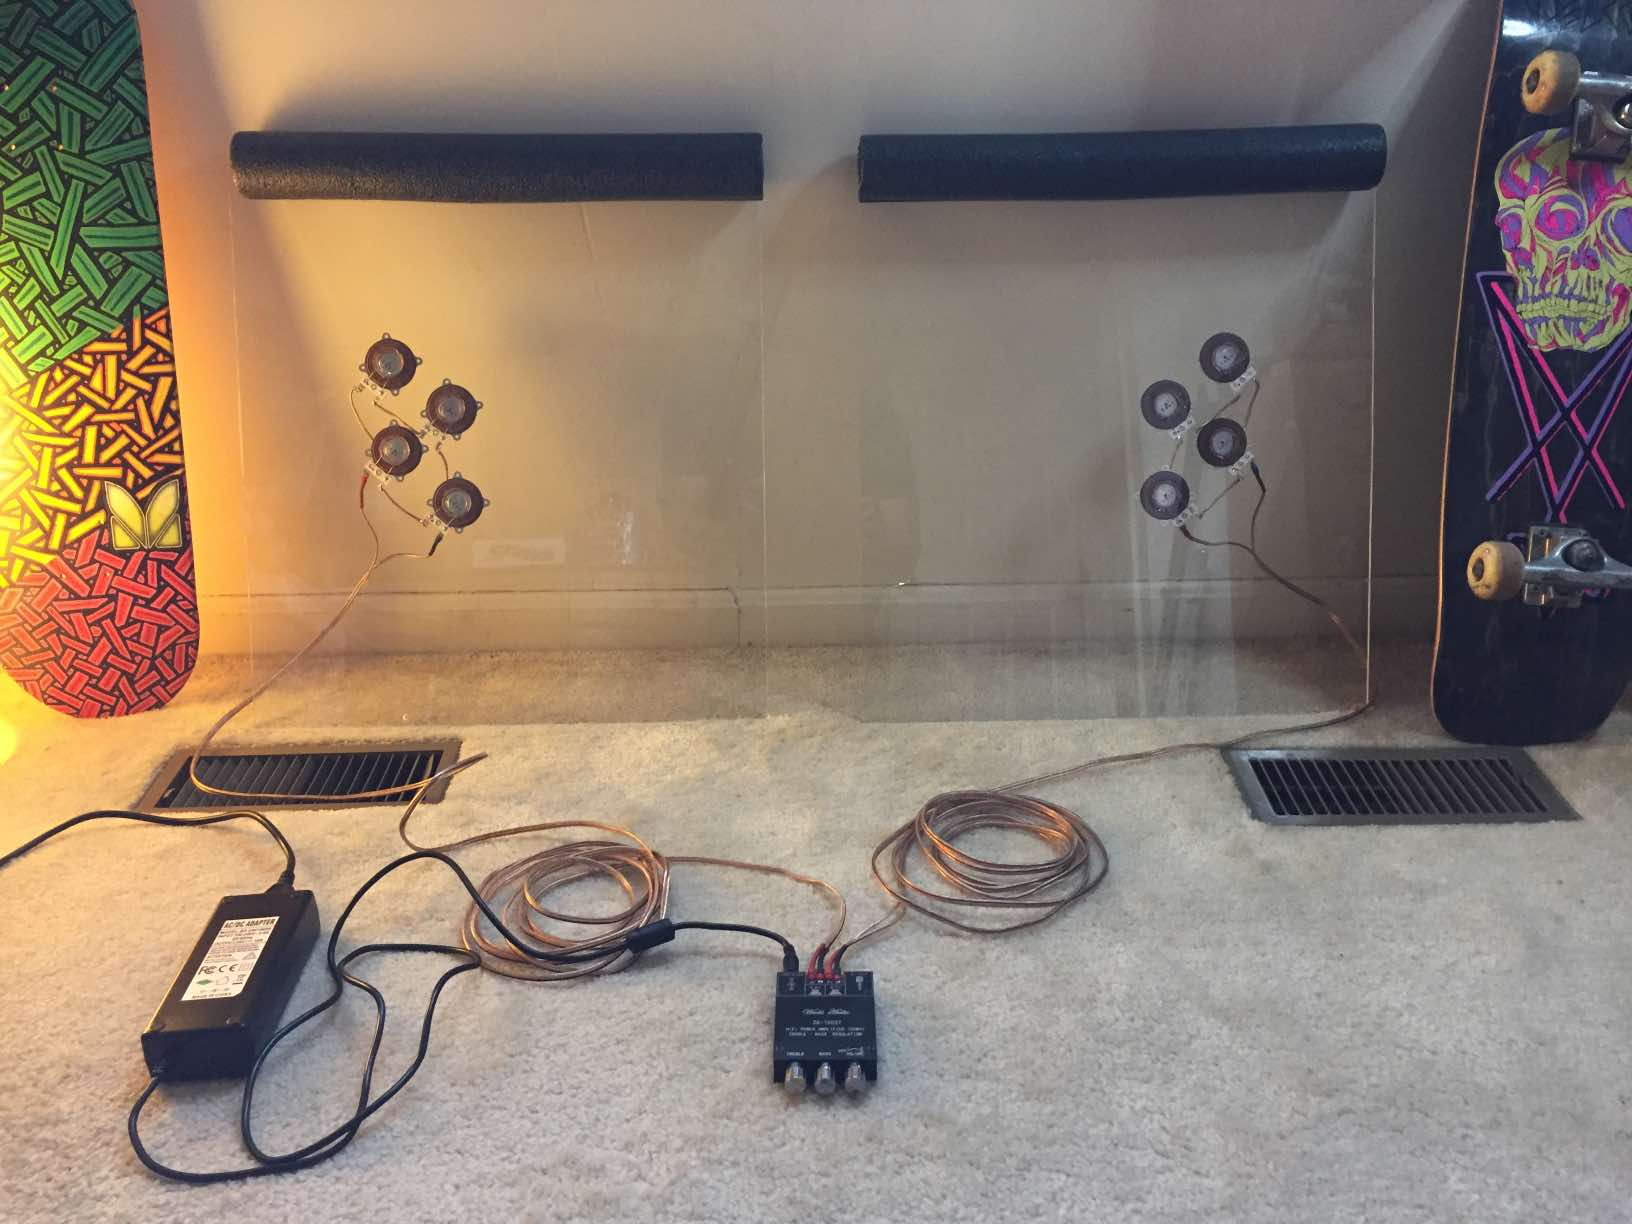
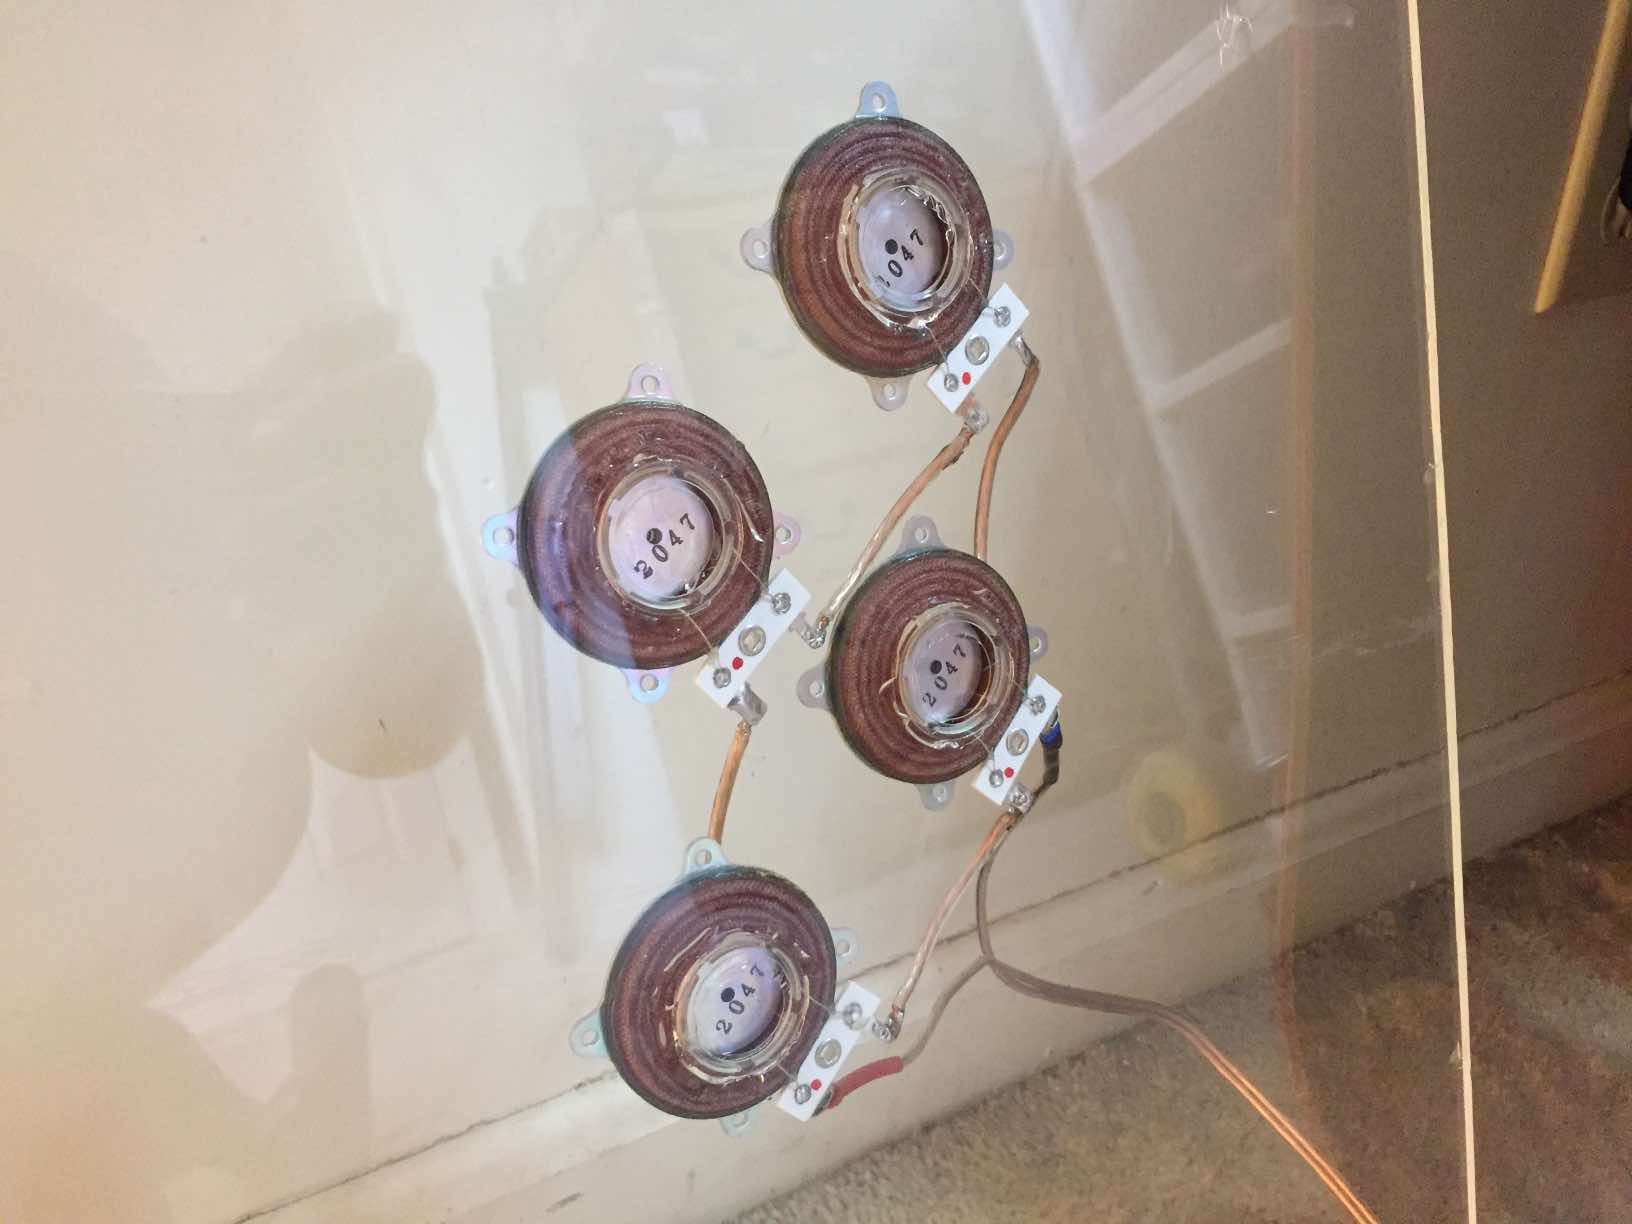
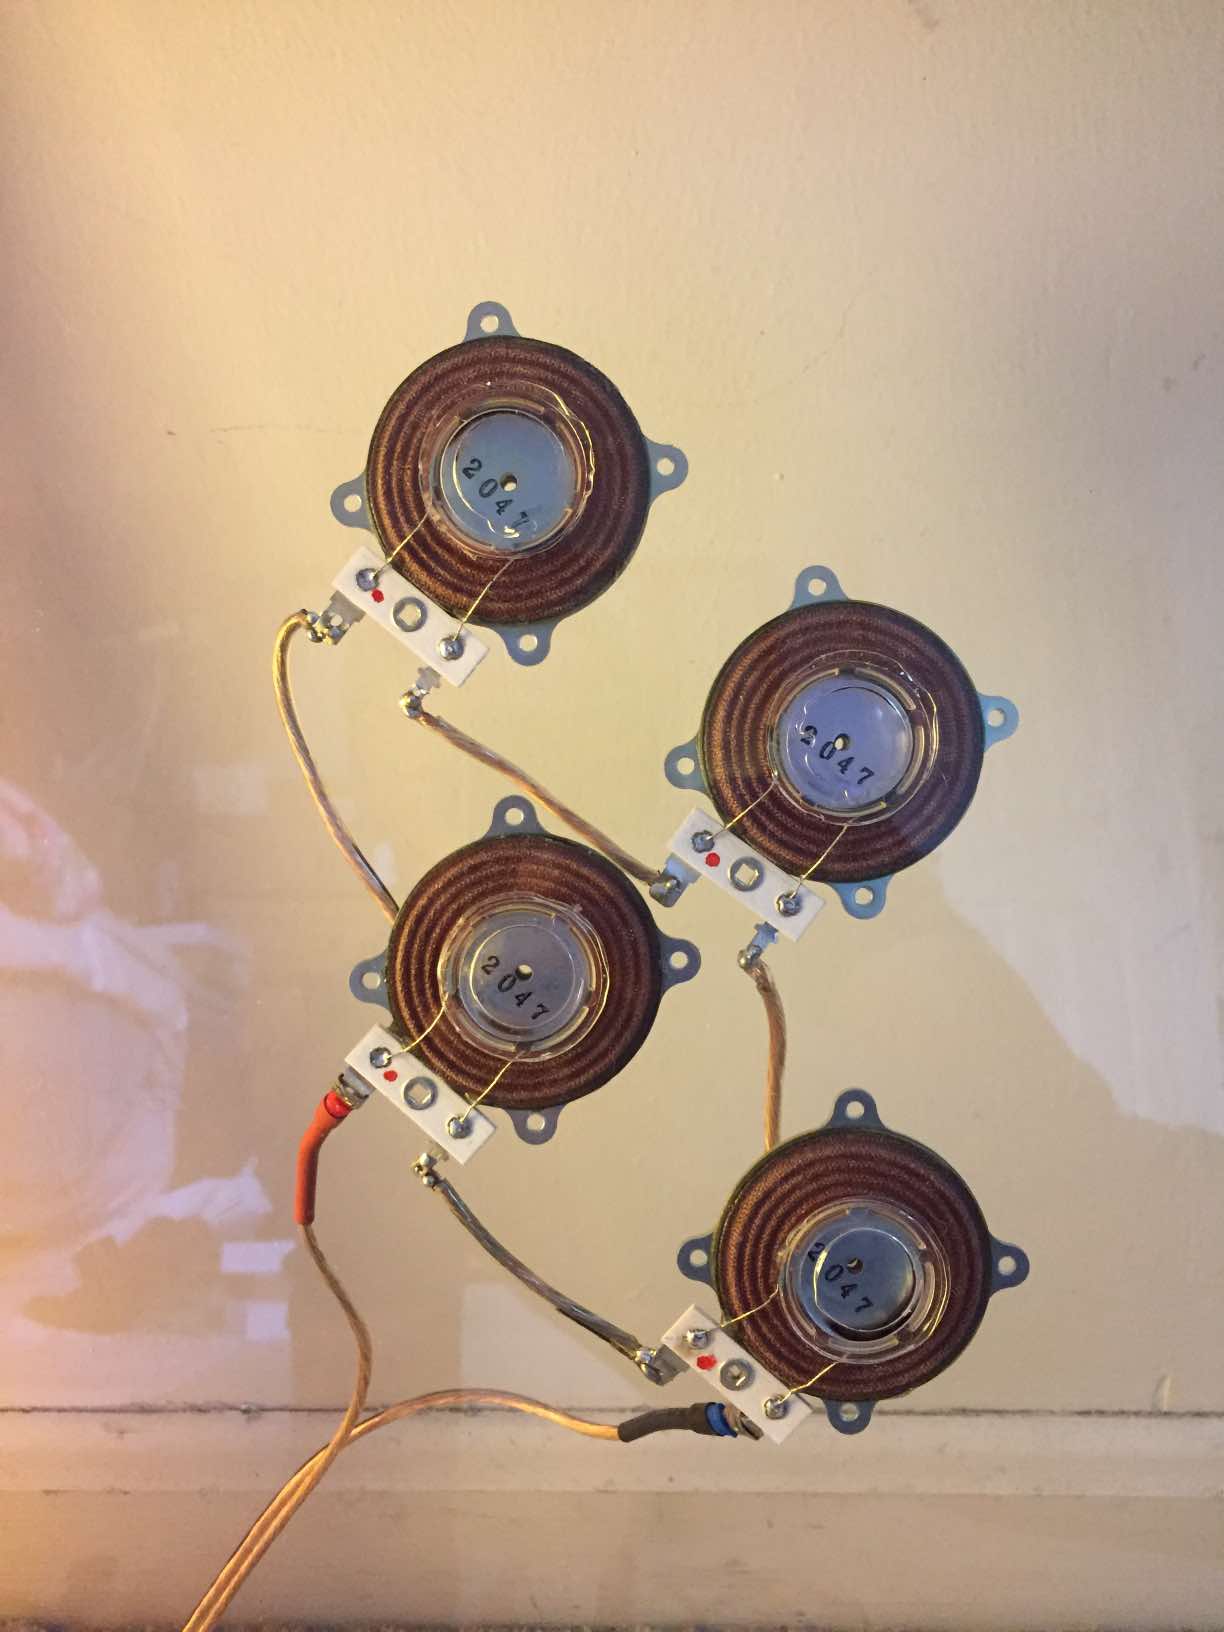
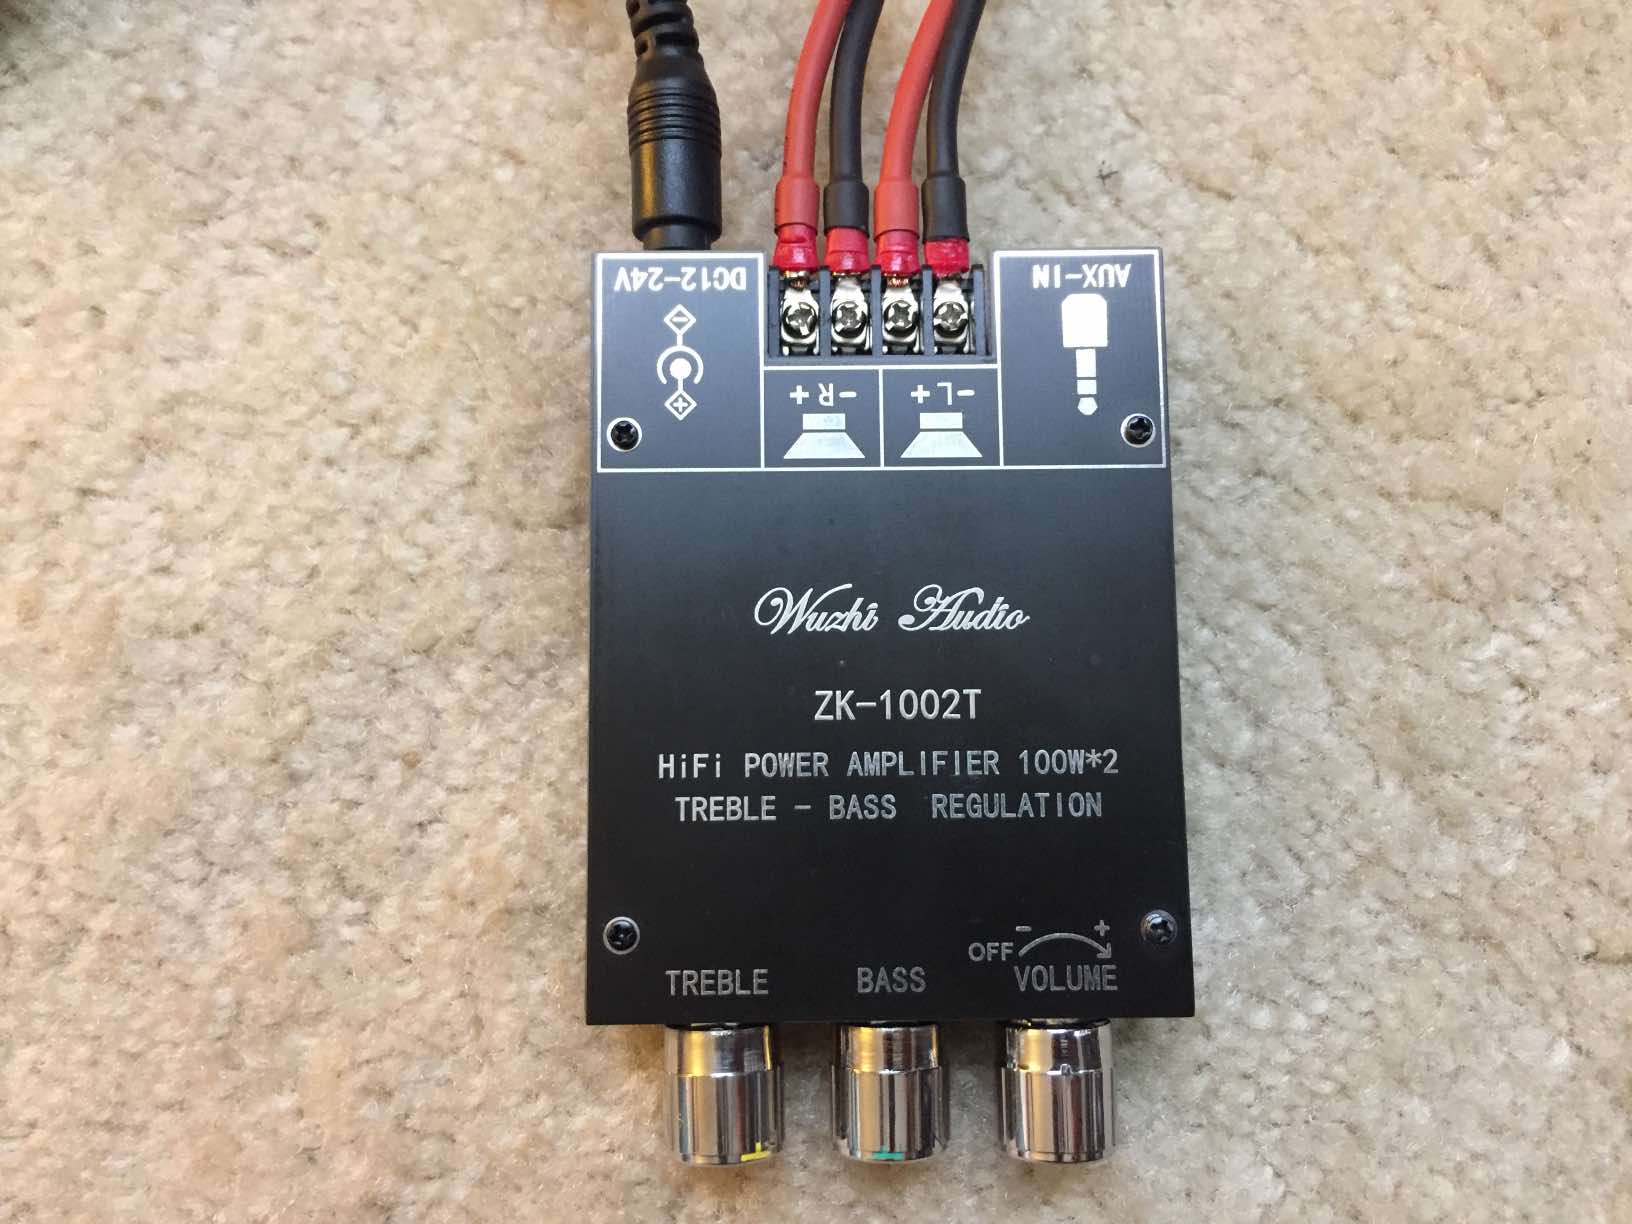
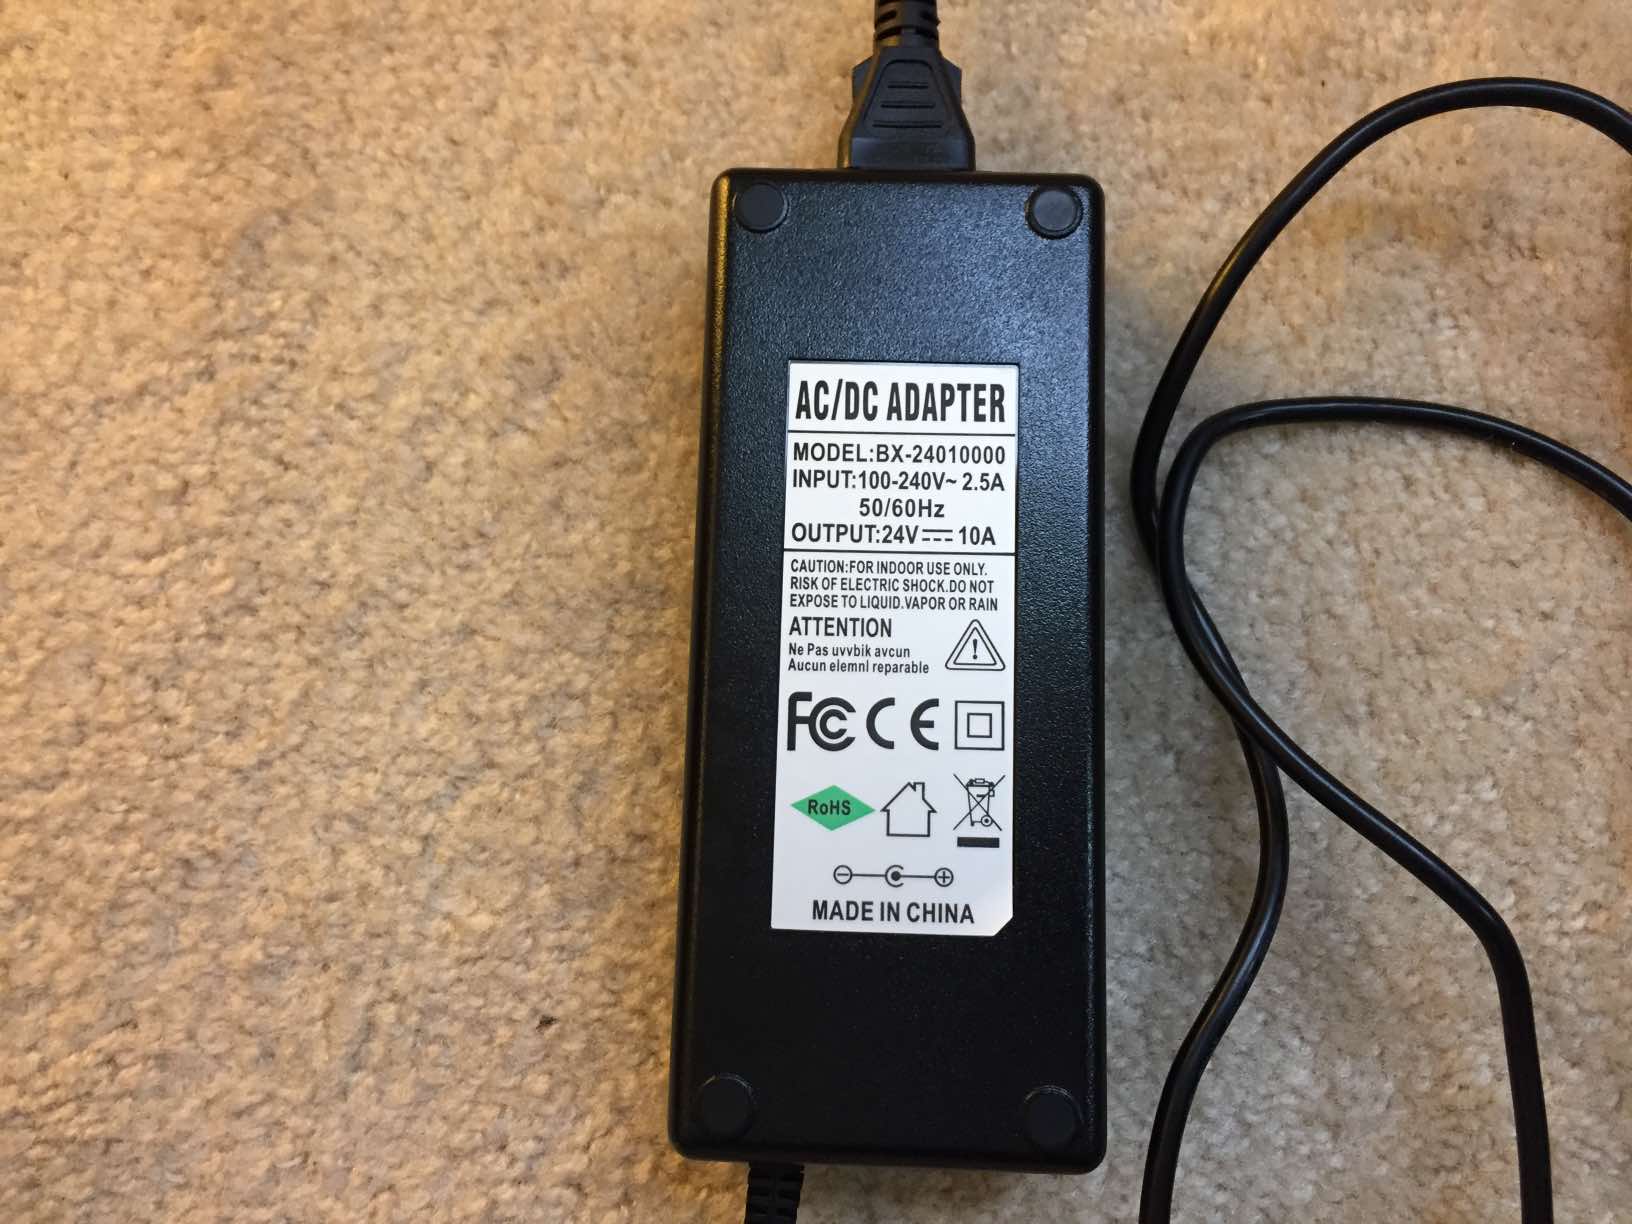
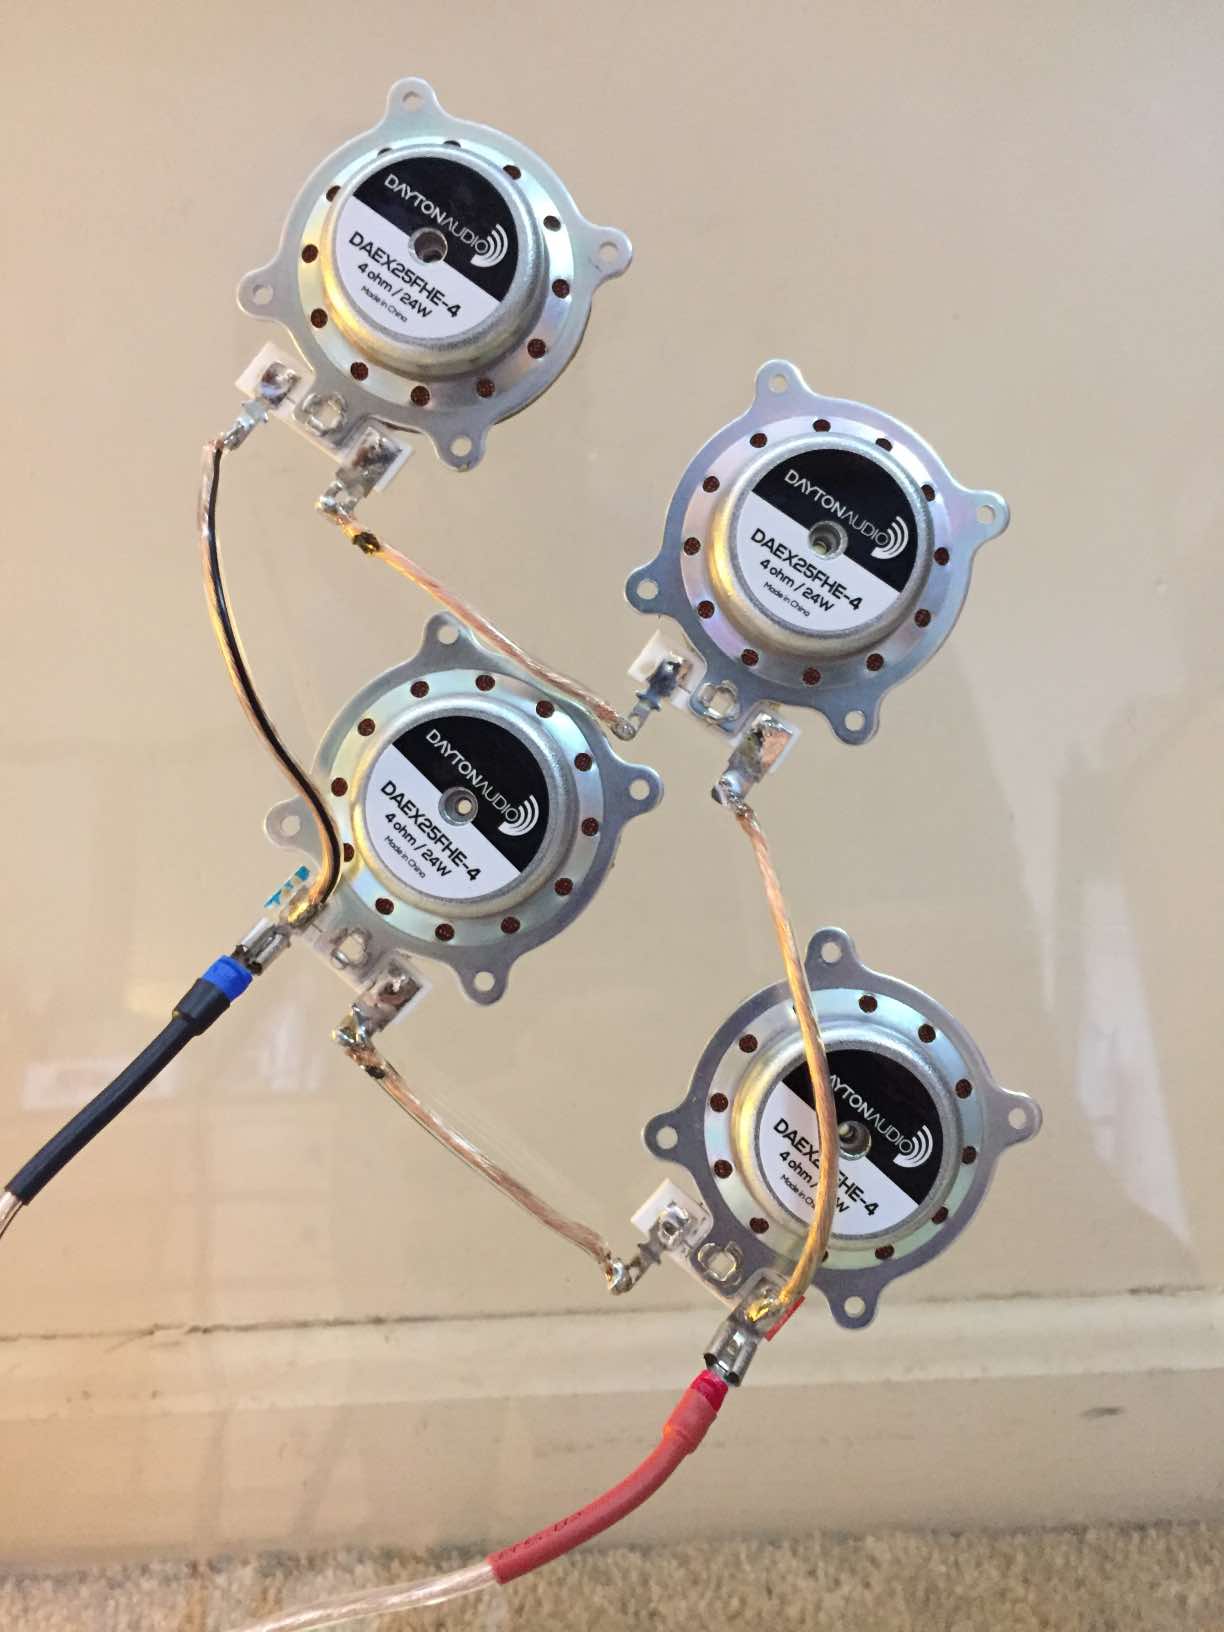
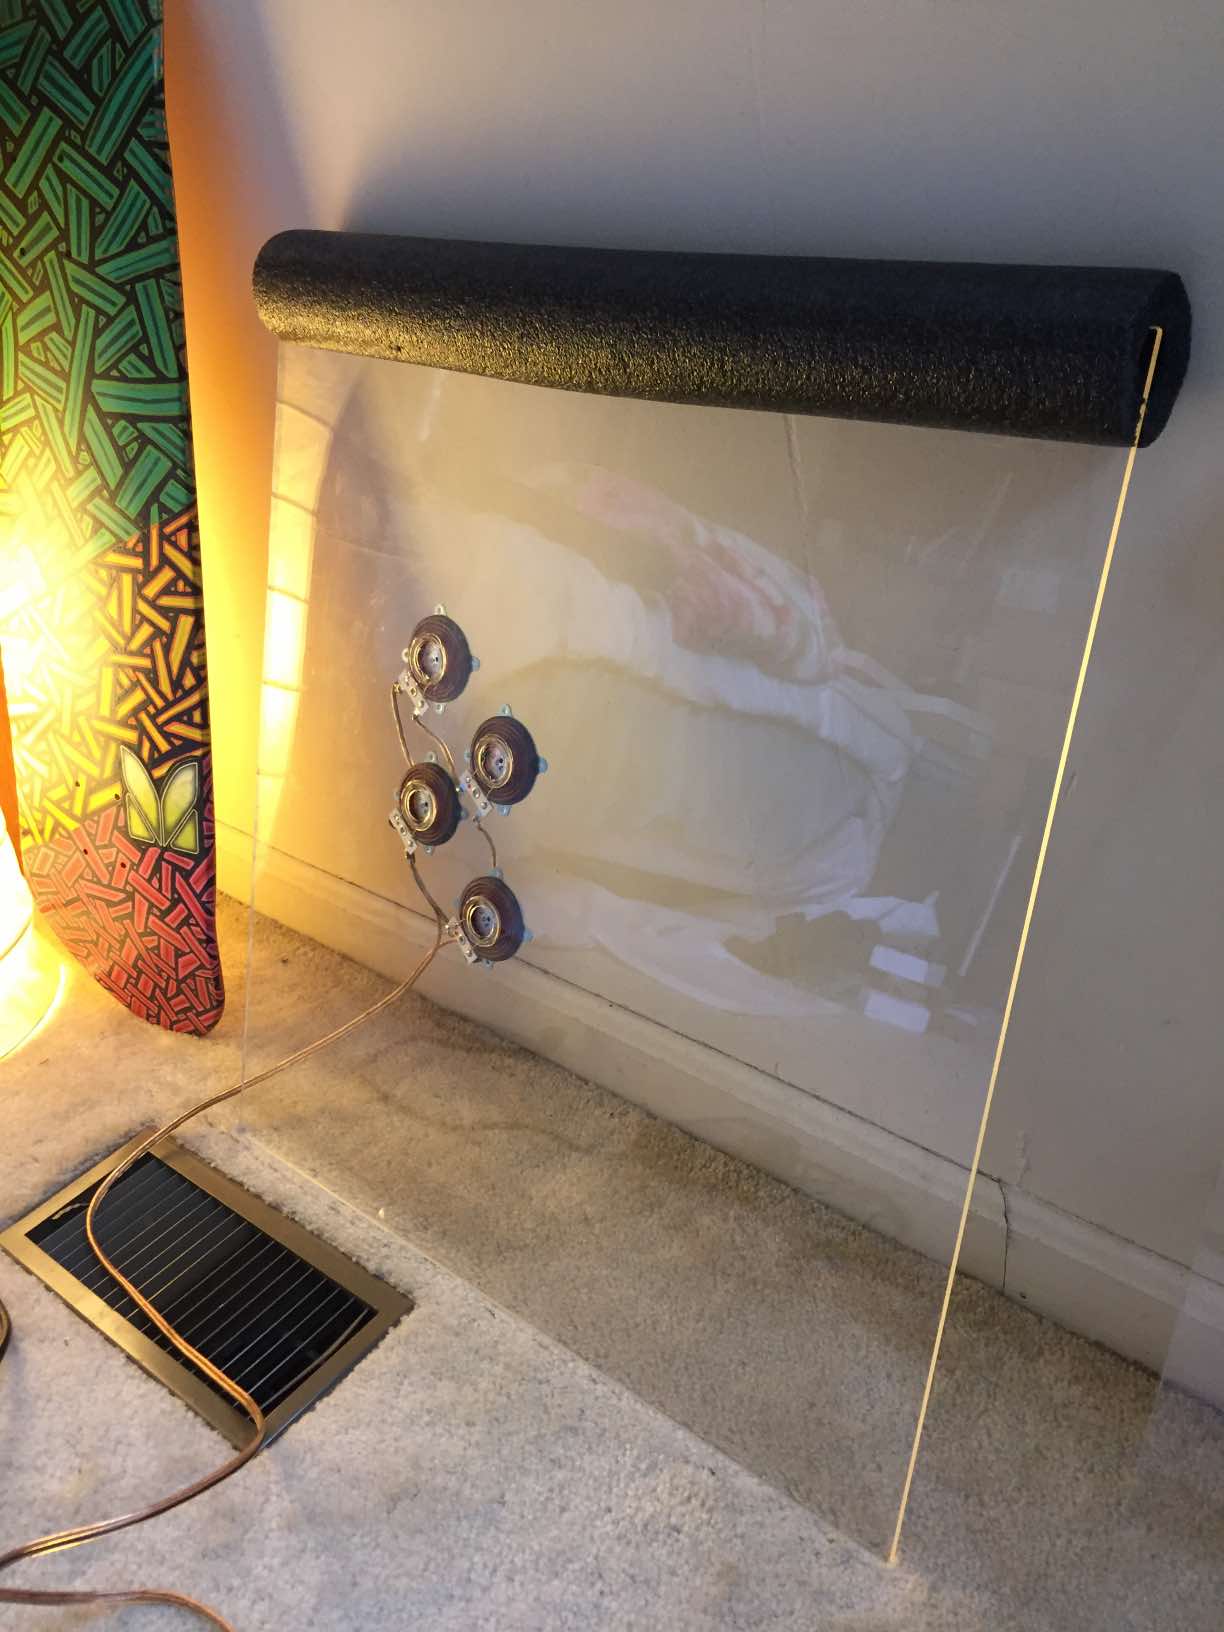
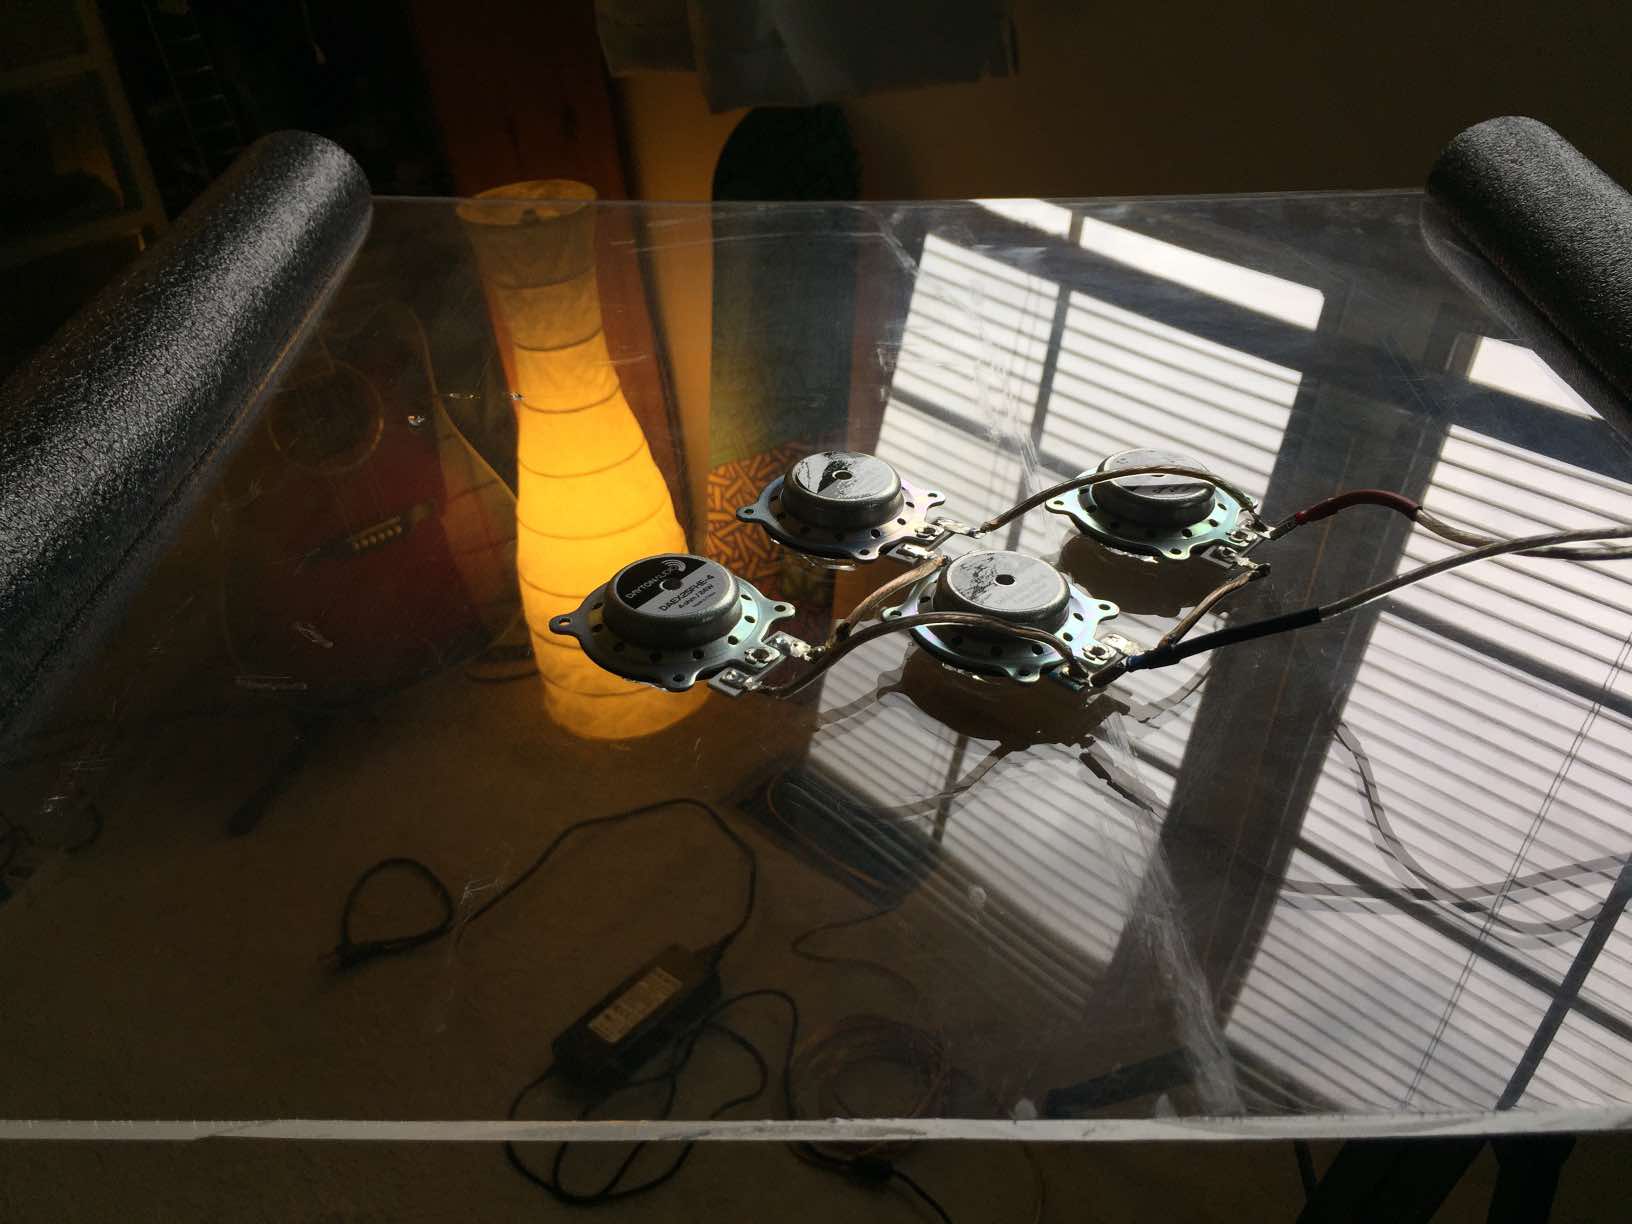
My new 192 Watt DIY DML panel build (Bertha)! At 20in x 22in each 1/4″ thick plexiglass panel is running at 4 ohm’s @ 96 Watts, exciters wired in a series-parallel configuration for each panel and powered by a HiFi 100W x 2 (200W) Bluetooth 5 amp with a 24V 10a power supply. A total of 8 Dayton Audio DAEX25FHE-4 Framed High Efficiency 25mm Exciters each 24W 4 Ohm were used for this DML build.
Design Goals:
My design goals were to create a powerful and loud HiFi system from a pair of DML panels made of 1/4″ thick plexiglass.
Driver Selection:
Part# 295-224
Enclosure Design:
Plexiglass
Enclosure Assembly:
Plexiglass
Crossover Design:
none
Video:
https://www.youtube.com/channel/UCTebi_4eyK1xhpWHvAt00Rg
Tips & Tricks:
Providing the full power of a 24V 10a (240V total) power supply to a 200W HiFi amp with treble and bass regulation really took this project to the next level, along with placement of the exciters on the proper panel material. I found this great resource from Dayton Audio’s site that helped me with this particular build here: https://www.daytonaudio.com/topic/excitersbuyerguide#installation
Conclusion:
Using multiple exciters configured and powered correctly on thick plexiglass produces unbelievably beautiful sound imaging- The best DML speakers I’ve ever heard for my third and most powerful DML panel build- Bertha!
About the Designer:
From a very young age, I’ve always been the type of person interested in how things work/function. Captivatingly intrigued with taking apart and reassembling different objects for fun or just to fix. I’m autodidactic by nature and have a voracious DIY ethic. I’ve worked in the creative fields of print + interactive + digital media for 20+yrs and continue to do freelance work remotely. I’m a geek @ ❤️ interested in art & music, sk8boarding, snowboarding, DIY projects ranging from arts & crafts, electronics, computer hardware mods and landscaping- a bonsai ninja I am indeed✨
Project Parts List:
|
Part # |
Description |
Qty |
|
295-224 |
Dayton Audio DAEX25FHE-4 Framed High Efficiency 25mm Exciter 24W 4 Ohm |
4 |
How did you mitigate rattles with the mounting system? I’m building a DML system right now and I’m very concerned about this
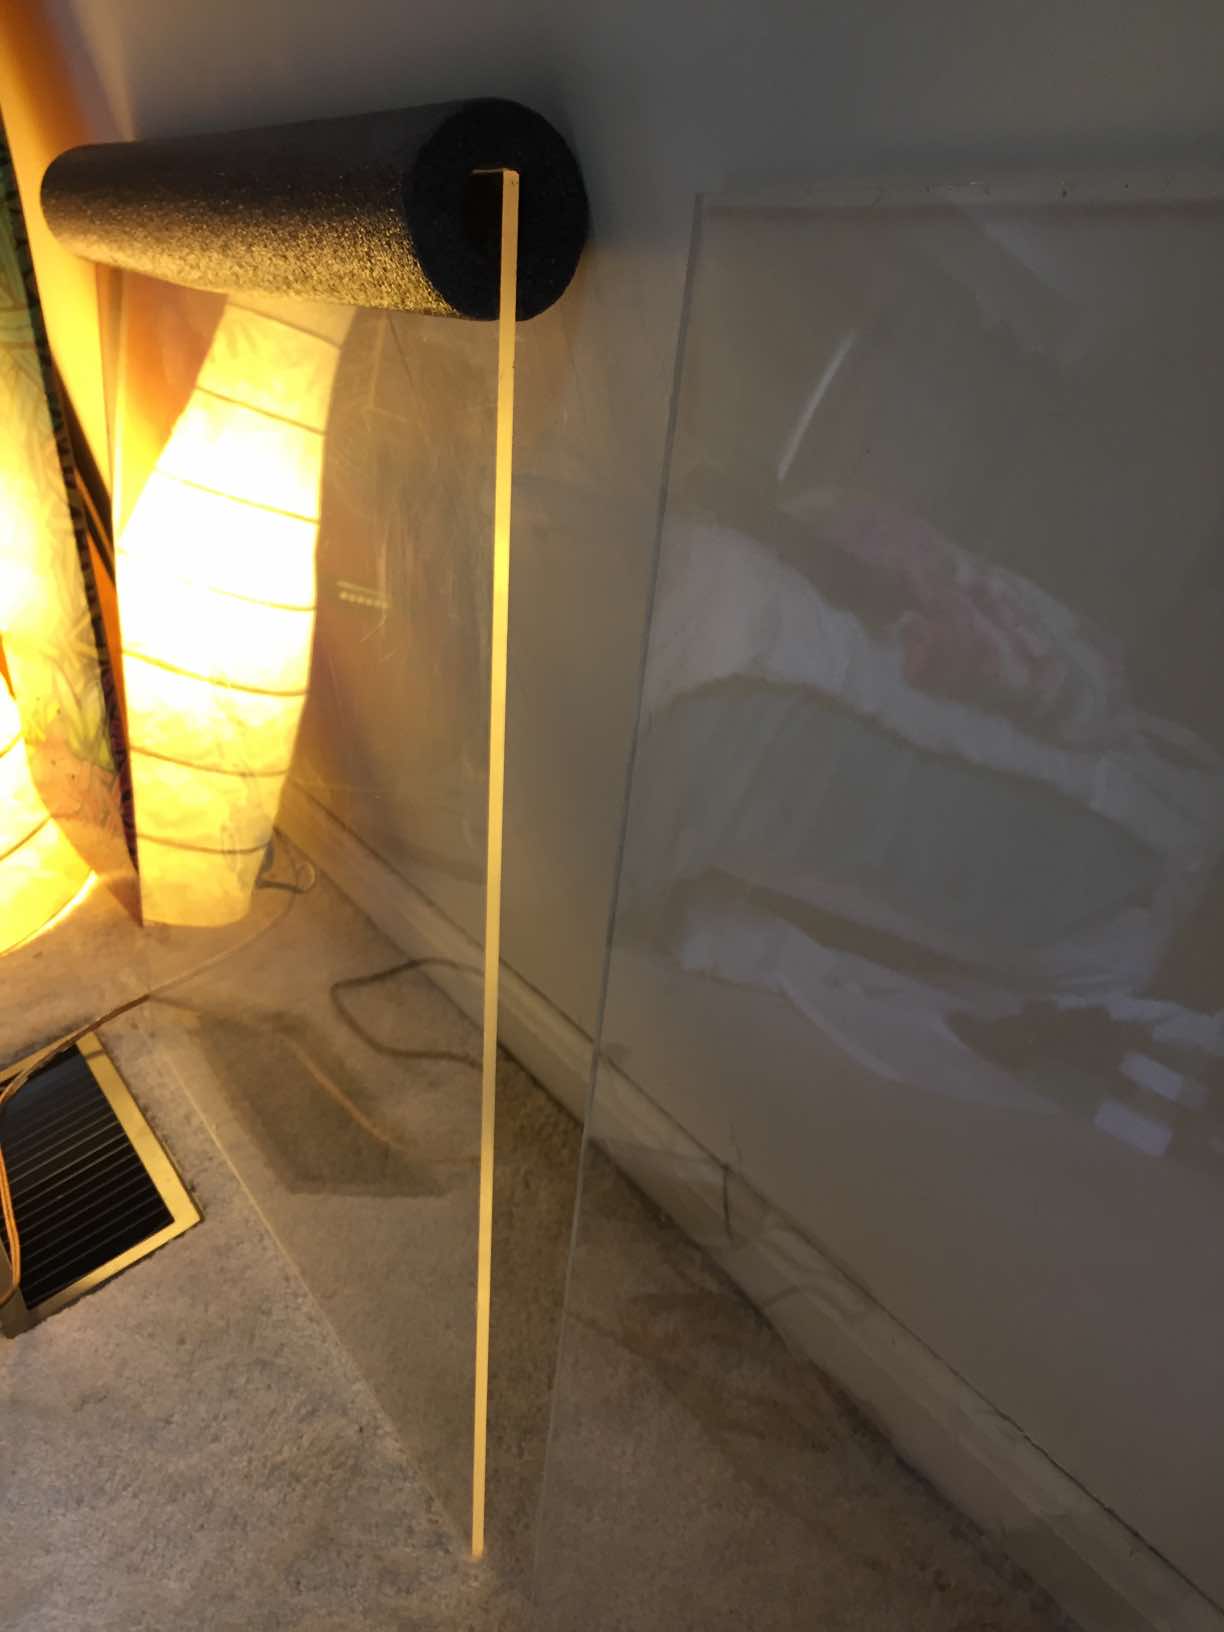
I’ve managed to mititage rattling with my builds when mounted on my heavy duty easel by using foam pool noodles that I’ve cut slits into and place them on the top and bottom of the plexiglass. This also works well with the DML panels leaning up against the wall on top of the flooring. Check out some of my DML sound demos I’ve posted on my YouTube Channel (link is posted above) to give you an idea. I used Dayton Audio’s installation guide to help me with my build and it might help you too with your current build- https://www.daytonaudio.com/topic/excitersbuyerguide#installation
I listened to your YouTube videos and was impressed with the full range sound and the vocals. Did you do anything to enhance the base?
Thanks, Randy! I did a lot of key things to enhance the bass and overall sound of these dml panels-
1. Increased the power supply to 24V 10a, resulting in 240W of total power.
2. Using a 200W (100w + 100w) Class D Amp with Bass and Treble regulation control knobs.
3. Installed and wired 4 powerful exciters (rated at 24W @ 4ohms each) on both dml panels to create a greater full range listening experience on 1/4″ thick plexiglass (22 3/4″ x 20 3/4″).
Giving the HiFi amp and exciters full power to perform at 100% of their wattages and using thicker plexiglass at 1/4″ helped enhance the bass resonance coupled with controlling the bass regulation output directly from the HiFi amp- the larger the material the deeper the bass. Without the bass and treble regulation control knobs from the HiFi amp, the sound from these dml panels would be flat. With the bass regulation control from the amp I was able to control how much bass flows through each panel and make adjustments based on what music I might be listening to at the current moment. As you can see, everything had to come together just right to work correctly and when it did the sound from these dml panels is off the charts ridiculously superb in quality. I’m enchantingly impressed everyday I listen to them, lol.
So I have reproduced this build as I had been looking for a more full range DMl speaker project, while initially everything seemed to be going well, I had a pop and lost my power supply. Is this a fluke? Should I just replace and try again? I’ve seen other builds go with more trusted power supplies that are 24v 8a. Thoughts?
Hmmm..the dreaded *POP ⚡️…i think you’ve experienced a legit power failure of some kind in the supply- especially if you witnessed it fry. There’s many reasons the power supply could have blown, but I would definitely replace the power supply and try again- make sure you’ve got enough power to give your amp at least 90-100% power If you’ve got a 200 watt amp. Using a 24v 8a power supply will give you 192 watts (24v x 8a = 192w) of power that will work great the amp.
And congratulations on reproducing my build it’s my favorite build of the year and use it everyday- hopefully you’ll be enjoying your DMLs soon! They really do sound amazing!