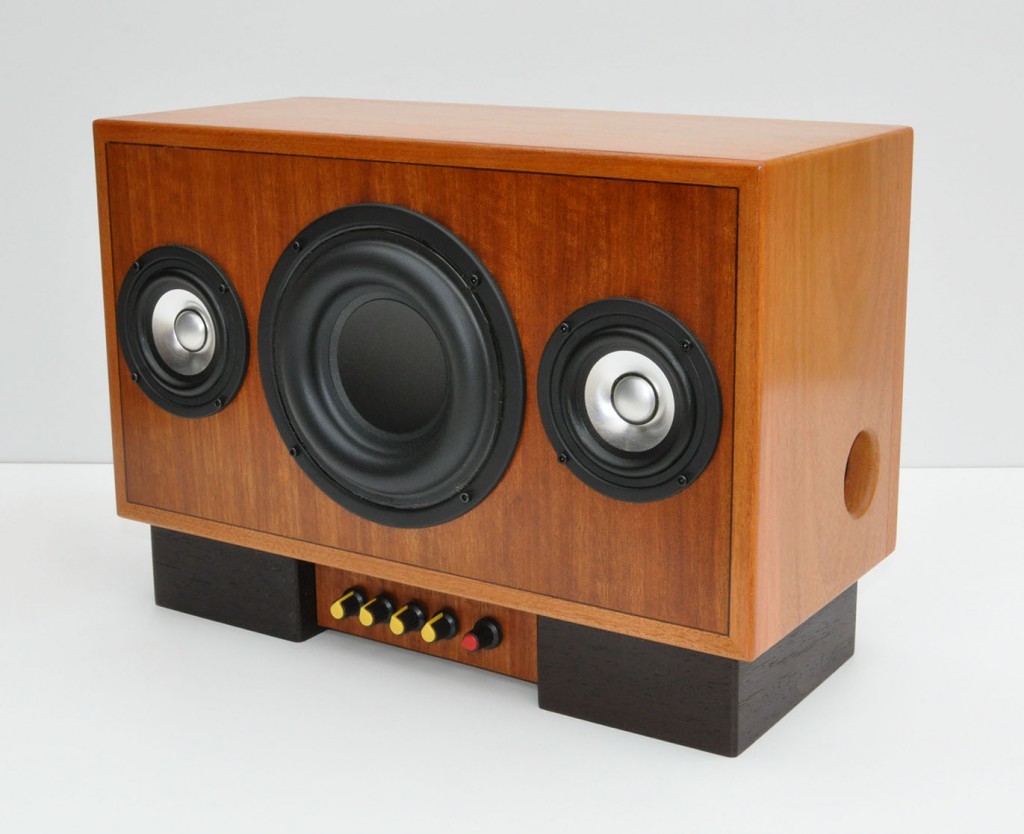
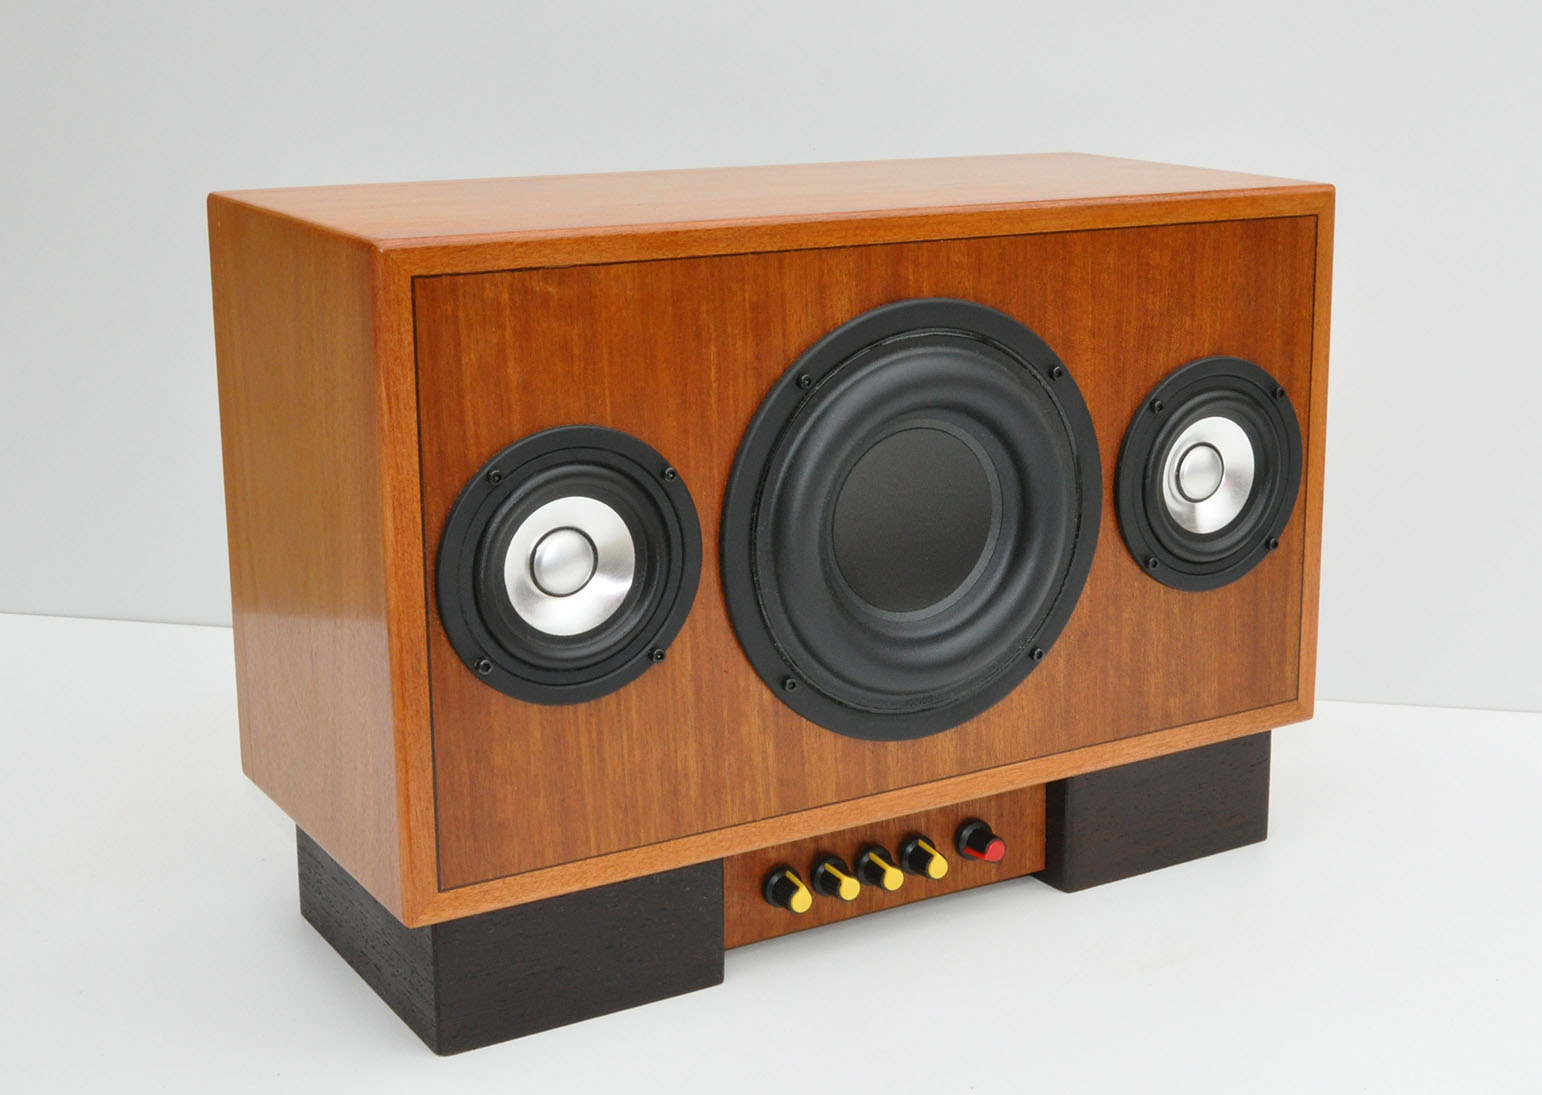
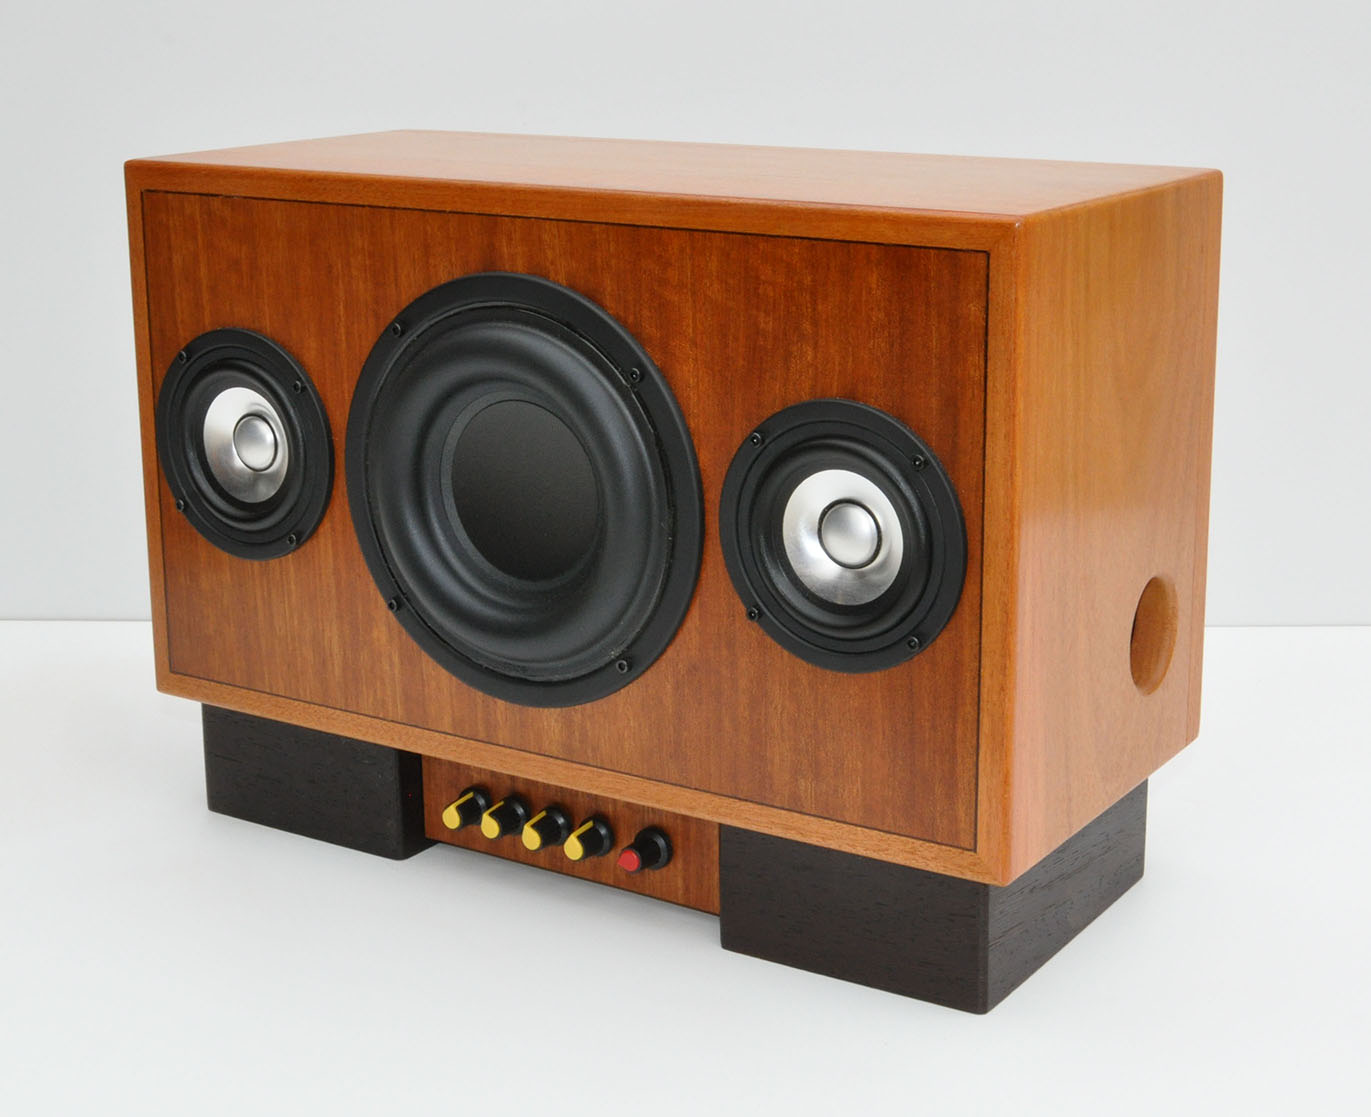
Isetta 2.1 Speaker Build
Designer:
GoofBoy
Project Category:
Freestyle
Project Level:
Intermediate
Project Time:
20+ Hours
Project Cost:
$100 – $500
Project Description:
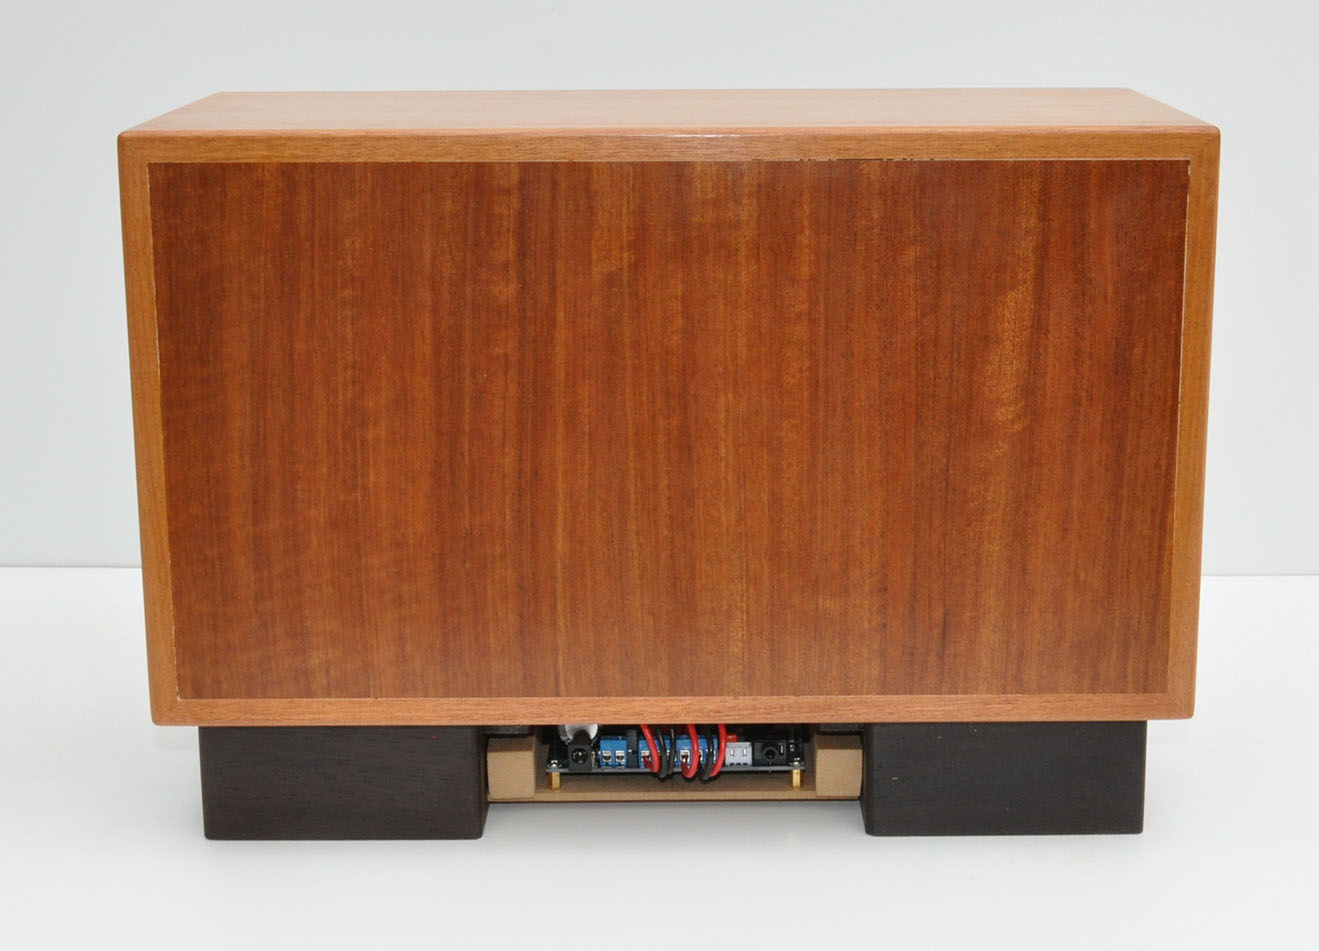
IMplementation of Paul Carmody’s Isetta 2.1 Enclosure with an added built in amp.
Design Goals:
Make a small box that doesn’t look like something you can buy cheaply in a store. Also, to have fun.
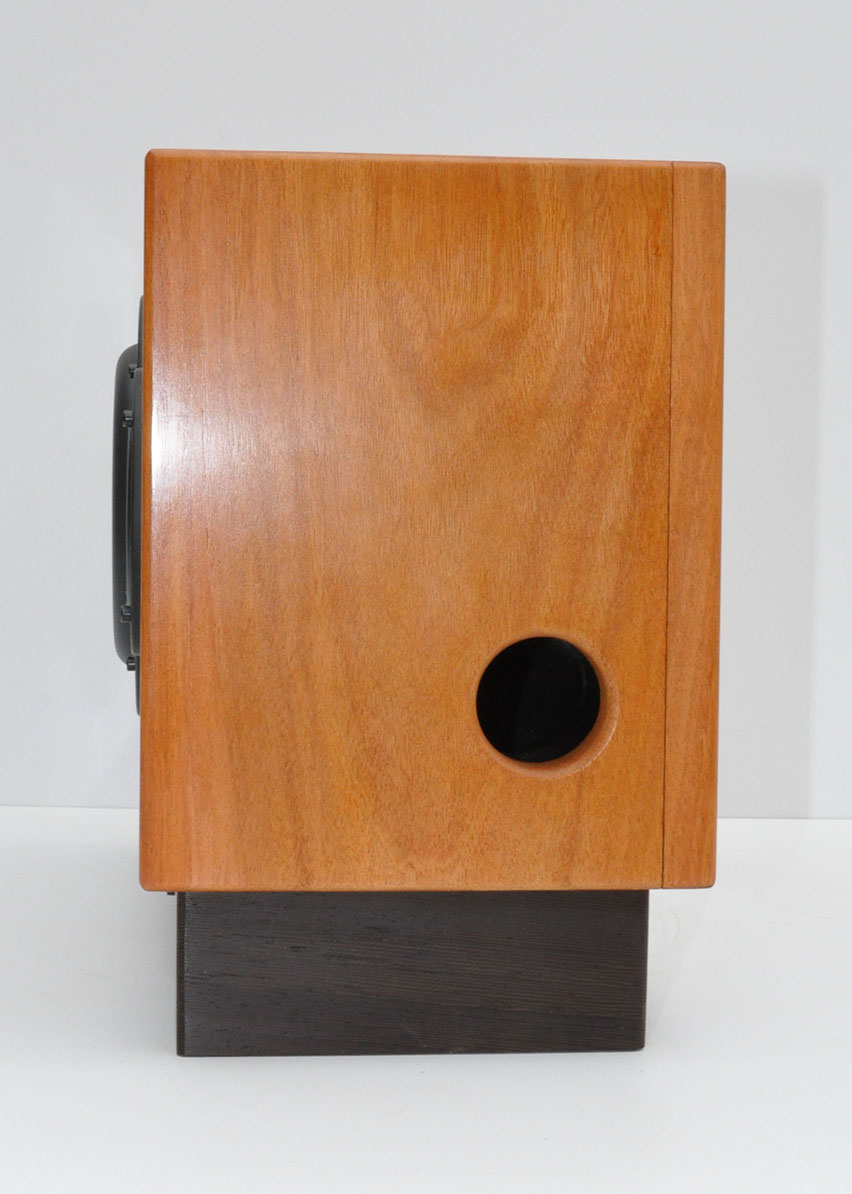
Driver Selection:
1 – Tang-Band W5-1138SMF
2 – Fountek FE85
Enclosure Design:
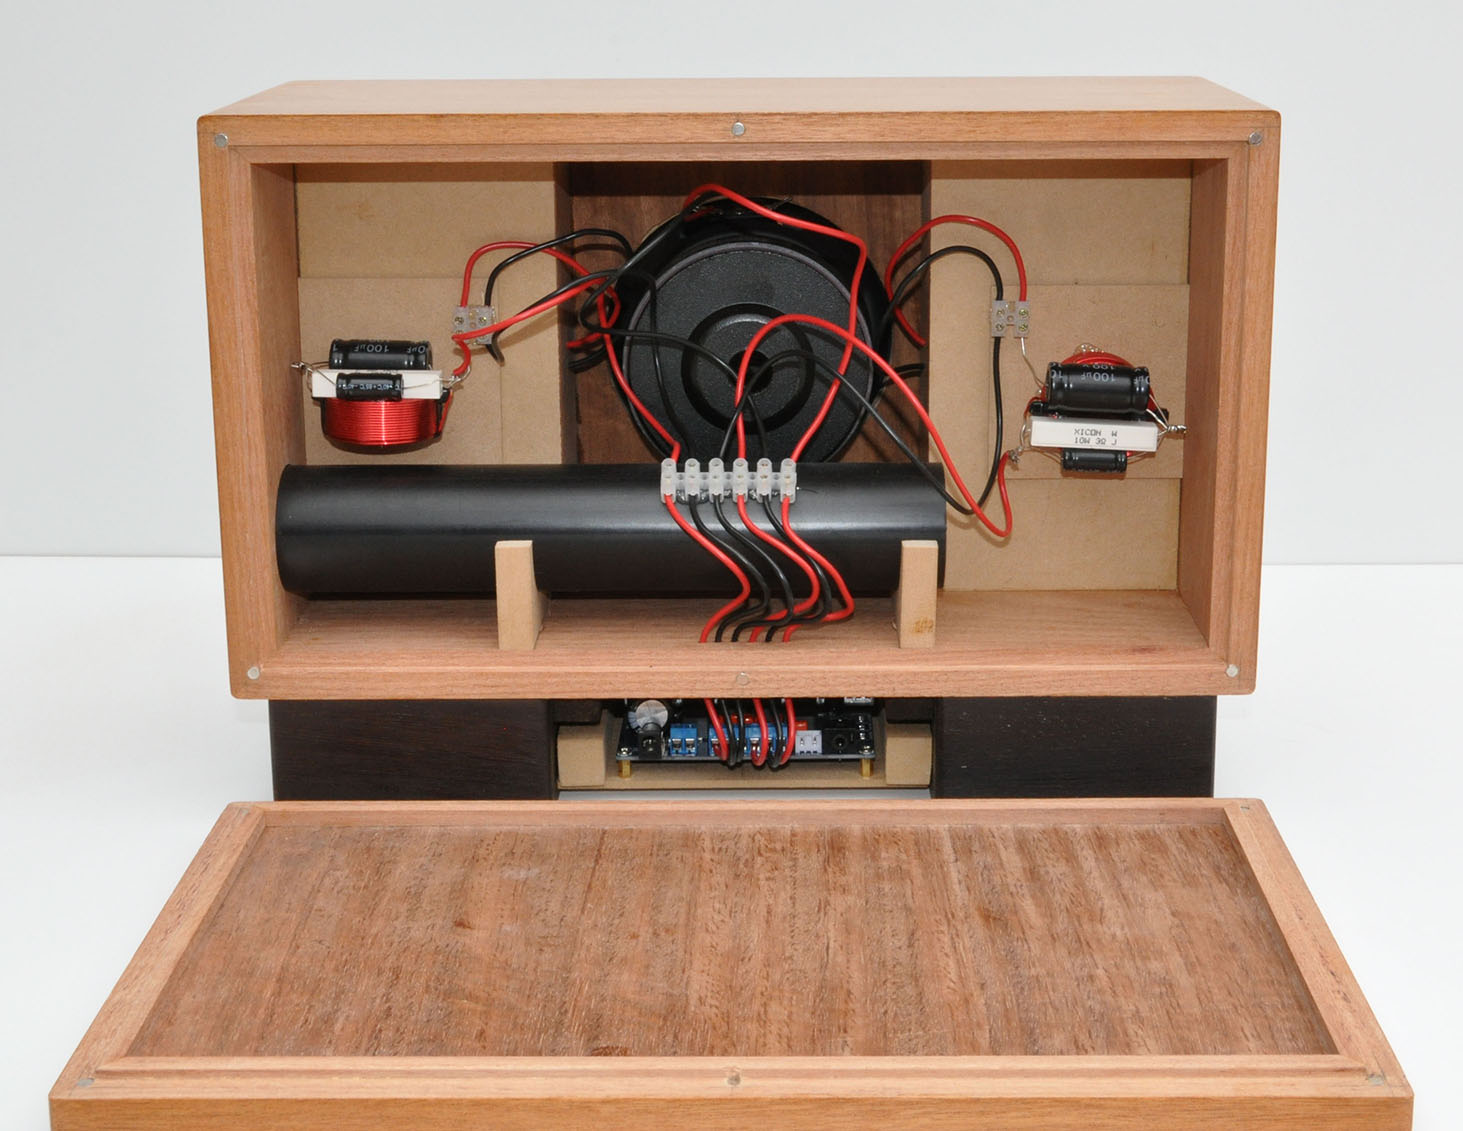
Solid Santos Mahogany, African Mahogany Veneer, Solid Wenge, and 1/2in MDF were used for the enclosure.
Enclosure Assembly:
Hardwood and veneered MDF so it does require some thought on wood movement. There is a full annotated gallery of the build with some wood working tips here – https://imgur.com/a/mFRAiLh
Crossover Design:
Staight from Paul Carmody’s Isetta design – (https://sites.google.com/site/undefinition/isetta)
Conclusion:
Really like the sound and the look of the end product. Fun build.
About the Designer:
A woodworker and recovering engineer just getting into making speakers, because… well, it is just fun.
Project Parts List:
|
Part # |
Description |
Qty |
|
016-3 |
3 Ohm 10W Resistor Wire Wound 5% Tolerance |
2 |
|
257-816 |
Dayton Audio 0.50mH 18 AWG Perfect Layer Inductor Crossover Coil |
2 |
|
027-360 |
100uF 100V Electrolytic Non-Polarized Crossover Capacitor |
2 |
|
027-342 |
12uF 100V Electrolytic Non-Polarized Crossover Capacitor |
2 |
|
296-717 |
Fountek FE85 3″ Full Range Speaker Driver |
2 |
|
264-917 |
Tang Band W5-1138SMF 5-1/4″ Paper Cone Subwoofer Speaker |
2 |
|
260-317 |
Acousta-Stuf Polyfill Speaker Cabinet Sound Damping Material 1 lb. Bag |
2 |
classy looking speaker.
What amplifier did you use for this?
I am a little confused by paul’s design drawing. Maybe you can help. is the interior dimension of the fountek enclosure 3.25 x 2 x 7, or is the dimension intended to be 3.25 x 2 x 8. The former would create a volume of .75 liters, the latter a volume of .85 liters. I can’t tell from the drawing if the top and bottom of the enclosure sits on top of the sides and front/ back, or if it is supposed to be flush with the front of the box. In the photo of the finished box, the top is clearly inset. It’s the same for the volume of the sub enclosure. With an interior height of 7″, the sub volume is 7.4 liters, for an 8″ height, the interior vol is 8.5 liters. Quite a difference. I guess I am asking for the interior dimensions of the enclosure.
Did not get a notice a post was here and just saw this. I went with with 3.25 x 2 x 7 for the volume. Figure the entire box finished dimensions should be 14.5 x 8 x 6.5 for 1/2in material – so subtract 1in from each measurement for rough internal dimensions, Top and bottom, the two sides, front and back.
Hope this helps you.
The amp is the TPS3116D2
Does the PVC have an actual internal diameter of 1.5, or will the off the shelf stuff with an ID of 1.6~ work? Thanks!
I used the standard 1.5in PVC, bought a 2ft length from home depot. Works fine. Full build link. https://imgur.com/a/mFRAiLh
Very nice ! According to your driver choice, which voltage for the power supply did you choose, 15v, 19v or 24V ? Thanks
I have a 24v 5000mA output DC converter hooked up to it right now. I have also used 19v. I listen to it in my office while I program, the volume level is such I can’t honestly tell the difference. Either way, it can get very loud (when I have it in the back yard) but still sounds good at lower volumes.
I think it will depend a lot on what works with the Amp board you end up using.
Good Luck.
I’ve used 19v and 24v can’t really tell the difference as I do not crank it way up. I think it will be more of a requirement/concern based on the board you use the the drivers themselves.
Good Luck
I have used both 19v and 24v DC converted with the board I have, didn’t notice a difference at the volumes I listen at – they both sound great.
I am thinking of building this but had a question regarding the filters. Was there a reason for mounting them in the orientation you have?